
Rumah >hujung hadapan web >tutorial js >Membina API Boleh Skala dengan Node.js dan Express
Membina API Boleh Skala dengan Node.js dan Express

- WBOYWBOYWBOYWBOYWBOYWBOYWBOYWBOYWBOYWBOYWBOYWBOYWBasal
- 2024-09-07 08:30:031181semak imbas
Node.js dan Express telah menjadi alat penting dalam membina API boleh skala, penting untuk mengekalkan prestasi tinggi dan memastikan pengalaman pengguna yang lancar. Dengan seni bina dipacu acara, Node.js sangat cekap dalam mengurus permintaan yang semakin meningkat untuk aplikasi masa nyata, menjadikannya pilihan utama untuk pembangunan bahagian belakang. Satu kajian mendapati bahawa 68% daripada pembangun melaporkan peningkatan produktiviti dengan Node.js, sebahagian besarnya disebabkan oleh keupayaannya untuk menggunakan JavaScript pada kedua-dua sisi klien dan pelayan, sekali gus memudahkan proses pembangunan. Dalam blog ini, kami akan menyediakan panduan langkah demi langkah, lengkap dengan contoh kod yang tepat, untuk membantu anda membina API boleh skala menggunakan Node.js dan Express.
Prinsip Utama untuk Membina API Boleh Skala
Pengaturcaraan Tak Segerak
Node.js sememangnya tidak segerak, membenarkan ia mengendalikan berbilang permintaan serentak tanpa menyekat gelung acara. Ciri ini penting untuk kebolehskalaan, kerana ia membolehkan pengurusan sumber yang cekap, terutamanya dalam keadaan beban tinggi.
Seni Bina Modular
Mengguna pakai pendekatan modular adalah penting. Dengan memecahkan aplikasi kepada modul yang lebih kecil dan serba lengkap, pembangun boleh mengurus kerumitan dan memudahkan penskalaan bebas. Setiap modul harus menumpukan pada fungsi tertentu, yang membolehkan ujian, penyelenggaraan dan penskalaan lebih mudah bagi komponen individu mengikut keperluan.
Perkhidmatan Mikro
Menggunakan seni bina perkhidmatan mikro boleh meningkatkan kebolehskalaan dengan ketara. Pendekatan ini membolehkan bahagian aplikasi yang berlainan diskalakan secara bebas, mengoptimumkan penggunaan sumber dan meningkatkan prestasi keseluruhan. Setiap perkhidmatan mikro boleh dibangunkan, digunakan dan diskalakan tanpa menjejaskan perkhidmatan lain.
Penghalaan dan Perisian Tengah yang Berkesan
Express.js memudahkan penciptaan laluan dan penyepaduan perisian tengah. Fungsi middleware boleh mengendalikan tugas seperti pengesahan, pengelogan dan pengendalian ralat, menjadikan API lebih teguh dan lebih mudah untuk diurus. Mengatur laluan dan pengawal dengan betul adalah penting untuk mengekalkan kejelasan dan kecekapan dalam pangkalan kod.
Ralat Pengendalian dan Pembalakan
Melaksanakan mekanisme pengendalian ralat dan pengelogan yang komprehensif adalah penting untuk mengekalkan kestabilan API. Ini memastikan isu dapat dikenal pasti dan diselesaikan dengan cepat, meminimumkan masa henti dan meningkatkan pengalaman pengguna.
Dokumentasi API
Menggunakan alatan seperti Swagger untuk dokumentasi API adalah disyorkan. API yang didokumentasikan dengan baik bukan sahaja memudahkan onboarding yang lebih mudah untuk pembangun baharu tetapi juga memastikan bahawa API itu mesra pengguna untuk pengguna, membolehkan penyepaduan dan penggunaan yang lebih baik.
Pengoptimuman Prestasi
Mengoptimumkan kod untuk prestasi adalah penting. Teknik termasuk meminimumkan operasi segerak, mengurus penggunaan sumber dan memanfaatkan strategi caching (cth., menggunakan Redis) untuk mengurangkan beban pangkalan data dan meningkatkan masa tindak balas.
Ujian Muatan
Ujian beban yang kerap adalah penting untuk mengenal pasti kemungkinan kesesakan dan memastikan API dapat mengendalikan lonjakan trafik yang dijangkakan. Memantau metrik utama seperti masa tindak balas dan kadar ralat boleh membimbing pelarasan dan strategi penskalaan yang diperlukan.
Cara Membina API Boleh Skala dengan Node.js dan Express
1. Sediakan Projek Anda
Kami mencipta folder scalable-api. Buka folder ini di dalam editor kod anda.
kemudian ikut arahan di bawah.
Untuk Memulakan projek Node.js baharu dijalankan di bawah arahan.
npm init -y
Setelah anda menjalankan arahan di atas, fail package.json anda akan dibuat di dalam folder.
kini, anda perlu menjalankan arahan di bawah untuk memasang ekspres.
npm install express
sebaik sahaja anda menjalankan arahan di atas, folder node_modules & fail package-lock.json akan dibuat dalam folder akar.
2. Mencipta Pelayan
Memandangkan anda sudah memasang Express, langkah seterusnya ialah mencipta fail pelayan anda dan menyediakan pelayan ekspres asas.
Anda perlu mencipta nama fail app.js dalam folder akar.
Sekarang, anda telah mencipta fail app.js anda, sediakan pelayan Express asas dalam app.js.
const express = require('express');
const app = express();
const port = process.env.PORT || 3000;

// Middleware to parse JSON bodies
app.use(express.json());

// Basic route
app.get('/', (req, res) => {
    res.send('Hello World!');
});

// Start the server
app.listen(port, () => {
    console.log(`Server is running on port ${port}`);
});
Sekarang, setelah anda selesai, jalankan pelayan anda dengan melaksanakan arahan berikut dalam terminal anda.
node app.js
Sebaik sahaja anda menjalankan arahan di atas, anda akan melihat mesej di bawah dalam terminal anda
Starting the server...
Middleware set up.
Route set up.
Server is running on port 3000
dan untuk mengakses pelayan, buka penyemak imbas chrome anda atau mana-mana yang anda gunakan, Navigasi ke http://localhost:3000 , Anda akan melihat mesej "Hello World".
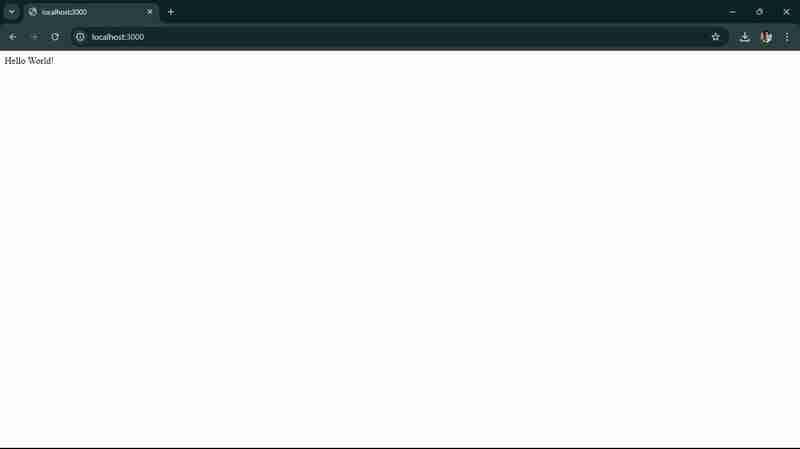
seperti yang ditunjukkan dalam skrin di atas.
Langkah seterusnya untuk membina API boleh skala dengan Node.js dan Express biasanya melibatkan:
3. Defining & Adding More Routes:
Adding More Routes:
You have to define additional routes to handle different endpoints. For example, let’s add routes for /api and /users.
// ... existing code ...

// New route for /api
app.get('/api', (req, res) => {
    res.send('API endpoint');
});

// New route for /users
app.get('/users', (req, res) => {
    res.send('Users endpoint');
});

// ... existing code ...
You to add above code in your app.js file and update your app.js file.
- app.get('/api', (req, res) => { ... }): This defines a new route that listens for GET requests on the /api endpoint. When a request is received, it sends back the response "API endpoint".
- app.get('/users', (req, res) => { ... }): This defines another route that listens for GET requests on the /users endpoint. When a request is received, it sends back the response "Users endpoint".
Now, let’s test the new routes.
start your server by running:
node app.js
Now, open your browser, and go to http://localhost:3000/api , you’ll see the message “API endpoint”

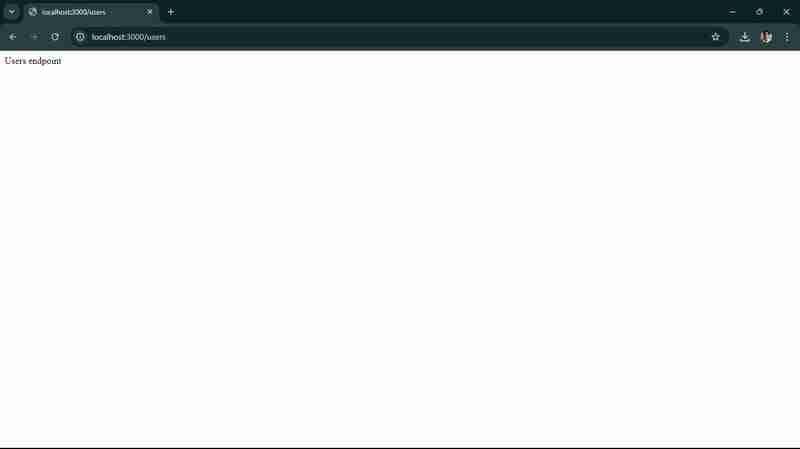
Now, you should navigate to **http://localhost:3000/users,** you’ll see the message “Users endpoint”, shown in below screen
Now, your next step will be to connect to a database. For this, we’ll use we'll use MongoDB with Mongoose, a popular ODM (Object Data Modeling) library for MongoDB and Node.js.
4. Connecting to a Database.
- Install a mongoose.
You’ve to run the following command to install the Mongoose.
npm install mongoose
- now, you to update your app.js to Connect to MongoDB:
Let’s see how you can update your app.js file to connect to MongoDB database.
   const mongoose = require('mongoose');

   // Connect to MongoDB
   mongoose.connect('mongodb://localhost:27017/mydatabase', { useNewUrlParser: true, useUnifiedTopology: true })
       .then(() => console.log('Connected to MongoDB'))
       .catch(err => console.error('Could not connect to MongoDB', err));

   // ... existing code ...
Connect to MongoDB: Use mongoose.connect to connect to your MongoDB database. Replace 'mongodb://localhost:27017/mydatabase' with your actual MongoDB connection string if it's different.
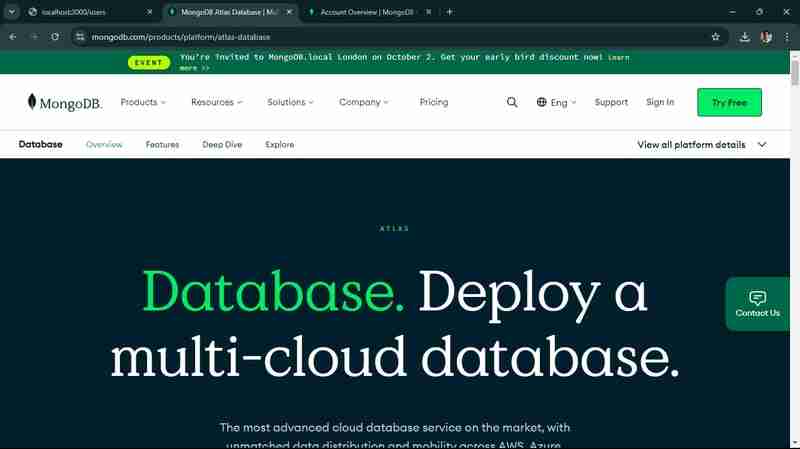
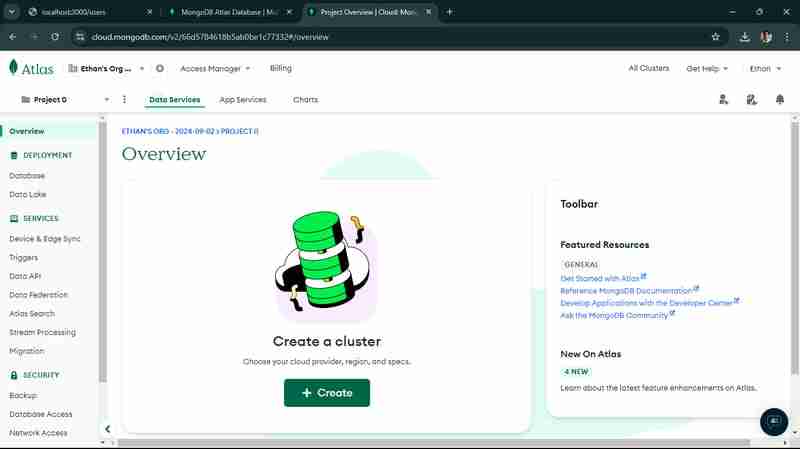
Now, that for that, You must first have set up your MongoDB, If you haven’t, let’s set it up now. Use MongoDB Atlas (Cloud Database). You have to create a MongoDB Atlas account, Go to MongoDB Atlas and sign up for free account.
once you sign up via or Google or GitHub Account, You’ll see below screen after login.
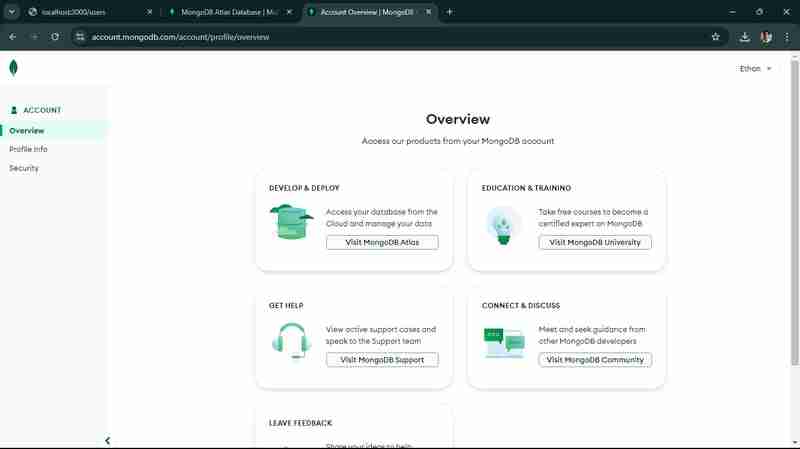
You’ll to click on visit MongoDB Atlas, Click on Create a New Cluster,
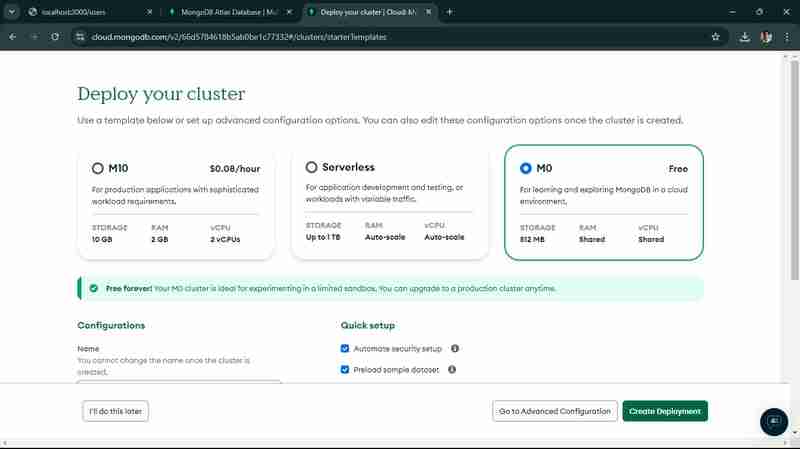
Once you click on Create as shown in above screen, you’ll be redirect to below screen, select M0 free version.
you have to keep your configuration as it is by default, now click on Create Deployment.
once, you click on that, you’ll come to this screen.
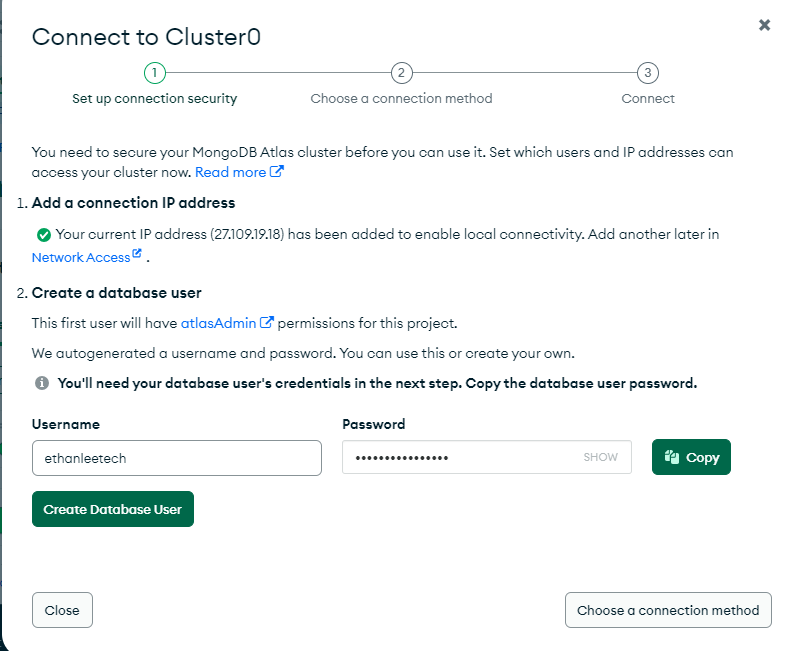
You’ve to notedown, your username and password, once you click on “Create Database User”,
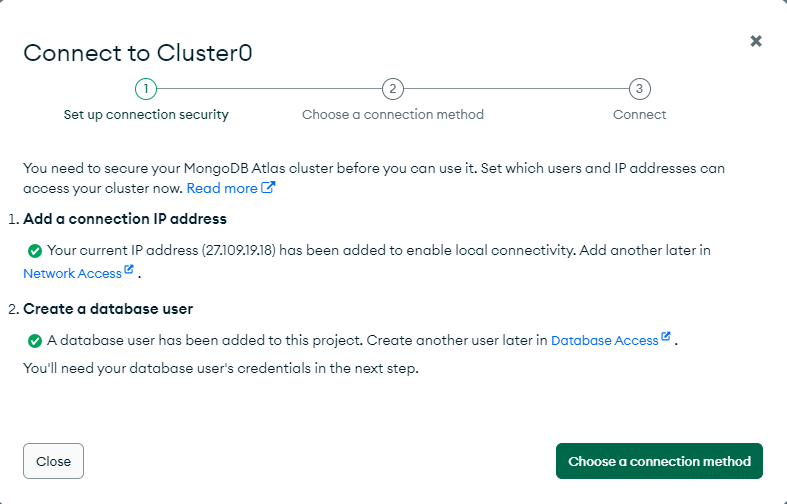
Once you click on “Choose a connection method”,
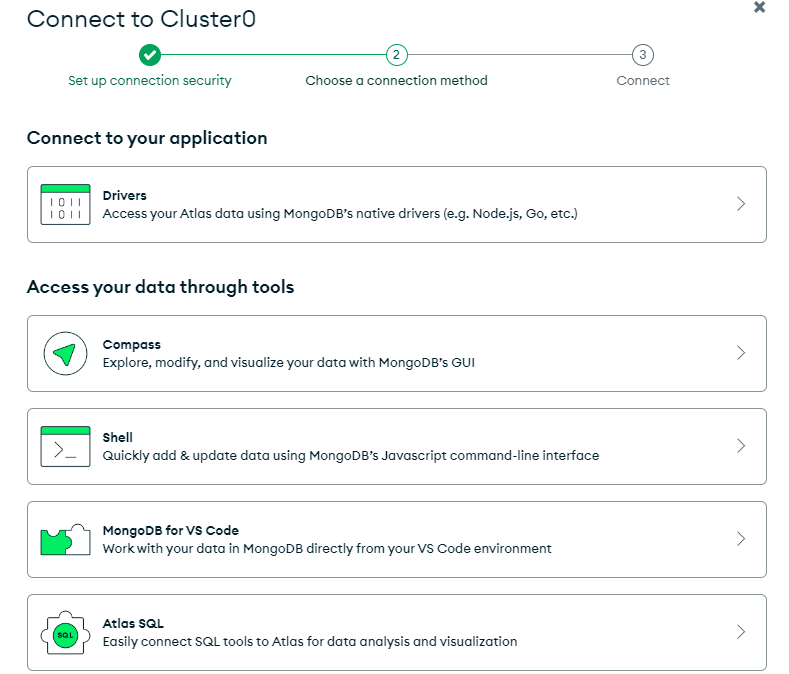
now, choose, Choose “Connect to your application”, You’ll see below screen.
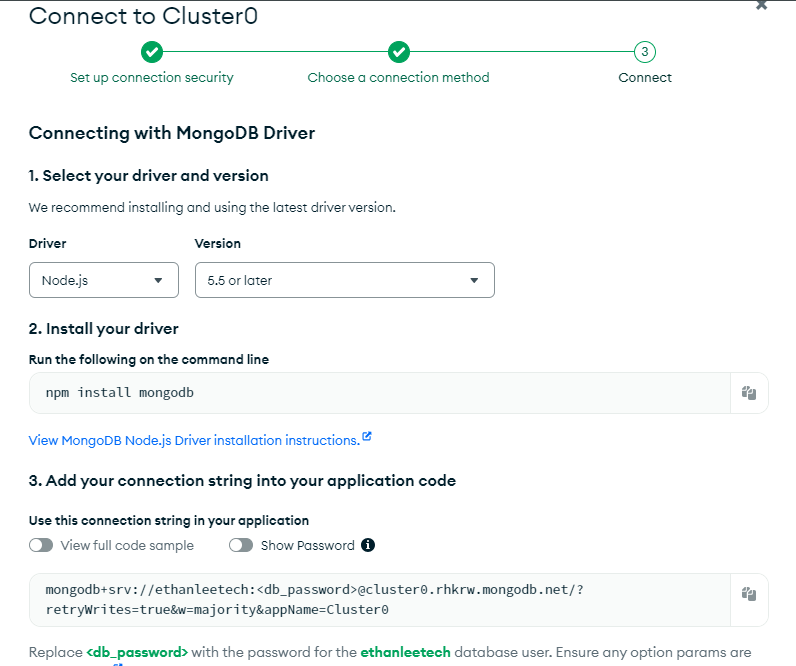
Now, you’ll see connection string like this - mongodb+srv://
replace it with your username and password you noted down earlier.
Now that, you to copy your MongoDB string and have to replace in your app.js code, and you have to update it.
now, you to run your node app.js file again in your terminal. You’ll see the message “Connected to MongoDB”

5. Implementing Middleware
So, now you see above successful message, now, next step is to add simple logging middleware using Morgan which is a popular HTTP request logger middleware for Node.js.
To install Morgan, run below command.
npm install morgan
now, you’ve to update, your app.js file to use Morgan.
   const express = require('express');
   const morgan = require('morgan'); // Import morgan
   const app = express();
   const port = process.env.PORT || 3000;

   console.log('Starting the server...');

   const mongoose = require('mongoose');

   // Replace with your actual MongoDB connection string
   const mongoURI = 'mongodb+srv://<username>:<password>@cluster0.mongodb.net/myFirstDatabase?retryWrites=true&w=majority';

   mongoose.connect(mongoURI, { useNewUrlParser: true, useUnifiedTopology: true })
       .then(() => console.log('Connected to MongoDB'))
       .catch(err => console.error('Could not connect to MongoDB', err));

   // Middleware to parse JSON bodies
   app.use(express.json());

   // Use morgan for logging
   app.use(morgan('tiny'));

   console.log('Middleware set up.');

   // Basic route
   app.get('/', (req, res) => {
       console.log('Received a request on /');
       res.send('Hello World!');
   });

   // New route for /api
   app.get('/api', (req, res) => {
       res.send('API endpoint');
   });

   // New route for /users
   app.get('/users', (req, res) => {
       res.send('Users endpoint');
   });

   console.log('Route set up.');

   // Start the server
   app.listen(port, () => {
       console.log(`Server is running on port ${port}`);
   });
now, run your node app.js, go to http://localhost:3000/ and you’ll see log entry for request in terminal. This step will add basic logging to your application.

Your next step is to define a schema and model for your MongoDB collections using Mongoose. This will allow you to interact with your database in a structured way.
6. Define a Schema and Model
You have to create a new file named user.js in a models directory you may need to create the models directory if it doesn't exist). You’ve define a User Schema and model for user.
   const mongoose = require('mongoose');

   // Define the User schema
   const userSchema = new mongoose.Schema({
       name: {
           type: String,
           required: true
       },
       email: {
           type: String,
           required: true,
           unique: true
       },
       password: {
           type: String,
           required: true
       }
   });

   // Create the User model
   const User = mongoose.model('User', userSchema);

   module.exports = User;
Now, you’ve to update the app.js to Use the User Model:
In app.js, import the User model and create a route to add a new user:
   const express = require('express');
   const morgan = require('morgan');
   const mongoose = require('mongoose');
   const User = require('./models/user'); // Import the User model
   const app = express();
   const port = process.env.PORT || 3000;

   console.log('Starting the server...');

   // Replace with your actual MongoDB connection string
   const mongoURI = 'mongodb+srv://<username>:<password>@cluster0.mongodb.net/myFirstDatabase?retryWrites=true&w=majority';

   mongoose.connect(mongoURI, { useNewUrlParser: true, useUnifiedTopology: true })
       .then(() => console.log('Connected to MongoDB'))
       .catch(err => console.error('Could not connect to MongoDB', err));

   // Middleware to parse JSON bodies
   app.use(express.json());

   // Use morgan for logging
   app.use(morgan('tiny'));

   console.log('Middleware set up.');

   // Basic route
   app.get('/', (req, res) => {
       console.log('Received a request on /');
       res.send('Hello World!');
   });

   // New route for /api
   app.get('/api', (req, res) => {
       res.send('API endpoint');
   });

   // New route for /users
   app.get('/users', (req, res) => {
       res.send('Users endpoint');
   });

   // Route to add a new user
   app.post('/users', async (req, res) => {
       try {
           const user = new User(req.body);
           await user.save();
           res.status(201).send(user);
       } catch (error) {
           res.status(400).send(error);
       }
   });

   console.log('Route set up.');

   // Start the server
   app.listen(port, () => {
       console.log(`Server is running on port ${port}`);
   });
now, that you’ve to open postman, you can also use desktop postman agent, click on new request, select request type to “Post”, Enter the URL - http://localhost:3000/users , now, select body tab, select row and json there.
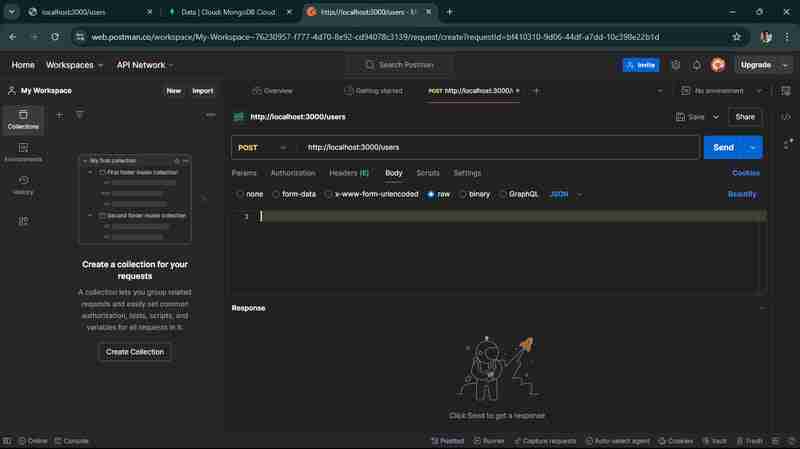
enter the following json in text area.
     {
         "name": "John Doe",
         "email": "john.doe@example.com",
         "password": "password123"
     }
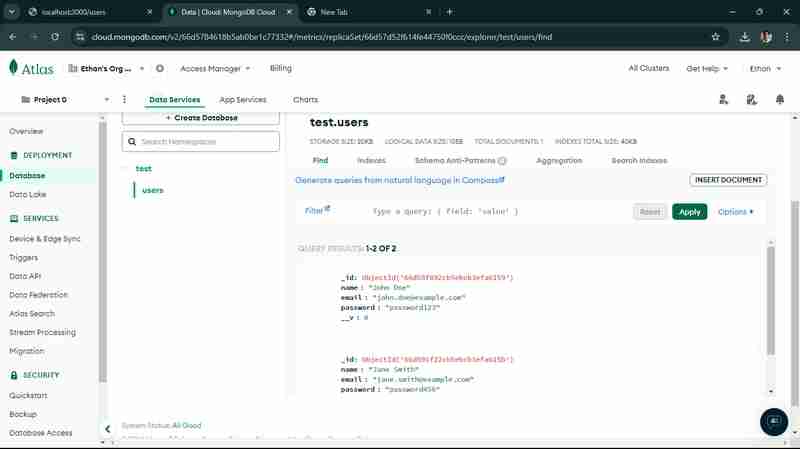
and once you send the request, it will reflect in your MongoDB Atlas account, you have to go database and have to select cluster0, find your database which you’ve create, go to the user, and here you’ll found the information, you send via a request. just like below screen.
7. Implemented CRUD Operations:
As we successfully added users to your MongoDB database, the next step is to implement additional CRUD (Create, Read, Update, Delete) operations for your User model. This will allow you to manage users more effectively.
Let's start by adding routes for reading, updating, and deleting users.
1. Read (GET) Users
Add a route to get all users and a route to get a user by ID.
// ... existing code ...

// Route to get all users
app.get('/users', async (req, res) => {
    try {
        const users = await User.find();
        res.send(users);
    } catch (error) {
        res.status(500).send(error);
    }
});

// Route to get a user by ID
app.get('/users/:id', async (req, res) => {
    try {
        const user = await User.findById(req.params.id);
        if (!user) {
            return res.status(404).send('User not found');
        }
        res.send(user);
    } catch (error) {
        res.status(500).send(error);
    }
});

// ... existing code ...
2. Update (PUT) Users
Add a route to update a user by ID.
// ... existing code ...

// Route to update a user by ID
app.put('/users/:id', async (req, res) => {
    try {
        const user = await User.findByIdAndUpdate(req.params.id, req.body, { new: true, runValidators: true });
        if (!user) {
            return res.status(404).send('User not found');
        }
        res.send(user);
    } catch (error) {
        res.status(400).send(error);
    }
});

// ... existing code ...
3. Delete (DELETE) Users
Add a route to delete a user by ID.
// ... existing code ...

// Route to delete a user by ID
app.delete('/users/:id', async (req, res) => {
    try {
        const user = await User.findByIdAndDelete(req.params.id);
        if (!user) {
            return res.status(404).send('User not found');
        }
        res.send(user);
    } catch (error) {
        res.status(500).send(error);
    }
});

// ... existing code ...
once, you update your above code in your app.js file,
start your server using node app.js command,
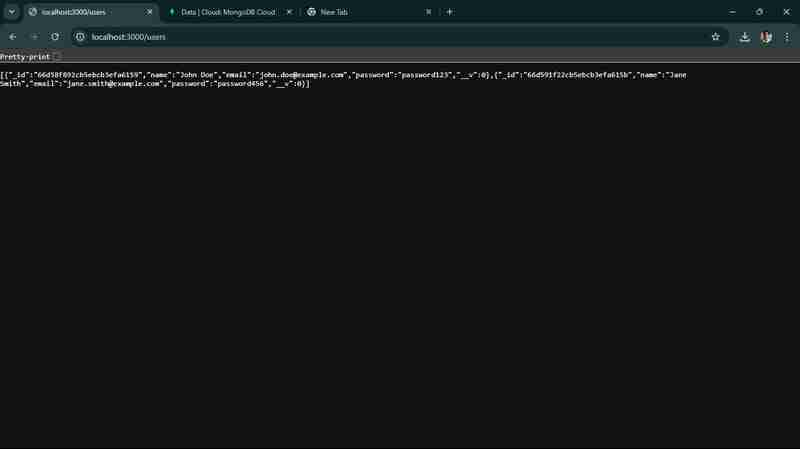
now, send request to get all users: You’ll see below screen, in your http://localhost:3000/users
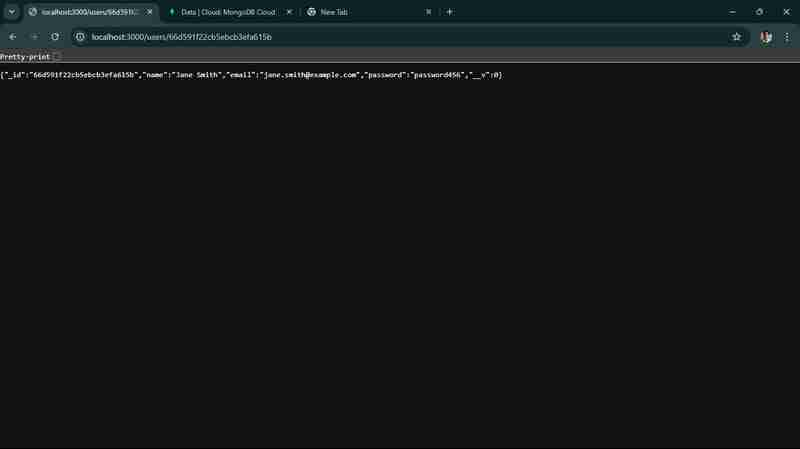
when you run get user by id, you’ll see in terminal as well on local host as well.
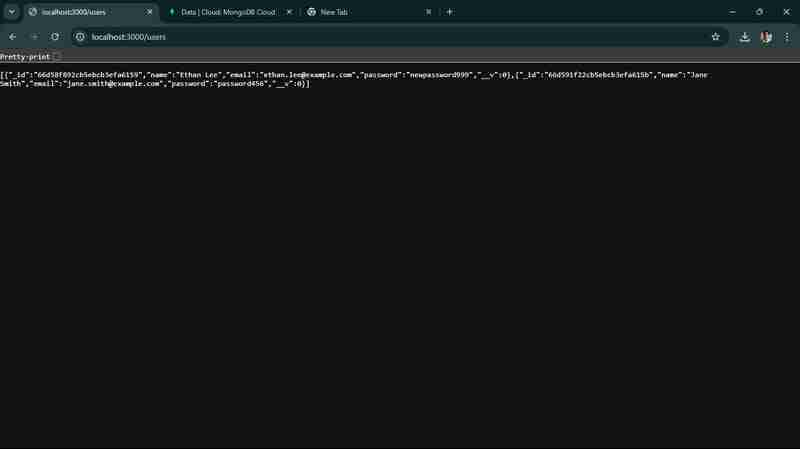
when you update any information, you’ll able to see it here. we changed name from john doe to Ethan lee,
when you run a delete request, one user will be deleted.

so, we successfully implemented and tested all the basic CRUD Operations for your API.
8. Implement Error Handling Middleware
Centralized error handling helps manage errors gracefully and provides consistent error responses.
Add Error Handling Middleware
   // ... existing code ...

   // Error handling middleware
   app.use((err, req, res, next) => {
       console.error(err.stack);
       res.status(500).send({ error: 'Something went wrong!' });
   });

   // Start the server
   app.listen(port, () => {
       console.log(`Server is running on port ${port}`);
   });
9. Use Environment Variables
Using environment variables helps manage configuration settings securely.
- Install dotenv
npm install dotenv
2. Create a .env File:
PORT=3000
MONGODB_URI=mongodb+srv://<username>:<password>@cluster0.mongodb.net/myFirstDatabase?retryWrites=true&w=majority
this is your updated app.js
   require('dotenv').config();
   const express = require('express');
   const morgan = require('morgan');
   const mongoose = require('mongoose');
   const cors = require('cors');
   const User = require('./models/user');
   const app = express();
   const port = process.env.PORT || 3000;

   console.log('Starting the server...');

   mongoose.connect(process.env.MONGODB_URI, { useNewUrlParser: true, useUnifiedTopology: true })
       .then(() => console.log('Connected to MongoDB'))
       .catch(err => console.error('Could not connect to MongoDB', err));

   // Middleware to parse JSON bodies
   app.use(express.json());

   // Use morgan for logging
   app.use(morgan('tiny'));

   // Use cors for handling CORS issues
   app.use(cors());

   console.log('Middleware set up.');

   // Basic route
   app.get('/', (req, res) => {
       console.log('Received a request on /');
       res.send('Hello World!');
   });

   // CRUD routes
   // ... existing CRUD routes ...

   // Error handling middleware
   app.use((err, req, res, next) => {
       console.error(err.stack);
       res.status(500).send({ error: 'Something went wrong!' });
   });

   console.log('Route set up.');

   // Start the server
   app.listen(port, () => {
       console.log(`Server is running on port ${port}`);
   });
10. Add Basic Authentication
For a more secure API, you might want to add basic authentication. Here’s a simple example using HTTP Basic Auth:
Install Basic Auth Middleware:
npm install express-basic-auth
2. Update app.js to Use Basic Auth:
   const basicAuth = require('express-basic-auth');

   // ... existing code ...

   // Use basic auth for all routes
   app.use(basicAuth({
       users: { 'admin': 'supersecret' },
       challenge: true
   }));

   // ... existing code ...
11. Document Your API
Using tools like Swagger can help you document your API endpoints.
Install Swagger UI
npm install swagger-ui-express swagger-jsdoc
Create a Swagger Configuration File
create a swagger.js file in root folder, you’ve to add following code to your file.
const swaggerJsDoc = require('swagger-jsdoc');
const swaggerUi = require('swagger-ui-express');

const swaggerOptions = {
    swaggerDefinition: {
        openapi: '3.0.0',
        info: {
            title: 'User API',
            version: '1.0.0',
            description: 'A simple Express User API'
        },
        servers: [
            {
                url: 'http://localhost:3000'
            }
        ]
    },
    apis: ['./app.js'] // Path to the API docs
};

const swaggerDocs = swaggerJsDoc(swaggerOptions);

module.exports = (app) => {
    app.use('/api-docs', swaggerUi.serve, swaggerUi.setup(swaggerDocs));
};
Update app.js to Use Swagger
Add the following code to your app.js file to set up Swagger:
update your app.js file
require('dotenv').config();
const express = require('express');
const morgan = require('morgan');
const mongoose = require('mongoose');
const cors = require('cors');
const User = require('./models/user');
const setupSwagger = require('./swagger'); // Import the Swagger setup function
const app = express();
const port = process.env.PORT || 3000;

console.log('Starting the server...');

mongoose.connect(process.env.MONGODB_URI, { useNewUrlParser: true, useUnifiedTopology: true })
    .then(() => console.log('Connected to MongoDB'))
    .catch(err => console.error('Could not connect to MongoDB', err));

// Middleware to parse JSON bodies
app.use(express.json());

// Use morgan for logging
app.use(morgan('tiny'));

// Use cors for handling CORS issues
app.use(cors());

console.log('Middleware set up.');

// Basic route
app.get('/', (req, res) => {
    console.log('Received a request on /');
    res.send('Hello World!');
});

// CRUD routes
// ... existing CRUD routes ...

// Setup Swagger
setupSwagger(app);

// Error handling middleware
app.use((err, req, res, next) => {
    console.error(err.stack);
    res.status(500).send({ error: 'Something went wrong!' });
});

console.log('Route set up.');

// Start the server
app.listen(port, () => {
    console.log(`Server is running on port ${port}`);
});
Add Swagger Comments to Your Routes
Add comments to your routes in app.js to document them with Swagger. Here’s an example for the GET /users route:
/**
 * @swagger
 * /users:
 *   get:
 *     summary: Retrieve a list of users
 *     responses:
 *       200:
 *         description: A list of users
 *         content:
 *           application/json:
 *             schema:
 *               type: array
 *               items:
 *                 type: object
 */
app.get('/users', async (req, res) => {
    try {
        const users = await User.find();
        res.send(users);
    } catch (error) {
        res.status(500).send(error);
    }
});

/**
 * @swagger
 * /users/{id}:
 *   get:
 *     summary: Retrieve a single user by ID
 *     parameters:
 *       - in: path
 *         name: id
 *         required: true
 *         schema:
 *           type: string
 *         description: The user ID
 *     responses:
 *       200:
 *         description: A single user
 *         content:
 *           application/json:
 *             schema:
 *               type: object
 *       404:
 *         description: User not found
 */
app.get('/users/:id', async (req, res) => {
    try {
        const user = await User.findById(req.params.id);
        if (!user) {
            return res.status(404).send('User not found');
        }
        res.send(user);
    } catch (error) {
        res.status(500).send(error);
    }
});

// Add similar comments for other routes...
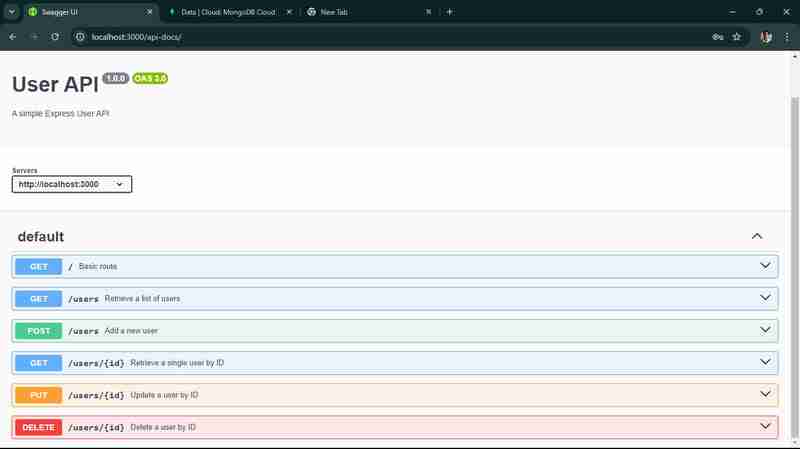
now, when you go to http://localhost:3000/api-docs , use your username and password which is in app.js

You’ll get this, you should be able to access the Swagger UI and see the documentation for your API.
You have successfully built a scalable API with Node.js and Express, complete with CRUD operations, basic authentication, and API documentation using Swagger. This should provide a comprehensive demo for your technical article. You can deploy your API over cloud which make it accessible for all people on the internet, you can use services like Heroku for deployment.
Conclusion
Building scalable APIs with Node.js and Express requires a strategic approach, including modular architecture, optimized performance with non-blocking I/O, clustering, efficient database management, and robust security measures. By implementing caching, monitoring tools, and auto-scaling, your API can handle thousands of requests per second, ensuring reliability and performance under heavy loads. Ready to scale your API with Node.js and Express? Contact us today to build a future-proof API solution for your business needs!
FAQs
1. What are the main advantages of using Node.js for building APIs?
Node.js offers several advantages for API development, including its asynchronous, non-blocking architecture that allows for handling multiple requests simultaneously. This leads to improved performance and scalability. Additionally, Node.js uses JavaScript, enabling developers to work across both the client and server sides, which streamlines the development process.
2. Why should I use Express.js with Node.js?
Express.js is a minimal and flexible web application framework that simplifies the process of building APIs with Node.js. It provides robust routing, middleware support, and easy integration with various databases, making it an excellent choice for developing RESTful APIs quickly and efficiently.
3. How can I ensure my API is scalable?
To ensure your API is scalable, consider implementing a microservices architecture, which allows different components to be scaled independently. Additionally, optimize your code for performance, use caching strategies, and conduct regular load testing to identify and address potential bottlenecks.
4. What are some best practices for error handling in Node.js APIs?
Best practices for error handling in Node.js APIs include using middleware to catch errors globally, logging errors for monitoring and debugging, and providing meaningful error messages to clients. It's also essential to handle different types of errors (e.g., validation errors, database errors) appropriately to enhance user experience.
5. Bagaimanakah ViitorCloud boleh membantu anda membina API boleh skala dengan Node.js dan Express?
ViitorCloud menawarkan perkhidmatan pembangunan komprehensif yang disesuaikan dengan keperluan perniagaan anda, mengkhusus dalam membina API berskala menggunakan Node.js dan Express. Pasukan pembangun berpengalaman kami menggunakan amalan terbaik dalam reka bentuk dan seni bina API, memastikan aplikasi anda boleh mengendalikan beban tinggi dengan cekap. Dengan tumpuan pada pengoptimuman prestasi dan proses pembangunan yang mantap, ViitorCloud boleh membantu anda mencipta API yang bukan sahaja memenuhi permintaan semasa tetapi juga menyesuaikan diri dengan pertumbuhan masa hadapan, menyediakan asas yang kukuh untuk penyelesaian digital anda.
Atas ialah kandungan terperinci Membina API Boleh Skala dengan Node.js dan Express. Untuk maklumat lanjut, sila ikut artikel berkaitan lain di laman web China PHP!
Artikel berkaitan
Lihat lagi- Analisis mendalam bagi komponen kumpulan senarai Bootstrap
- Penjelasan terperinci tentang fungsi JavaScript kari
- Contoh lengkap penjanaan kata laluan JS dan pengesanan kekuatan (dengan muat turun kod sumber demo)
- Angularjs menyepadukan UI WeChat (weui)
- Cara cepat bertukar antara Cina Tradisional dan Cina Ringkas dengan JavaScript dan helah untuk tapak web menyokong pertukaran antara kemahiran_javascript Cina Ringkas dan Tradisional