Rumah >hujung hadapan web >html tutorial >Atribut Acara HTML
Atribut Acara HTML
- WBOYWBOYWBOYWBOYWBOYWBOYWBOYWBOYWBOYWBOYWBOYWBOYWBasal
- 2024-09-04 16:17:27741semak imbas
Dalam artikel ini, kita akan membincangkan secara terperinci tentang Atribut Acara HTML. Peristiwa ialah tindakan yang dilakukan sebagai hasil daripada tindakan pengguna. Sebagai contoh, apabila pengguna menekan papan kekunci untuk membaca data, ia dikatakan sebagai peristiwa papan kekunci. Aktiviti ini dilakukan apabila pengguna melihat ke dalam laman web dan melakukan klik butang atau apabila halaman dimuatkan dengan menekan butang muat semula di mana penyemak imbas melakukan manipulasi pada halaman; semua tindakan ini dikatakan sebagai satu peristiwa. Di sini kita akan melalui pemahaman asas tentang peristiwa dan cara ia berfungsi dalam penyemak imbas pada tindakan pengguna. Terdapat jenis peristiwa berbeza yang berlaku dalam keseluruhan tetingkap penyemak imbas yang dijelaskan dalam bahagian berikut.
5 Atribut Acara HTML Terbaik
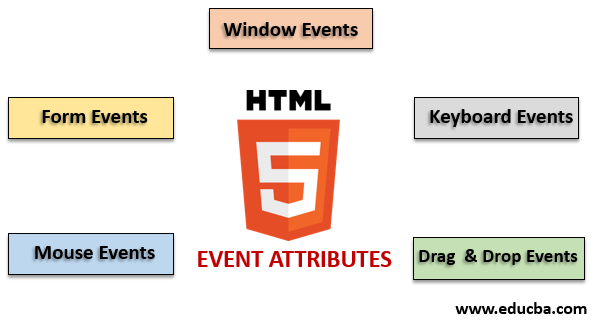
Terdapat variasi acara berbeza yang tersedia dalam HTML. Dan semua acara ini mempunyai blok kecil kod yang dinamakan sebagai pengendali acara yang menyala apabila tindakan acara dilakukan. Ini dilampirkan pada elemen HTML. Pengendali acara atau pendengar acara memainkan peranan penting dalam atribut acara HTML. Mari lihat pelbagai jenis atribut acara yang diisytiharkan secara global dan digunakan pada elemen HTML serta kerja mereka secara terperinci. Empat atribut acara utama digunakan secara besar-besaran. Mereka ialah:
- Acara Tetingkap
- Borang Acara
- Acara Tetikus
- Acara Papan Kekunci
- Seret dan lepaskan Acara
Kami akan menerangkan semua sifat ini satu persatu dengan contoh. Mula-mula, kita akan ikut.
1. Acara Tetingkap
- onafterprintEvent: Atribut ini disokong oleh semua teg Html dan berfungsi apabila halaman mula dicetak dan mempunyai skrip nilai tunggal. Berikut adalah contoh kod HTML. Contoh ini menunjukkan apabila butang ditekan; ia mencetak mesej yang dicetak dalam mesej dialog.
Kod:
<!DOCTYPE html>
<html>
<head>
<title>
Windows onafterprint Event
</title>
</head>
<body onafterprint="myfun()">
<h1>Windows onafterprint Event </h1>
<p>This attribute works in IE and Mozilla</p>
<body style = "text-align:center">
<script>
function myfun() {
alert("Document is being printed");
}
</script>
</body>
</html>
Output:

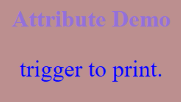
- onbeforeprint: Ia berfungsi sebelum mencetak. Acara itu dipecat selepas proses pencetakan. Di bawah ialah contoh kod.
Kod:
<!DOCTYPE html>
<html>
<head>
<style>
body {
color: #9370DB;
background-color: #BC8F8F;
text-align: center;
padding: 20px;
}
p {
font-size: 2rem;
}
</style>
</head>
<body onbeforeprint="get()">
<h1> Attribute Demo</h1>
<p style="color:#0000FF;">trigger to print.</p>
<div class="show"></div>
<script>
function get() {
document.body.style.background = "#00BFFF";
}
</script>
</body>
</html>
Output:
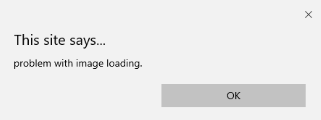
- ralat: Fungsi ini dicetuskan apabila ralat dilemparkan semasa tiada unsur wujud.
Kod:
<!DOCTYPE html>
<html>
<body>
<img src="p.jpg" onerror="myFun()">
<p>hello world.</p>
<script>
function myFun() {
alert("problem with image loading.");
}
</script>
</body>
</html>
Output:
- onload: Fungsi ini membantu dalam memuatkan objek dan berfungsi dengan baik untuk melihat sama ada halaman web dimuatkan dengan betul.
Kod:
<!DOCTYPE html>
<html>
<head>
<title>onload event demo</title>
</head>
<body>
<img src="pic.jpg" onload="ldImg()" width="50" height="92">
<script>
function ldImg() {
alert("image loaded without error");
}
</script>
</body>
</html>
Output:
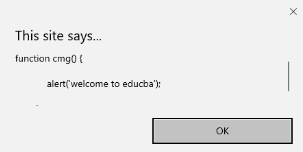
- onresize: Peristiwa ini dicetuskan apabila tetingkap penyemak imbas diubah saiznya dan sebarang elemen boleh dicetuskan di bawah atribut ubah saiz.
Kod:
<!DOCTYPE html>
<head>
<title>onresize event</title>
</head>
<body>
<script type="text/javascript">
function cmg() {
alert('welcome to educba');
}
window.onresize = cmg;
</script>
</head>
<body>
<input type="button"  value="Click the button"
onclick="alert(window.onresize);">
</body>
</html>
Output:

- selepas muat: Acara ini dicetuskan apabila tetingkap halaman web ditutup atau apabila pengguna meninggalkan halaman web. Kod di bawah memunggah halaman apabila pengguna meninggalkan dan memberikan makluman terima kasih kerana mencari. Acara ini kadangkala berfungsi dalam semua penyemak imbas.
Kod:
<!DOCTYPE html>
<html>
<body onunload="onfunc()"><h1>Welcometo educba tutorial</h1>
<p>Leave the page .</p>
<script>
function onfunc() {
alert("Thank you for searching!");
}
</script>
</body>
</html>
Output:

2. Borang Acara
Ia berfungsi dengan Kawalan borang. Berikut ialah atribut yang berlaku apabila pengguna berinteraksi dengan penyemak imbas.
- onblur: Acara ini berlaku apabila perhatian pengguna berada jauh dari tetingkap borang. Contoh berikut mengambil input dalam huruf kecil dan apabila butang serah diklik, ia menukar output kepada huruf besar.
Kod:
<!DOCTYPE html>
<html>
<head>
<title> Form onblur </title>
<style>
body {
text-align:center;
}
h1 {
color:pink;
}
</style>
</head>
<body>
<h1>EDUCBA</h1>
<input type="text" name="fname" id="aaa"
onblur="myfunc()">
<button type="button">Submit</button>
<script>
function myfunc() {
var a = document.getElementById("aaa");
a.value = a.value.toUpperCase();
}
</script>
</body>
</html>
Output:
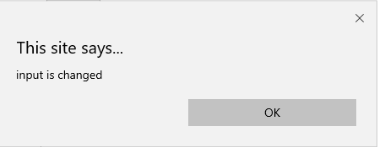

- perubahan: Peristiwa ini berlaku apabila pengguna menukar elemen sedia ada dalam borang. Ia berlaku apabila elemen hilang fokus.
Kod:
<!DOCTYPE html>
<html lang="en">
<head>
<meta charset="utf-8">
<title>HTML onchange</title>
</head>
<body>
<form name="example" action="">  <input type="text" name="rahul" onchange="alert('input is changed')"><br>
<label>select the dress color</label>
<select onchange="alert('You have changed the selection!');">
<option>pink</option>
<option>Yellow</option>
<option>White</option>
</select>
<p><strong>Note:</strong> Select any option </p>
<label>Describe yourself in short : </label>   <br/><textarea cols="15" rows="7" name="details" onchange="alert('description has changed')">   </textarea><br>
<button type="button" name="submit">Submit</button>
</form>
</body>
</html>
Output:

- onfocus: Atribut ini didayakan apabila pengguna memberikan perhatian kepada elemen pada halaman web atau apabila input difokuskan. Contoh di bawah diserlahkan apabila kami memasukkan input dalam medan.
Kod:
<!DOCTYPE html>
<html>
<body>
<p>This event gets triggered whwn an element is been focussed.</p>
Name: <input type="text" id="name" onfocus="onfoc(this.id)"><br>
Location: <input type="text" id="loc" onfocus="onfoc(this.id)">
<script>
function onfoc(a) {
document.getElementById(a).style.background = "pink";
}
</script>
</body>
</html>
Output:
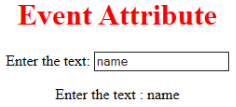
- oninput: This event triggers when the input is entered in the input field. It has been activated when the value in the text field is changed. It reflects once the value of the element is changed.
<!DOCTYPE html>
<html>
<head>
<title> HTML oninput </title>
</head>
<style>
body {
text-align:center;
}
h1 {
color:red;
}
</style>
<body>
<h1> Event Attribute </h1>
Enter the text:
<input type="text" id="EDUCBA"  oninput="myon()">
<p id= "sid"></p>
<script>
function myon()
{
var x = document.getElementById("EDUCBA").value;
document.getElementById("sid").innerHTML = "Enter the text : " +x;
}
</script>
</body>
</html>
Output:

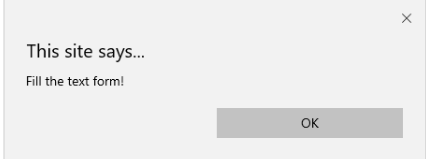
- oninvalid: This attribute calls the events when the text entered in the input type is invalid or remains empty. This event attribute must fill the input element.
Code:
<!DOCTYPE html>
<html>
<head>
<title> example oninvalid Event </title>
<style>
p {
color:orange;
}
body {
text-align:center;
}
</style>     </head>
<body>
<p> HTML is used to create a web page</p>
<form  method="get">
Enter the name:
<input type="text" oninvalid="alert('Fill the text form!');" required>
<input type="submit" value="Submit">
</form>  </body>
</html>
Output:
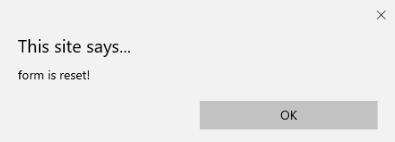
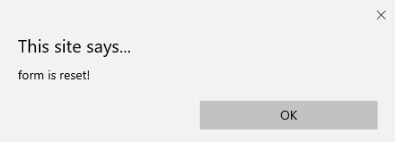
- onreset: It is fired when a form is a rest. The following example says when you submit the button, a form is processed, and again when you click to reset, the form is being reset.
Code:
<!DOCTYPE html>
<html>
<style>
body {font-family:calibri;}
label {font-variant:small-caps;}
ol {background-color:#610000; margin-top:35px;}
li {margin-top:3px; padding:3px; background-color:rose; font-size:15px;}
div {position:absolute;top:250px;left:70px; font-size:1.5em;
}
</style>
<body>
<ol>
<li>Form with input to reset and submit</li>
</ol>
<form action="" method="get" onreset="onRes()" onsubmit="onSub()">
<label>Enter input:<br /><input type="text" id="iv" oninvalid="onInva()" oninput="onInp()"></label><br /><br />
<input type="submit" value="press"> <input type="reset">
</form>
<div id="a_box"></div>
<script>
function onInva() {
alert("Input field cannot be empty!");
}
function onInp() {
var input_value = document.getElementById("iv").value;
document.getElementById("a_box").innerHTML = "Input value: <br />" + iv;
}
function onRes() {
alert("form is reset!");
}
function onSubmitEvent() {
alert("Form is loading");
location.reload();
}
</script>
</body>
</html>
Output:
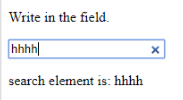
- onsearch: It works when a user presses an enter button.
Code:
<!DOCTYPE html>
<html>
<body>
<p>Write in the field.</p>
<input type="search" id="value1" onsearch="myF()">
<p id="sample"></p>
<script>
function myF() {
var k = document.getElementById("value1");
document.getElementById("sample").innerHTML = "search element is: " + k.value;
}
</script>
</body>
</html>
Output:
- onselect: It is triggered when a text has been selected in an input box. It throws a dialog box printing an alert message.
Code:
<!DOCTYPE html>
<html>
<head>
<title>onselect demo</title>
<style>
h1 {
color:magenta;
}
body {
text-align:center;
}
</style>
<script>
function eduhtml() {
alert("text highlighted!");
}
</script>
</head>
<body>
<h1>EDUCBA Online tutorial</h1>
Text Box: <input type="text" value="onselectattribute: A well defined portal" onselect="eduhtml()">
</body>
</html>
</html>
Output:

- onsubmit: The purpose of this event is to execute the action performed while pressing the submit button.
Code:
<!DOCTYPE html>
<html>
<body>
<head>
<title> Onsubmit Example</title>
</head>
<form action="demo_form.asp" onsubmit="myF()">
Enter name: <input type="text" name="fname">
<label>Email :</label>
<input id="email" name="email" type="text">
<input type="submit" value="Submit">
</form>
<script>
function myF() {
alert("The form was submitted");
}
</script>
</body>
</html>
Output:

3. Key Board Attributes
- OnKeyDown: It is triggered when a user presses a down Arrow key.
Code:
<!DOCTYPE html>
<html>
<body>
<p>Example for Onkeydown.</p>
<input type="text" onkeydown="mykedwn()">
<script>
function mykedwn() {
alert("key press is activated");
}
</script>
</body>
</html>
Output:

- OnKeyPress: This event gets triggered when the user presses any key on the keyboard. Note: some browser doesn’t support pressing any key.
Code:
<!DOCTYPE html>
<html>
<body>
<p> This example shows when a user type in the text area it triggers an event </p>
<form>
<textarea onkeypress="alert('triggering onkeypress event.')" placeholder="Place the cursor inside the textarea and press a key."  " cols="30" rows="4" style="background-color:pink;">> </textarea> </form>
</body>
</html>
Output:

- OnKeyUp: This attribute gets triggered when a user releases a cursor from the text field. Below comes the demonstration.
Code:
<!DOCTYPE html>
<html>
<body>
<p> This example transforms the character to lower case.</p>
Fill the name: <input type="text" id="jjj" onkeyup="mykey()">
<script>
function mykey() {
var g = document.getElementById("jjj");
g.value = g.value.toLowerCase();
}
</script>
</body>
</html>
Output:

4. Mouse Event Attributes
This action triggers a mouse event when a mouse is pressed either from a computer or any external devices like a smartphone or tablet. Some of the mouse events are given below:
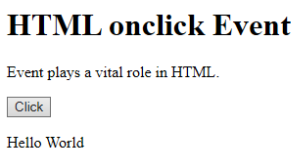
- onclick: It is triggered when a user presses the button over the mouse. An input example is given below to show the event while clicking the mouse.
Code:
<!DOCTYPE html>
<html>
<body>
<h1>HTML onclick Event</h1>
<p> Event plays a vital role in HTML.</p>
<button onclick="oncf()">Click </button>
<p id="sample"></p>
<script>
function oncf() {
document.getElementById("sample").innerHTML = "Hello World";
}
</script>
</body>
</html>
Output:
- onmousemove: It is fired when a mouse is moved over an image in any direction.
Code:
<!doctype html>
<html>
<head><title> Event onmousemove demo</title>
</head>
<body>
<p>This event is activated when the pointer drags its direction.</p>
<body style="width:200px;height:80px;border:2px solid;" onmousemove="javascript:alert('mouse action');">Sample text</body>
</body>
</html>
Output:

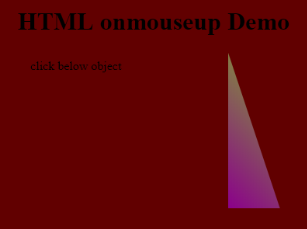
- Onmouseup: This event gives a notification when a user releases a button on an output.
Code:
<!DOCTYPE html>
<html>
<head>
<style>
body {
color:  "#ff0000";
height: 120vh;
background-color: #610000;
text-align: center;
}
.polygon {
float: right;
shape-inside: polygon(0 0, 0 200px, 100px 200px);
clip-path: polygon(0 0, 0 250px, 100px 300px);
height: 200px;
width: 200px;
background: linear-gradient(to bottom left, #7CFC00, #8B008B);
}
p {
margin: 30px auto;
}
</style>
</head>
<body>
<h1>HTML onmouseup Demo</h1>
<div class="polygon" onmouseup="mupfn()"></div>
<p> click below object</p>
<script>
function mupFn() {
document.querySelector('.polygon').style.transform = 'scale(2.2)';
}
</script>
</body>
</html>
Output:
- Onmouseover: Execute a JavaScript when moving the mouse pointer over an image
Code:
<!DOCTYPE html>
<html>
<body>
<title>Example demonstrating Onmouseover.</title>
<h1 id="sample" onmouseover="A()" onmouseout="B()">Mouse over </h1>
<script>
function A() {
document.getElementById("sample").style.color = "yellow";}
function B() {
document.getElementById("sample").style.color = "green";
}
</script>
</body>
</html>
Output:

5. Drag Event Attributes
This application helps in the HTML window when the user drags the input element. Below are the different event listeners used in HTML to store dragged data.
- Ondrag: This is used when an element is being dragged from the web page.
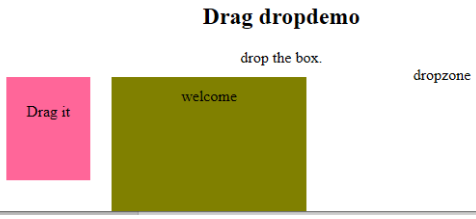
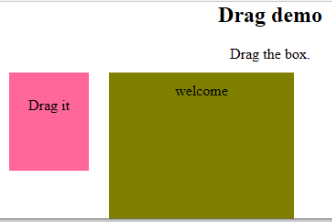
- Ondragstart: This fires when the user begins to drag from the input field. The below example demonstrates about dragging the two-target area.
Code:
<!DOCTYPE HTML>
<html>
<head>
<style type = "text/css">
#b1, #b2 {
float:left;padding:11px;margin:11px; -moz-user-select:none;
}
#b1 { background-color: #FF6699; width:65px; height:85px;  }
#b2 { background-color: #808000; width:180px; height:180px; }
</style>
<script type = "text/javascript">
function dStart(e) {
e.dataTransfer.effectAllowed = 'move';
e.dataTransfer.setData("Text", e.target.getAttribute('id'));
e.dataTransfer.setDragImage(e.target,0,0);
return true;
}
</script>
</head>
<body>
<center>
<h2>Drag demo</h2>
<div> Drag the box.</div>
<div id = "b1" draggable = "true"
ondragstart = "return dStart(e)">
<p>Drag it</p>
</div>
<div id = "b2">welcome</div>
</center>
</body>
</html>
Output:
-
ondrop: Execute this attribute when a draggable element is dropped in element.
Code:
<!DOCTYPE HTML>
<html>
<head>
<style type = "text/css">
#b1, #b2 {
float:left;padding:11px;margin:11px; -moz-user-select:none;
}
#b1 { background-color: #FF6699; width:65px; height:85px;  }
#b2 { background-color: #808000; width:180px; height:180px; }
</style>
<script type = "text/javascript">
function dStart(e) {
e.dataTransfer.effectAllowed = 'move';
e.dataTransfer.setData("Text", e.target.getAttribute('id'));
e.dataTransfer.setDragImage(e.target,0,0);
return true;
}
</script>
</head>
<body>
<center>
<h2>Drag  dropdemo</h2>
<div> drop the box.</div>
<div id = "b1" draggable = "true"
ondragstart = "return dStart(e)">
<p>Drag it</p>
</div>
<div class="droptarget"
ondrop="drop(event)"
ondragover="allowDrop(event)">
</div>
<div id = "b2">welcome</div>
<span> dropzone </span>
</center>
</body>
</html>
Output:

Conclusion
This event attribute helps to make a web application very easier and attractive. The different occurrence of actions generates various events. Even though this approach is generally avoided, the programmer likes to learn the function assigned for the HTML attributes events. These event handlers are still executed to beautify the web pages.
Recommended Article
This is a guide to the HTML Event Attributes. Here we discuss the Introduction to HTML Event Attributes along with Code implementation and Output. you can also go through our suggested articles to learn more –
- HTML Frames
- HTML Style Attribute
- Applications of HTML
- HTML vs HTML5
Atas ialah kandungan terperinci Atribut Acara HTML. Untuk maklumat lanjut, sila ikut artikel berkaitan lain di laman web China PHP!
JavaScript html5 html Object if for while Error Attribute Event pointer function this alert input windowsKenyataan:Kandungan artikel ini disumbangkan secara sukarela oleh netizen, dan hak cipta adalah milik pengarang asal. Laman web ini tidak memikul tanggungjawab undang-undang yang sepadan. Jika anda menemui sebarang kandungan yang disyaki plagiarisme atau pelanggaran, sila hubungi admin@php.cn


