


十、安装clusterware 开始安装,我是使用xmanager 4安装的,我的本机ip为192.168.1.103 [root@rac1 ~]# xhost -bash: xhost: command not found[root@rac1 ~]# export DISPLAY=192.168.1.103:0.0 [root@rac1 ~]# su - oracle[oracle@rac1 ~]$ cd /stage/clus
十、安装clusterware
开始安装,我是使用xmanager 4安装的,我的本机ip为192.168.1.103
[root@rac1 ~]# xhost+ -bash: xhost+: command not found [root@rac1 ~]# export DISPLAY=192.168.1.103:0.0 [root@rac1 ~]# su - oracle [oracle@rac1 ~]$ cd /stage/clustware/Disk1/clusterware/ [oracle@rac1 clusterware]$ ll total 36 drwxr-xr-x 2 oracle oinstall 4096 Jul 3 2005 cluvfy drwxr-xr-x 6 oracle oinstall 4096 Jul 3 2005 doc drwxr-xr-x 4 oracle oinstall 4096 Jul 3 2005 install drwxr-xr-x 2 oracle oinstall 4096 Jul 3 2005 response drwxr-xr-x 2 oracle oinstall 4096 Jul 3 2005 rpm -rwxr-xr-x 1 oracle oinstall 1328 Jul 3 2005 runInstaller drwxr-xr-x 9 oracle oinstall 4096 Jul 3 2005 stage drwxr-xr-x 2 oracle oinstall 4096 Jul 3 2005 upgrade -rw-r--r-- 1 oracle oinstall 3445 Jul 3 2005 welcome.html [oracle@rac1 clusterware]$ ./runInstaller Starting Oracle Universal Installer...
Checking installer requirements...
Checking operating system version: must be redhat-3, SuSE-9, redhat-4, UnitedLinux-1.0, asianux-1 or asianux-2 Passed
All installer requirements met.
Preparing to launch Oracle Universal Installer from /tmp/OraInstall2014-03-22_03-39-48PM. Please wait ...[oracle@rac1 clusterware]$ Oracle Universal Installer, Version 10.2.0.1.0 Production Copyright (C) 1999, 2005, Oracle. All rights reserved.
------------------------------------------------------------------------------------------------------------------------------------------------------------------------
如果出现以下错误,则是因为缺少-ivh libXp-1.0.0-8.1.el5.i386.rpm的原因,之前我在检查缺少包时,已经安装过了。
------------------------------------------------------------------------------------------------------------------------------------------------------------------------
Exception java.lang.UnsatisfiedLinkError: /tmp/OraInstall2014-03-22_08-31-31AM/jre/1.4.2/lib/i386/libawt.so: libXp.so.6: cannot open shared object file: No such file or directory occurred.. java.lang.UnsatisfiedLinkError: /tmp/OraInstall2014-03-22_08-31-31AM/jre/1.4.2/lib/i386/libawt.so: libXp.so.6: cannot open shared object file: No such file or directory at java.lang.ClassLoader$NativeLibrary.load(Native Method) at java.lang.ClassLoader.loadLibrary0(Unknown Source) at java.lang.ClassLoader.loadLibrary(Unknown Source) at java.lang.Runtime.loadLibrary0(Unknown Source) at java.lang.System.loadLibrary(Unknown Source) at sun.security.action.LoadLibraryAction.run(Unknown Source) at java.security.AccessController.doPrivileged(Native Method) at sun.awt.NativeLibLoader.loadLibraries(Unknown Source) at sun.awt.DebugHelper.
缺少包 [oracle@rac1 clusterware]$ su - Password: [root@rac1 ~]# mount /dev/cdrom /mnt/ mount: you must specify the filesystem type [root@rac1 ~]# mount /dev/cdrom /mnt/ mount: block device /dev/cdrom is write-protected, mounting read-only [root@rac1 ~]# cd /mnt/Server/ [root@rac1 Server]# rpm -ivh libXp-1.0.0-8.1.el5.i386.rpm warning: libXp-1.0.0-8.1.el5.i386.rpm: Header V3 DSA signature: NOKEY, key ID 1e5e0159 Preparing... ########################################### [100%] 1:libXp ########################################### [100%] ----------------------------------------------------------------------------------------------------------------------------------------------------------------------------------------------------------
1.稍微等几秒钟,便可看见弹出的clusterware安装界面,点击“Next” 安装oracle clusterware 10.2.0.1.0开始,进入欢迎界面点击“Next”

2.将Z喎?http://www.2cto.com/kf/ware/vc/" target="_blank" class="keylink">vcmFJbnZlbnRvcnnEv8K8sLLXsLW9L3UwMS9hcHAvb3JhY2xlL29yYUludmVudG9yec/Co6y147v3obBOZXh0obEK1ri2qLLZ1/fPtc2z1+mjum9pbnN0YWxs1+kKxKzIzwo8YnI+Cgo8aW1nIHNyYz0="http://www.2cto.com/uploadfile/Collfiles/20140324/2014032409113091.jpg" alt="\">
3.定义clusterware的安装路径,点击“Next” Name:OraCrs10g_home Path:/u01/app/oracle/product/10.2.0/crs_1

4.先决条件prerequisite检查,0 requirements to beverified。 安装前期的环境检查,如图所示

5. 指定集群节点rac1 rac2 Specify Cluster Configuration 这个地方系统默认只显示一个节点,另一个节点需要手动添加 点击“Add…”-> Public Node Name:rac2.localdomain -> Private Node Name:rac2-priv.localdomain -> virtual Host Name: rac2-vip.localdomain


6. 指定网卡接口用途,系统把所有网卡都扫描进来 点击“Edit”修改 eth0设置为public网卡 eth1设置为private网卡

7.指定“OCR 集群注册表”所对应裸设备路径,点击“Next” OCR:oracle cluster register集群注册表文件,这个文件中记录了oracle RAC的所有可用资源,例如:实例, 数据库 ,监听 ,节点 ,ASM 磁盘组, service服务等资源,只有把新资源注册到OCR才能被RAC调配使用。例如 新加入一个节点到RAC架构,就需要把新节点注册到OCR,由于OCR文件非常重要因此需要我们拥有冗余方案。 选择“External Redundancy 外部冗余”【你将用磁盘管理系统提供OCR冗余】 Specify OCR Location:/dev/raw/raw1

8.指定“Voting Disk 表决磁盘”所对应裸设备路径,点击“Next” Voting Disk:表决磁盘是用于防止脑裂现象的一种判断机制,一般为单数个磁盘,当某个节点发生通信故障或不能继续扮演RAC角色时需要表决磁盘来判断是否剔除它。 选择“External Redundancy 外部冗余” Specify Voting Disk Location:/dev/raw/raw2

9.当上述属性设置完之后,下面开始正式的安装过程,点击“Install”,主节点安装完成后,系统会自动往rac2对应目录下推送clusterware的所有文件。


---------------------------------------------------------------------------------------------------------------------------------------- 如果出现以下错误,则是缺少包的原因,安装包后,在retry,就可以了。

[root@rac1 Server]# rpm -ivh kernel-headers-2.6.18-274.el5.i386.rpm warning: kernel-headers-2.6.18-274.el5.i386.rpm: Header V3 DSA signature: NOKEY, key ID 1e5e0159 Preparing... ########################################### [100%] 1:kernel-headers ########################################### [100%] [root@rac1 Server]# rpm -ivh glibc-headers-2.5-65.i386.rpm warning: glibc-headers-2.5-65.i386.rpm: Header V3 DSA signature: NOKEY, key ID 1e5e0159 Preparing... ########################################### [100%] 1:glibc-headers ########################################### [100%] [root@rac1 Server]# rpm -ivh glibc-devel-2.5-65.i386.rpm warning: glibc-devel-2.5-65.i386.rpm: Header V3 DSA signature: NOKEY, key ID 1e5e0159 Preparing... ########################################### [100%] 1:glibc-devel ########################################### [100%] [root@rac1 Server]# rpm -ivh gcc-4.1.2-51.el5.i386.rpm warning: gcc-4.1.2-51.el5.i386.rpm: Header V3 DSA signature: NOKEY, key ID 1e5e0159 Preparing... ########################################### [100%] 1:gcc ########################################### [100%] [root@rac1 Server]# rpm -ivh libstdc++-devel-4.1.2-51.el5.i386.rpm warning: libstdc++-devel-4.1.2-51.el5.i386.rpm: Header V3 DSA signature: NOKEY, key ID 1e5e0159 Preparing... ########################################### [100%] 1:libstdc++-devel ########################################### [100%] [root@rac1 Server]# rpm -ivh gcc-c++-4.1.2-51.el5.i386.rpm warning: gcc-c++-4.1.2-51.el5.i386.rpm: Header V3 DSA signature: NOKEY, key ID 1e5e0159 Preparing... ########################################### [100%] 1:gcc-c++ ########################################### [100%] [root@rac1 Server]#
---------------------------------------------------------------------------------------------------------------------------
10.安装完成之后,需要分别在两个节点以root身份运行两个脚本 第一个脚本在所有节点上都执行 /u01/app/oracle/oraInventory/orainstRoot.sh 第二个脚本在所有节点上都执行 /u01/app/oracle/product/10.2.0/crs_1/root.sh

按顺序执行 su - root 先在rac1节点上执行:
root@rac1 ~]# /u01/app/oracle/oraInventory/orainstRoot.sh Changing permissions of /u01/app/oracle/oraInventory to 770. Changing groupname of /u01/app/oracle/oraInventory to oinstall. The execution of the script is complete [root@rac1 ~]# /u01/app/oracle/product/10.2.0/crs_1/root.sh WARNING: directory "/u01/app/oracle/product/10.2.0' is not owned by root WARNING: directory '/u01/app/oracle/product' is not owned by root WARNING: directory '/u01/app/oracle' is not owned by root Checking to see if Oracle CRS stack is already configured /etc/oracle does not exist. Creating it now.
Setting the permissions on OCR backup directory Setting up NS directories Oracle Cluster Registry configuration upgraded successfully WARNING: directory '/u01/app/oracle/product/10.2.0' is not owned by root WARNING: directory '/u01/app/oracle/product' is not owned by root WARNING: directory '/u01/app/oracle' is not owned by root assigning default hostname rac1 for node 1. assigning default hostname rac2 for node 2. Successfully accumulated necessary OCR keys. Using ports: CSS=49895 CRS=49896 EVMC=49898 and EVMR=49897. node
再在rac2节点上执行
[root@rac2 ~]# /u01/app/oracle/oraInventory/orainstRoot.sh Changing permissions of /u01/app/oracle/oraInventory to 770. Changing groupname of /u01/app/oracle/oraInventory to oinstall. The execution of the script is complete
------------------------------------------------------------------------------------------------------
在rac2执行/u01/app/oracle/product/10.2.0/crs_1/root.sh之前要修改两个文件,否则会出现以下错误: /u01/app/oracle/product/10.2.0/crs_1/jdk/jre//bin/java: error while loading shared libraries: libpthread.so.0: cannot open shared object file: No such file or directory
----------------------------------------------------------------------------------------------------------------
11.下面我们在rac2上执行root.sh脚本之前需要先在两个节点中都编辑两个文件,使用root用户修改 其实这里需要在两个节点上都需要这两个文件的修改。
第一个文件 [root@rac2 ~]# vi /u01/app/oracle/product/10.2.0/crs_1/bin/vipca 搜索/LD_ASSUME_KERNEL
#Remove this workaround when the bug 3937317 is fixed arch=`uname -m` if [ "$arch" = "i686" -o "$arch" = "ia64" ] then LD_ASSUME_KERNEL=2.4.19 export LD_ASSUME_KERNEL fi unset LD_ASSUME_KERNEL ---添加一行:清除环境变量 #End workaround
------------------------------------------------------------------------------------------------------- 第二个文件 [root@rac2 ~]# vi /u01/app/oracle/product/10.2.0/crs_1/bin/srvctl
#Remove this workaround when the bug 3937317 is fixed LD_ASSUME_KERNEL=2.4.19 export LD_ASSUME_KERNEL unset LD_ASSUME_KERNEL---添加一行:清除环境变量 # Run ops control utility
--------------------------------------------------------------------------------------
12.然后在rac2节点下用root身份执行
[root@rac2 ~]# /u01/app/oracle/product/10.2.0/crs_1/root.sh WARNING: directory '/u01/app/oracle/product/10.2.0' is not owned by root WARNING: directory '/u01/app/oracle/product' is not owned by root WARNING: directory '/u01/app/oracle' is not owned by root Checking to see if Oracle CRS stack is already configured /etc/oracle does not exist. Creating it now.
Setting the permissions on OCR backup directory Setting up NS directories Oracle Cluster Registry configuration upgraded successfully WARNING: directory '/u01/app/oracle/product/10.2.0' is not owned by root WARNING: directory '/u01/app/oracle/product' is not owned by root WARNING: directory '/u01/app/oracle' is not owned by root clscfg: EXISTING configuration version 3 detected. clscfg: version 3 is 10G Release 2. assigning default hostname rac1 for node 1. assigning default hostname rac2 for node 2. Successfully accumulated necessary OCR keys. Using ports: CSS=49895 CRS=49896 EVMC=49898 and EVMR=49897. node
NO KEYS WERE WRITTEN. Supply -force parameter to override. -force is destructive and will destroy any previous cluster configuration. Oracle Cluster Registry for cluster has already been initialized Startup will be queued to init within 90 seconds. Adding daemons to inittab Expecting the CRS daemons to be up within 600 seconds. CSS is active on these nodes. rac1 rac2 CSS is active on all nodes. Waiting for the Oracle CRSD and EVMD to start Waiting for the Oracle CRSD and EVMD to start Waiting for the Oracle CRSD and EVMD to start Waiting for the Oracle CRSD and EVMD to start Oracle CRS stack installed and running under init(1M) Running vipca(silent) for configuring nodeapps Error 0(Native: listNetInterfaces:[3]) [Error 0(Native: listNetInterfaces:[3])] [root@rac2 ~]#
-------------------------------------------------------------------- 这里报错,有的文档这样修改,我没有验证过。 我是在rac1节点上修改 /u01/app/oracle/product/10.2.0/crs_1/bin/vipca和 /u01/app/oracle/product/10.2.0/crs_1/bin/srvctl后,再次在rac2节点上运行 /u01/app/oracle/product/10.2.0/crs_1/root.sh,如下:
1.这里我没有验证过。有的文档说明可以这样修改。
Waiting for the Oracle CRSD and EVMD to start Oracle CRS stack installed and running under init(1M) Running vipca(silent) for configuring nodeapps 运行vipca配置节点 Error 0(Native: listNetInterfaces:[3]) 本地网卡错误 [Error 0(Native: listNetInterfaces:[3])] 本地网卡错误
cd /u01/app/oracle/product/10.2.0/crs_1/bin ./oifcfg 这是oracle网卡配置工具,我们可以使用这个工具来检查网卡配置是否正确 oifcfg iflist 检查网卡配置 oifcfg setif -global eth0/192.168.1.0:public 指定全局公有网卡 oifcfg setif -global eth1/172.168.1.0:cluster_interconnect 指定全局私有网卡 oifcfg getif 获取配置结果,当rac2配置好后rac1自动生成vipca文件,oifcfg getif
-----------------------------------------------------------------------------------------
2.我是在第一个节点rac1修改后,再在rac2上执行一下/u01/app/oracle/product/10.2.0/crs_1/root.sh脚本:
-- ------------------------------------------------------------------------------------------- rac1节点
第一个文件[root@rac1 ~]# vi /u01/app/oracle/product/10.2.0/crs_1/bin/vipca 搜索/LD_ASSUME_KERNEL
#Remove this workaround when the bug 3937317 is fixed arch=`uname -m` if [ "$arch" = "i686" -o "$arch" = "ia64" ] then LD_ASSUME_KERNEL=2.4.19 export LD_ASSUME_KERNEL fi unset LD_ASSUME_KERNEL ---添加一行:清除环境变量 #End workaround
第二个文件[root@rac1 ~]# vi /u01/app/oracle/product/10.2.0/crs_1/bin/srvctl
#Remove this workaround when the bug 3937317 is fixed LD_ASSUME_KERNEL=2.4.19 export LD_ASSUME_KERNEL unset LD_ASSUME_KERNEL---添加一行:清除环境变量 # Run ops control utility
--------------------------------------------------------------------------------
3.rac2节点再次执行,没有出现错误:
[root@rac2 ~]# /u01/app/oracle/product/10.2.0/crs_1/root.sh WARNING: directory '/u01/app/oracle/product/10.2.0' is not owned by root WARNING: directory '/u01/app/oracle/product' is not owned by root WARNING: directory '/u01/app/oracle' is not owned by root Checking to see if Oracle CRS stack is already configured Oracle CRS stack is already configured and will be running under init(1M) [root@rac2 ~]#
---------------------------------------------------------------------------------------------------------------------------------------------------------------------------- 13.两个节点执行完毕后,点击OK,出现如下配置信息。

14.在执行oracle cluster verification utility出现错误,此时需要在任意节点上执行配置虚拟ip。


15.使用root用户配置虚拟ip 此步骤在rac1和rac2节点上都可操作 执行/u01/app/oracle/product/10.2.0/crs_1/bin/vipca 自动弹出图形化界面我们可以使用vipca来创建和配置VIP GSD ONS 资源

16.打开欢迎界面,点击“Next”

17. 系统自动找到public的eth0,点击“Next”,【虚拟ip是基于公有网卡eth0】

18 . 补填各节点对应的vip名称和ip地址 mask地址,点击“Next” Node name IP Alias Name IP address Subnet Mask rac1 rac1-vip.localdomain 192.168.1.152 255.255.255.0 rac2 rac2-vip.localdomain 192.168.1.154 255.255.255.0

19 .检查概述信息,点击“Finish”开始安装,重点检查返填出来的IP地址是否正确千万不能错.

20.安装完之后就可以点击“ok”查看结果,点击“Exit”退出vipca.


21.检查vip服务 gsd ons vip 包含三个进程.
crs_stat -t 全是ONLINE才算正常,在所有节点上都相同
target是希望的最终状态,state是当前状态
[root@rac1 bin]# crs_stat -t Name Type Target State Host ------------------------------------------------------------ ora.rac1.gsd application ONLINE ONLINE rac1 ora.rac1.ons application ONLINE ONLINE rac1 ora.rac1.vip application ONLINE ONLINE rac1 ora.rac2.gsd application ONLINE ONLINE rac2 ora.rac2.ons application ONLINE ONLINE rac2 ora.rac2.vip application ONLINE ONLINE rac2
22 .vipca执行成功后,那么相当于rac2的root.sh脚本也顺利完成,下一步需要做的就是返回到rac1节点,执行剩下的步骤,点击“OK”在Retry,

23 .启动三个组件并通过前提条件检查.如下,状态为全部成功》 Oracle Notification Server Configuration Assistance 通知服务 Oracle Private Interconnect Configuration Assistance 私有互联服务 Oracle Cluster Verification Utility 集群检查工具

24 .等待配置完成后,将会收到“The installation of Oracle Clusterware was successful”提示信息,点击“Exit”,“Yes”退出整个clusterware的安装界面


25.验证安装成功.至此,clusterware安装成功。
在rac1和rac2上分别执行crs_stat -t 检查集群软件状态,必须都为ONLINE才算正常 [root@rac1 bin]# crs_stat -t Name Type Target State Host ------------------------------------------------------------ ora.rac1.gsd application ONLINE ONLINE rac1 ora.rac1.ons application ONLINE ONLINE rac1 ora.rac1.vip application ONLINE ONLINE rac1 ora.rac2.gsd application ONLINE ONLINE rac2 ora.rac2.ons application ONLINE ONLINE rac2 ora.rac2.vip application ONLINE ONLINE rac2 ---------------------------------------------------------------------- [root@rac2 bin]# crs_stat -t Name Type Target State Host ------------------------------------------------------------ ora.rac1.gsd application ONLINE ONLINE rac1 ora.rac1.ons application ONLINE ONLINE rac1 ora.rac1.vip application ONLINE ONLINE rac1 ora.rac2.gsd application ONLINE ONLINE rac2 ora.rac2.ons application ONLINE ONLINE rac2 ora.rac2.vip application ONLINE ONLINE rac2
---------------------------------------------------------------------------------------------------------------------------------------------------------------------------------------------------------------------------------------

 win11安装语言包错误0x800f0950什么原因Jul 01, 2023 pm 11:29 PM
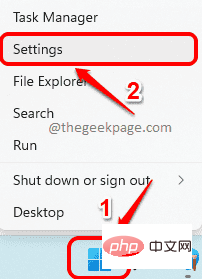
win11安装语言包错误0x800f0950什么原因?当我们在给windows11系统安装新语言包时,有时会遇到系统提示错误代码:0x800f0950,导致语言包安装流程无法继续进行下去。导致这个错误代码一般是什么原因,又要怎么解决呢?今天小编就来给大家说明一下win11安装语言包错误0x800f0950的具体解决步骤,有需要的用户们赶紧来看一下吧。win11电脑错误代码0x800f0950解决技巧1、首先按下快捷键“Win+R”打开运行,然后输入:Regedit打开注册表。2、在搜索框中输入“
 如何在 Google Docs 中安装自定义字体Apr 26, 2023 pm 01:40 PM
GoogleDocs在学校和工作环境中变得很流行,因为它提供了文字处理器所期望的所有功能。使用Google文档,您可以创建文档、简历和项目提案,还可以与世界各地的其他用户同时工作。您可能会注意到GoogleDocs不包括MicrosoftWord附带的所有功能,但它提供了自定义文档的能力。使用正确的字体可以改变文档的外观并使其具有吸引力。GoogleDocs提供了大量字体,您可以根据自己的喜好从中选择任何人。如果您希望将自定义字体添加到Google文档,请继续阅读本文。在本文中
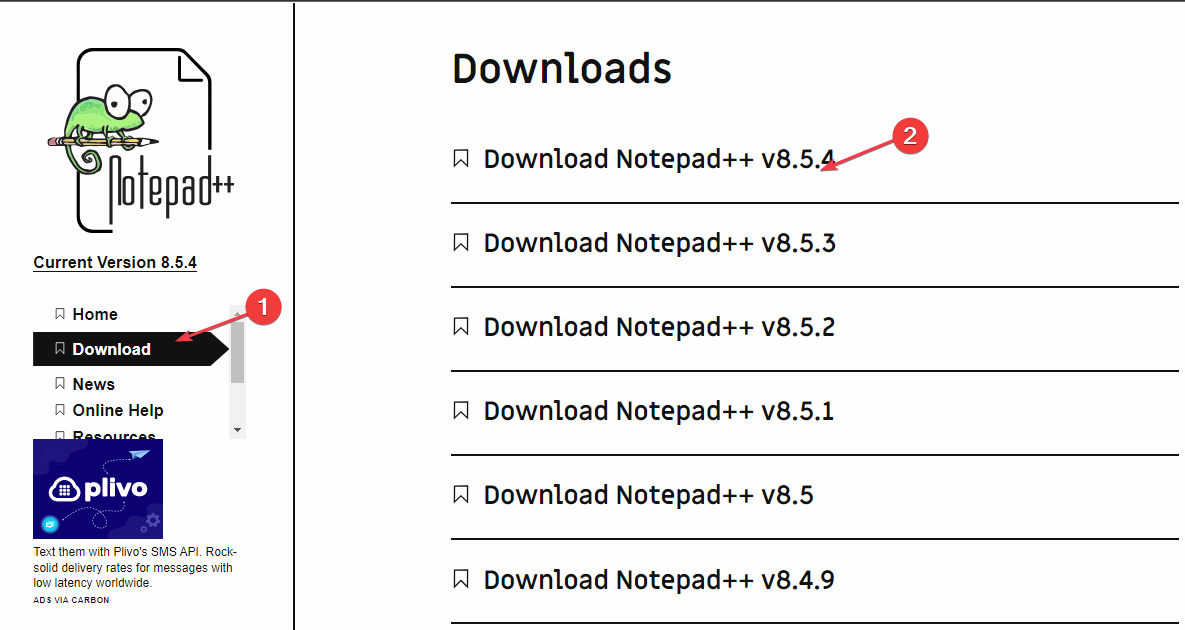 适用于 Windows 11 的记事本++:如何下载和安装它Jul 06, 2023 pm 10:41 PM
Notepad++主要由开发人员用于编辑源代码,由临时用户用于编辑文本。但是,如果您刚刚升级到Windows11,则在您的系统上下载和安装该应用程序可能具有挑战性。因此,我们将讨论在Windows11上下载和安装记事本++。此外,您可以轻松阅读我们关于修复Notepad++在Windows上没有响应的详细指南。记事本++可以在Windows11上运行吗?是的,记事本++可以在Windows11上有效工作,而不会出现兼容性问题。更具体地说,没有臃肿的选项或错误,只需在一个非常小的编辑器中即可。此外
 Steam 未检测到 Windows 11/10 中已安装的游戏,如何修复Jun 27, 2023 pm 11:47 PM
Steam客户端无法识别您计算机上的任何游戏吗?当您从计算机上卸载Steam客户端时,会发生这种情况。但是,当您重新安装Steam应用程序时,它会自动识别已安装文件夹中的游戏。但是,别担心。不,您不必重新下载计算机上的所有游戏。有一些基本和一些高级解决方案可用。修复1–尝试在同一位置安装游戏这是解决这个问题的最简单方法。只需打开Steam应用程序并尝试在同一位置安装游戏即可。步骤1–在您的系统上打开Steam客户端。步骤2–直接进入“库”以查找您拥有的所有游戏。第3步–选择游戏。它将列在“未分类
 修复:在 Xbox 应用上的 Halo Infinite(Campaign)安装错误代码 0X80070032、0X80070424 或 0X80070005May 21, 2023 am 11:41 AM
<p><strong>HaloInfinite(Campaign)</strong>是一款第一人称射击视频游戏,于2021年11月推出,可供单人和多用户使用。该游戏是Halo系列的延续,适用于Windows、XboxOne和Xbox系列的用户X|S。最近,它还在PC版XboxGamePass上发布,以提高其可访问性。大量玩家报告在尝试使用WindowsPC上的<strong>Xbox应
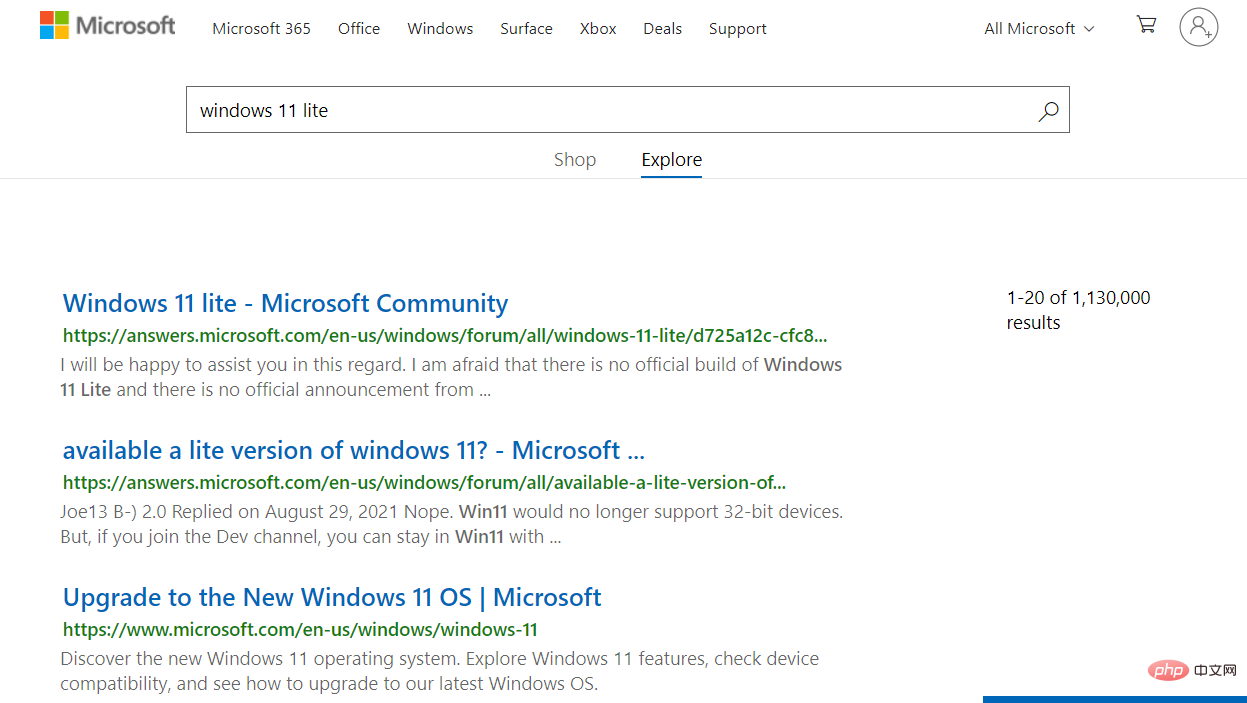 Windows 11 Lite:它是什么以及如何在您的 PC 上安装它Apr 14, 2023 pm 11:19 PM
我们深知MicrosoftWindows11是一个功能齐全且设计吸引人的操作系统。但是,用户一直要求Windows11Lite版本。尽管它提供了重大改进,但Windows11是一个资源匮乏的操作系统,它可能很快就会使旧机器混乱到无法顺利运行的地步。本文将解决您最常问的关于是否有Windows11Lite版本以及是否可以安全下载的问题。跟着!有Windows11Lite版本吗?我们正在谈论的Windows11Lite21H2版本是由Neelkalpa的T
 虚拟机如何安装Win11Jul 03, 2023 pm 12:17 PM
虚拟机怎么安装Win11?近期有用户想要尝试使用VirtualBox虚拟机安装Win11,但是不太清楚具体的操作方法,针对这一情况,小编将为大家演示使用VirtualBox安装Win11的方法,很多小伙伴不知道怎么详细操作,小编下面整理了使用VirtualBox安装Win11的步骤,如果你感兴趣的话,跟着小编一起往下看看吧! 使用VirtualBox安装Win11的步骤 1、要下载VirtualBox,请前往VirtualBox官方下载页面,下载适用于Windows的.exe文件。如果你
 如何在 Windows 11 中重新安装邮件应用程序Apr 14, 2023 pm 03:19 PM
<p><strong>邮件应用程序</strong>是Windows11内置的一个非常有用的电子邮件客户端。它允许您从一个位置管理所有邮件帐户。虽然Mail应用程序非常有用,但有时可能需要重置,有时也需要重新安装,原因有多种。在本文中,我们将通过一些简单的步骤说明如何从Windows11轻松卸载Mail应用程序,以及如何轻松地从MicrosoftStore将其取回。</p>&l


Alat AI Hot

Undresser.AI Undress
Apl berkuasa AI untuk mencipta foto bogel yang realistik

AI Clothes Remover
Alat AI dalam talian untuk mengeluarkan pakaian daripada foto.

Undress AI Tool
Gambar buka pakaian secara percuma

Clothoff.io
Penyingkiran pakaian AI

AI Hentai Generator
Menjana ai hentai secara percuma.

Artikel Panas
Alat panas

Pelayar Peperiksaan Selamat
Pelayar Peperiksaan Selamat ialah persekitaran pelayar selamat untuk mengambil peperiksaan dalam talian dengan selamat. Perisian ini menukar mana-mana komputer menjadi stesen kerja yang selamat. Ia mengawal akses kepada mana-mana utiliti dan menghalang pelajar daripada menggunakan sumber yang tidak dibenarkan.

DVWA
Damn Vulnerable Web App (DVWA) ialah aplikasi web PHP/MySQL yang sangat terdedah. Matlamat utamanya adalah untuk menjadi bantuan bagi profesional keselamatan untuk menguji kemahiran dan alatan mereka dalam persekitaran undang-undang, untuk membantu pembangun web lebih memahami proses mengamankan aplikasi web, dan untuk membantu guru/pelajar mengajar/belajar dalam persekitaran bilik darjah Aplikasi web keselamatan. Matlamat DVWA adalah untuk mempraktikkan beberapa kelemahan web yang paling biasa melalui antara muka yang mudah dan mudah, dengan pelbagai tahap kesukaran. Sila ambil perhatian bahawa perisian ini

SublimeText3 versi Inggeris
Disyorkan: Versi Win, menyokong gesaan kod!

EditPlus versi Cina retak
Saiz kecil, penyerlahan sintaks, tidak menyokong fungsi gesaan kod

SublimeText3 Linux versi baharu
SublimeText3 Linux versi terkini

