RelativeLayout(상대 레이아웃)
이 섹션 소개
이전 섹션에서 LinearLayout을 자세히 분석했는데, LinearLayout도 우리의 우리는 무게 속성을 더 좋아하며 동일한 비율로 나누어 화면에 적용합니다. 이는 매우 유용하지만 LinearLayout을 사용할 때도 문제가 있습니다. 즉, 인터페이스가 더 복잡하면 여러 레이어에 중첩되어야 합니다. LinearLayout은 UI Render의 효율성(렌더링 속도)을 감소시키며, Listview 또는 GridView에 있는 경우 항목을 사용하면 효율성이 낮아지고 LinearLayout 중첩 수준이 너무 많으면 더 많은 시스템 리소스를 차지하게 되어 스택오버플로가 발생할 수 있습니다. 그러나 RelativeLayout을 사용하는 경우 완료하려면 레이어 하나만 필요할 수 있습니다. 상위 컨테이너 또는 형제 구성 요소 + 여백을 참조하세요. +padding은 컴포넌트의 표시 위치를 설정할 수 있어 더 편리합니다. 물론, 구체적인 문제를 자세히 분석해 보겠습니다. 요약은 다음과 같습니다. RelativeLayout + LinearLayout의 가중치 속성을 함께 사용해 보세요 !
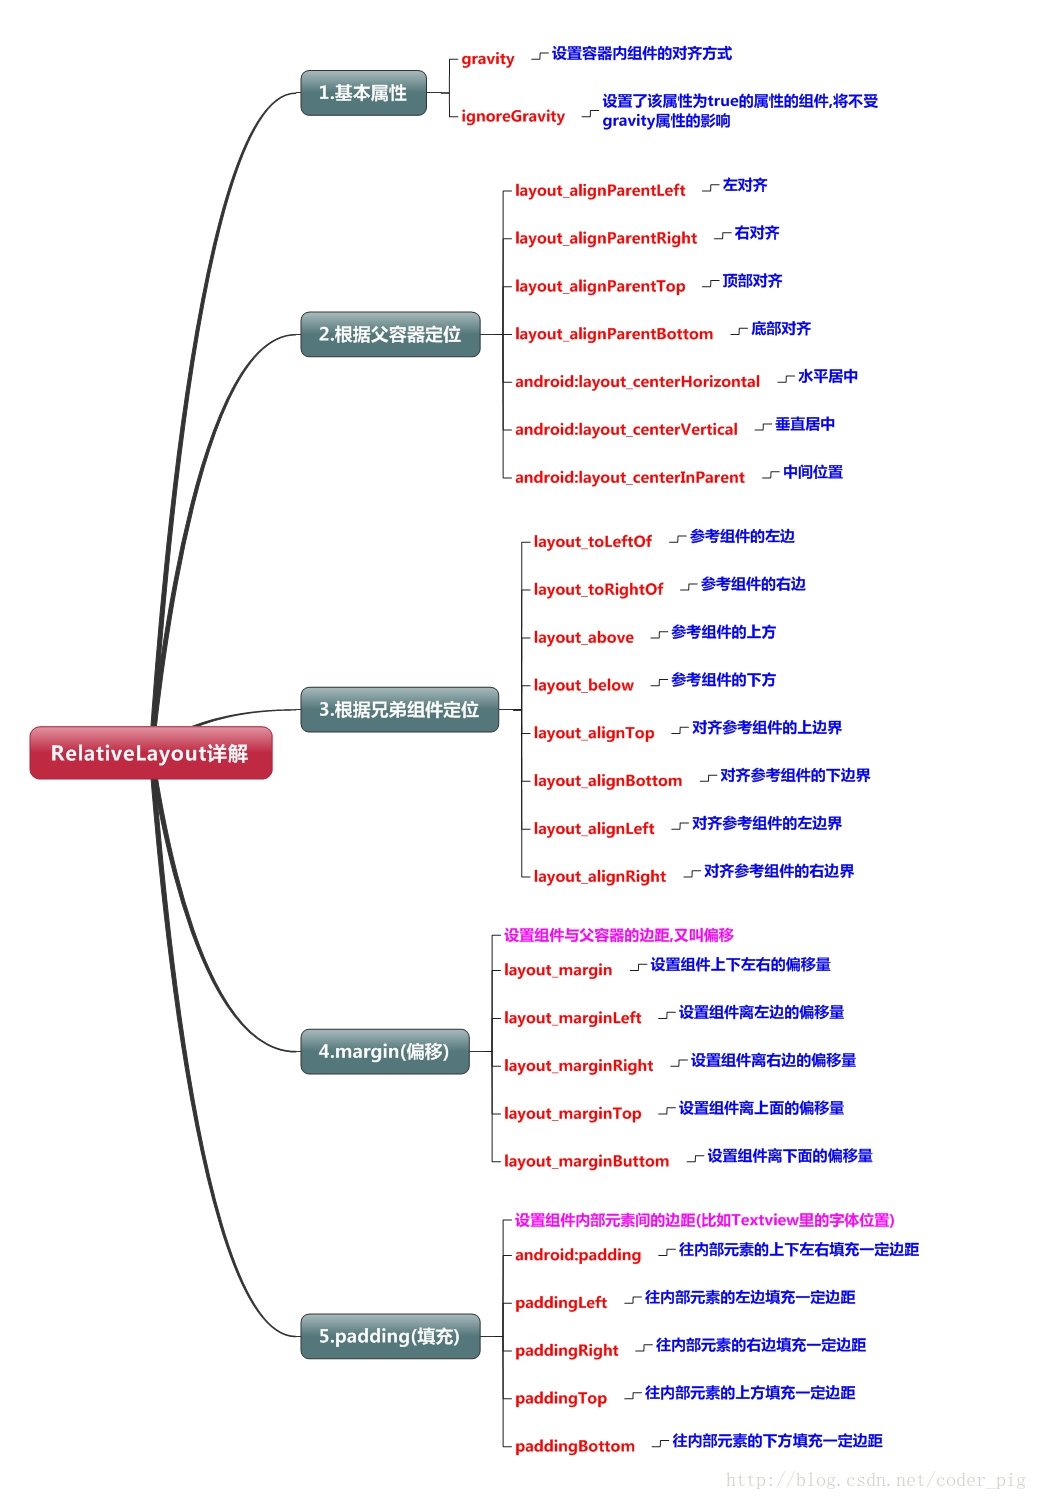
핵심 속성 다이어그램
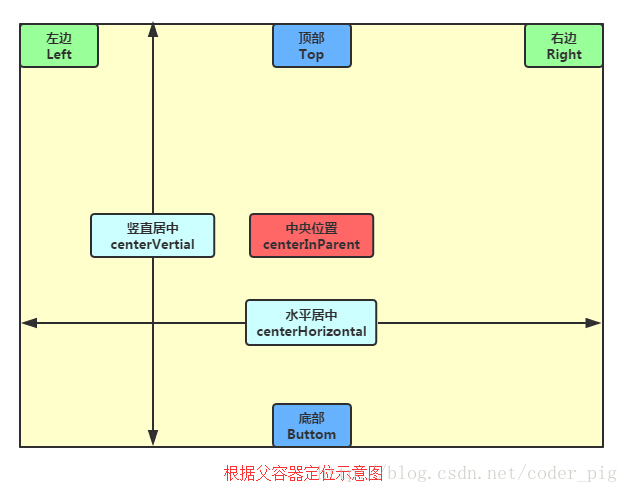
2. 상위 컨테이너 위치 지정 속성 다이어그램
3. 형제 구성 요소를 기반으로 한 위치 지정
그럼, 먼저 형제 구성 요소가 무엇인지부터 살펴보겠습니다. 형제 컴포넌트라고 불리는 것은 그림
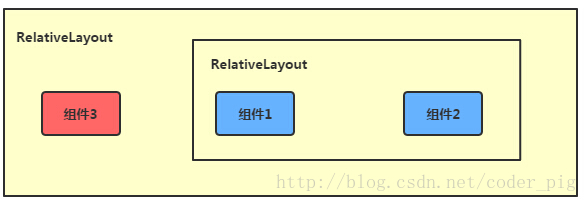
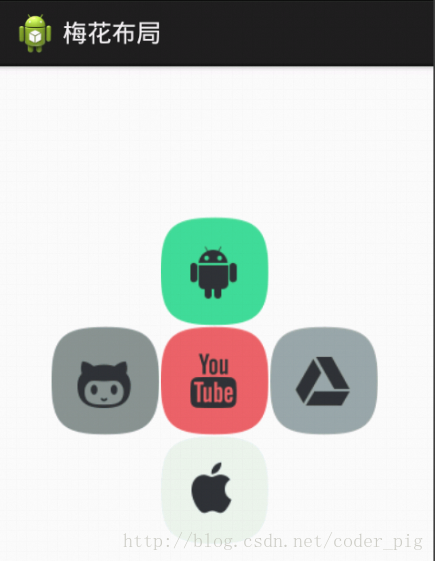
에 표시된 것처럼 동일한 레벨 컨테이너에 있는 컴포넌트이며 그림의 컴포넌트 1과 2는 형제 컴포넌트이고 컴포넌트 3은 컴포넌트 1 또는 컴포넌트 2의 형제 컴포넌트가 아니므로 컴포넌트 3은 통과할 수 없다 위치 지정을 위한 구성요소 1 또는 2(예:layout_toleftof = "Component 1")는 오류를 보고합니다! 기억하다! 이 형제 구성 요소의 위치 지정에 대한 가장 일반적인 예는 "매화 레이아웃"입니다. 다음 코드가 구현됩니다.
렌더링 실행:
구현 코드:
xmlns:tools="http://schemas.android.com/tools"
android:id=" @+id/RelativeLayout1"
android:layout_width="match_parent"
android:layout_height="match_parent" >
<-- 这个是在容器中央的 --> ㅋㅋㅋ
android:layout_centerInParent="true"
android:src="@drawable/ pic1"/> ㅋㅋㅋ ㅋㅋㅋ _toLeftOf="@id/img1"
android:layout_centerVertical="true "
android:src="@drawable/pic2"/> ㅋㅋㅋ
<ImageView
android:id="@+id/img3"
android:layout_width="80dp"
android:layout_height="80dp"
android:layout_toRightOf="@id/img1"
android:layout_centerVertical="true"
android:src="@drawable/pic3"/>
<!-- 중중间图작품상상면--> ㅋㅋㅋ out_above="@id/img1"
android:layout_centerHorizontal="true "
android:src="@drawable/pic4"/> ㅋㅋㅋ ㅋㅋㅋ out_below="@id/img1"
android:layout_centerHorizontal="true "
android:src="@drawable/pic5"/>
</RelativeLayout>
4. 마진과 패딩의 차이점
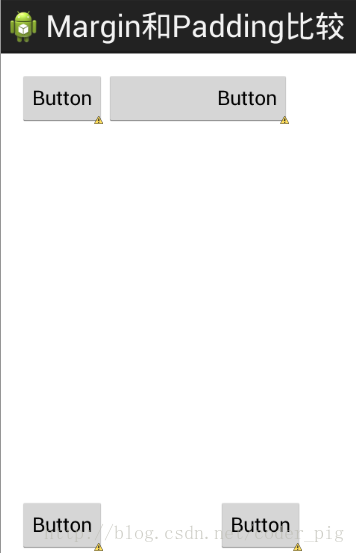
초보자는 이 두 가지 속성을 약간 혼동할 수 있습니다. 먼저 margin은 오프셋을 나타냅니다. 예를 들어 marginleft = "5dp"는 구성 요소가 컨테이너의 왼쪽 가장자리에서 5dp만큼 오프셋되었음을 의미합니다. Padding은 채우기를 나타내며, padding 객체는 TextView의 텍스트와 같은 구성 요소의 요소를 위한 것입니다. 예를 들어 TextView에 paddingleft = "5dp"를 설정하면 구성 요소의 요소 왼쪽에 5dp 공간이 채워집니다! 여백은 컨테이너의 구성 요소를 위한 것이고 패딩은 구성 요소의 요소를 위한 것입니다. 다음은 둘 사이의 차이점을 보여주는 간단한 코드입니다.
비교 예제 코드는 다음과 같습니다.
xmlns:tools="http://schemas.android.com/tools"
android:layout_width=" match_parent"
android:layout_height="match_parent"
android:paddingBottom="@dimen/activity_vertical_margin"
android:paddingLeft="@dimen/activity_horizontal_margin"
android:paddingRight="@dimen/activity_hor izontal_margin"
android:paddingTop="@ dimen/activity_vertical_margin"
tools:context=".MainActivity" >
<버튼
android:id="@+id/btn1"
android:layout_height="wrap_content"
Android:layout_width="wrap_content"
android:text="버튼"/> ㅋㅋㅋ ="버튼"
android:layout_toRightOf="@id/btn1"/>
<버튼
android:id="@+id/btn2"
android:layout_height="wrap_content"
android:text="Button"
android:layout_alignParentBottom="true"/> ㅋㅋㅋ :text="Button"
android:layout_toRightOf="@id/btn2"
android: layout_alignParentBottom="true"/>
</RelativeLayout>
런닝 렌더링 비교:
5. 매우 일반적인 점: 마진은 음수로 설정할 수 있습니다.
많은 친구들이 이것을 모르는 것 같아요. 양수입니다. 실제로 음수를 사용해도 됩니다. 소프트웨어에 들어가면 광고가 뜹니다. 페이지 오른쪽 상단 취소 버튼의 여백은 음수를 사용하고 있습니다!
렌더링은 다음과 같습니다.
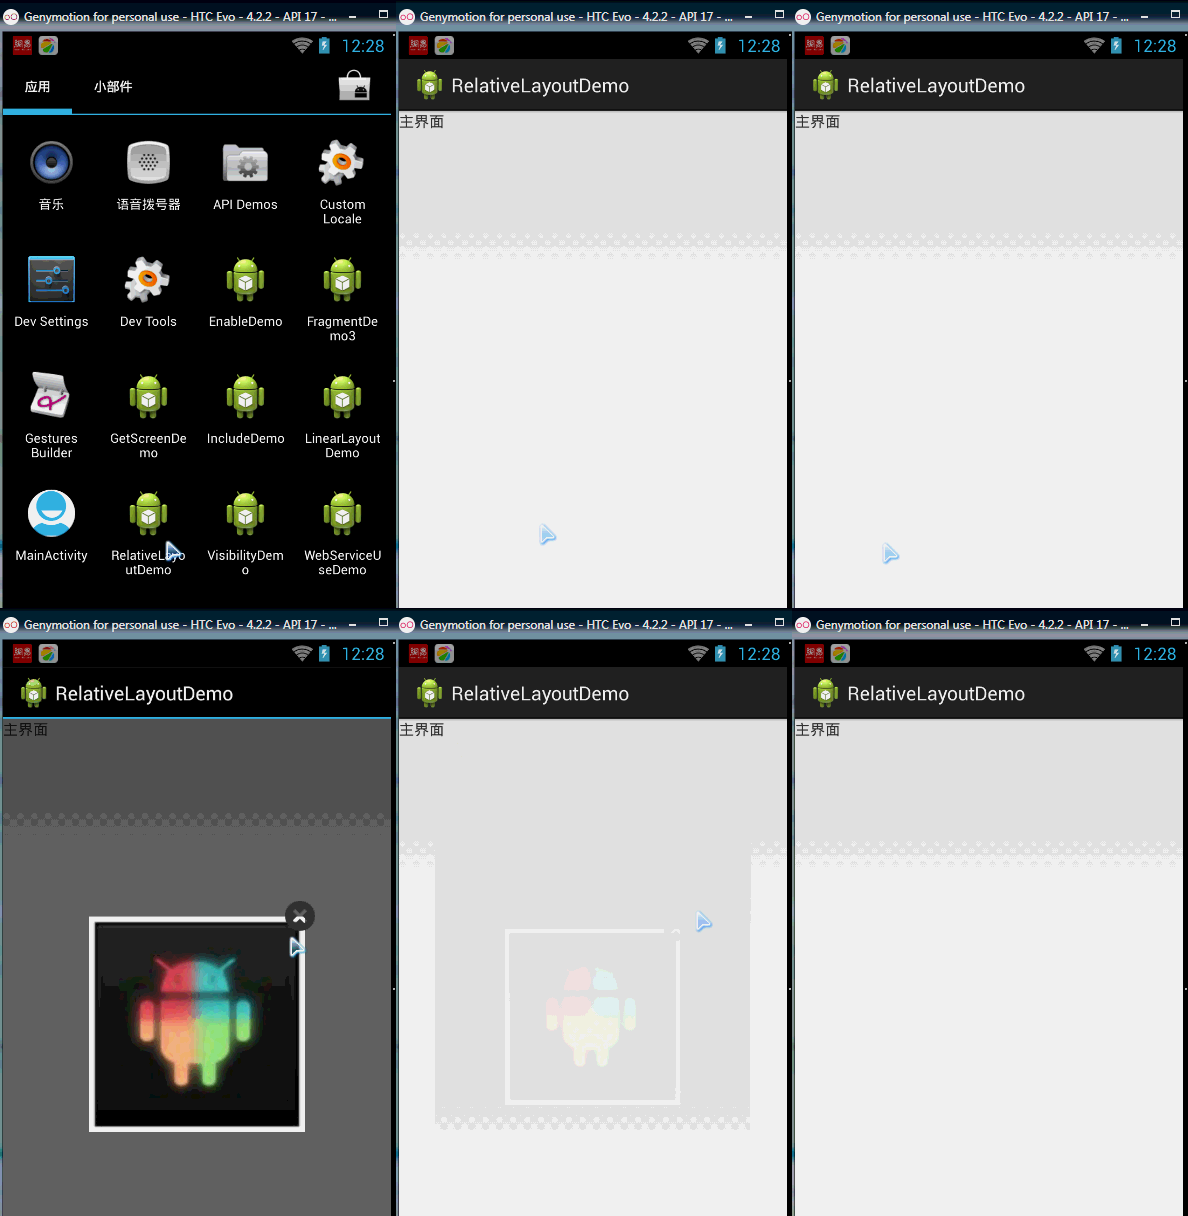
게시된 광고 활동의 레이아웃 코드입니다. 물론 이에 관심이 있으시면 데모를 다운로드하실 수 있습니다. 단지 효과를 내기 위한 것이기 때문에 코드가 조금 거칠어질 것입니다!
xmlns:tools="http://schemas.android.com/tools"
android:layout_width=" match_parent"
android:layout_height="match_parent"
tools:context="com.jay.example.relativelayoutdemo.MainActivity"
android:Background="../style/images/android-tutorial-relativelayout.html">
<ImageView
android:id="@+id/imgBack"
android:layout_width="200dp"
android:layout_height="200dp"
android: layout_centerInParent="true"
android:Background="../ 스타일/이미지/myicon" />
<ImageView
android:id="@+id/imgCancle"
android:layout_width="28dp"
android:layout_height="28dp"
Android:layout _alignRight="@id/imgBack"
android:layout_alignTop=" @id/imgBack"
android:Background="../style/images/cancel"
android:layout_marginTop="-15dp"
android:layout_marginRight="-10dp" />
</RelativeLayout>
本节small结:
关于RelativeLayout的详解就到这里,有什么纰漏,错误,好的建议,欢迎提出~ 最后提供下上下载:RelativeLayoutDemo
