
WordPress HTTP API 살펴보기: wp_remote_get의 실제 그림

- PHPz원래의
- 2023-09-01 17:37:011241검색
이 시리즈의 마지막 기사에서는 원격 요청에 사용할 수 있는 PHP 함수를 살펴보았습니다.
구체적으로 검토한 내용은 다음과 같습니다.
file_get_contentscURL
WordPress 기능에 대해서도 논의했습니다 wp_remote_get.
이 글에서는 wp_remote_get를 활용하겠습니다. 이 함수는 HTTP API의 일부입니다. 실제로 이를 사용하여 다음 두 가지를 검색하는 데 사용됩니다.
- 트위터 팔로어 수
- 최신 트윗
장점은 OAuth나 인증 메커니즘을 사용할 필요 없이 트위터 응답과 PHP의 JSON 기능만 활용한다는 것입니다.
그래서 이 글에서는 실제로 그 방법을 살펴보고, 시리즈 마지막에 반환된 모든 정보wp_remote_get를 검토하여 앞으로 올바르게 수행하는 방법을 알도록 하겠습니다.
플러그인 디렉토리 준비
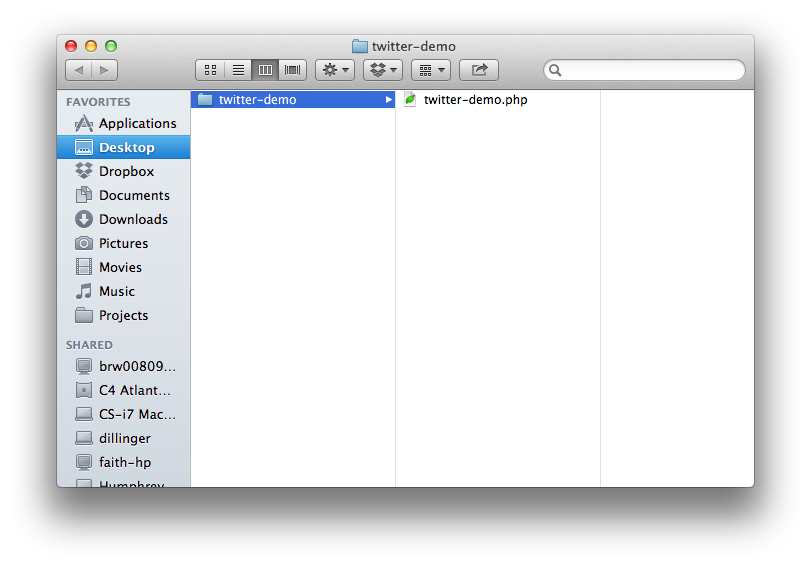
모든 플러그인과 마찬가지로 가장 먼저 해야 할 일은 wp-content/plugins 디렉토리 내에 디렉토리를 만드는 것입니다. 이 데모에서는 플러그인을 Twitter Demo라고 부르겠습니다.
따라서 플러그인 디렉토리 이름을 twitter-demo로 지정하고 관련 플러그인 파일 이름을 twitter-demo.php로 지정했습니다.
다음으로 WordPress에서 플러그인 파일을 감지할 수 있도록 플러그인 헤더를 제거해야 하므로 지금 그렇게 하겠습니다.
플러그인 제거
먼저, twitter-demo.php 파일 헤더에 다음 코드를 입력하세요:
으아악저희는 이 플러그인을 국제화하지 않습니다. 이 주제는 이 기사에서 하려는 범위를 벗어나는 다른 기사에서 다루겠습니다.
이제 WordPress에 설치된 플러그인 대시보드에서 플러그인을 볼 수 있습니다. 활성화할 수는 있지만 실제로는 아무 작업도 수행되지 않습니다.
적어도 아직은 아닙니다.
플러그인에 생명을 불어넣으세요
여기에 게시한 다른 데모 플러그인과 마찬가지로, 코딩을 시작하기 전에 플러그인이 무엇을 할 것인지 먼저 개요를 잡는 것이 중요하다고 생각합니다.
따라서 다음과 같은 결과를 기대할 수 있습니다.
- 모든 게시물 하단에는 다음과 같은 작은 알림이 표시됩니다. 트위터에 X 팔로어가 있습니다. 내 마지막 트윗은 Y이었습니다.
- 메인 색인이나 아카이브 페이지에 표시되지 않도록 단일 게시물 페이지에서만 이 작업을 수행하도록 하겠습니다.
물론, 이 플러그인을 게시물 하단에 두는 것이 조금 귀찮지만, 이 플러그인의 목적은 사용 방법, Twitter의 응답을 구문 분석하는 방법 및 표시 방법을 보여주는 것임을 기억하세요. wp_remote_get
이제 이 기능을 제공할 클래스를 삭제해 보겠습니다.
1. Twitter 데모 수업 삭제
작업하기 전에 Twitter에 요청하는 데 사용될 클래스를 제거해 보겠습니다. 각 속성 및 메서드에 대한 문서와 함께 아래의 모든 코드를 포함했습니다.
으아악
이러한 방법의 나머지 부분은 진행하면서 작성하고 기사 마지막 부분에 플러그인의 전체 소스 코드도 제공할 예정입니다.더 진행하기 전에 이 플러그인에 싱글톤 패턴을 사용할 것이라는 점을 지적하고 싶습니다. 이 디자인 패턴은 이전 기사에서 다루었으며, 그 장점은 이 기사의 범위를 벗어나지만, 왜 플러그인을 이런 방식으로 설정했는지 완전히 이해하려면 관련 기사를 읽어 보시기 바랍니다.
p> 다음으로 우리가 어디로 향하고 있는지 정확히 알 수 있도록 나열된 기능을 살펴보겠습니다.
- 단일 게시물에 Twitter 정보를 추가하기 위해 생성자에 작업을 추가합니다
- 게시물 하단의 메시지를 렌더링하는 데 사용됩니다
display_twitter_information - 실제로 Twitter에서 데이터를 요청하고 반환합니다(또는 요청이 실패하면 null)
make_twitter_request - 지정된 사용자의 팔로어 수를 반환합니다(문제가 있는 경우 -1 반환)
get_follower_count - 사용자의 마지막 트윗을 반환하거나 플러그인이 실패할 경우 메시지를 반환합니다
get_last_tweet
2. Twitter에서 데이터 요청
먼저
함수를 다음 코드로 채워보겠습니다. 코드 다음에 설명하겠습니다. make_twitter_request
으아악
를 사용하여 요청합니다. 사용자의 JSON 피드를 검색하려면 $username 매개변수를 사용합니다. wp_remote_get 来发出我们的请求。请注意,我们使用 $username 参数来检索用户的 JSON feed。请注意,使用 wp_remote_get 함수를 사용하여 요청하는 것이 얼마나 간단한지 확인하세요.
이 사용자 이름은 나중에 살펴보게 될 다른 함수에서 전달됩니다.
接下来,请注意我们将代码包装在 try/catch 中。这是因为向 Twitter 发出的请求可能会失败。如果没有失败,那么我们将使用 PHP 的 json_decode 函数来解码响应的正文;否则,我们会将响应设置为 null。
这将使调用函数中的条件变得简单。
在我们进一步讨论之前,重要的是要注意这里有一个微妙的要点:请注意,我们正在解码返回的 $response 数组的 'body' 键。对于对此更好奇的人,我们将在下一篇文章中详细查看使用 wp_remote_get 时出现的响应。
现在,只需注意 $response 数组的 body 索引只是我们可用的一条信息。
3。调用请求函数
现在我们已经定义了负责向 Twitter 发出请求的函数,接下来让我们定义一个函数,该函数将从 Twitter 请求数据,然后将其显示在帖子内容下方。
同样,这是代码,之后我将准确解释它的作用:
public function display_twitter_information( $content ) {

	// If we're on a single post or page...
	if ( is_single() ) {

		// ...attempt to make a response to twitter. Note that you should replace your username here!
		if ( null == ( $json_response = $this->make_twitter_request( 'wptuts' ) ) ) {

			// ...display a message that the request failed
			$html = '
<div id="twitter-demo-content">';
 $html .= 'There was a problem communicating with the Twitter API..';
 $html .= '</div>
<!-- /#twitter-demo-content -->';

		// ...otherwise, read the information provided by Twitter
		} else {

			$html = '
<div id="twitter-demo-content">';
 $html .= 'I have ' . $this->get_follower_count( $json_response ) . ' followers and my last tweet was "' . $this->get_last_tweet( $json_response ) . '".';
 $html .= '</div>
<!-- /#twitter-demo-content -->';

		} // end if/else

		$content .= $html;

	} // end if/else

	return $content;

}
首先,要知道这是整个插件中最长的函数。如果您能对此进行筛选,那么您就可以开始了。
记住:这个函数将在插件完全完成后在我们的构造函数中定义的 the_content 操作期间被调用。
因此,该函数首先检查我们是否在单个帖子上。如果没有,那么它只会返回内容;否则,它将执行以下操作:
- 尝试向 Twitter 提出请求
- 如果请求失败,则会显示一条消息
- 否则,如果将打印一条消息,显示关注者数量以及该人留下的最后一条推文
- 它将把消息附加到帖子内容
重要说明:在此函数中,您可以指定要检索其信息的用户名。例如,请注意,我正在尝试通过调用 $this->make_twitter_request('wptuts') 来检索 @WPTuts 的信息。
4。阅读信息
此时,我们已准备好读取信息并将字符串连接到消息中以显示给用户。我们将使用 get_follower_count 方法和 get_last_tweet 来完成此操作。
因为这些方法非常相似,所以我们将看一下它们,然后我将在代码后面解释它们:
private function get_follower_count( $json ) {
	return ( -1 < $json->followers_count ) ? $json->followers_count : -1;
} // end get_follower_count

private function get_last_tweet( $json ) {
	return ( 0 < strlen( $json->status->text ) ) ? $json->status->text : '[ No tweet found. ]';
} // end get_last_tweet
请注意,这两个函数的相似之处在于它们都接受插件早期的 $json 数据。接下来,它们都使用三元运算符来确定是否应该返回请求的文本或默认消息。
换句话说,如果我们要显示 followers_count 并且该值大于 -1,那么我们知道我们有一个要显示的值,因此我们将返回它;否则,我们将返回 -1 作为该值未正确设置的指示符。
这使我们能够针对处理数据时可能出错的问题进行防御性编码。
Twitter 演示插件
正如所承诺的,这里是完整的源代码以及匹配的文档:
<?php
/**
 * Plugin Name: Twitter Demo
 * Plugin URI:  http://example.com/twitter-demo/
 * Description: Retrieves the number of followers and latest Tweet from your Twitter account.
 * Version:     1.0.0
 * Author:      Tom McFarlin
 * Author URI:  http://tommcfarlin.com/
 * License:     GPL-2.0+
 * License URI: http://www.gnu.org/licenses/gpl-2.0.txt
 */
class Twitter_Demo {
	/**
	 * Instance of this class.
	 *
	 * @var      Twitter_Demo
	 */
	private static $instance;

	/**
	 * Initializes the plugin so that the Twitter information is appended to the end of a single post.
	 * Note that this constructor relies on the Singleton Pattern
	 *
	 * @access private
	 */
	private function __construct() {
		add_action( 'the_content', array( $this, 'display_twitter_information' ) );
	} // end constructor

	/**
	 * Creates an instance of this class
	 *
	 * @access public
	 * @return Twitter_Demo    An instance of this class
	 */
	public function get_instance() {
		if ( null == self::$instance ) {
			self::$instance = new self;
		}
		return self::$instance;
	} // end get_instance

	/**
	 * Appends a message to the bottom of a single post including the number of followers and the last Tweet.
	 *
	 * @access public
	 * @param  $content    The post content
	 * @return $content    The post content with the Twitter information appended to it.
	 */
	public function display_twitter_information( $content ) {
		// If we're on a single post or page...
		if ( is_single() ) {
			// ...attempt to make a response to twitter. Note that you should replace your username here!
			if ( null == ( $json_response = $this--->make_twitter_request('wptuts') ) ) {

				// ...display a message that the request failed
				$html = '
<div id="twitter-demo-content">';
 $html .= 'There was a problem communicating with the Twitter API..';
 $html .= '</div>
<!-- /#twitter-demo-content -->';

				// ...otherwise, read the information provided by Twitter
			} else {

				$html = '
<div id="twitter-demo-content">';
 $html .= 'I have ' . $this->get_follower_count( $json_response ) . ' followers and my last tweet was "' . $this->get_last_tweet( $json_response ) . '".';
 $html .= '</div>
<!-- /#twitter-demo-content -->';

			} // end if/else

			$content .= $html;

		} // end if/else

		return $content;

	} // end display_twitter_information

	/**
	 * Attempts to request the specified user's JSON feed from Twitter
	 *
	 * @access public
	 * @param  $username   The username for the JSON feed we're attempting to retrieve
	 * @return $json       The user's JSON feed or null of the request failed
	 */
	private function make_twitter_request( $username ) {

		$response = wp_remote_get( 'https://twitter.com/users/' . $username . '.json' );
		try {

			// Note that we decode the body's response since it's the actual JSON feed
			$json = json_decode( $response['body'] );

		} catch ( Exception $ex ) {
			$json = null;
		} // end try/catch

		return $json;

	} // end make_twitter_request

	/**
	 * Retrieves the number of followers from the JSON feed
	 *
	 * @access private
	 * @param  $json     The user's JSON feed
	 * @return           The number of followers for the user. -1 if the JSON data isn't properly set.
	 */
	private function get_follower_count( $json ) {
		return ( -1 < $json->followers_count ) ? $json->followers_count : -1;
	} // end get_follower_count

	/**
	 * Retrieves the last tweet from the user's JSON feed
	 *
	 * @access private
	 * @param  $json     The user's JSON feed
	 * @return           The last tweet from the user's feed. '[ No tweet found. ]' if the data isn't properly set.
	 */
	private function get_last_tweet( $json ) {
		return ( 0 < strlen( $json->status->text ) ) ? $json->status->text : '[ No tweet found. ]';
	} // end get_last_tweet

} // end class

// Trigger the plugin
Twitter_Demo::get_instance();
其实很简单,对吧?事实上,代码注释的数量与实际代码行的数量一样多,因此插件本身非常小。
结论
这个演示展示了使用 wp_remote_get 与第三方服务交互、解析它们的响应并将其集成到插件中是多么容易。诚然,这非常很简单,但它仍然证明了这个概念。
在本系列的下一篇文章中,我们将查看可以传递给 wp_remote_get 的所有信息,以了解该方法的灵活性。之后,我们将详细查看响应数据,以便我们能够编写更复杂的请求并编写更多的防御性代码,更具防御性。
위 내용은 WordPress HTTP API 살펴보기: wp_remote_get의 실제 그림의 상세 내용입니다. 자세한 내용은 PHP 중국어 웹사이트의 기타 관련 기사를 참조하세요!