SpringBoot 파일 업로드 기능 구현 방법
- WBOYWBOYWBOYWBOYWBOYWBOYWBOYWBOYWBOYWBOYWBOYWBOYWB앞으로
- 2023-05-17 12:15:361699검색
1. 애플리케이션 예시
요구 사항: 양식을 통해 사용자를 등록하고 사진 업로드를 지원하는 Spring-Boot를 시연합니다.
2. 코드 구현
코드 구현 - 파일 업로드
아바타가 하나를 선택하고 애완 동물은 여러 장의 사진을 업로드할 수 있습니다
<!DOCTYPE html>
<html lang="en" xmlns:th="http://www.thymeleaf.org">
<head>
    <meta charset="UTF-8">
    <title>upload</title>
</head>
<body bgcolor="#CED3FE">
<img  src="images/1.GIF"/ alt="SpringBoot 파일 업로드 기능 구현 방법" >
<hr/>
<div >
    <h2>注册用户~</h2>
    <form action="#" th:action="@{/upload}" method="post" enctype="multipart/form-data">
        用户名:<input type="text"  name="name"/><br/><br/>
        电 邮:<input type="text"  name="email"/><br/><br/>
        年 龄:<input type="text"  name="age"/><br/><br/>
        职 位:<input type="text"  name="job"/><br/><br/>
        头 像:<input type="file"  name="header"><br/><br/>
        宠 物:<input type="file"  name="photos" multiple><br/><br/>
        <input type="submit" value="注册"/>
        <input type="reset" value="重新填写"/>
    </form>
</div>
<hr/>
</body>
</html>
2. srcmainjavacomllpspringbootcontrollerUploadController.java
@Slf4j
@Controller
public class UploadController {
    //处理转发到用户注册-可以完成文件上传页面
    @GetMapping("/upload.html")
    public String uploadPage() {
        return "upload";// 视图解析,转发到templates/upload.html
    }
    @PostMapping("/upload")
    @ResponseBody
    public String upload(@RequestParam("name") String name,
                         @RequestParam("email") String email,
                         @RequestParam("age") Integer age,
                         @RequestParam("job") String job,
                         @RequestParam("header") MultipartFile header,
                         @RequestParam("photos") MultipartFile[] photos) throws IOException {
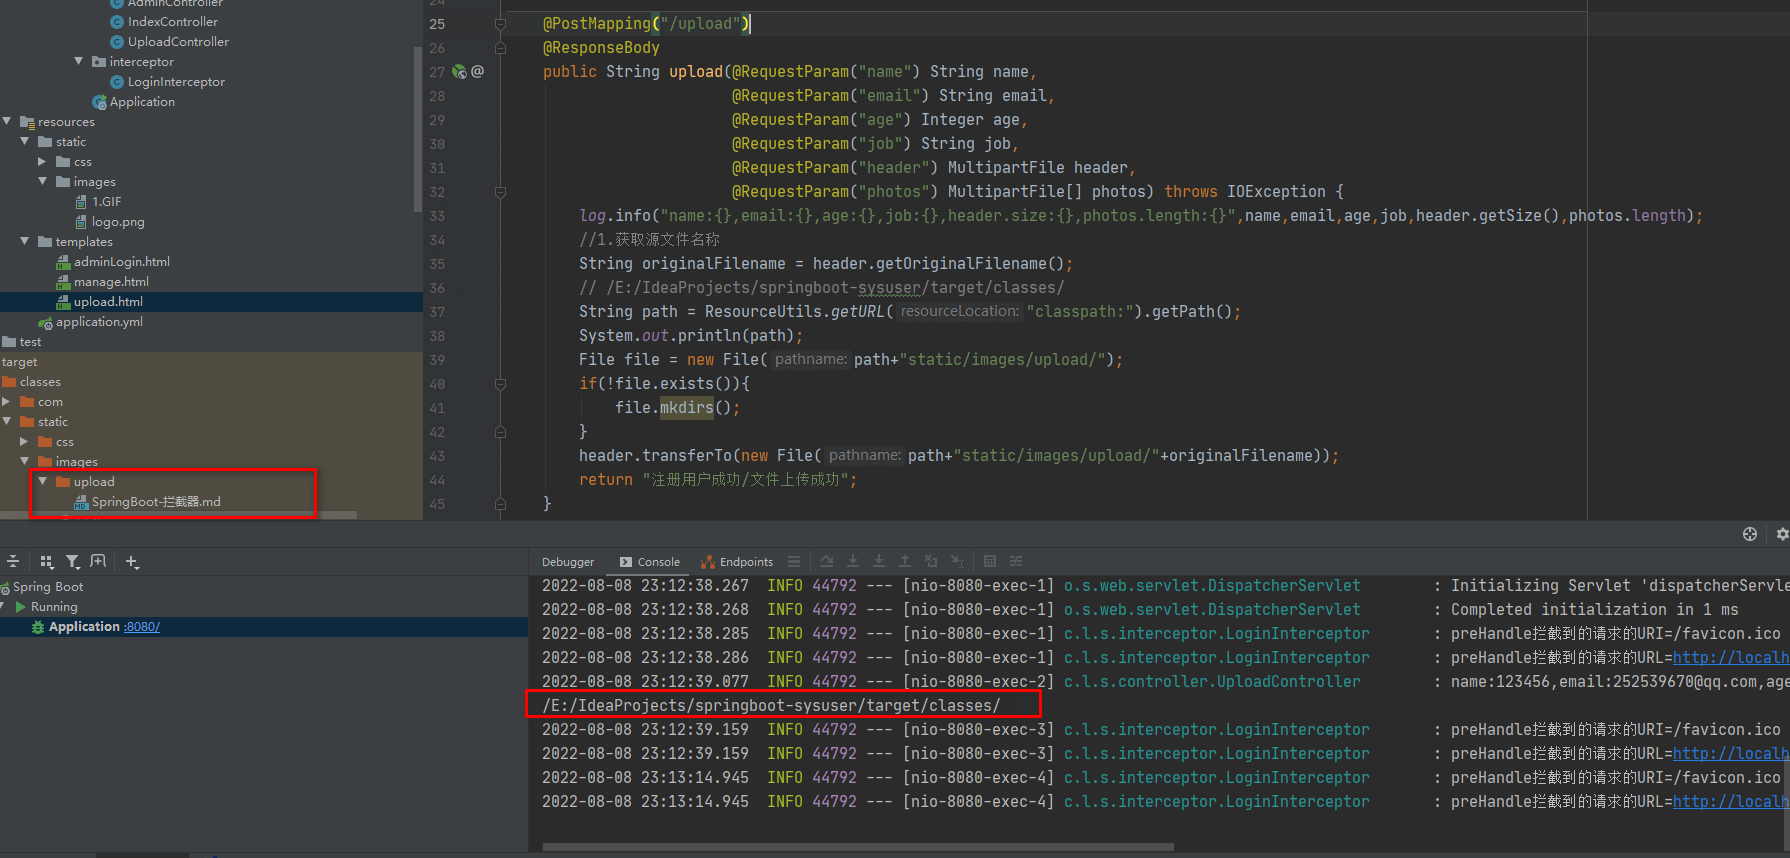
        log.info("name:{},email:{},age:{},job:{},header.size:{},photos.length:{}",name,email,age,job,header.getSize(),photos.length);
        //1.获取源文件名称
        String originalFilename = header.getOriginalFilename();
        // /E:/IdeaProjects/springboot-sysuser/target/classes/
        String path = ResourceUtils.getURL("classpath:").getPath();
        System.out.println(path);
        File file = new File(path+"static/images/upload/");
        if(!file.exists()){
            file.mkdirs();
        }
        header.transferTo(new File(path+"static/images/upload/"+originalFilename));
        return "注册用户成功/文件上传成功";
    }
}

3. 파일 범위 문제
1. 업로드가 구현되었지만 두 개의 다른 파일이 동일한 파일 이름을 가질 경우 파일 덮어쓰기 문제가 발생합니다. 어떻게 해결합니까?
@PostMapping("/upload")
@ResponseBody
public String upload(@RequestParam("name") String name,
                     @RequestParam("email") String email,
                     @RequestParam("age") Integer age,
                     @RequestParam("job") String job,
                     @RequestParam("header") MultipartFile header,
                     @RequestParam("photos") MultipartFile[] photos) throws IOException {
    log.info("name:{},email:{},age:{},job:{},header.size:{},photos.length:{}",name,email,age,job,header.getSize(),photos.length);
    //1.获取源文件名称
    String originalFilename = header.getOriginalFilename();
    originalFilename = UUID.randomUUID().toString().replaceAll("-","")+System.nanoTime()+originalFilename;
    //2.获取文件上传的路径
    // /E:/IdeaProjects/springboot-sysuser/target/classes/
    String path = ResourceUtils.getURL("classpath:").getPath();
    System.out.println(path);
    //3.动态的创建文件上传目录
    File file = new File(path+"static/images/upload/");
    if(!file.exists()){
        file.mkdirs();
    }
    //4.将文件传输到目标目录
    header.transferTo(new File(path+"static/images/upload/"+originalFilename));
    return "注册用户成功/文件上传成功";
}
, 업로드된 파일에 고유한 파일 이름을 다시 할당하는 것이 아이디어입니다originalFilename = UUID.randomUUID().toString().replaceAll("-","")+System.nanoTime()+originalFilename;
 2. 업로드된 파일이 많으면 파일 액세스 속도가 느려집니다. down
해결 방법: 파일을 다른 디렉터리에 업로드하세요. 예를 들어, 특정 날짜에 업로드된 파일은 2022/11/11 디렉터리
public class WebUtils {
    //定义一个文件上传的路径
    public static String  UPLOAD_FILE_DIRECTORY = "static/images/upload/";
    //编写方法,生成一个目录-根据当前日期 年/月/日
    public static String getUploadFileDirectory() {
        return UPLOAD_FILE_DIRECTORY + new SimpleDateFormat("yyyy/MM/dd").format(new Date());
    }
}
@PostMapping("/upload")
@ResponseBody
public String upload(@RequestParam("name") String name,
@RequestParam("email") String email,
@RequestParam("age") Integer age,
@RequestParam("job") String job,
@RequestParam("header") MultipartFile header,
@RequestParam("photos") MultipartFile[] photos) throws IOException {
//输出获取到的信息
log.info("上传的信息 name={} email={} age={} job={} header={} photos={} ",
name, email, age, job, header.getSize(), photos.length);
//得到类路径(运行的时候)
String path = ResourceUtils.getURL("classpath:").getPath();
//log.info("path={}", path);
//动态创建指定目录
File file = new File(path + WebUtils.getUploadFileDirectory());
if (!file.exists()) {//如果目录不存在,我们就创建, 在java io
file.mkdirs();
}
if (!header.isEmpty()) {//处理头像
//获取上传文件的名字
String originalFilename = header.getOriginalFilename();
String fileName = UUID.randomUUID().toString() + "_" + System.currentTimeMillis() + "_" + originalFilename;
//保存到动态创建的目录
header.transferTo(new File(file.getAbsolutePath() + "/" + fileName));
}
//处理多个文件
if (photos.length > 0) {
for (MultipartFile photo : photos) {//遍历
if (!photo.isEmpty()) {
String originalFilename = photo.getOriginalFilename();
String fileName = UUID.randomUUID().toString() + "_" + System.currentTimeMillis() + "_" + originalFilename;
//保存到动态创建的目录
photo.transferTo(new File(file.getAbsolutePath() + "/" + fileName));
}
}
}
return "注册用户成功/文件上传成功";
}
와 같이 연/월/일 폴더에 넣어야 합니다.
위 내용은 SpringBoot 파일 업로드 기능 구현 방법의 상세 내용입니다. 자세한 내용은 PHP 중국어 웹사이트의 기타 관련 기사를 참조하세요!
성명:
이 기사는 yisu.com에서 복제됩니다. 침해가 있는 경우 admin@php.cn으로 문의하시기 바랍니다. 삭제

