이미지 및 정적 페이지에 액세스하도록 nginx 및 tomcat을 구성하는 방법
- PHPz앞으로
- 2023-05-14 08:58:121959검색
첫 번째 방법: nginx 구성
1. 파일 경로 만들기:
[root@localhost /]# mkdir /data/soft/
[root@localhost ~]# cd /data/soft/
[root@localhost soft]# mkdir html images
2. 이미지 디렉터리에 사진을 넣습니다
[root@localhost soft]# cd images/
[root@localhost images]# ll
总用量 80
-rw-r--r--. 1 root root 9503 4月 25 17:06 thpzfulfjn.jpg
-rw-r--r--. 1 root root 16083 4月 25 17:06 thr2c5vcmz.jpg
-rw-r--r--. 1 root root 12218 4月 25 17:06 thrg3yx53t.jpg
-rw-r--r--. 1 root root 15048 4月 25 17:06 thsuf51vtr.jpg
-rw-r--r--. 1 root root 21799 4月 25 17:06 thvwslf8ze.jpg
3. html 디렉터리에 테스트 파일을 넣습니다
[root@localhost html]# cat index.html
this is test page !!!!
4. nginx를 설치합니다.
yum을 선택하거나 컴파일을 선택하는 것은 선호도에 따라 다릅니다. 설치 모듈을 직접 컴파일하고 사용자 정의합니다
pcre-8.34.tar.gz zlib-1.2.8.tar.gz openssl-1.0.1g를 추출합니다. tar.gz 3개 패키지를 설치하고
tar -zxvf pcre-8.34.tar.gz
cd pcre-8.34
/configure && make && make install
tar -zxvf zlib-1.2.8.tar.gz
cd zlib-1.2.8
/configure && make && make install
tar -zxvf openssl-1.0.1g.tar.gz
cd openssl-1.0.1g
/config && make && make install
nginx 설치
tar -zxvf nginx-1.9.0.tar.gz
cd nginx-1.9.0
#./configure --prefix=/data/soft/nginx \
--user=www \
--group=www \
--with-mail \
--with-mail_ssl_module \
--with-http_ssl_module \
--with-http_flv_module \
--with-http_dav_module \
--with-http_sub_module \
--with-http_spdy_module \
--with-http_realip_module \
--with-http_addition_module \
--with-http_gzip_static_module \
--with-http_stub_status_module \
--with-pcre=/data/src/pcre-8.34 \
--with-zlib=/data/src/zlib-1.2.8 \
--with-openssl=/data/src/openssl-1.0.1g
컴파일 및 설치
make && make install
groupadd www
useradd -g www www
nginx 구성 파일
[root@localhost nginx]# vim conf/nginx.conf
 server {
  listen 80;
  server_name localhost;
  #charset koi8-r;
  #access_log logs/host.access.log main;
  location ~ .*\.(gif|jpg|jpeg|png)$ {
   expires 24h;
   root /data/soft/images/;#指定图片存放路径
   access_log /data/soft/nginx/logs/images.log;#日志存放路径
   proxy_store on;
   proxy_store_access user:rw group:rw all:rw;
   proxy_temp_path /data/soft/images/;#图片访问路径
   proxy_redirect off;
   proxy_set_header host 127.0.0.1;
   client_max_body_size 10m;
   client_body_buffer_size 1280k;
   proxy_connect_timeout 900;
   proxy_send_timeout 900;
   proxy_read_timeout 900;
   proxy_buffer_size 40k;
   proxy_buffers 40 320k;
   proxy_busy_buffers_size 640k;
   proxy_temp_file_write_size 640k;
   if ( !-e $request_filename)
   {
     proxy_pass http://127.0.0.1;#默认80端口
   }
  }
   location / {
   root /data//soft/html; #html访问路径
   index index.html index2.htm; #html文件名称
   }
  }
   error_page 404 /404.html;
5을 수정합니다. 이때 html 페이지
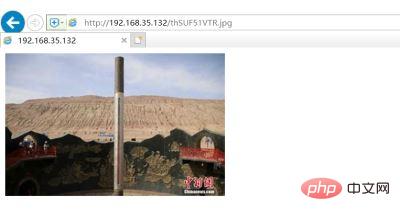
 를 먼저 테스트하고 볼 수 있습니다. 사진을 보세요
분명히 nginx 설정에서 정적 페이지와 이미지에 성공적으로 액세스할 수 있습니다. tomcat 액세스 설정을 시작하겠습니다
두 번째 방법: tomcat
1.jdk 버전을 확인하세요
 java -version
openjdk version "1.8.0_65"
openjdk runtime environment (build 1.8.0_65-b17)
openjdk 64-bit server vm (build 25.65-b01, mixed mode)
2. tomcat을 실행해 보세요.
tar -xvf apache-tomcat-8.5.30.tar.gz
[root@localhost tomcat]# sh bin/startup.sh
3. 로컬 테스트에 액세스할 수 있나요?
4. 위의 내용이 정상이라면 html 폴더에 inde.html 페이지가 있다는 점에 유의하세요. 
[root@localhost soft]# cp -rp html/ /data/soft/tomcat/webapps/html 페이지에 대한 액세스 테스트
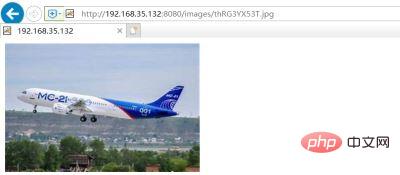
계속해서 wepapps 아래에 사진 폴더를 넣으세요. 이미지 아래에 사진이 있습니다. 
[root@localhost images]# cp -rp /data/soft/images/ /data/soft/tomcat/webapps/다음과 같이 브라우저에서 직접 방문해보세요

위 내용은 이미지 및 정적 페이지에 액세스하도록 nginx 및 tomcat을 구성하는 방법의 상세 내용입니다. 자세한 내용은 PHP 중국어 웹사이트의 기타 관련 기사를 참조하세요!
성명:
이 기사는 yisu.com에서 복제됩니다. 침해가 있는 경우 admin@php.cn으로 문의하시기 바랍니다. 삭제

