


jquery를 기반으로 한 페이지 넘김 애니메이션이 포함된 전자 잡지입니다. 편집자는 가끔 우리가 읽는 모든 종이 교과서를 전자책으로 바꿀 수 있지 않을까 하는 생각을 하기도 합니다.
예를 들어 이 CSS3 책 페이지 넘김 애니메이션은 매우 생생합니다. 오늘 공유하고 싶은 jQuery 책 페이지 넘김 3D 애니메이션은 더욱 강력하고, 페이지 넘김을 얼마든지 지원할 수 있으며, 시각적 효과도 매우 아름답습니다. 책의 내용은 매우 유연한 HTML 요소를 지원합니다.
렌더링 운영 ~ 소스코드 이후----------------------------------------- -
여러분에게 공유하는 페이지 넘김 애니메이션이 포함된 jquery 전자잡지 코드는 다음과 같습니다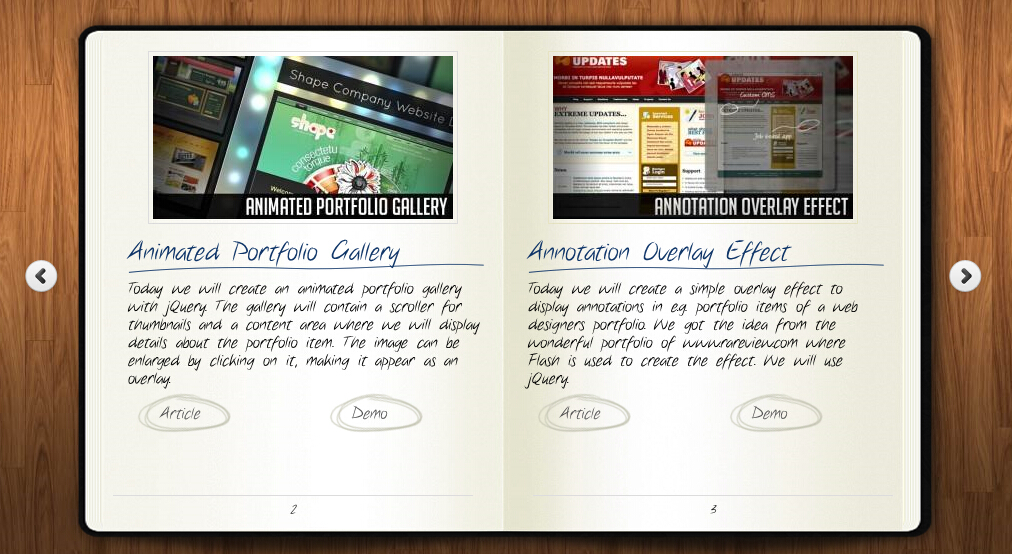
<head>
    <title>jQuery书本翻页动画效果DEMO演示</title>
    <meta http-equiv="Content-Type" content="text/html; charset=UTF-8">
 <script type="text/javascript" src="http://code.jquery.com/jquery-1.4.4.min.js"></script>
 <script src="booklet/jquery.easing.1.3.js" type="text/javascript"></script>
 <script src="booklet/jquery.booklet.1.1.0.min.js" type="text/javascript"></script>
 <link href="booklet/jquery.booklet.1.1.0.css" type="text/css" rel="stylesheet" media="screen" />
 <link rel="stylesheet" href="css/style.css" type="text/css" media="screen"/>
 <script src="cufon/cufon-yui.js" type="text/javascript"></script>
 <script src="cufon/ChunkFive_400.font.js" type="text/javascript"></script>
 <script src="cufon/Note_this_400.font.js" type="text/javascript"></script>
 <script type="text/javascript">
  Cufon.replace('h1,p,.b-counter');
  Cufon.replace('.book_wrapper a', {hover:true});
  Cufon.replace('.title', {textShadow: '1px 1px #C59471', fontFamily:'ChunkFive'});
  Cufon.replace('.reference a', {textShadow: '1px 1px #C59471', fontFamily:'ChunkFive'});
  Cufon.replace('.loading', {textShadow: '1px 1px #000', fontFamily:'ChunkFive'});
 </script>
  </head>
  <body>


<div style="text-align:center;clear:both">
<script src="/gg_bd_ad_720x90.js" type="text/javascript"></script>
<script src="/follow.js" type="text/javascript"></script>
</div>
 <div class="book_wrapper">
  <a id="next_page_button"></a>
  <a id="prev_page_button"></a>
  <div id="loading" class="loading">Loading pages...</div>
  <div id="mybook" style="display:none;">
  <div class="b-load">
   <div>
   <img src="/static/imghwm/default1.png"  data-src="images/1.jpg"  class="lazy" alt=""/>
   <h1 id="Slider-Gallery">Slider Gallery</h1>
   <p>This tutorial is about creating a creative gallery with a
    slider for the thumbnails. The idea is to have an expanding
    thumbnails area which opens once an album is chosen.
    The thumbnails will scroll to the end and move back to
    the first image. The user can scroll through the thumbnails
    by using the slider controls. When a thumbnail is clicked,
    it moves to the center and the full image preview opens.</p>
   <a href="#" class="article">Article</a>
   <a href="#" class="demo">Demo</a>
   </div>
   <div>
   <img src="/static/imghwm/default1.png"  data-src="images/2.jpg"  class="lazy" alt="" />
   <h1 id="Animated-Portfolio-Gallery">Animated Portfolio Gallery</h1>
   <p>Today we will create an animated portfolio gallery with jQuery.
    The gallery will contain a scroller for thumbnails and a
    content area where we will display details about the portfolio
    item. The image can be enlarged by clicking on it, making
    it appear as an overlay.</p>
   <a href="#" class="article">Article</a>
   <a href="#" class="demo">Demo</a>
   </div>
   <div>
   <img src="/static/imghwm/default1.png"  data-src="images/3.jpg"  class="lazy" alt="" />
   <h1 id="Annotation-Overlay-Effect">Annotation Overlay Effect</h1>
   <p>Today we will create a simple overlay effect to display annotations in e.g. portfolio
    items of a web designers portfolio. We got the idea from the wonderful
    portfolio of www.rareview.com where Flash is used to create the
    effect. We will use jQuery.</p>
   <a href="#" class="article">Article</a>
   <a href="#" class="demo">Demo</a>
   </div>
   <div>
   <img src="/static/imghwm/default1.png"  data-src="images/4.jpg"  class="lazy" alt="" />
   <h1 id="Bubbleriffic-Image-Gallery">Bubbleriffic Image Gallery</h1>
   <p>In this tutorial we will create a bubbly image gallery that
    shows your images in a unique way. The idea is to show the
    thumbnails of albums in a rounded fashion allowing the
    user to scroll them automatically by moving the mouse.
    Clicking on a thumbnail will zoom in a big circle and
    the full image which will be automatically resized to
    fit into the screen.</p>
   <a href="#" class="article">Article</a>
   <a href="#" class="demo">Demo</a>
   </div>
   <div>
   <img src="/static/imghwm/default1.png"  data-src="images/5.jpg"  class="lazy" alt="" />
   <h1 id="Collapsing-Site-Navigation">Collapsing Site Navigation</h1>
   <p>Today we will create a collapsing menu that contains vertical
    navigation bars and a slide out content area. When hovering
    over a menu item, an image slides down from the top and a
    submenu slides up from the bottom. Clicking on one of the
    submenu items will make the whole menu collapse like a card
    deck and the respective content area will slide out.</p>
   <a href="#" class="article">Article</a>
   <a href="#" class="demo">Demo</a>
   </div>
   <div>
   <img src="/static/imghwm/default1.png"  data-src="images/6.jpg"  class="lazy" alt="" />
   <h1 id="Custom-Animation-Banner">Custom Animation Banner</h1>
   <p>In today's tutorial we will be creating a custom animation banner with jQuery.
    The idea is to have different elements in a banner that will
    animate step-wise in a custom way.</p>
   <p>We will be using the jQuery Easing Plugin and the jQuery 2D
    Transform Plugin to create some nifty animations.</p>
   <a href="#" class="article">Article</a>
   <a href="#" class="demo">Demo</a>
   </div>
   <div>
   <img src="/static/imghwm/default1.png"  data-src="images/7.jpg"  class="lazy" alt="" />
   <h1 id="Full-Page-Image-Gallery">Full Page Image Gallery</h1>
   <p>In this tutorial we are going to create a stunning full page
    gallery with scrollable thumbnails and a scrollable full
    screen preview. The idea is to have a thumbnails bar at
    the bottom of the page that scrolls automatically when
    the user moves the mouse. When a thumbnail is clicked,
    it moves to the center of the page and the full screen
    image is loaded in the background.</p>
   <a href="#" class="article">Article</a>
   <a href="#" class="demo">Demo</a>
   </div>
   <div>
   <img src="/static/imghwm/default1.png"  data-src="images/8.jpg"  class="lazy" alt="" />
   <h1 id="Hover-Slide-Effect">Hover Slide Effect</h1>
   <p>Today we will create a neat effect with some images using
    jQuery. The main idea is to have an image area with several
    images that slide out when we hover over them, revealing
    other images. The sliding effect will be random, i.e.
    the images will slide to the top or bottom, left or
    right, fading out or not. When we click on any area,
    all areas will slide their images out.</p>
   <a href="#" class="article">Article</a>
   <a href="#" class="demo">Demo</a>
   </div>
   <div>
   <img src="/static/imghwm/default1.png"  data-src="images/9.jpg"  class="lazy" alt="" />
   <h1 id="Merging-Image-Boxes">Merging Image Boxes</h1>
   <p>Today we will show you a nice effect for images with jQuery.
    The idea is to have a set of rotated thumbnails that,
    once clicked, animate to form the selected image.
    You can navigate through the images with previous
    and next buttons and when the big image gets clicked
    it will scatter into the little box shaped thumbnails again.</p>
   <a href="#" class="article">Article</a>
   <a href="#" class="demo">Demo</a>
   </div>
   <div>
   <img src="/static/imghwm/default1.png"  data-src="images/10.jpg"  class="lazy" alt="" />
   <h1 id="Compact-News-Previewer">Compact News Previewer</h1>
   <p>Today we will create a news previewer that let's you
    show your latest articles or news in a compact way.
    The news previewer will show some list of articles
    on the left side and the preview of the article with a
    longer description on the right. Once a news on the left
    is clicked, the preview will slide in.</p>
   <a href="#" class="article">Article</a>
   <a href="#" class="demo">Demo</a>
   </div>
   <div>
   <img src="/static/imghwm/default1.png"  data-src="images/11.jpg"  class="lazy" alt="" />
   <h1 id="Overlay-Effect-Menu">Overlay Effect Menu</h1>
   <p>In this tutorial we are going to create a simple menu
    that will stand out once we hover over it by covering
    everything except the menu with a dark overlay.
    The menu will stay white and a submenu area will
    expand. We will create this effect using jQuery.</p>
   <a href="#" class="article">Article</a>
   <a href="#" class="demo">Demo</a>
   </div>
   <div>
   <img src="/static/imghwm/default1.png"  data-src="images/12.jpg"  class="lazy" alt="" />
   <h1 id="Polaroid-Photobar-Gallery">Polaroid Photobar Gallery</h1>
   <p>In this tutorial we are going to create an image gallery
    with a Polaroid look. We will have albums that will expand
    to sets of slightly rotated thumbnails that pop out on hover.
    The full image will slide in from the bottom once a thumbnail
    is clicked. In the full image view the user can navigate
    through the pictures or simply choose another thumbnail
    to be displayed.</p>
   <a href="#" class="article">Article</a>
   <a href="#" class="demo">Demo</a>
   </div>
   <div>
   <img src="/static/imghwm/default1.png"  data-src="images/13.jpg"  class="lazy" alt="" />
   <h1 id="Pull-Out-Content-Panel">Pull Out Content Panel</h1>
   <p>In this tutorial we will create a content panel that
    slides out at a predefined scroll position. It will
    reveal a teaser with related content and it can be
    expanded to full page size to show more. A custom
    slider allows to scroll through many items in the
    panel.</p>
   <a href="#" class="article">Article</a>
   <a href="#" class="demo">Demo</a>
   </div>
   <div>
   <img src="/static/imghwm/default1.png"  data-src="images/14.jpg"  class="lazy" alt="" />
   <h1 id="Thumbnails-Navigation-Gallery">Thumbnails Navigation Gallery</h1>
   <p>In this tutorial we are going to create an extraordinary
    gallery with scrollable thumbnails that slide out from a
    navigation. We are going to use jQuery and some CSS3
    properties for the style. The main idea is to have a
    menu of albums where each item will reveal a horizontal
    bar with thumbnails when clicked.</p>
   <a href="#" class="article">Article</a>
   <a href="#" class="demo">Demo</a>
   </div>
  </div>
  </div>
 </div>

    <!-- The JavaScript -->

    <script type="text/javascript">
  $(function() {
  var $mybook  = $('#mybook');
  var $bttn_next = $('#next_page_button');
  var $bttn_prev = $('#prev_page_button');
  var $loading = $('#loading');
  var $mybook_images = $mybook.find('img');
  var cnt_images = $mybook_images.length;
  var loaded  = 0;
  //preload all the images in the book,
  //and then call the booklet plugin

  $mybook_images.each(function(){
   var $img = $(this);
   var source = $img.attr('src');
   $('<img / alt="페이지 넘기기 animation_jquery를 사용한 jquery 전자 잡지 코드 공유" >').load(function(){
   ++loaded;
   if(loaded == cnt_images){
    $loading.hide();
    $bttn_next.show();
    $bttn_prev.show();
    $mybook.show().booklet({
    name:        null,              // name of the booklet to display in the document title bar
    width:       800,               // container width
    height:       500,               // container height
    speed:       600,               // speed of the transition between pages
    direction:     'LTR',              // direction of the overall content organization, default LTR, left to right, can be RTL for languages which read right to left
    startingPage:    0,                // index of the first page to be displayed
    easing:       'easeInOutQuad',         // easing method for complete transition
    easeIn:       'easeInQuad',          // easing method for first half of transition
    easeOut:      'easeOutQuad',          // easing method for second half of transition

    closed:       true,              // start with the book "closed", will add empty pages to beginning and end of book
    closedFrontTitle:  null,              // used with "closed", "menu" and "pageSelector", determines title of blank starting page
    closedFrontChapter: null,              // used with "closed", "menu" and "chapterSelector", determines chapter name of blank starting page
    closedBackTitle:  null,              // used with "closed", "menu" and "pageSelector", determines chapter name of blank ending page
    closedBackChapter: null,              // used with "closed", "menu" and "chapterSelector", determines chapter name of blank ending page
    covers:       false,              // used with "closed", makes first and last pages into covers, without page numbers (if enabled)

    pagePadding:    10,               // padding for each page wrapper
    pageNumbers:    true,              // display page numbers on each page

    hovers:       false,              // enables preview pageturn hover animation, shows a small preview of previous or next page on hover
    overlays:      false,              // enables navigation using a page sized overlay, when enabled links inside the content will not be clickable
    tabs:        false,              // adds tabs along the top of the pages
    tabWidth:      60,               // set the width of the tabs
    tabHeight:     20,               // set the height of the tabs
    arrows:       false,              // adds arrows overlayed over the book edges
    cursor:       'pointer',            // cursor css setting for side bar areas

    hash:        false,              // enables navigation using a hash string, ex: #/page/1 for page 1, will affect all booklets with 'hash' enabled
    keyboard:      true,              // enables navigation with arrow keys (left: previous, right: next)
    next:        $bttn_next,       // selector for element to use as click trigger for next page
    prev:        $bttn_prev,       // selector for element to use as click trigger for previous page

    menu:        null,              // selector for element to use as the menu area, required for 'pageSelector'
    pageSelector:    false,              // enables navigation with a dropdown menu of pages, requires 'menu'
    chapterSelector:  false,              // enables navigation with a dropdown menu of chapters, determined by the "rel" attribute, requires 'menu'

    shadows:      true,              // display shadows on page animations
    shadowTopFwdWidth: 166,               // shadow width for top forward anim
    shadowTopBackWidth: 166,               // shadow width for top back anim
    shadowBtmWidth:   50,               // shadow width for bottom shadow

    before:       function(){},          // callback invoked before each page turn animation
    after:       function(){}           // callback invoked after each page turn animation
    });
    Cufon.refresh();
   }
   }).attr('src',source);
  });

  });
    </script>

  </body>
</html>

 JavaScript 엔진 이해 : 구현 세부 사항Apr 17, 2025 am 12:05 AM
보다 효율적인 코드를 작성하고 성능 병목 현상 및 최적화 전략을 이해하는 데 도움이되기 때문에 JavaScript 엔진이 내부적으로 작동하는 방식을 이해하는 것은 개발자에게 중요합니다. 1) 엔진의 워크 플로에는 구문 분석, 컴파일 및 실행; 2) 실행 프로세스 중에 엔진은 인라인 캐시 및 숨겨진 클래스와 같은 동적 최적화를 수행합니다. 3) 모범 사례에는 글로벌 변수를 피하고 루프 최적화, Const 및 Lets 사용 및 과도한 폐쇄 사용을 피하는 것이 포함됩니다.
 Python vs. JavaScript : 학습 곡선 및 사용 편의성Apr 16, 2025 am 12:12 AM
Python은 부드러운 학습 곡선과 간결한 구문으로 초보자에게 더 적합합니다. JavaScript는 가파른 학습 곡선과 유연한 구문으로 프론트 엔드 개발에 적합합니다. 1. Python Syntax는 직관적이며 데이터 과학 및 백엔드 개발에 적합합니다. 2. JavaScript는 유연하며 프론트 엔드 및 서버 측 프로그래밍에서 널리 사용됩니다.
 Python vs. JavaScript : 커뮤니티, 라이브러리 및 리소스Apr 15, 2025 am 12:16 AM
Python과 JavaScript는 커뮤니티, 라이브러리 및 리소스 측면에서 고유 한 장점과 단점이 있습니다. 1) Python 커뮤니티는 친절하고 초보자에게 적합하지만 프론트 엔드 개발 리소스는 JavaScript만큼 풍부하지 않습니다. 2) Python은 데이터 과학 및 기계 학습 라이브러리에서 강력하며 JavaScript는 프론트 엔드 개발 라이브러리 및 프레임 워크에서 더 좋습니다. 3) 둘 다 풍부한 학습 리소스를 가지고 있지만 Python은 공식 문서로 시작하는 데 적합하지만 JavaScript는 MDNWebDocs에서 더 좋습니다. 선택은 프로젝트 요구와 개인적인 이익을 기반으로해야합니다.
 C/C에서 JavaScript까지 : 모든 것이 어떻게 작동하는지Apr 14, 2025 am 12:05 AM
C/C에서 JavaScript로 전환하려면 동적 타이핑, 쓰레기 수집 및 비동기 프로그래밍으로 적응해야합니다. 1) C/C는 수동 메모리 관리가 필요한 정적으로 입력 한 언어이며 JavaScript는 동적으로 입력하고 쓰레기 수집이 자동으로 처리됩니다. 2) C/C를 기계 코드로 컴파일 해야하는 반면 JavaScript는 해석 된 언어입니다. 3) JavaScript는 폐쇄, 프로토 타입 체인 및 약속과 같은 개념을 소개하여 유연성과 비동기 프로그래밍 기능을 향상시킵니다.
 JavaScript 엔진 : 구현 비교Apr 13, 2025 am 12:05 AM
각각의 엔진의 구현 원리 및 최적화 전략이 다르기 때문에 JavaScript 엔진은 JavaScript 코드를 구문 분석하고 실행할 때 다른 영향을 미칩니다. 1. 어휘 분석 : 소스 코드를 어휘 단위로 변환합니다. 2. 문법 분석 : 추상 구문 트리를 생성합니다. 3. 최적화 및 컴파일 : JIT 컴파일러를 통해 기계 코드를 생성합니다. 4. 실행 : 기계 코드를 실행하십시오. V8 엔진은 즉각적인 컴파일 및 숨겨진 클래스를 통해 최적화하여 Spidermonkey는 유형 추론 시스템을 사용하여 동일한 코드에서 성능이 다른 성능을 제공합니다.
 브라우저 너머 : 실제 세계의 JavaScriptApr 12, 2025 am 12:06 AM
실제 세계에서 JavaScript의 응용 프로그램에는 서버 측 프로그래밍, 모바일 애플리케이션 개발 및 사물 인터넷 제어가 포함됩니다. 1. 서버 측 프로그래밍은 Node.js를 통해 실현되며 동시 요청 처리에 적합합니다. 2. 모바일 애플리케이션 개발은 재교육을 통해 수행되며 크로스 플랫폼 배포를 지원합니다. 3. Johnny-Five 라이브러리를 통한 IoT 장치 제어에 사용되며 하드웨어 상호 작용에 적합합니다.
 Next.js (백엔드 통합)로 멀티 테넌트 SAAS 애플리케이션 구축Apr 11, 2025 am 08:23 AM
일상적인 기술 도구를 사용하여 기능적 다중 테넌트 SaaS 응용 프로그램 (Edtech 앱)을 구축했으며 동일한 작업을 수행 할 수 있습니다. 먼저, 다중 테넌트 SaaS 응용 프로그램은 무엇입니까? 멀티 테넌트 SAAS 응용 프로그램은 노래에서 여러 고객에게 서비스를 제공 할 수 있습니다.
 Next.js (Frontend Integration)를 사용하여 멀티 테넌트 SaaS 응용 프로그램을 구축하는 방법Apr 11, 2025 am 08:22 AM
이 기사에서는 Contrim에 의해 확보 된 백엔드와의 프론트 엔드 통합을 보여 주며 Next.js를 사용하여 기능적인 Edtech SaaS 응용 프로그램을 구축합니다. Frontend는 UI 가시성을 제어하기 위해 사용자 권한을 가져오고 API가 역할 기반을 준수하도록합니다.


핫 AI 도구

Undresser.AI Undress
사실적인 누드 사진을 만들기 위한 AI 기반 앱

AI Clothes Remover
사진에서 옷을 제거하는 온라인 AI 도구입니다.

Undress AI Tool
무료로 이미지를 벗다

Clothoff.io
AI 옷 제거제

AI Hentai Generator
AI Hentai를 무료로 생성하십시오.

인기 기사
뜨거운 도구

Eclipse용 SAP NetWeaver 서버 어댑터
Eclipse를 SAP NetWeaver 애플리케이션 서버와 통합합니다.

안전한 시험 브라우저
안전한 시험 브라우저는 온라인 시험을 안전하게 치르기 위한 보안 브라우저 환경입니다. 이 소프트웨어는 모든 컴퓨터를 안전한 워크스테이션으로 바꿔줍니다. 이는 모든 유틸리티에 대한 액세스를 제어하고 학생들이 승인되지 않은 리소스를 사용하는 것을 방지합니다.

Atom Editor Mac 버전 다운로드
가장 인기 있는 오픈 소스 편집기

드림위버 CS6
시각적 웹 개발 도구

Dreamweaver Mac版
시각적 웹 개발 도구

