TV 끝 도시 목록을 구현하기 위한 Vue+flex 레이아웃을 자세히 설명하는 기사
- 藏色散人앞으로
- 2023-01-20 14:33:241825검색
이 기사에서는 Vue가 플렉스 레이아웃을 사용하여 TV 측 도시 목록 효과를 구현하는 방법을 주로 요약하고 소개합니다. 함께 살펴보겠습니다. 친구의 도움이 필요하면 도와주세요.
Vue는 플렉스 레이아웃을 사용하여 TV에서 도시 목록을 구현합니다.
도시 목록 및 검색은 Vue에서 매우 일반적입니다. 이 블로그에서는 검색 및 도시 목록을 구현하는 방법에 대해 설명합니다.
1.
<div class="search-bar">
  <input class="search-input" v-model="citySearchResult" :placeholder="searchDefault" :key="searchTitle"
         @endEditing="endEditing" :focusable="true" ref="searchInput" :duplicateParentState="true"
         :enableFocusBorder="true"/>
  <img  class="index-root-search-image-view-css lazy"  src="/static/imghwm/default1.png"  data-src="searchIcon"   : alt="TV 끝 도시 목록을 구현하기 위한 Vue+flex 레이아웃을 자세히 설명하는 기사" >
  <span class="index-root-search-text-view-css" ref="textViewCity">{{searchDefaultKeyWord}}</span>
</div>
2. 검색 레이아웃 CSS 스타일 코드:
.search-bar-root {
  display: flex;
  flex-direction: column;
  align-items: center;
  justify-content: center;
  margin-top: 140px;
}.index-root-search-title-css {
  flex-direction: column;
  align-items: center;
  justify-content: center;
  margin-bottom: 40px;
}.search-bar-root .search-bar {
  background-color: #ffffff;
  width: 1000px;
  height: 100px;
  display: flex;
  justify-content: center;
  border-radius: 8px;
}.search-input {
  width: 780px;
  border-radius: 8px;
  font-size: 36px;
  font-family: PingFangSC-Regular, PingFang SC;
  font-weight: 400;
  color: #000000;
  margin-left: 40px;
  text-indent: 40px;
}.index-root-search-image-view-css {
  position: absolute;
  width: 32px;
  height: 32px;
  top: 35px;
  bottom: 35px;
  right: 0;
  margin-right: 102px;
  text-align: center;
}.index-root-search-flex-view-css {
  display: flex;
  flex-wrap: wrap;
  flex-direction: row;
  width: 1450px;
  margin-left: 245px;
  margin-right: 245px;
  margin-top: 40px;
}.index-root-search-text-view-css {
  font-size: 30px;
  font-family: PingFangSC-Regular, PingFang SC;
  color: #000000;
  text-align: center;
  font-weight: 400;
  top: 0;
  bottom: 0;
  right: 0;
  position: absolute;
  margin-right: 30px;
}.index-root-search-title-text-view-css {
  font-size: 70px;
  font-family: PingFangSC-Regular, PingFang SC;
  color: #ffffff;
  text-align: center;
  opacity: 1.0;
}.search-city-button-view-css {
  width: 270px;
  height: 100px;
  background-color: rgba(0, 0, 0, .1);
  margin-right: 20px;
  margin-top: 40px;
  border-radius: 11px;
  border-width: 2px;
  border-color: rgba(255, 255, 255, 0.1);
  focus-background-color: #fff;
}.search-city-button-view-css .city-sel-box {
  border-width: 2px;
  border-color: #32C5FF;
}
3. 도시 목록 레이아웃 코드:
<div>
  <div>
    <div>
      <img  class="icon-location lazy" src="/static/imghwm/default1.png" data-src="@/assets/location.png" alt="TV 끝 도시 목록을 구현하기 위한 Vue+flex 레이아웃을 자세히 설명하는 기사" >
      <img  class="icon-location lazy" src="/static/imghwm/default1.png" data-src="@/assets/location_hot_focus.png" alt="TV 끝 도시 목록을 구현하기 위한 Vue+flex 레이아웃을 자세히 설명하는 기사" >
    </div>
    <span>{{item.cityName}}</span>
  </div>
<p>4. 도시 목록 가져오기 이벤트. 초점: <strong></strong></p> 주로 div에 설정: focusable="true" 및 @focus="onFocus"<p></p>
<pre class="brush:php;toolbar:false">.index-root-search-flex-view-css {
  display: flex;
  flex-wrap: wrap;
  flex-direction: row;
  width: 1450px;
  margin-left: 245px;
  margin-right: 245px;
  margin-top: 40px;
}.index-root-search-text-view-css {
  font-size: 30px;
  font-family: PingFangSC-Regular, PingFang SC;
  color: #000000;
  text-align: center;
  font-weight: 400;
  top: 0;
  bottom: 0;
  right: 0;
  position: absolute;
  margin-right: 30px;
}.index-root-search-title-text-view-css {
  font-size: 70px;
  font-family: PingFangSC-Regular, PingFang SC;
  color: #ffffff;
  text-align: center;
  opacity: 1.0;
}.search-city-button-view-css {
  width: 270px;
  height: 100px;
  background-color: rgba(0, 0, 0, .1);
  margin-right: 20px;
  margin-top: 40px;
  border-radius: 11px;
  border-width: 2px;
  border-color: rgba(255, 255, 255, 0.1);
  focus-background-color: #fff;
}.search-city-button-view-css .city-sel-box {
  border-width: 2px;
  border-color: #32C5FF;
}.icon-location-reactive {
  position: absolute;
  width: 26px;
  height: 34px;
  margin-left: 60px;
  margin-top: 30px;
  margin-bottom: 30px;
}.icon-location {
  width: 26px;
  height: 34px;
  position: absolute;
  left: 0;
  top: 0;
  z-index: 9;
}.search-city-hot-text-iew-css {
  width: 270px;
  height: 100px;
  background-color: rgba(50, 197, 255, 0.1);
  border-radius: 11px;
  border: 2px solid #32C5FF;
  font-size: 36px;
  font-family: PingFangSC-Regular, PingFang SC;
  text-align: center;
  color: white;
}.search-city-empty {
  margin-top: 40px;
  width: 425px;
  display: flex;
  align-items: center;
  justify-content: center;
  flex-direction: column;
  margin-left: 535px;
}.search-city-empty .icon-no-connect {
  width: 425px;
  height: 307px;
}.search-city-empty .empty-txt {
  font-size: 32px;
  font-family: PingFangSC-Light, PingFang SC;
  font-weight: 300;
  color: #FFFFFF;
  margin-top: 60px;
}
6. 초점 배경 색상 및 글꼴 효과 설정: 주로 설정: 텍스트가 중복될 때 DuplicateParentState="true" gets 포커스가 켜져 있을 때 색상은 상위 레이아웃의 영향을 받지 않습니다. 또한 포커스 확대 및 테두리 효과를 설정할 수도 있습니다.
<div>
          <div>
            <img  class="icon-location lazy" src="/static/imghwm/default1.png" data-src="@/assets/location.png" alt="TV 끝 도시 목록을 구현하기 위한 Vue+flex 레이아웃을 자세히 설명하는 기사" >
            <img  class="icon-location lazy" src="/static/imghwm/default1.png" data-src="@/assets/location_hot_focus.png" alt="TV 끝 도시 목록을 구현하기 위한 Vue+flex 레이아웃을 자세히 설명하는 기사" >
 </div>
<strong>Focus effect style: :style="{focusColor: focusHotTextColor,fontSize: textFontSize,fontWeight: textFontWeight,} </strong><pre class="brush:php;toolbar:false">:enableFocusBorder="true"//设置获得焦点时的边框
:focusScale="1.0"//设置焦点放大时的倍数
7. 검색창 입력 이벤트:
<span>{{item.cityName}}</span>
8. 검색창 포커스 이벤트:
//输入内容之后请求城市列表接口刷新数据
endEditing(e) {
  console.log("--resultData--", this.citySearchResult)
},
9. 기본적으로 TV 소프트 키보드 팝업:
onFocus(e) {
  this.focused = e.isFocused;
  this.$emit("onButtonFocused", e.isFocused);
},
10.
mounted() {
  this.hotCity = hotCity;
  this.showHot = true;
  this.pageLoading = true
  //弹出软键盘
  this.$refs.searchInput.focus()
  //搜索框默认获取焦点
  this.setHideLoading()
},
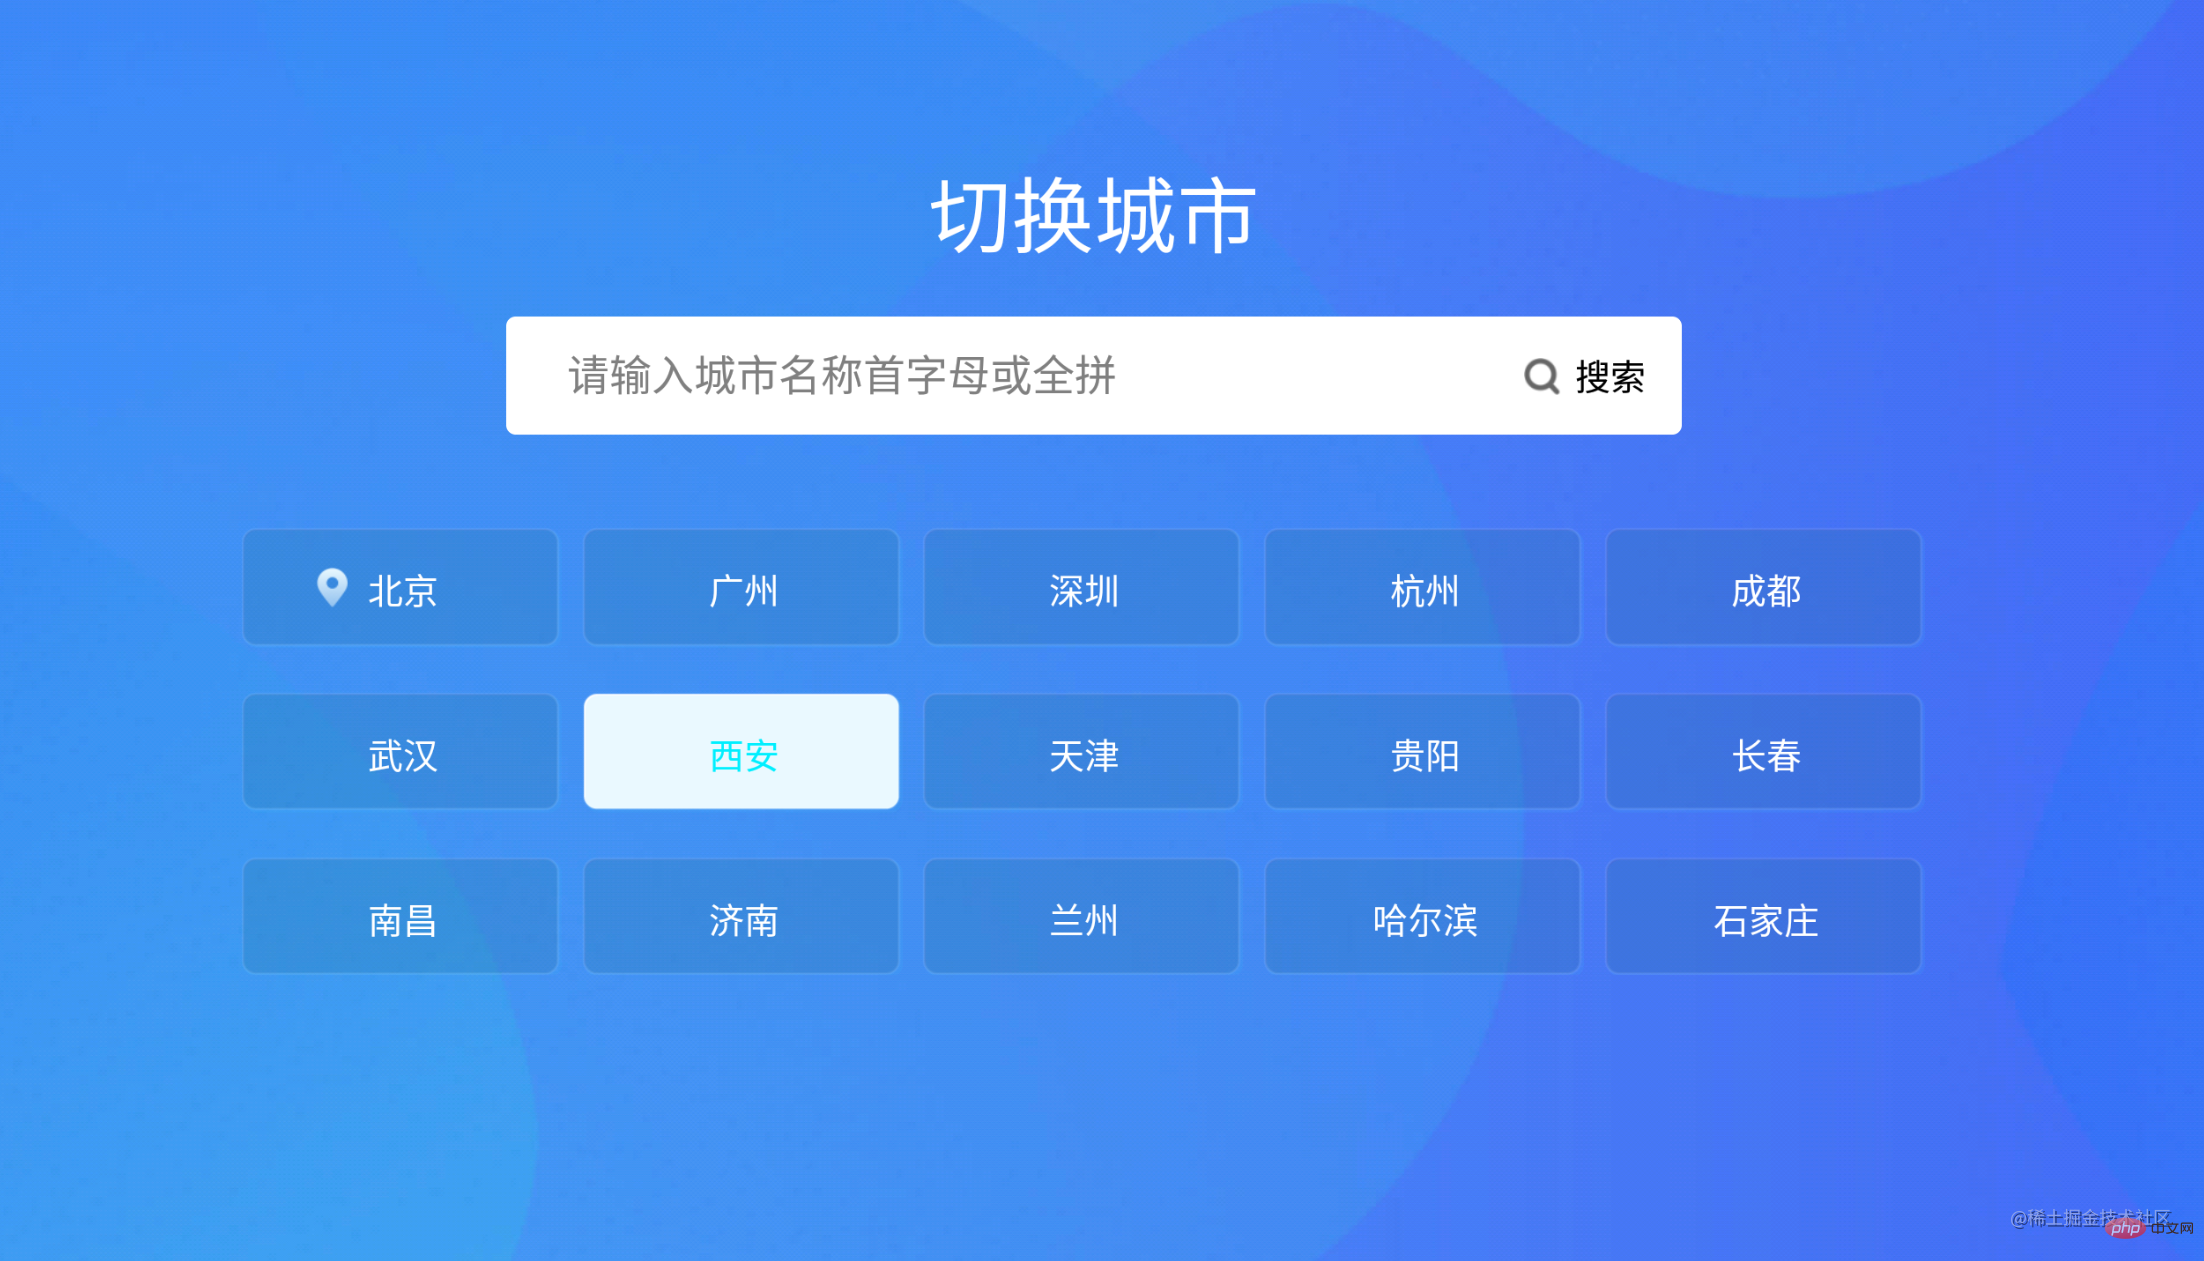
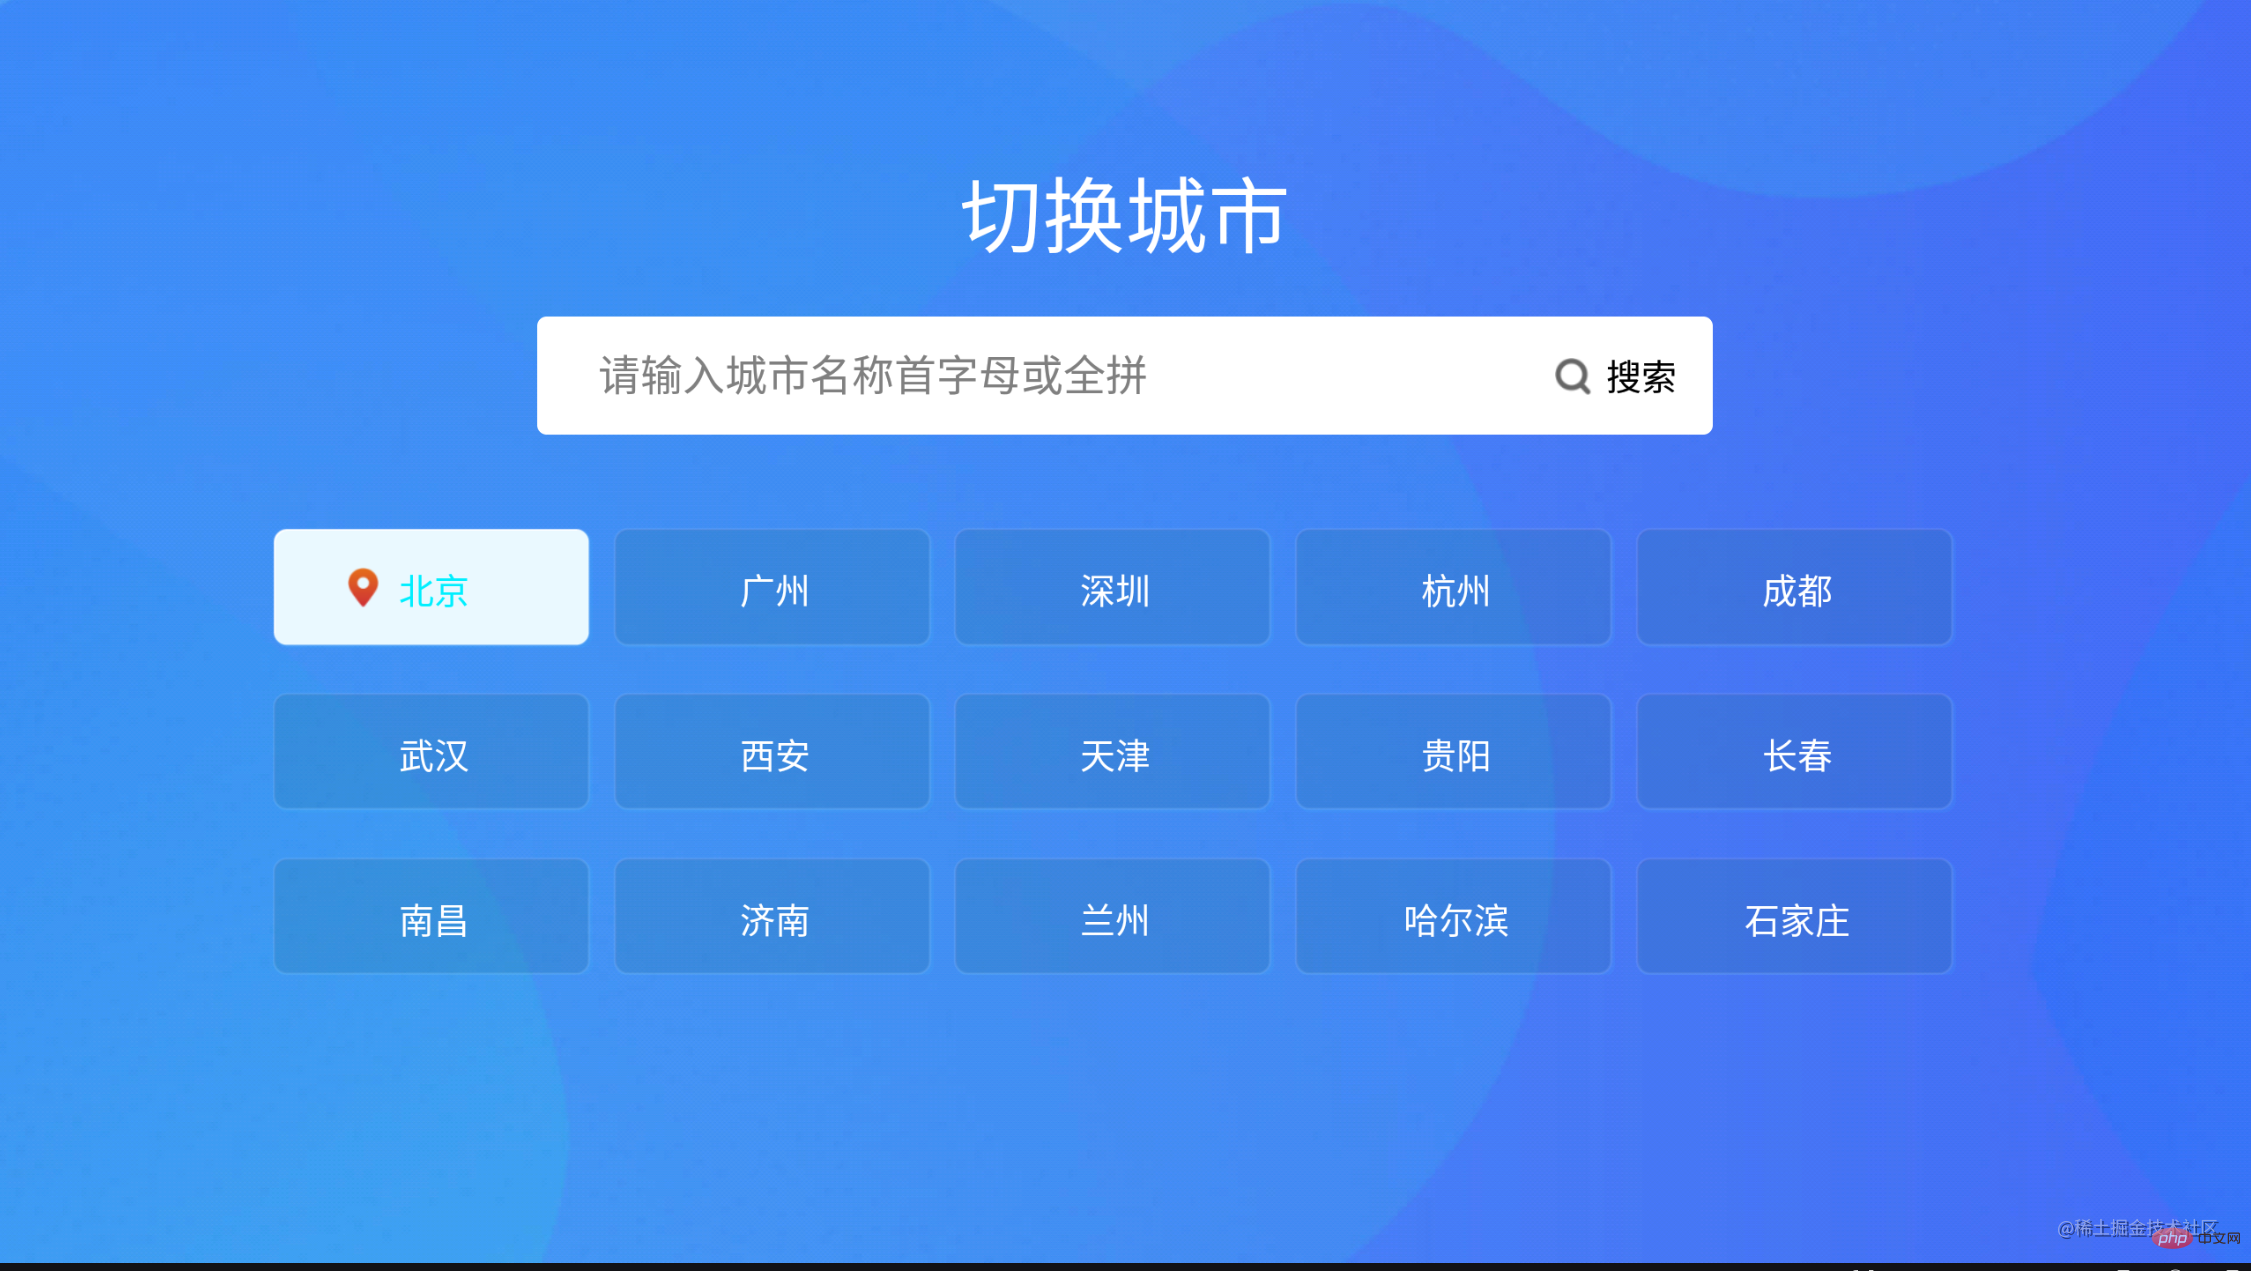
11 달성된 효과의 스크린샷은 다음과 같습니다.
 관련 권장 사항:

위 내용은 TV 끝 도시 목록을 구현하기 위한 Vue+flex 레이아웃을 자세히 설명하는 기사의 상세 내용입니다. 자세한 내용은 PHP 중국어 웹사이트의 기타 관련 기사를 참조하세요!
성명:
이 기사는 juejin.im에서 복제됩니다. 침해가 있는 경우 admin@php.cn으로 문의하시기 바랍니다. 삭제

