HTML 유성우 코드를 구현하는 방법
- 藏色散人원래의
- 2023-01-04 15:06:253385검색
html 유성우 코드 구현 방법: 1. HTML 샘플 파일을 생성합니다. 2. HTML 코드를 "
..." 3. CSS 스타일을 ".container {위치: 상대..." }"를 달성합니다.
이 튜토리얼의 운영 환경: Windows 10 시스템, HTML5 버전, Dell G3 컴퓨터.
html 유성우 코드를 구현하는 방법은 무엇입니까?
동적 유성우 제작 코드 공유 (직접 복사 가능)
유성우 제작
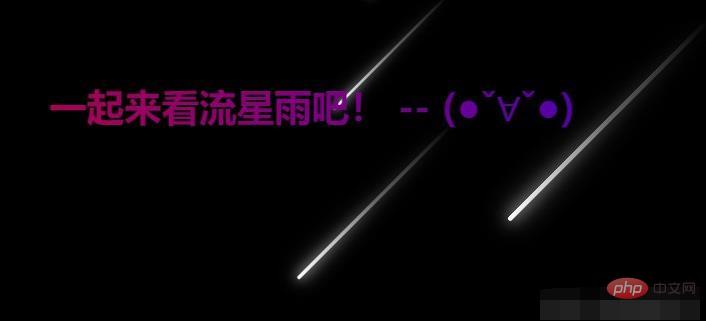
렌더링 (유성은 색상이 지정되어 있으며, 스크린샷에는 표시되지 않음) :
오늘 좋은 유성우 제작을 보았습니다. 책의 경우 꽤 괜찮아 보인다고 생각합니다. 코드에 대해서는 많이 말하지 않겠습니다. 원하시면 수집하실 수 있습니다.
코드는 다음과 같습니다.
html 코드:
<!DOCTYPE html>
<html>
<head>
<meta charset="utf-8">
<title>漫天流星雨</title>
<link rel="stylesheet" type="text/css" href="index.css"/>
</head>
<body>
<div class="channel">
<!--嗯,这行下面的字可以改变-->
一起来看流星雨吧!   -- (●ˇ∀ˇ●)
</div>
<div class="container">
<div class="line" style="--color:#ec3e27;--x:3;--z:3;--d:1;"></div>
<div class="line" style="--color:#fff;--x:3;--z:2;--d:2;"></div>
<div class="line" style="--color:#fff;--x:4;--z:1;--d:3;"></div>
<div class="line" style="--color:#fd79a8;--x:4;--z:0;--d:1;"></div>
<div class="line" style="--color:#fff;--x:6;--z:-1;--d:2;"></div>
<div class="line" style="--color:#0984e3;--x:6;--z:-2;--d:3;"></div>
<div class="line" style="--color:#fff;--x:8;--z:-3;--d:1;"></div>
<div class="line" style="--color:#fff;--x:10;--z:-4;--d:2;"></div>
<div class="line" style="--color:#fff;--x:12;--z:-5;--d:3;"></div>
<div class="line" style="--color:#fff;--x:14;--z:-6;--d:1;"></div>
<div class="line" style="--color:#fff;--x:16;--z:-7;--d:2;"></div>
<div class="line" style="--color:#fff;--x:18;--z:-8;--d:3;"></div>
<div class="line" style="--color:#e056fd;--x:20;--z:-9;--d:1;"></div>
</div>
</body>
</html>
css 코드:
:root {
--background-color: #2c3e50;
--border-color: #7591AD;
--text-color: #34495e;
--color1: #ec3e27;
--color2: #fd79a8;
--color3: #0984e3;
--color4: #00b894;
--color5: #fdcb6e;
--color6: #e056fd;
--color7: #F97F51;
--color8: #BDC581;
}
* {
margin: 0;
padding: 0;
}
html {
font-size: 14px;
}
body {
width: 100vw;
height: 100vh;
background-color: var(--background-color);
display: flex;
justify-content: center;
align-items: center;
/* font-family: 'Times New Roman', Times, serif; */
}
.channel {
position: absolute;
width: 80%;
text-align: center;
top: 50%;
left: 50%;
transform: translate(-50%, -200px);
font-size: 30px;
font-weight: bold;
color: #fff;
z-index: 999;
}
.container {
position: relative;
width: 100vw;
height: 100vh;
background-color: #000;
overflow: hidden;
display: flex;
justify-content: center;
align-items: center;
perspective: 800px;
/* perspective-origin: left bottom; */
transform-style: preserve-3d;
}
.line {
position: absolute;
width: 200px;
height: 3px;
border-radius: 3px;
/* background-color: #fff; */
background-image: linear-gradient(to right, var(--color), #ffffff50, transparent);
animation: down 1s linear infinite both;
animation-delay: calc(var(--d) * 0.3s);
}
.line::before,
.line::after {
position: absolute;
content: "";
width: inherit;
height: inherit;
background-image: inherit;
}
.line::before {
filter: blur(5px);
}
.line::after {
filter: blur(10px);
}
@keyframes down {
0% {
transform: translateY(calc(var(--z) * 60px))
translateZ(calc(var(--z) * 100px))
rotate(-45deg)
translateX(calc(var(--x) * 100px));
}
100% {
transform: translateY(calc(var(--z) * 60px))
translateZ(calc(var(--z) * 100px))
rotate(-45deg)
translateX(calc(var(--x) * -100px));
}
}
.channel{
background: linear-gradient(to right,red,blue);
-webkit-background-clip: text;
color: transparent;
}
가서 사용해 보세요!
추천 학습: "HTML 비디오 튜토리얼"
위 내용은 HTML 유성우 코드를 구현하는 방법의 상세 내용입니다. 자세한 내용은 PHP 중국어 웹사이트의 기타 관련 기사를 참조하세요!
성명:
본 글의 내용은 네티즌들의 자발적인 기여로 작성되었으며, 저작권은 원저작자에게 있습니다. 본 사이트는 이에 상응하는 법적 책임을 지지 않습니다. 표절이나 침해가 의심되는 콘텐츠를 발견한 경우 admin@php.cn으로 문의하세요.


