노드가 OCR을 구현하는 방법에 대한 간략한 분석
- 青灯夜游앞으로
- 2022-10-31 19:09:401800검색
OCR(광학 문자 인식)을 구현하는 방법은 무엇입니까? 다음 글에서는 node를 사용하여 OCR을 구현하는 방법을 소개하겠습니다. 도움이 되셨으면 좋겠습니다!

ocr은 광학 문자 인식입니다. 쉽게 말하면 사진 속 텍스트를 인식하는 것입니다.
안타깝게도 저는 AI에 대해 잘 모르는 저급 웹 프로그래머입니다. OCR을 구현하려면 타사 라이브러리만 찾을 수 있습니다.
Python 언어에는 OCR을 위한 타사 라이브러리가 많이 있습니다. 저는 오랫동안 OCR을 구현하기 위한 nodejs용 타사 라이브러리를 찾고 있었는데, 마침내 tesseract.js 라이브러리가 여전히 OCR을 구현할 수 있다는 것을 알게 되었습니다. 아주 편리하게. [관련 튜토리얼 권장 사항: nodejs 비디오 튜토리얼]
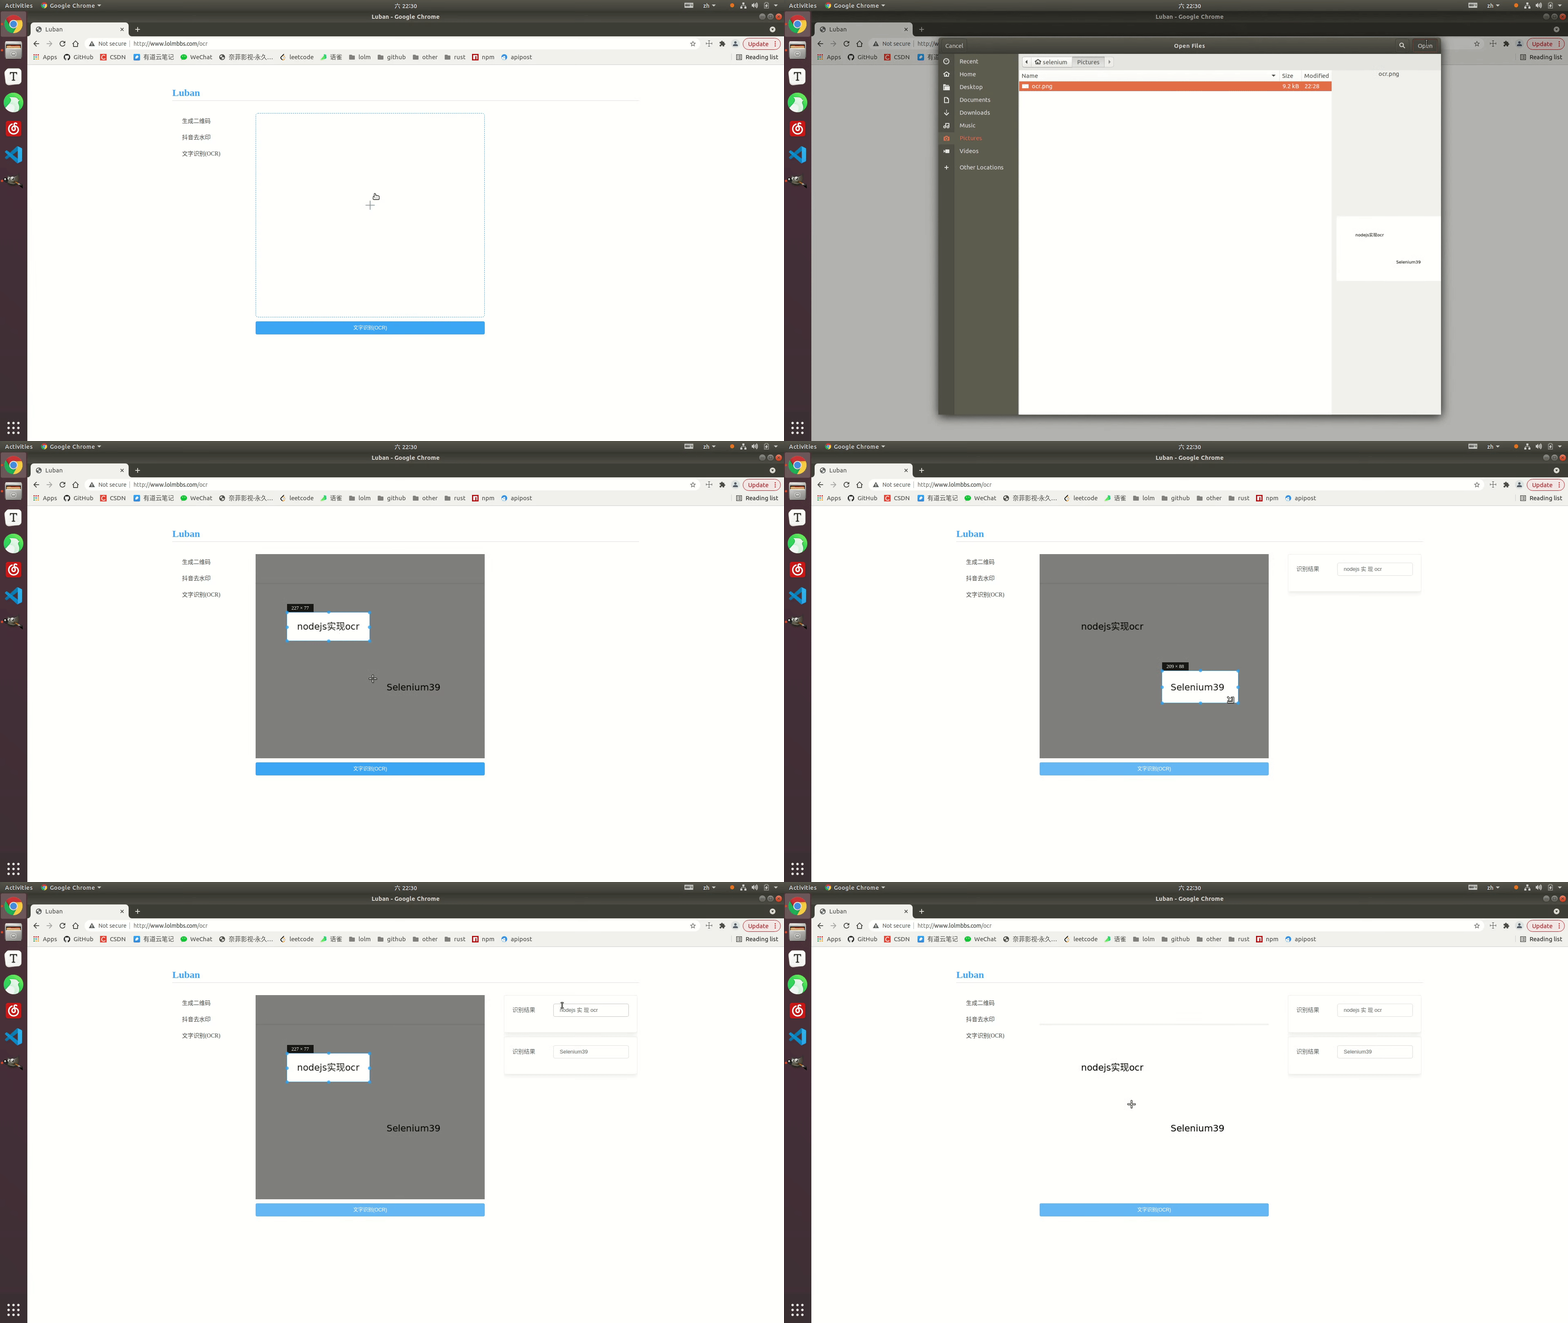
효과 표시
온라인 예시: http://www.lolmbbs.com/tool/ocr

자세한 코드
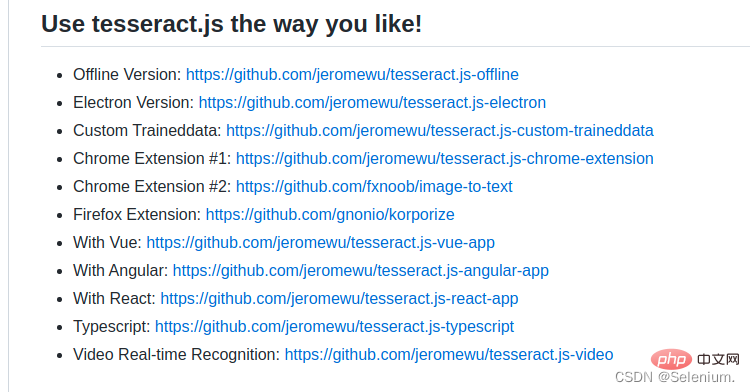
tesserract.js 이 라이브러리는 선택할 수 있는 여러 버전을 제공합니다. 저는 오프라인 버전인 tesseract.js-offline을 사용하고 있습니다. 결국 모든 사람이 열악한 네트워크 상태의 영향을 받습니다.
기본 샘플 코드
const { createWorker } = require('tesseract.js');
const path = require('path');

const worker = createWorker({
  langPath: path.join(__dirname, '..', 'lang-data'),
  logger: m => console.log(m),
});

(async () => {
  await worker.load();
  await worker.loadLanguage('eng');
  await worker.initialize('eng');
  const { data: { text } } = await worker.recognize(path.join(__dirname, '..', 'images', 'testocr.png'));
  console.log(text);
  await worker.terminate();
})();默认示例代码await worker.loadLanguage('chi_sim+jpn+eng'); await worker.initialize('chi_sim+jpn+eng');
1. 支持多语言识别
tesseract.js 离线版本默认示例代码只支持识别英文,如果识别中文,结果会是一堆问号。但是幸运的是你可以导入多个训练好的语言模型,让它支持多个语言的识别。
从https://github.com/naptha/tessdata/tree/gh-pages/4.0.0这里下载你需要的对应语言模型,放入到根目录下的lang-data目录下
我这里选择了中(chi_sim.traineddata.gz)日(jpn.traineddata.gz)英(eng.traineddata.gz)三国语言模型。修改代码中加载和初始化模型的语言项配置,来同时支持中日英三国语言。
const Koa = require('koa')
const Router = require('koa-router')
const router = new Router()
const app = new Koa()
const path = require('path')
const moment = require('moment')
const { createWorker, createScheduler } = require('tesseract.js')
;(async () => {
const scheduler = createScheduler()
for (let i = 0; i < 4; i++) {
const worker = createWorker({
langPath: path.join(__dirname, '.', 'lang-data'),
cachePath: path.join(__dirname, '.'),
logger: m => console.log(`${moment().format('YYYY-MM-DD HH:mm:ss')}-${JSON.stringify(m)}`)
})
await worker.load()
await worker.loadLanguage('chi_sim+jpn+eng')
await worker.initialize('chi_sim+jpn+eng')
scheduler.addWorker(worker)
}
app.context.scheduler = scheduler
})()
router.get('/test', async (ctx) => {
const { data: { text } } = await ctx.scheduler.addJob('recognize', path.join(__dirname, '.', 'images', 'chinese.png'))
// await ctx.scheduler.terminate()
ctx.body = text
})
app.use(router.routes(), router.allowedMethods())
app.listen(3002)为了方便大家的测试,我在示例的离线版本,已经放入了中日韩三国语言的训练模型和实例代码以及测试图片。
https://github.com/Selenium39/tesseract.js-offline
2. 提高识别性能
如果你运行了离线的版本,你会发现模型的加载和ocr的识别有点慢。可以通过这两个步骤优化。
web项目中,你可以在应用一启动的时候就加载模型,这样后续接收到ocr请求的时候就可以不用等待模型加载了。
参照Why I refactor tesseract.js v2?这篇博客,可以通过
createScheduler方法添加多个worker线程来并发的处理ocr请求。
多线程并发处理ocr请求示例
<template>
<div>
<div style="margin-top:30px;height:500px">
<div class="show">
<vueCropper
v-if="imgBase64"
ref="cropper"
:img="imgBase64"
:output-size="option.size"
:output-type="option.outputType"
:info="true"
:full="option.full"
:can-move="option.canMove"
:can-move-box="option.canMoveBox"
:original="option.original"
:auto-crop="option.autoCrop"
:fixed="option.fixed"
:fixed-number="option.fixedNumber"
:center-box="option.centerBox"
:info-true="option.infoTrue"
:fixed-box="option.fixedBox"
:max-img-size="option.maxImgSize"
style="background-image:none"
@mouseenter.native="enter"
@mouseleave.native="leave"
></vueCropper>
<el-upload
v-else
ref="uploader"
class="avatar-uploader"
drag
multiple
action=""
:show-file-list="false"
:limit="1"
:http-request="upload"
>
<i class="el-icon-plus avatar-uploader-icon"></i>
</el-upload>
</div>
<div
class="ocr"
@mouseleave="leaveCard"
>
<el-card
v-for="(item,index) in ocrResult"
:key="index"
class="card-box"
@mouseenter.native="enterCard(item)"
>
<el-form
size="small"
label-width="100px"
label-position="left"
>
<el-form-item label="识别结果">
<el-input v-model="item.text"></el-input>
</el-form-item>
</el-form>
</el-card>
</div>
</div>
<div style="margin-top:10px">
<el-button
size="small"
type="primary"
style="width:60%"
@click="doOcr"
>
文字识别(OCR)
</el-button>
</div>
</div>
</template>
<script>
import { uploadImage, ocr } from '../utils/api'
export default {
name: 'Ocr',
data () {
return {
imgSrc: '',
imgBase64: '',
option: {
info: true, // 裁剪框的大小信息
outputSize: 0.8, // 裁剪生成图片的质量
outputType: 'jpeg', // 裁剪生成图片的格式
canScale: false, // 图片是否允许滚轮缩放
autoCrop: true, // 是否默认生成截图框
fixedBox: false, // 固定截图框大小 不允许改变
fixed: false, // 是否开启截图框宽高固定比例
fixedNumber: [7, 5], // 截图框的宽高比例
full: true, // 是否输出原图比例的截图
canMove: false, // 时候可以移动原图
canMoveBox: true, // 截图框能否拖动
original: false, // 上传图片按照原始比例渲染
centerBox: true, // 截图框是否被限制在图片里面
infoTrue: true, // true 为展示真实输出图片宽高 false 展示看到的截图框宽高
maxImgSize: 10000
},
ocrResult: []
}
},
methods: {
upload (fileObj) {
const file = fileObj.file
const reader = new FileReader()
reader.readAsDataURL(file)
reader.onload = () => {
this.imgBase64 = reader.result
}
const formData = new FormData()
formData.append('image', file)
uploadImage(formData).then(res => {
this.imgUrl = res.imgUrl
})
},
doOcr () {
const cropAxis = this.$refs.cropper.getCropAxis()
const imgAxis = this.$refs.cropper.getImgAxis()
const cropWidth = this.$refs.cropper.cropW
const cropHeight = this.$refs.cropper.cropH
const position = [
(cropAxis.x1 - imgAxis.x1) / this.$refs.cropper.scale,
(cropAxis.y1 - imgAxis.y1) / this.$refs.cropper.scale,
cropWidth / this.$refs.cropper.scale,
cropHeight / this.$refs.cropper.scale
]
const rectangle = {
top: position[1],
left: position[0],
width: position[2],
height: position[3]
}
if (this.imgUrl) {
ocr({ imgUrl: this.imgUrl, rectangle }).then(res => {
this.ocrResult.push(
{
text: res.text,
cropInfo: { //截图框显示的大小
width: cropWidth,
height: cropHeight,
left: cropAxis.x1,
top: cropAxis.y1
},
realInfo: rectangle //截图框在图片上真正的大小
})
})
}
},
enterCard (item) {
this.$refs.cropper.goAutoCrop()// 重新生成自动裁剪框
this.$nextTick(() => {
// if cropped and has position message, update crop box
// 设置自动裁剪框的宽高和位置
this.$refs.cropper.cropOffsertX = item.cropInfo.left
this.$refs.cropper.cropOffsertY = item.cropInfo.top
this.$refs.cropper.cropW = item.cropInfo.width
this.$refs.cropper.cropH = item.cropInfo.height
})
},
leaveCard () {
this.$refs.cropper.clearCrop()
},
enter () {
if (this.imgBase64 === '') {
return
}
this.$refs.cropper.startCrop() // 开始裁剪
},
leave () {
this.$refs.cropper.stopCrop()// 停止裁剪
}
}
}
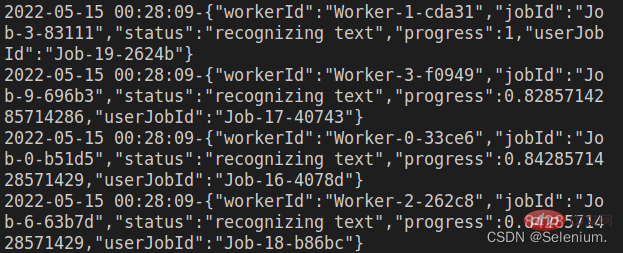
</script>发起并发请求,可以看到多个worker再并发执行ocr任务
ab -n 4 -c 4 localhost:3002/test

-
https://github.com/naptha/tessdata/tree/gh-pages/4.0.0 에서 필요한 해당 언어 모델을 다운로드하세요. 루트 디렉토리의 lang-data 디렉토리에 넣으세요 저는 중국어(
chi_sim.traineddata.gz) 일본어(jpn.traineddata.gz) 영어( )를 선택했습니다 eng.traineddata.gz) 3개국 언어 모델.
chi_sim.traineddata.gz) 일본어(jpn.traineddata.gz) 영어( )를 선택했습니다 eng.traineddata.gz) 3개국 언어 모델. 중국어, 일본어, 영어를 동시에 지원하도록 코드에서 모델 로드 및 초기화의 언어 구성을 수정합니다.
모든 사람의 테스트를 용이하게 하기 위해 예제의 오프라인 버전에 중국, 일본, 한국의 3개 언어로 된 훈련 모델, 예제 코드 및 테스트 사진을 포함했습니다.
https://github.com/Selenium39/tesseract.js-offline2. 인식 성능 향상
오프라인 버전을 실행해 보면 모델 로딩과 OCR 인식이 조금 느리다. 이 두 단계를 통해 최적화할 수 있습니다.- 웹 프로젝트에서는 애플리케이션이 시작되자마자 모델을 로드할 수 있으므로 모델이 생성될 때까지 기다릴 필요가 없습니다. 나중에 OCR 요청을 받을 때 로드됩니다.
- tesseract.js v2를 리팩토링하는 이유 블로그를 참조하세요.
createScheduler메서드를 통해 여러 작업자 스레드를 추가하여 ocr 요청을 동시에 처리할 수 있습니다. 🎜
OCR 요청의 다중 스레드 동시 처리 예🎜rrreee🎜동시 요청을 시작하면 OCR 작업을 동시에 실행하는 여러 작업자를 볼 수 있습니다🎜🎜ab - n 4 -c 4 localhost:3002/test🎜🎜🎜🎜🎜🎜3. 프런트엔드 코드 🎜🎜🎜효과 표시의 프런트엔드 코드는 주로 elementui 컴포넌트와 vue-cropper를 사용하여 구현됩니다. 요소. 🎜🎜vue-cropper 구성 요소 구체적인 사용법은 내 블로그를 참조하세요. vue 이미지 자르기: 이미지 자르기에 vue-cropper 사용🎜🎜🎜ps: 🎜이미지를 업로드할 때 먼저 업로드된 이미지의 base64를 프런트 엔드에 로드할 수 있습니다. , 먼저 이미지 업로드를 참조한 다음 백엔드에 이미지 업로드를 요청하면 더 나은 사용자 경험을 얻을 수 있습니다🎜🎜전체 코드는 다음과 같습니다🎜rrreee🎜노드 관련 지식을 더 보려면 🎜nodejs 튜토리얼🎜을 방문하세요! 🎜위 내용은 노드가 OCR을 구현하는 방법에 대한 간략한 분석의 상세 내용입니다. 자세한 내용은 PHP 중국어 웹사이트의 기타 관련 기사를 참조하세요!

