
숭고한 환경에서 PHP를 빌드하는 방법

- 藏色散人원래의
- 2022-10-26 09:31:092648검색
sublime搭建php的方法:1、打开sublime,点击“Ctrl+Shift+P”,再输入install;2、配置SublimeLinter;3、修改路径;4、配置php编译系统;5、添加“{ "cmd":["php","$file"],"file_regex": "php$","selector":"source.php"}”即可。

本教程操作环境:windows7系统、PHP8.1版、Dell G3电脑。
sublime 怎么搭建php?
sublime3配置php环境
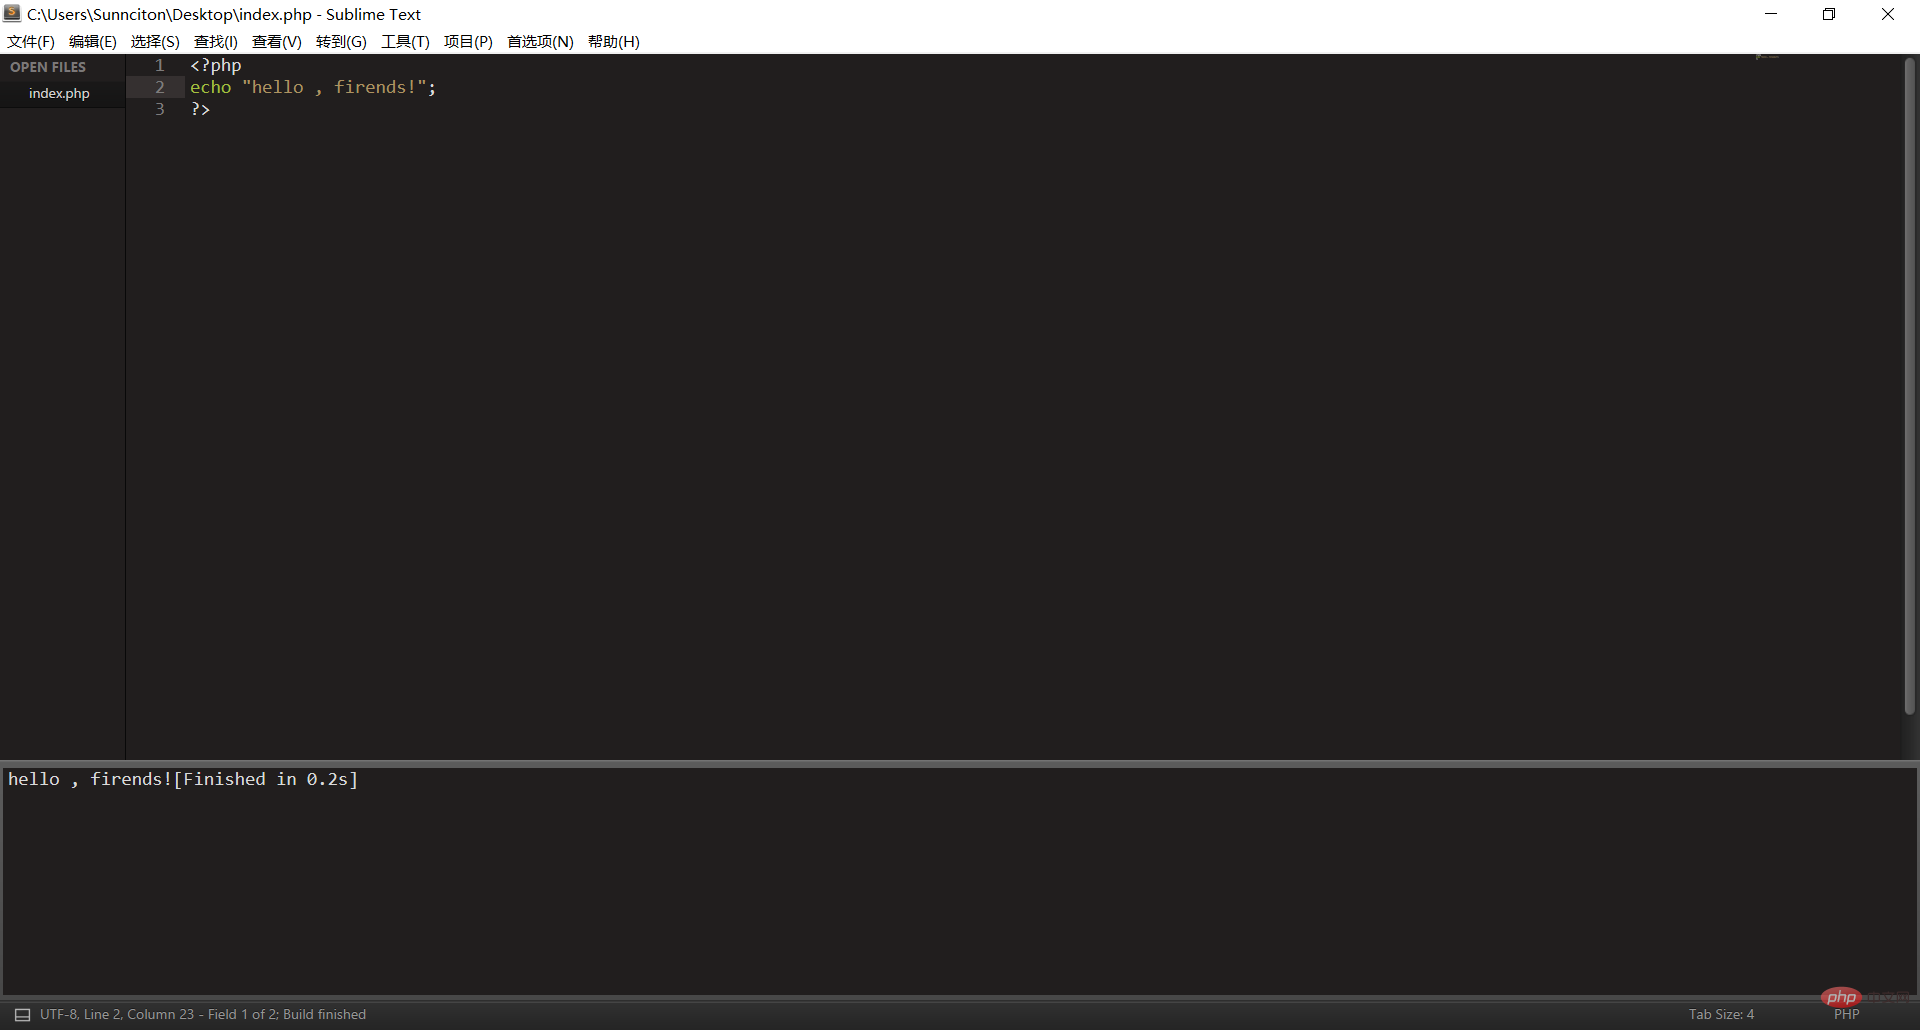
最后的演示效果:
1. 按照sublime3开始前的准备工作
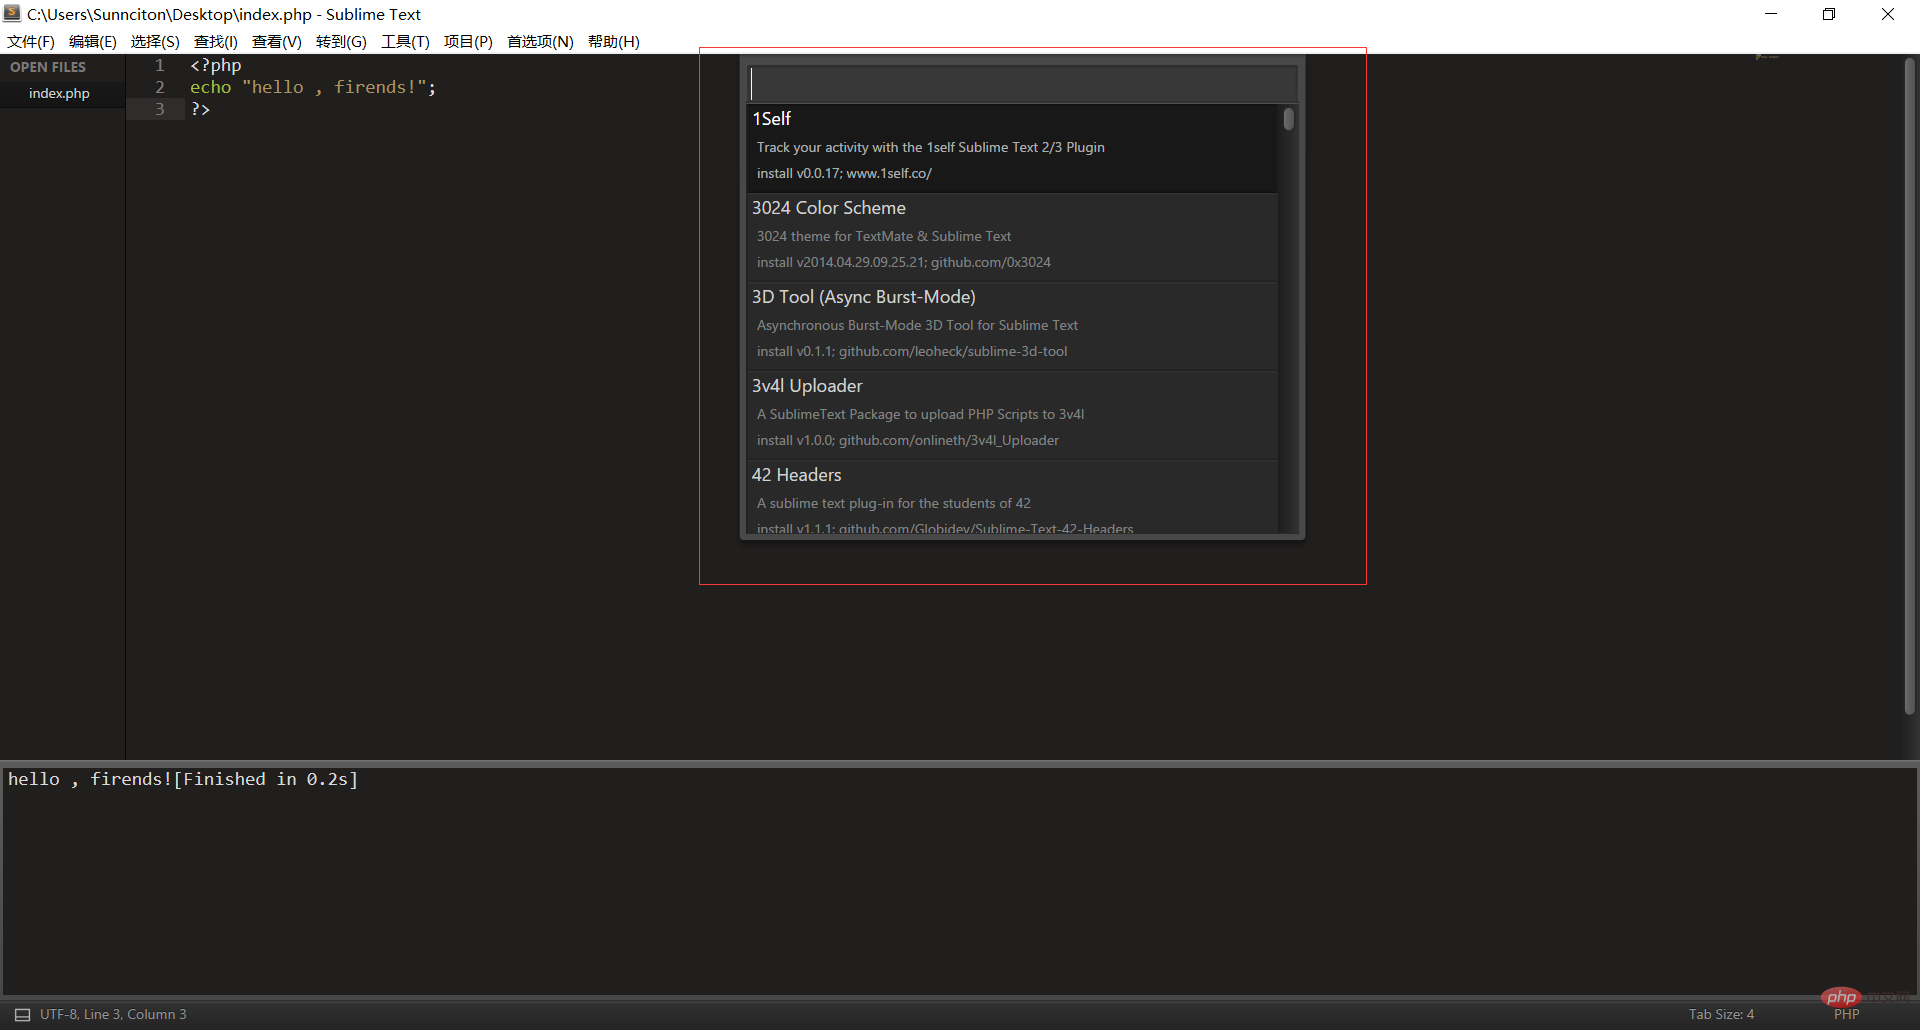
Ctrl+Shift+P,再输入install ,最后再输入想要安装的软件 (输入install会有几十秒的延迟,请不要重复操作)
配置php环境,目前只需要配置两个,首先配置SublimeLinter
先安装好SublimeLinter ,再进入下面的步骤(如果不懂英语翻译中文那么就去翻译)
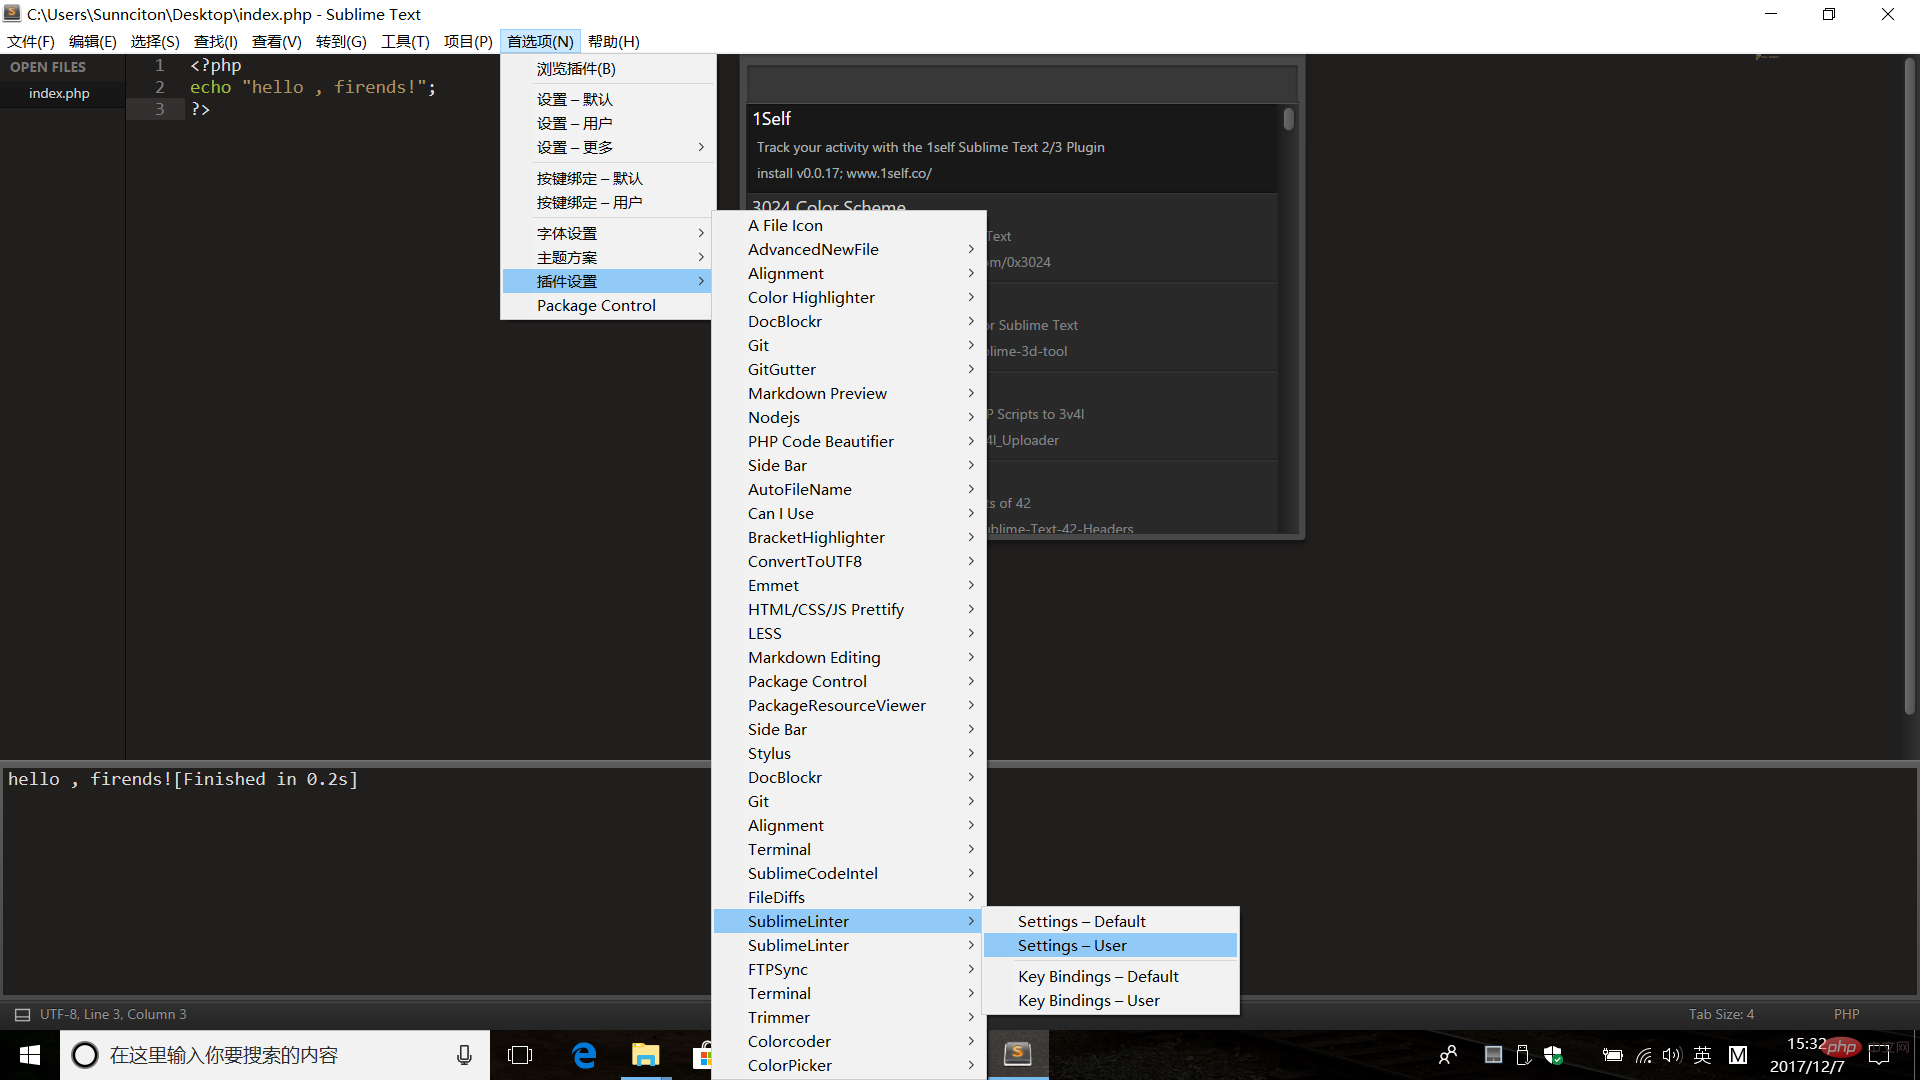
Settings-User
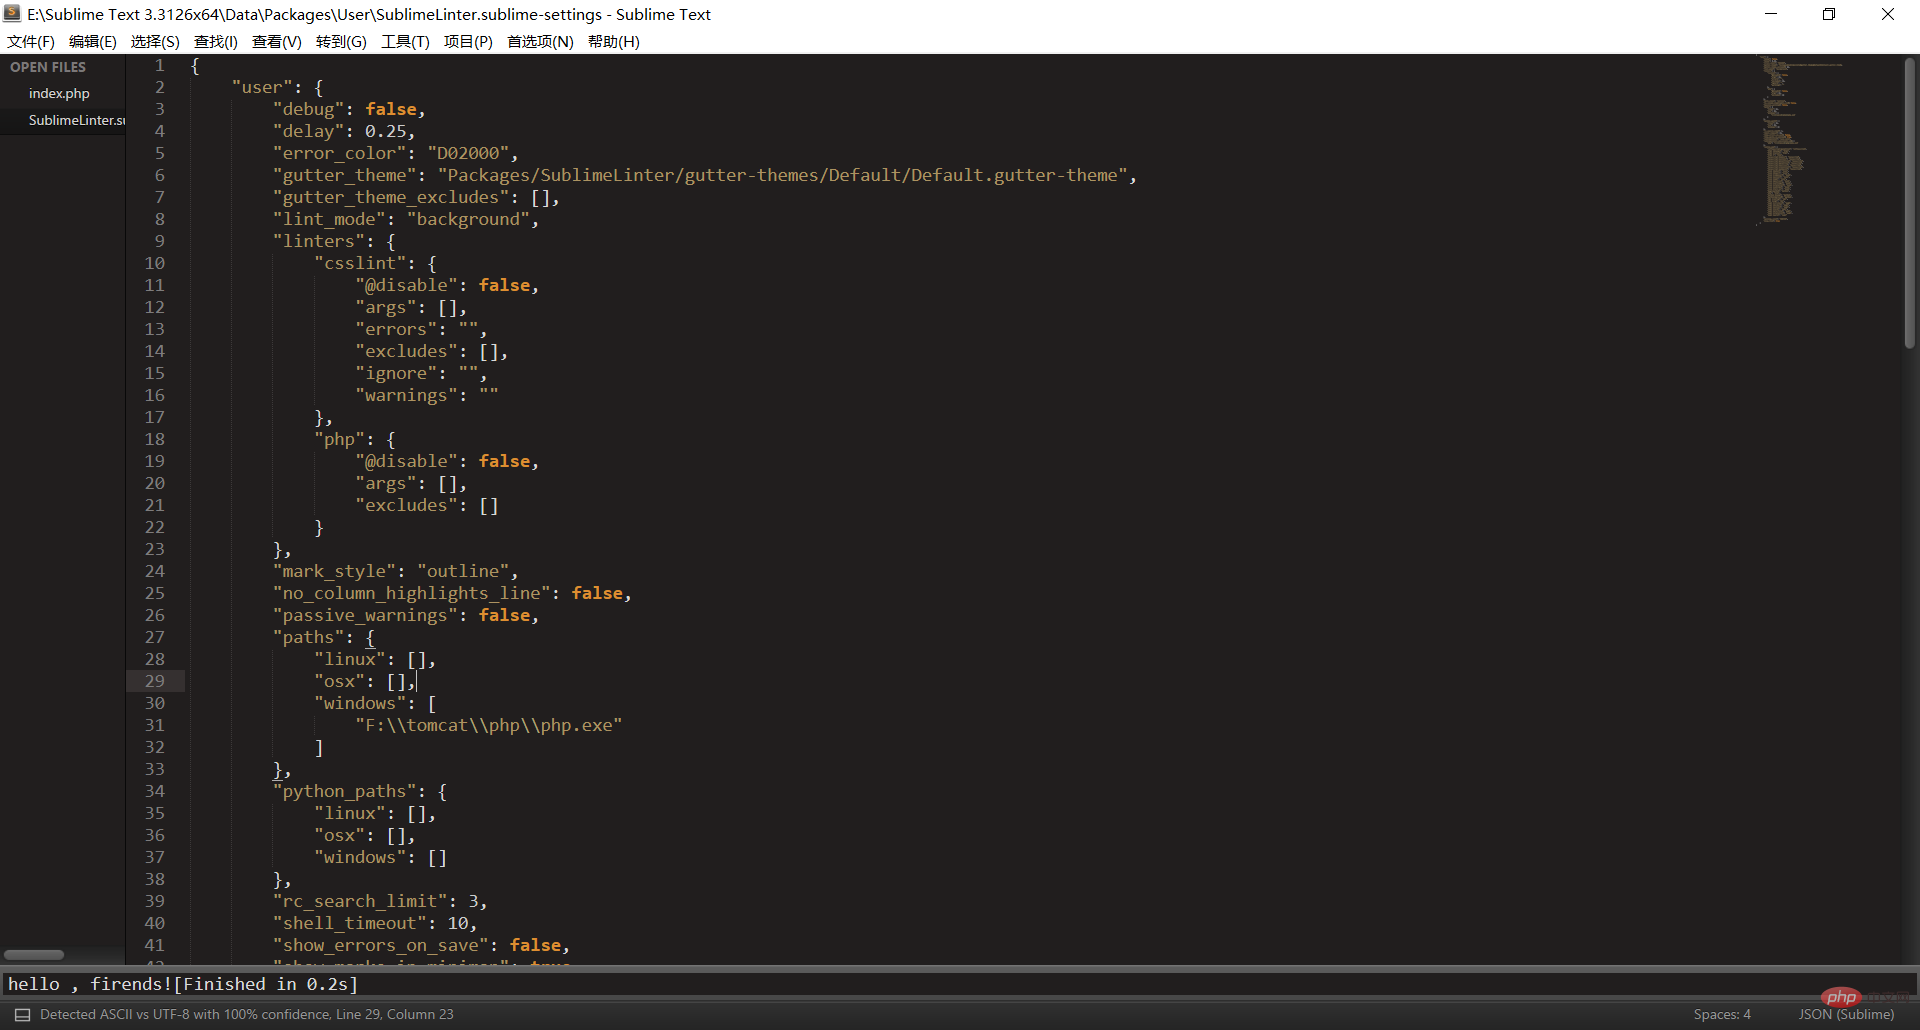
直接拷贝下面的代码上去即可,修改一下31和45行的路径即可(记得全部拷贝!)
{
    "user": {
        "debug": false,
        "delay": 0.25,
        "error_color": "D02000",
        "gutter_theme": "Packages/SublimeLinter/gutter-themes/Default/Default.gutter-theme",
        "gutter_theme_excludes": [],
        "lint_mode": "background",
        "linters": {
            "csslint": {
                "@disable": false,
                "args": [],
                "errors": "",
                "excludes": [],
                "ignore": "",
                "warnings": ""
            },
            "php": {
                "@disable": false,
                "args": [],
                "excludes": []
            }
        },
        "mark_style": "outline",
        "no_column_highlights_line": false,
        "passive_warnings": false,
        "paths": {
            "linux": [],
            "osx": [],
            "windows": [
                "F:\\tomcat\\php\\php.exe"
            ]
        },
        "python_paths": {
            "linux": [],
            "osx": [],
            "windows": []
        },
        "rc_search_limit": 3,
        "shell_timeout": 10,
        "show_errors_on_save": false,
        "show_marks_in_minimap": true,
        "sublimelinter": "save-only",
        "sublimelinter_executable_map": {
            "php": "F:\\tomcat\\php\\php.exe"
        },
        "syntax_map": {
            "coffeescript (gulpfile)": "coffeescript",
            "html (django)": "html",
            "html (rails)": "html",
            "html 5": "html",
            "javascript (babel)": "javascript",
            "javascript (eslint)": "javascript",
            "javascript (gruntfile)": "javascript",
            "javascript (gulpfile)": "javascript",
            "javascript (postcss)": "javascript",
            "javascript (stylelint)": "javascript",
            "javascript (webpack)": "javascript",
            "json (babel)": "json",
            "json (bower)": "json",
            "json (composer)": "json",
            "json (eslint)": "json",
            "json (npm)": "json",
            "json (postcss)": "json",
            "json (settings)": "json",
            "json (stylelint)": "json",
            "json (sublime)": "json",
            "json (tern js)": "json",
            "magicpython": "python",
            "php": "html",
            "python django": "python",
            "pythonimproved": "python",
            "xml (config)": "xml",
            "xml (svg)": "xml",
            "yaml (circleci)": "yaml",
            "yaml (docker)": "yaml",
            "yaml (eslint)": "yaml",
            "yaml (lock)": "yaml",
            "yaml (procfile)": "yaml",
            "yaml (stylelint)": "yaml",
            "yaml (yarn)": "yaml"
        },
        "warning_color": "DDB700",
        "wrap_find": true
    }
}
好了,再说配置php 编译系统的事情
一张图阐释配置系统环境
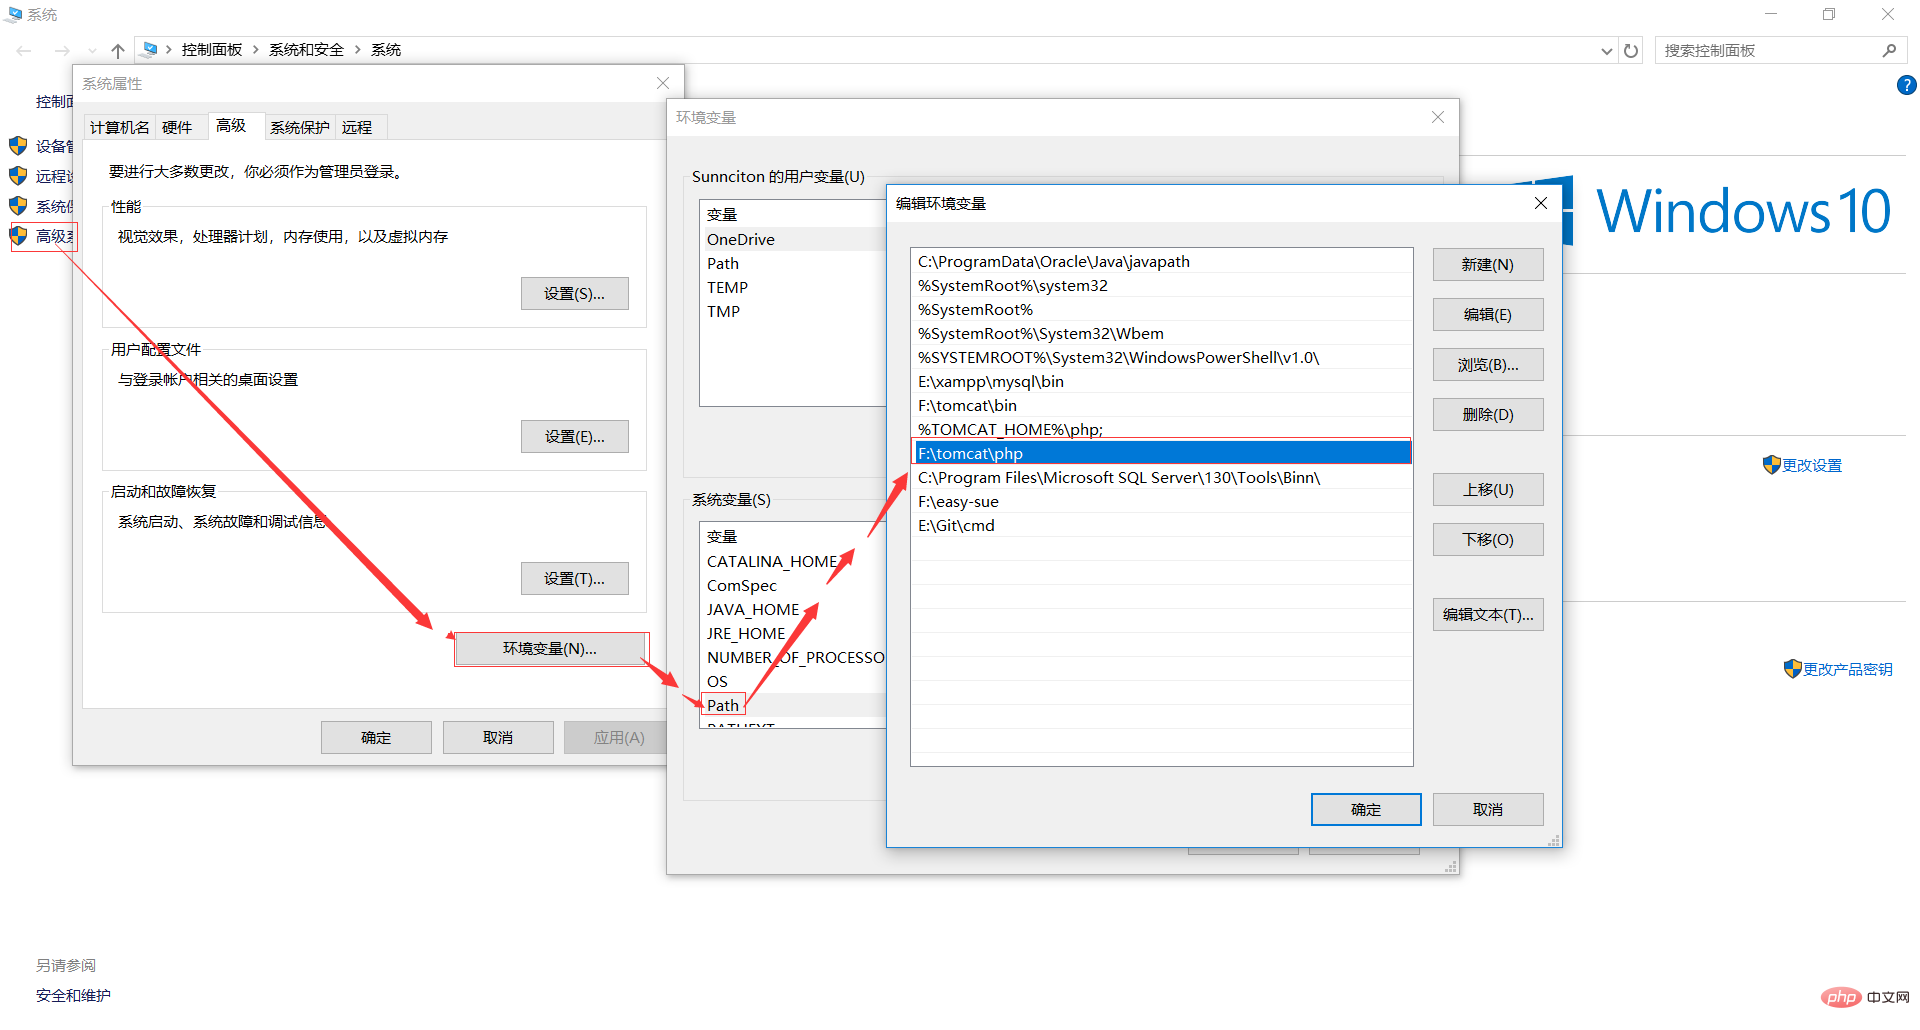
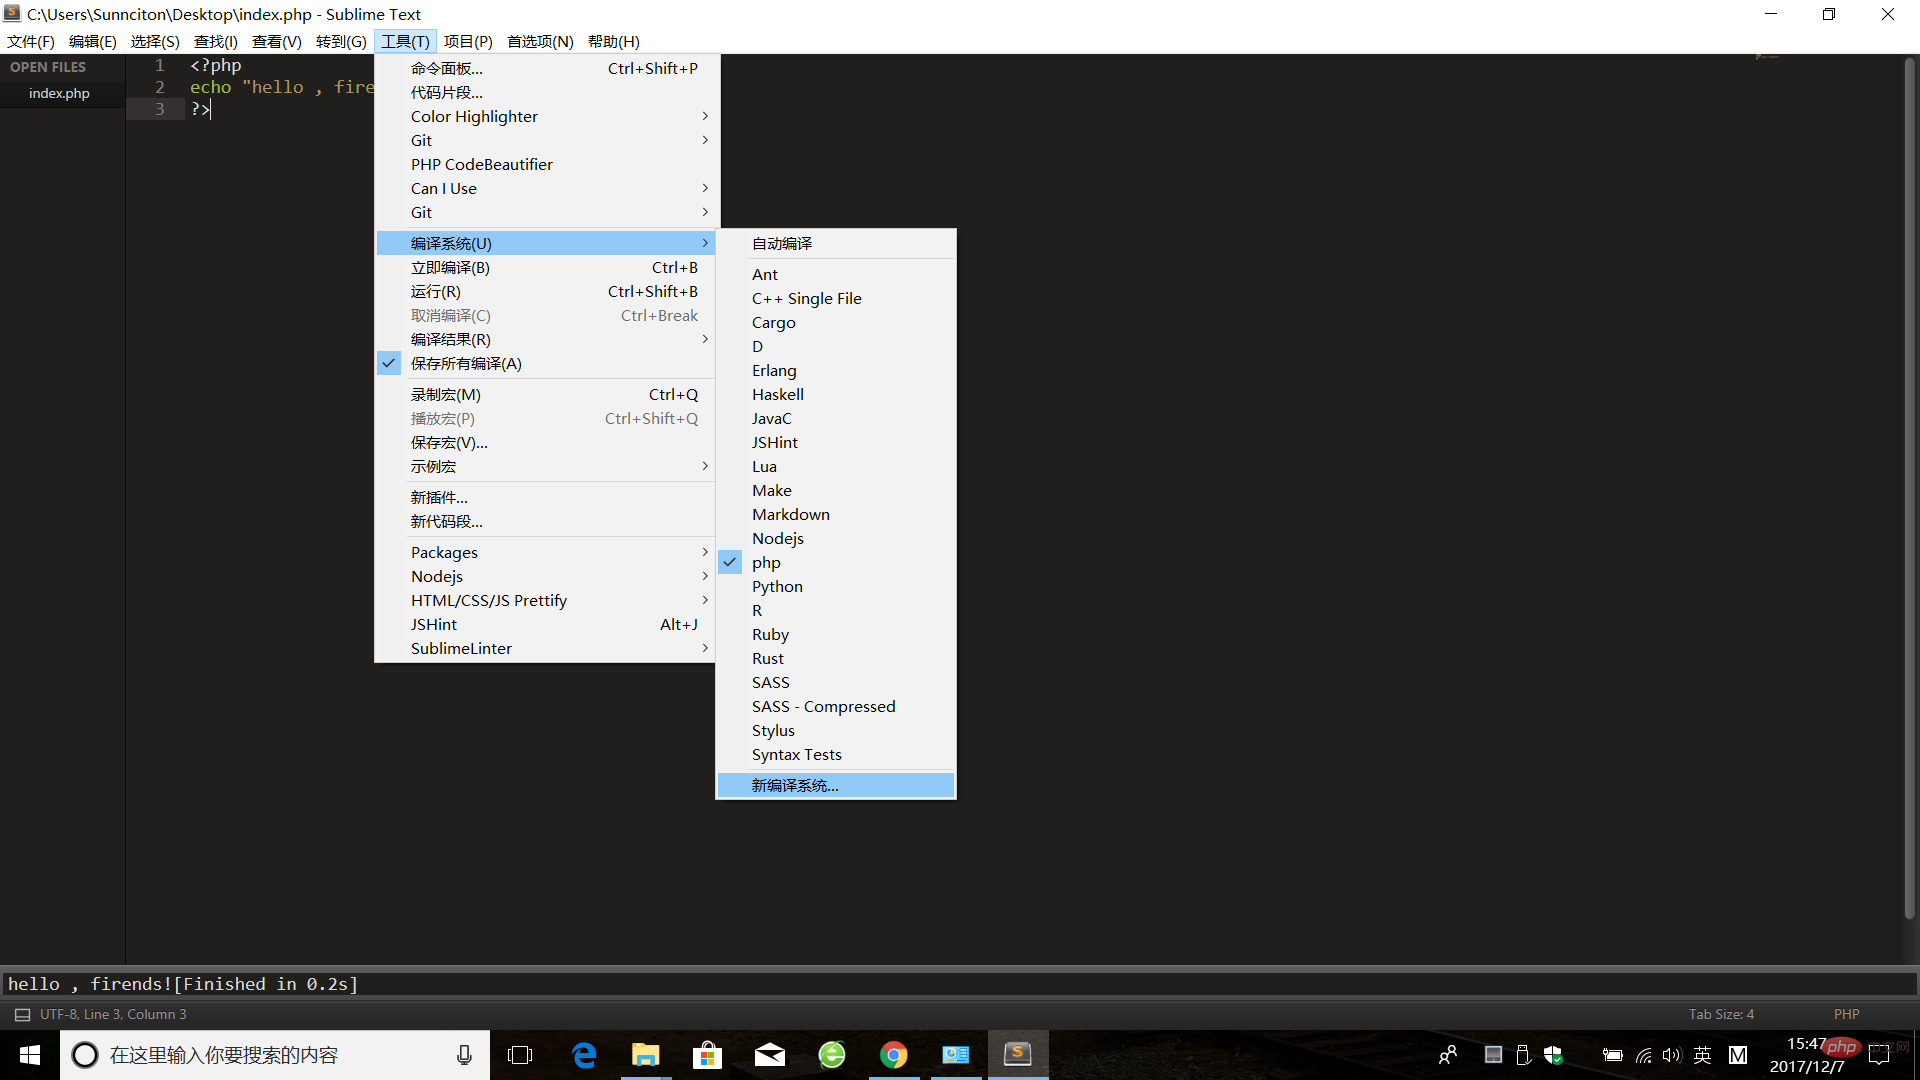
默认是有php的,不管你信不信,反正我是信了,来,说说配置php的编译系统吧!!!
先把里面的内容删除!
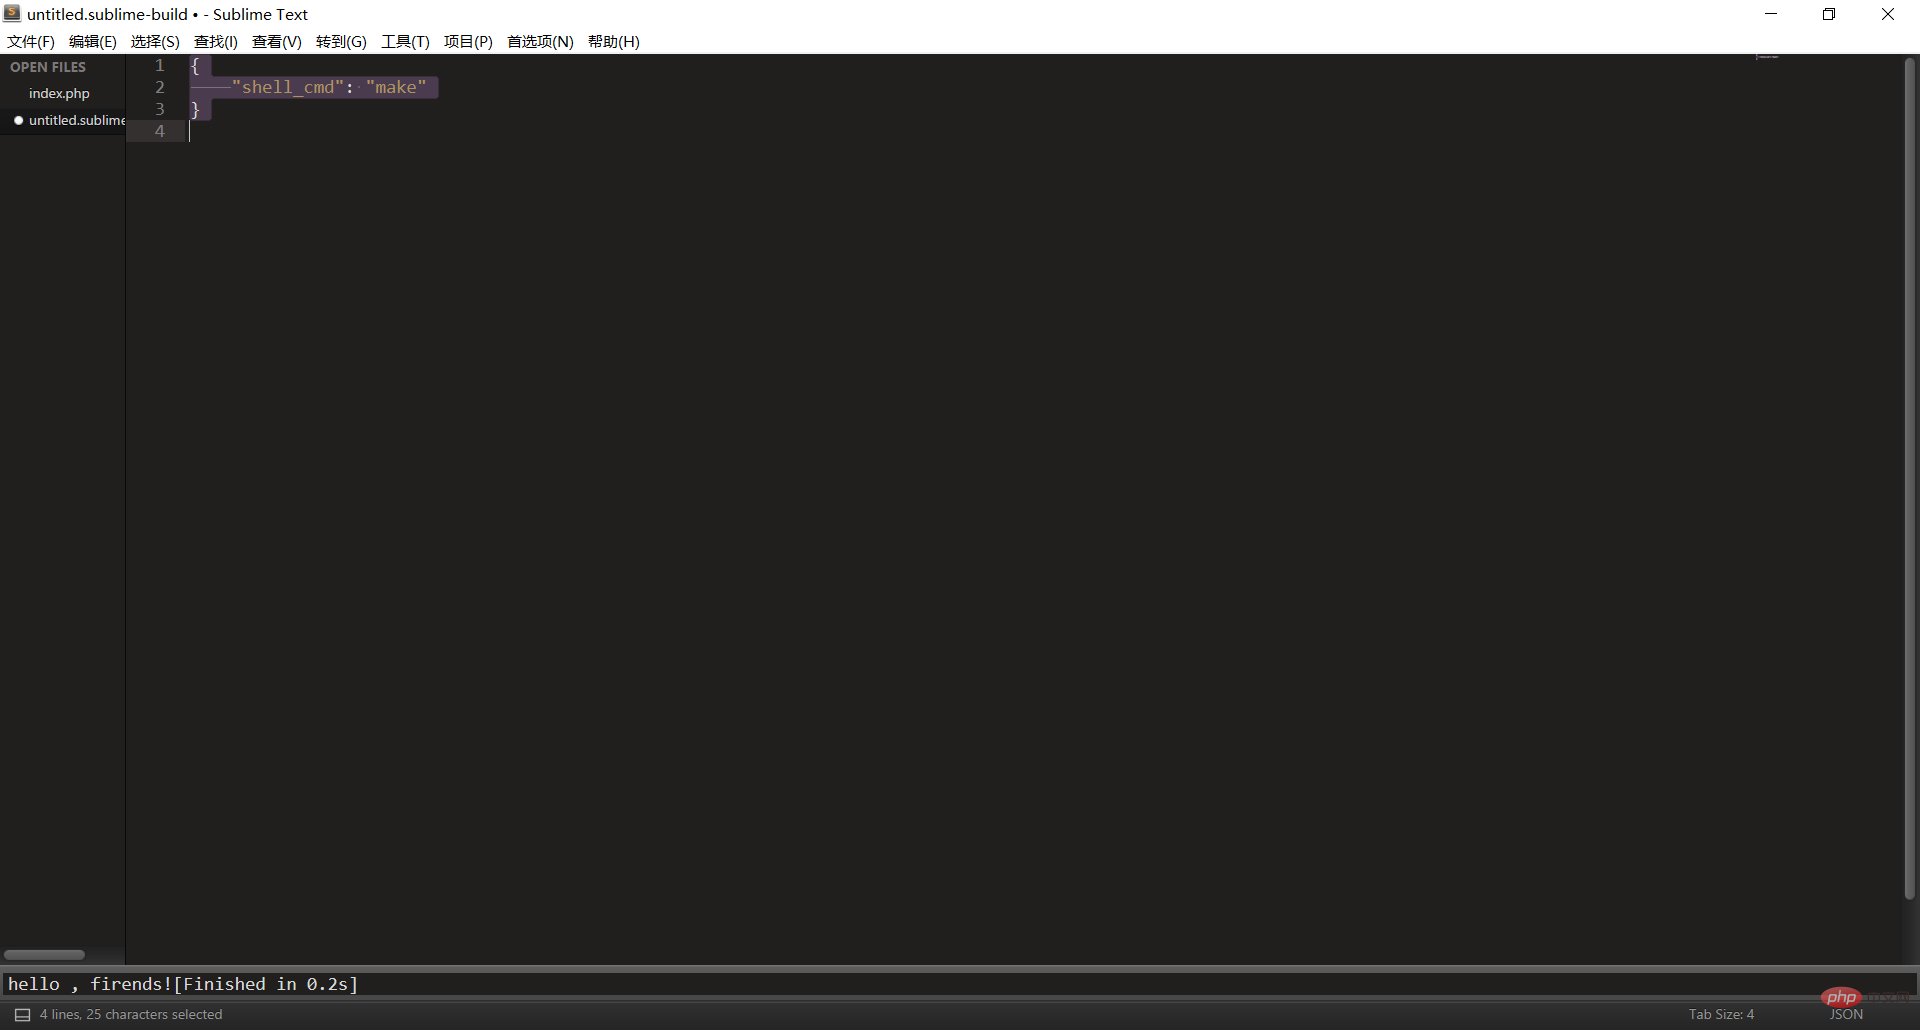
再加入以下代码:
{
    "cmd":["php","$file"],"file_regex":
    "php$","selector":"source.php"
}
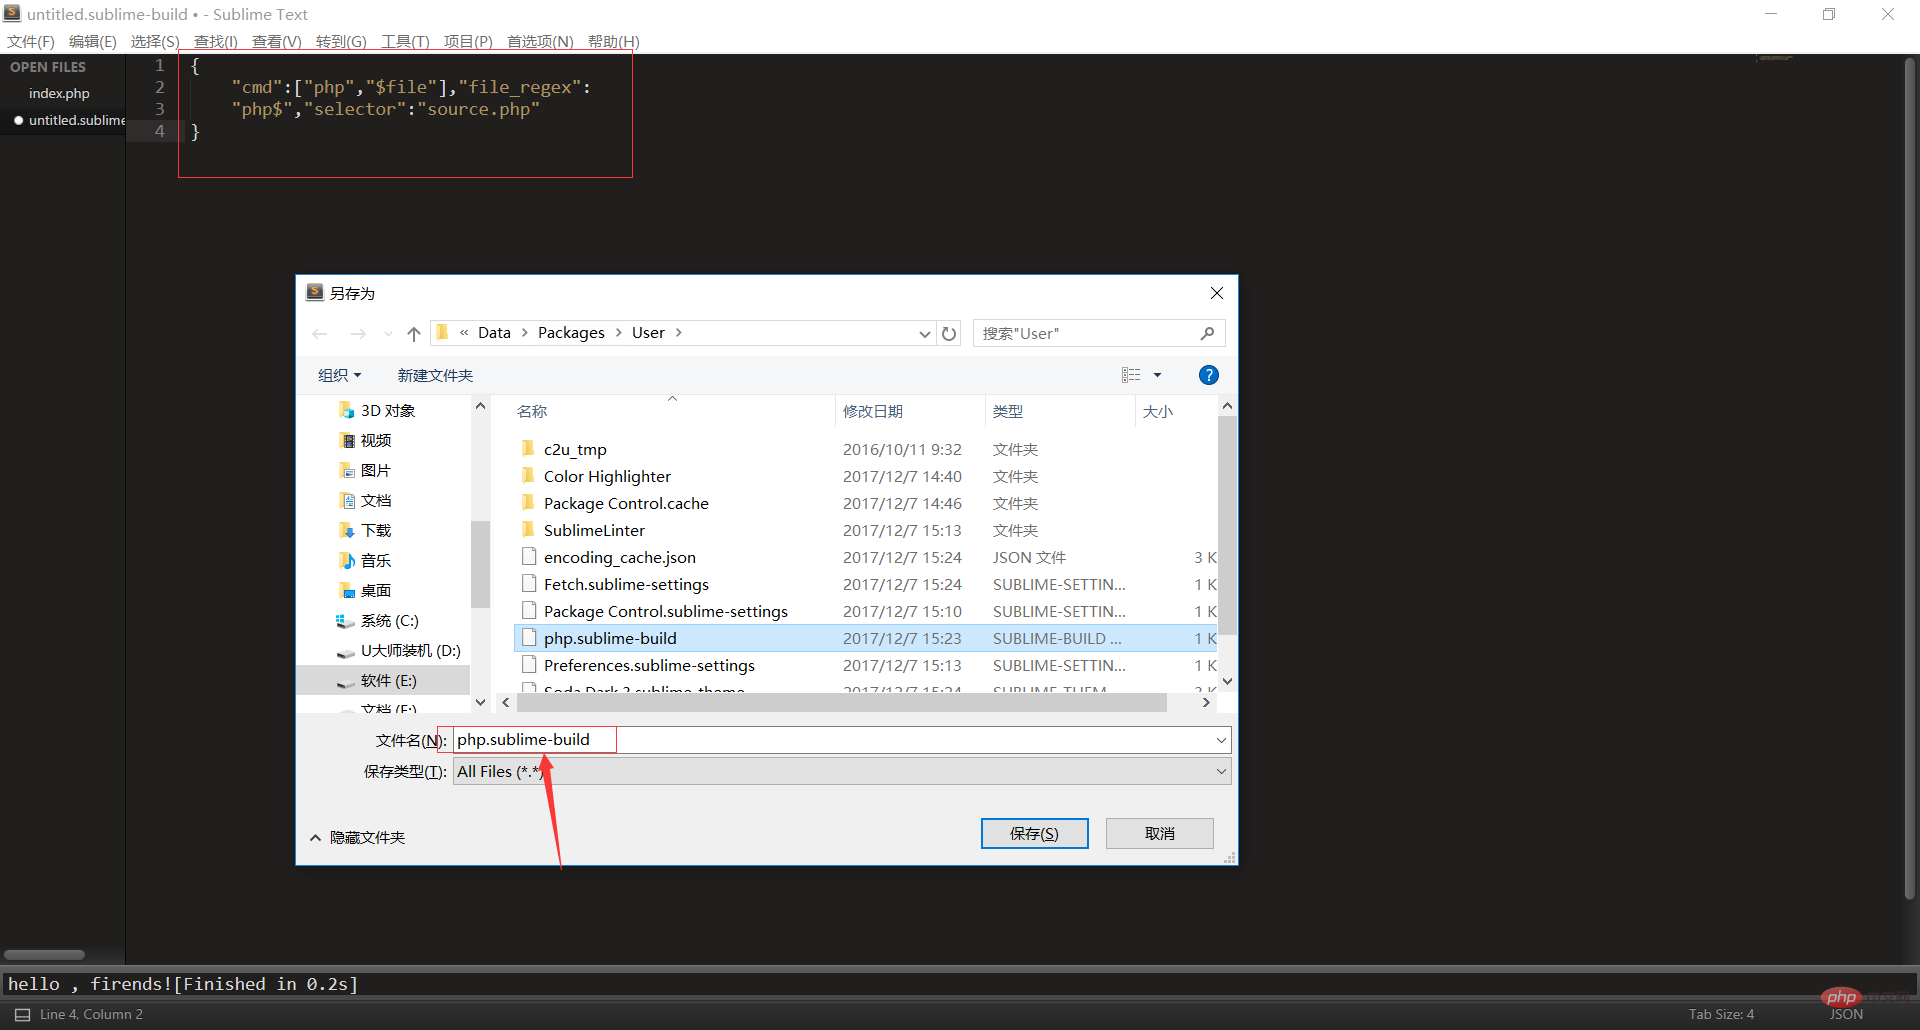
重命名为:php.sublime-build,最后保存即可,这是我们就可以在编译系统看见php了,这时我们再勾选上即可。
推荐学习:《PHP视频教程》
위 내용은 숭고한 환경에서 PHP를 빌드하는 방법의 상세 내용입니다. 자세한 내용은 PHP 중국어 웹사이트의 기타 관련 기사를 참조하세요!
성명:
본 글의 내용은 네티즌들의 자발적인 기여로 작성되었으며, 저작권은 원저작자에게 있습니다. 본 사이트는 이에 상응하는 법적 책임을 지지 않습니다. 표절이나 침해가 의심되는 콘텐츠를 발견한 경우 admin@php.cn으로 문의하세요.