집 >데이터 베이스 >MySQL 튜토리얼 >Deepin v20에 mysql을 설치하는 방법
Deepin v20에 mysql을 설치하는 방법
- 醉折花枝作酒筹앞으로
- 2021-07-08 09:22:542696검색
deepin v20은 mysql을 직접 설치할 수 없으므로 앞으로 더 빠르게 사용할 수 있도록 먼저 소스를 Alibaba 소스로 변경하세요. 오늘은 deepin v20에 mysql을 설치하는 방법을 소개해 드리겠습니다.

deepin v20 소스 변경 및 mysql 설치
deepin v20에서는 mysql을 직접 설치할 수 없기 때문에 먼저 소스를 변경한 후 알리바바 소스로 변경하면 앞으로 속도가 빨라질 것입니다
sudo 파일을 수정하세요 vim /etc/apt/sources .list
#删除内容,并添加以下内容:
## Generated by deepin-installer
deb [by-hash=force] https://mirrors.aliyun.com/deepin/ panda main contrib non-free
sudo apt-get update
실행 sudo apt-get 업그레이드 명령을 실행하세요.
Mysql 설치
1. mysql
sudo apt-get install mysql-server mysql-client
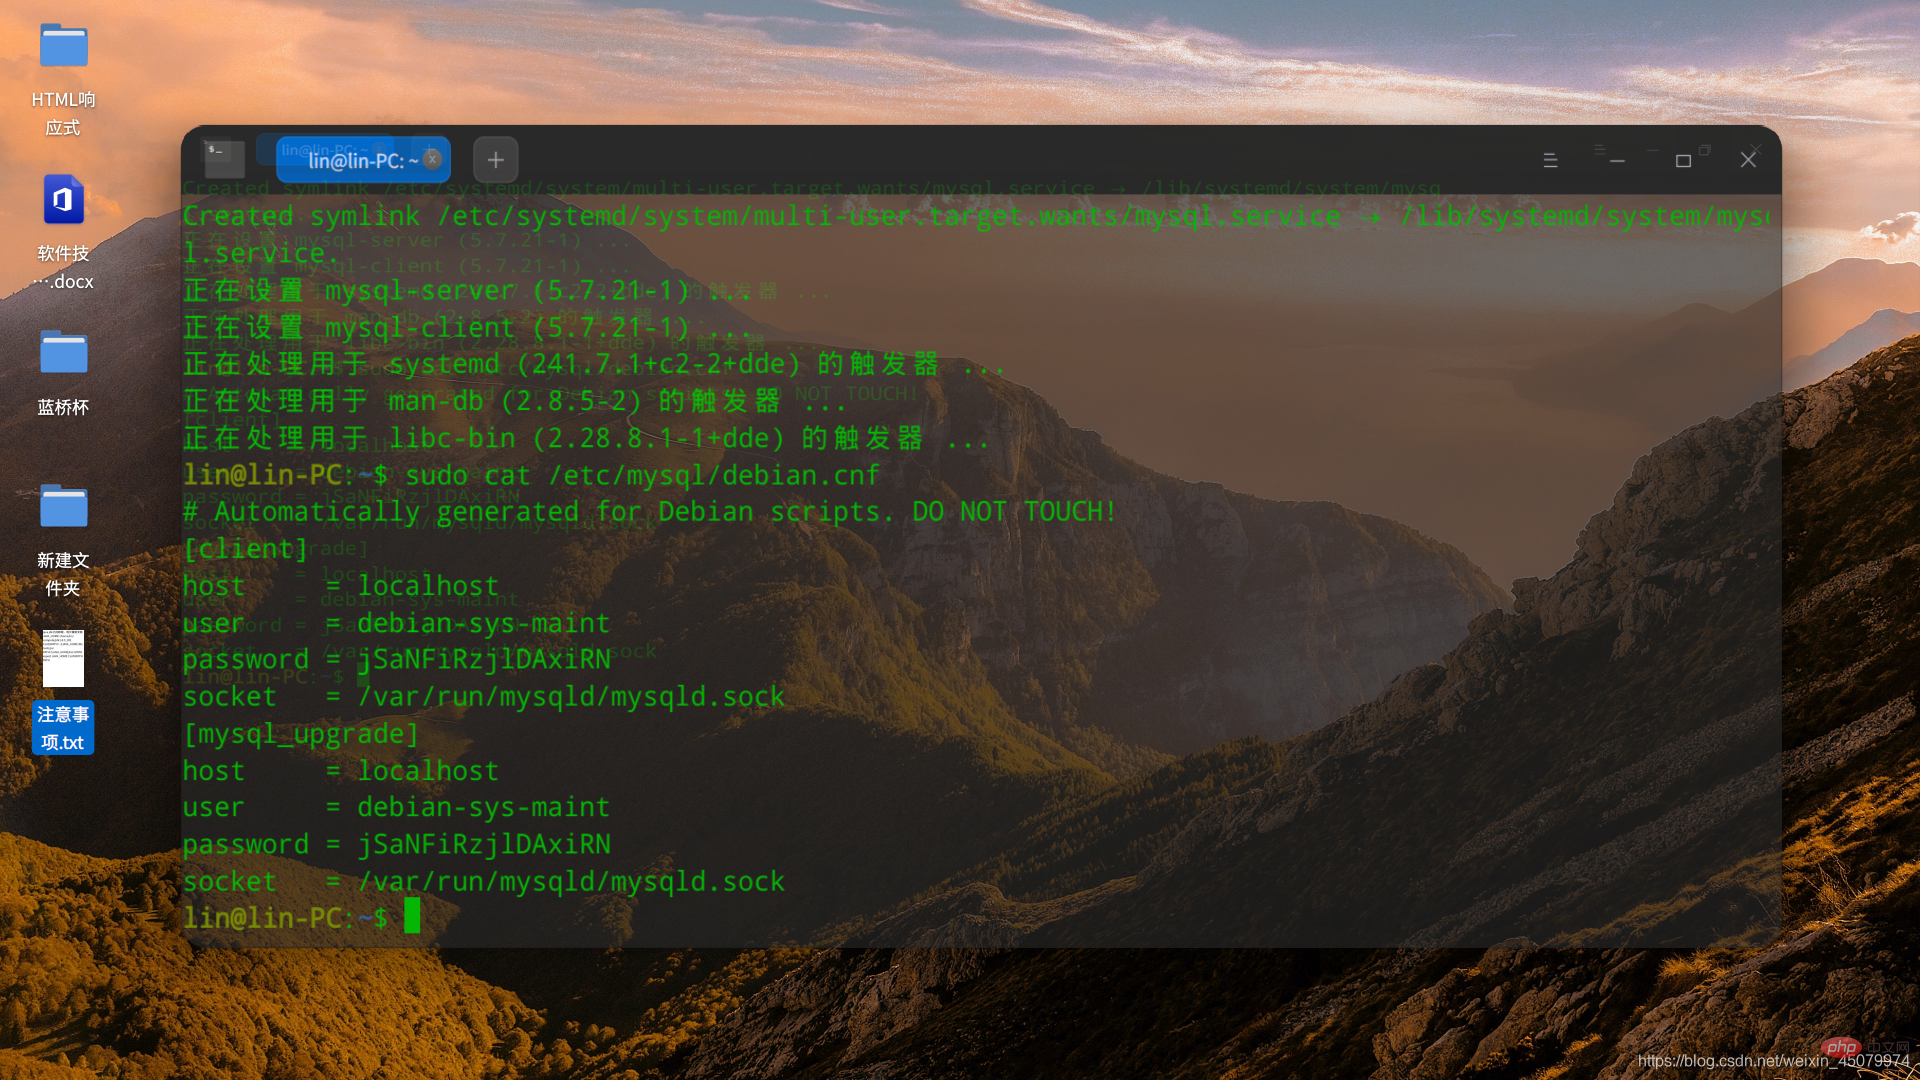
2를 설치하려면 로그인 계정을 확인하고 비밀번호를 확인하세요

3. 그런 다음 mysql
lin@lin-PC:~$ mysql -udebian-sys-maint -pjSaNFiRzjlDAxiRN
mysql: [Warning] Using a password on the command line interface can be insecure.
Welcome to the MySQL monitor.  Commands end with ; or \g.
Your MySQL connection id is 2
Server version: 5.7.21-1 (Debian)

Copyright (c) 2000, 2018, Oracle and/or its affiliates. All rights reserved.

Oracle is a registered trademark of Oracle Corporation and/or its
affiliates. Other names may be trademarks of their respective
owners.

Type 'help;' or '\h' for help. Type '\c' to clear the current input statement.

mysql>
에 로그인하세요. mysql 데이터베이스를 순차적으로 삭제하고, 루트 비밀번호를 변경하고 캐시를 새로 고칩니다. 그 후에는 루트 계정을 사용하여 종료하고 로그인할 수 있습니다:
use mysql;
update user set plugin="mysql_native_password",authentication_string=password('新密码') where user="root";
FLUSH PRIVILEGES;
5. 수정된 계정 비밀번호를 사용하여 로그인
mysql -uroot -p000000
관련 권장 사항: "mysql tutorial"
위 내용은 Deepin v20에 mysql을 설치하는 방법의 상세 내용입니다. 자세한 내용은 PHP 중국어 웹사이트의 기타 관련 기사를 참조하세요!
성명:
이 기사는 csdn.net에서 복제됩니다. 침해가 있는 경우 admin@php.cn으로 문의하시기 바랍니다. 삭제

