유니앱에서 신분증 업로드 방법
- 藏色散人원래의
- 2021-01-26 12:00:506347검색
Uniapp은 ID 카드 업로드 방법을 구현합니다. 먼저 ID 카드 업로드 페이지를 연 다음 Dcloud 플러그인 마켓 템플릿을 설치하고 이를 프로젝트 요구 사항에 따라 수정하고 사용합니다. "pathToBase64" 플러그인을 도입하고 이미지를 추가하세요. 경로를 base64로 변환하세요.

이 튜토리얼의 운영 환경: windows7 시스템, uni-app2.5.1 버전, Dell G3 컴퓨터.
추천(무료): uni-app tutorial
uniapp-app 문서 사진(신분증/은행카드)을 업로드한 후 base64로 변환하고 구현을 위해 백엔드 기능으로 보냅니다
기능 설명 :
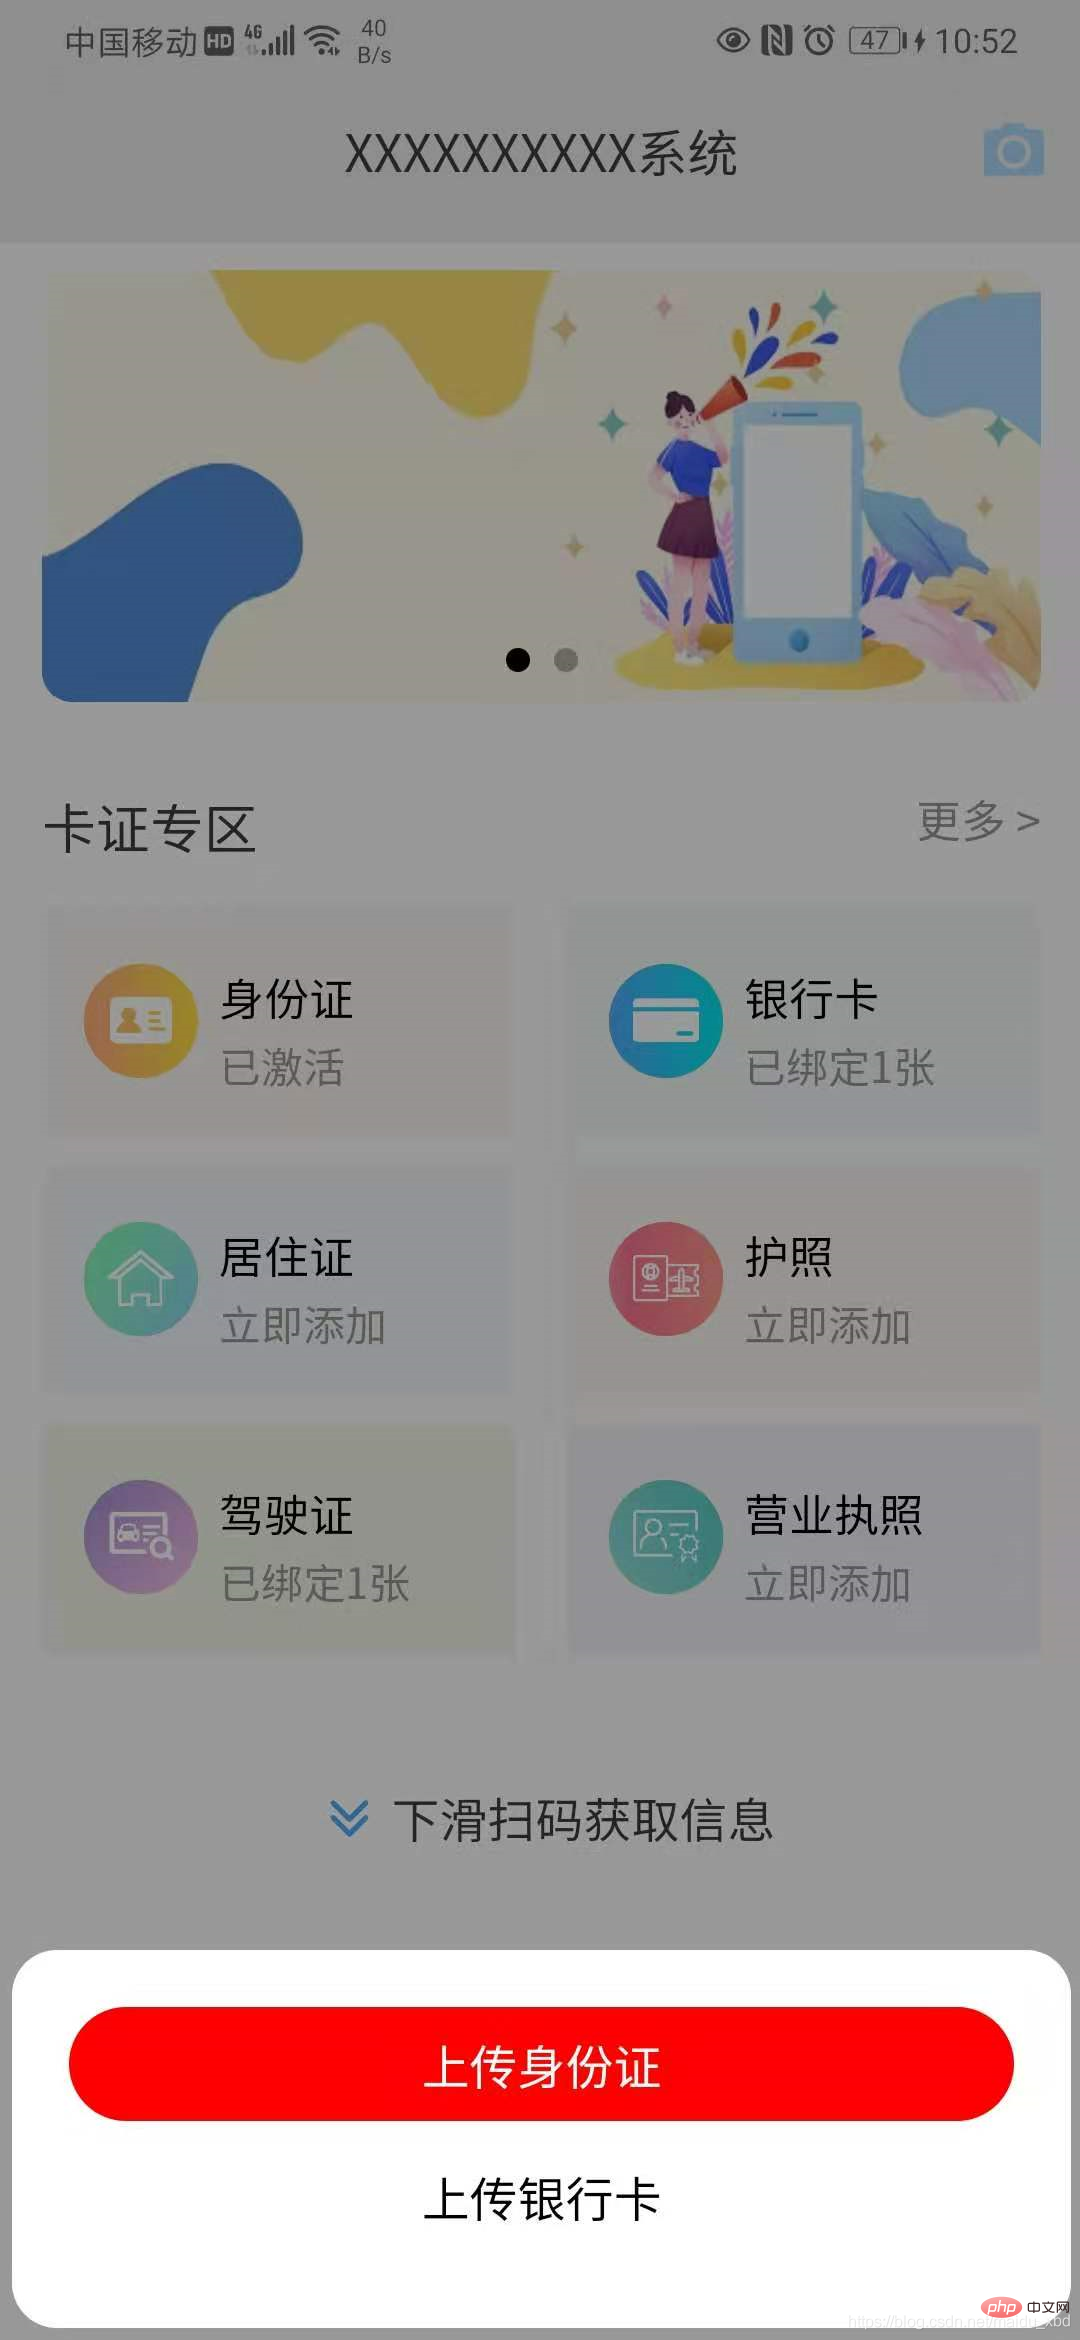
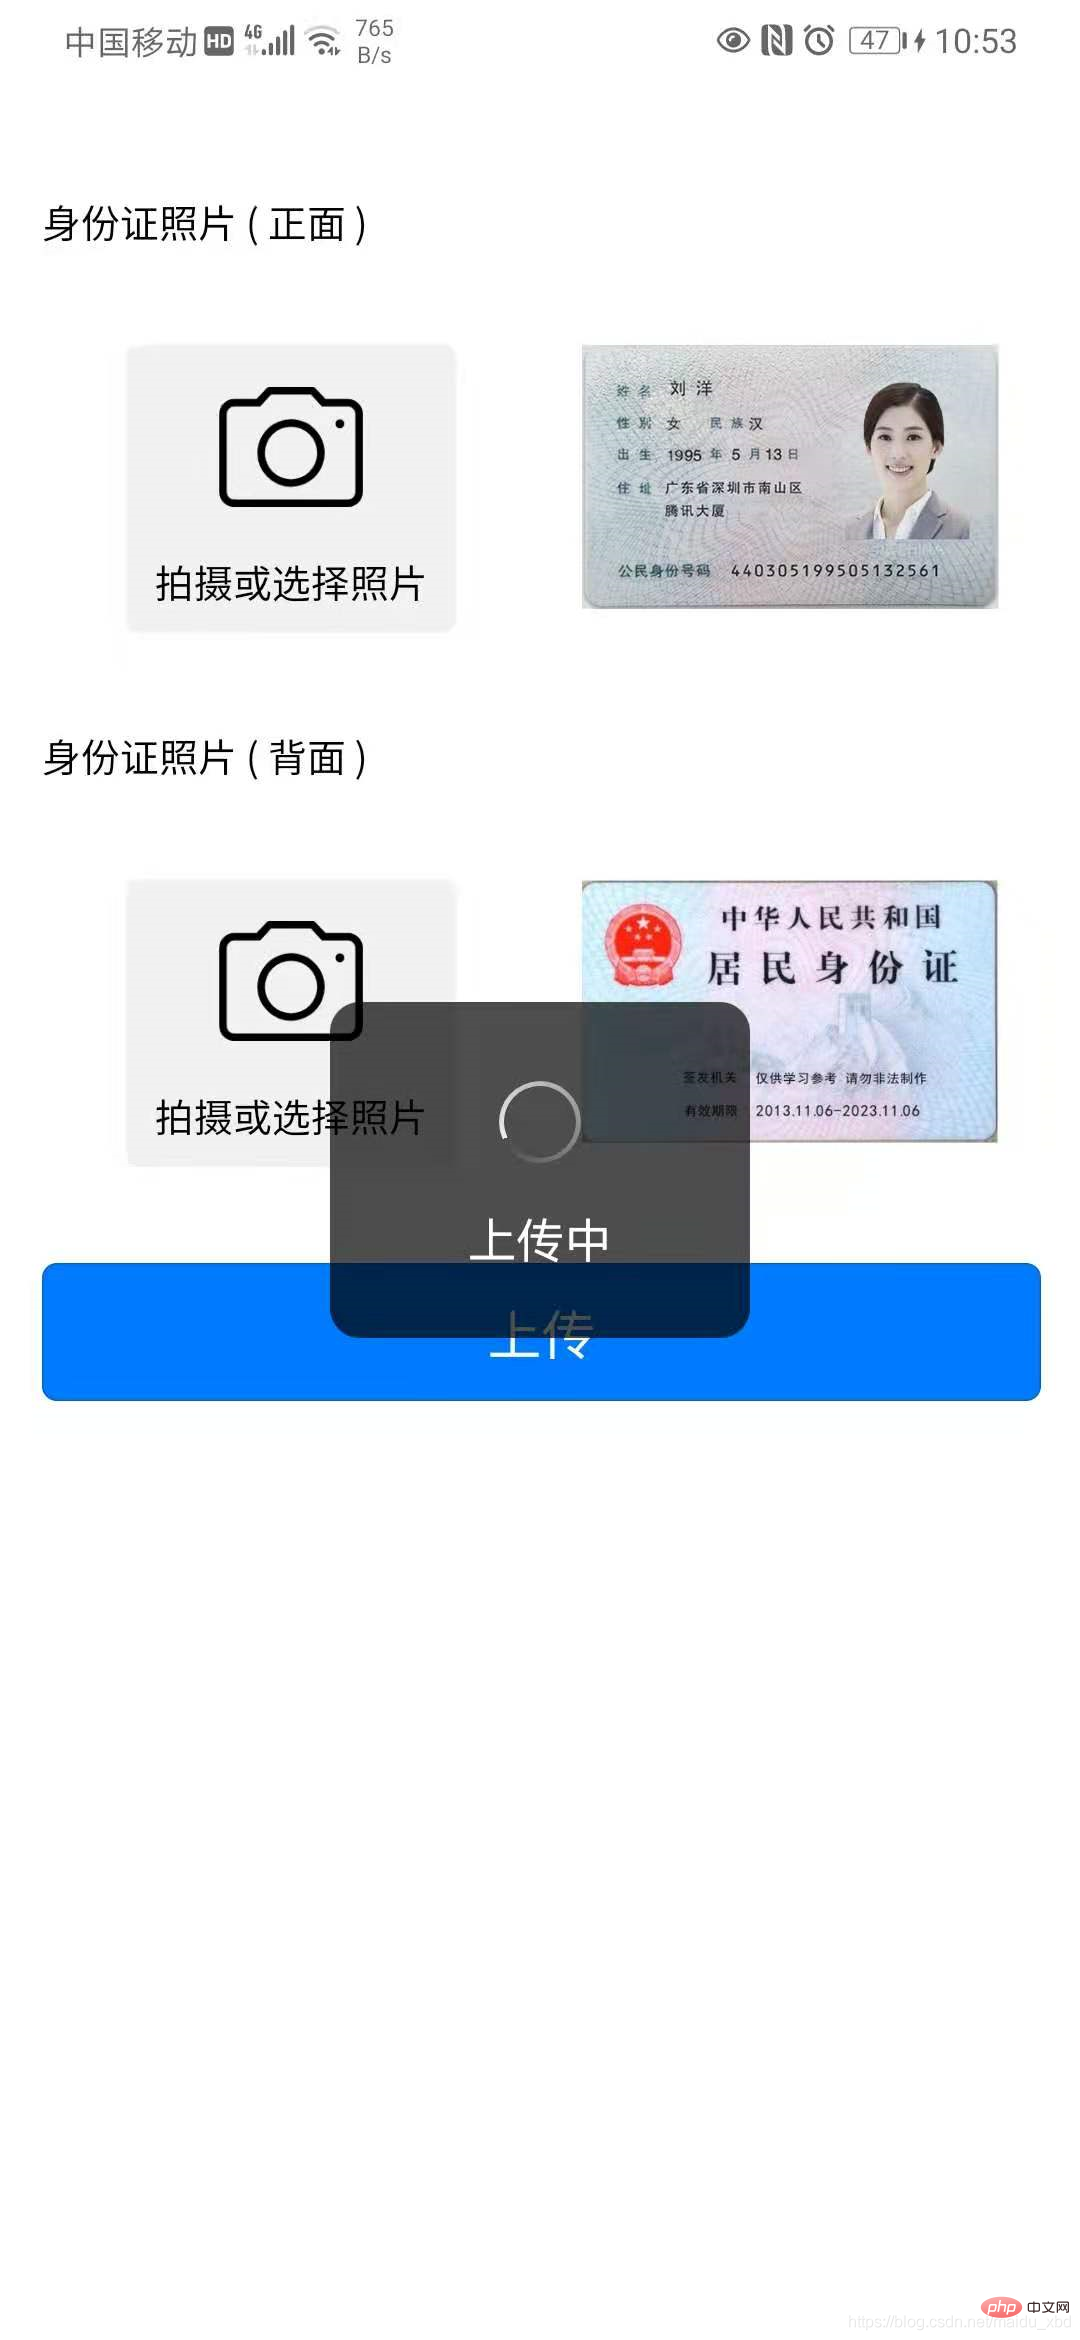
아래 그림과 같이 홈페이지 오른쪽 상단을 클릭하시면 코너 아이콘에 팝업창이 뜹니다. 클릭하시면 신분증 업로드 또는 은행카드 선택이 가능합니다. 업로드 버튼을 누르면 OCR 인식을 위해 이미지를 배경으로 업로드할 수 있습니다.


해결책:
핵심 사항 1. 인증서 업로드를 위한 인터페이스 구현 2. 처리를 위해 이미지 URL을 base64로 변환합니다.
구체적인 구현 단계는 다음과 같습니다
(1) 버튼을 클릭하고 홈페이지 오른쪽 상단의 아이콘을 클릭하여 팝업 상자를 표시한 후 "신분증 업로드" 또는 "은행"을 클릭하여 선택합니다. 카드"를 사용하여 인증서 및 사진 업로드 페이지로 이동합니다.
template:
<view @click="upload" class="iconfont icon-paizhao2"></view>
<!-- 选择证件弹窗 -->
<uni-popup ref="cardpopup" type="bottom">
<view class="dialog" >
<view @click="selectItem(index)" :class="active==index ? 'active':''" v-for="(item,index) in cardTypeList" :key="index">
{{item.name}}
</view>
</view>
</uni-popup> data:
data(){
    return{
        cardTypeList:[{name:"上传身份证"},{name:"上传银行卡"}],
    }
}
methods:
methods:{

    upload(){
				this.$refs.cardpopup.open()
			},
        //选择上传身份证/银行卡
	selectItem(index){
		this.active=index;
		if(index==0){
			// 选择上传身份证
			uni.navigateTo({
				url:"/pages/idcard/idcard"
			})
		}else{
			// 选择上传银行卡
			uni.navigateTo({
				url:"/pages/bankcard/bankcard"
			})
		}
	},

}
style
<style lang="scss">
.dialog{
	background-color: #fff;
	padding:40rpx;
	border-radius: 15px;
	margin:10rpx;
	view{
		height: 80rpx;
		line-height: 80rpx;
		text-align: center;
		margin-bottom: 6px;
	}
	.active{
		background-color: red;
		border-radius: 80rpx;
		color:#fff;

	}
}
</style>
(2)업로드 인증서 인터페이스 구현: Dcloud 플러그인 설치 마켓 템플릿 GraceUI [무료 인터페이스] - ID 카드 선택 업로드 템플릿
ps: GraceUI, 로그인 및 등록, 개인 센터, 아바타 자르기, 쇼핑몰 제품군 등과 같은 풍부한 구성 요소, 레이아웃 및 인터페이스 라이브러리를 제공합니다. 직접 사용할 수 있어 개발 효율성이 크게 향상됩니다. https://www.graceui.com/
(3) 플러그인을 설치한 후 자신의 프로젝트에 통합하고 프로젝트의 요구사항에 맞게 수정하여 사용하세요.
(4) 이미지 URL을 base64 처리로 변환: 이미지 및 base64 변환에 사용할 수 있는 Dcloud 플러그인 마켓 플러그인 이미지 도구 이미지 변환 도구를 설치하세요.
플러그인 소개 [pathToBase64] 이미지 경로에서 base64
import { pathToBase64 } from '../../js_sdk/gsq-image-tools/image-tools/index.js'
플러그인을 사용하여 이미지 업로드 후 이미지 URL을 base64로 변환하고 저장하세요
methods: {
		// 选择身份证正面照片
		selectImg1 : function() {
			uni.chooseImage({
				count:1,
				success:(res)=>{
					this.idCard1 = res.tempFilePaths[0];
					//将图片url转换为base64
					pathToBase64(res.tempFilePaths[0]).then(base64=>{
						// console.log(base64)
						this.idCard1base64=base64
					}).catch(error=>{
						console.log(error)
					})
				}
			})
		}
}
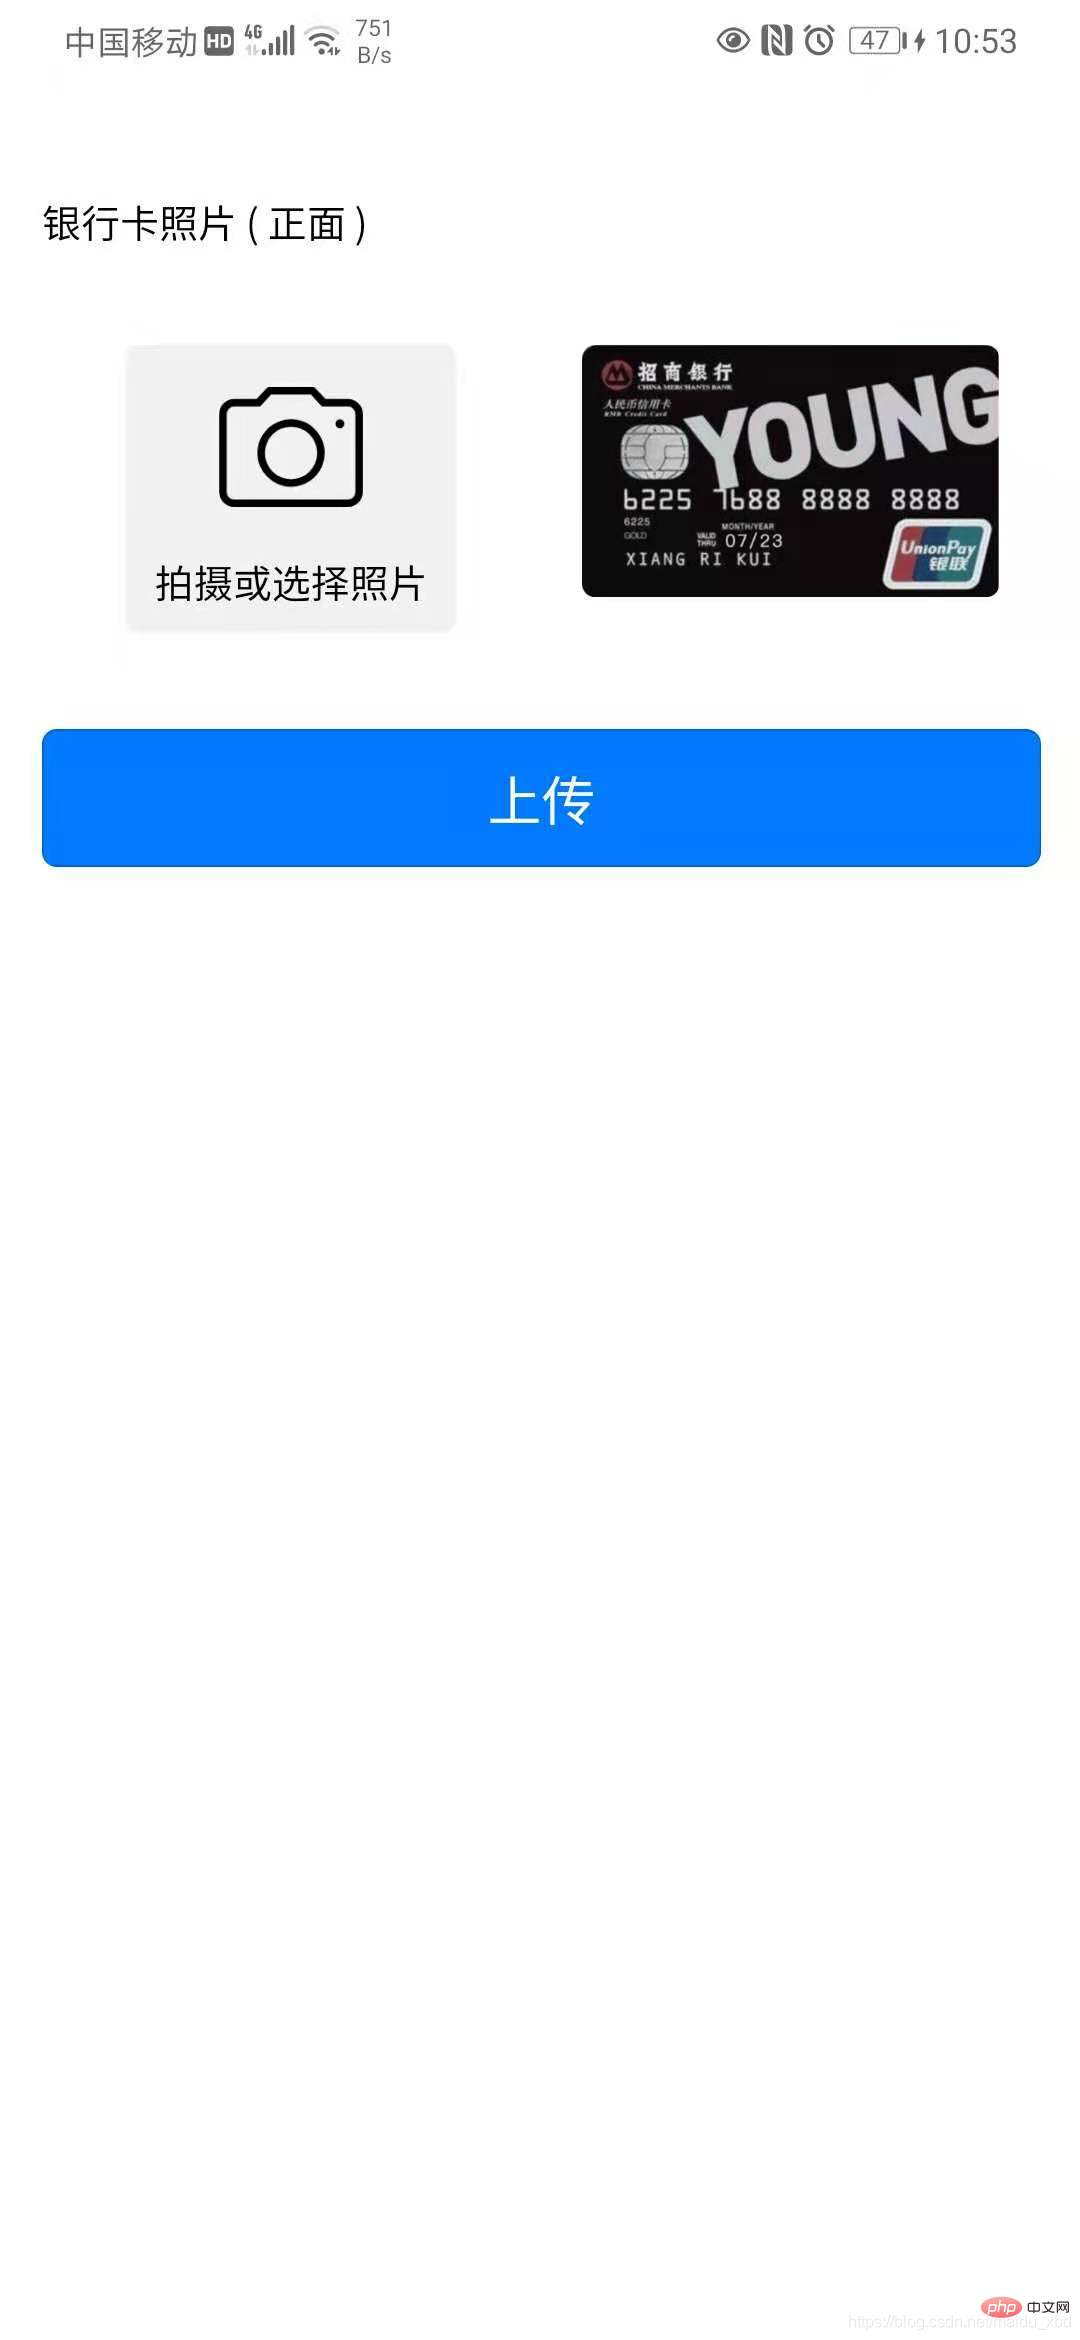
은행 카드 업로드 페이지의 전체 코드는 아래에 첨부되어 있습니다. 신분증 업로드도 비슷합니다(신분증 업로드 기능을 재사용 가능한 구성요소로 캡슐화하는 것이 좋습니다)
<template>
	<!-- 上传银行卡页面 -->
	<view>
		<view class="grace-idcard-main">
			<view class="grace-idcard-desc">
			</view>
			<view class="grace-idcard-text">
				银行卡照片 ( 正面 )
			</view>
			<view class="grace-idcard-items">
				<view class="grace-idcard-uper-btn" @tap="selectImg">
					<view class="img"><image src="../../static/images/camera.png" mode="widthFix" /></view>
					<view class="text">拍摄或选择照片</view>
				</view>
				<view class="grace-idcard-preview">
					<image :src="bankCard"  @tap="previewImg" mode="widthFix"></image>
				</view>
			</view>
			<view style="margin-top:38upx;">
				<button type="primary" @tap="uploadCards">上传</button>
			</view>
		</view>
	</view>
</template>
<script>
import { pathToBase64  } from '../../js_sdk/gsq-image-tools/image-tools/index.js'
var _self;
export default {
	data() {
		return {
			bankCard : '../../static/images/bankcard.jpg',
			bankCardBase64:null
		};
	},
	onLoad:function(){
		_self = this;
	},
	methods: {
		// 选择银行卡正面照片
		selectImg : function() {
			uni.chooseImage({
				count:1,
				success:(res)=>{
					this.bankCard = res.tempFilePaths[0];
					//将图片url转换为base64
					pathToBase64(res.tempFilePaths[0]).then(base64=>{
						this.bankCardBase64=base64
					}).catch(error=>{
						console.log(error)
					})
				}
			})
		},
		// 预览银行卡正面照片
		previewImg: function(){
			uni.previewImage({
				urls:[_self.bankCard]
			});
		},
		// 上传银行卡
		uploadCards : function(){
			if(this.bankCard == '../../static/images/bankcard.jpg'){
				uni.showToast({title:"请选择银行卡照片", icon:"none"});
				return;
			}
			uni.showLoading({title:"上传中"});
			var param={
				type:2,
				images:[
					{
						side:"front",
						image:this.bankCardBase64,
						orderNum:1
					}

				]
			}
			// 向后台发送请求
			this.$myRequest({
				url:"card/ocr",
				method:"POST",
				data:param
			}).then(res=>{
				console.log("上传银行卡返回结果:",res)
				if(res.data.respCode=="00000"){
					uni.hideLoading();
					uni.showToast({title:res.data.respDesc,icon:"none"})
					uni.navigateTo({
						url:"/pages/cardInfo/cardInfo?data="+JSON.stringify(res.data.result)
					})
				}else{
					uni.hideLoading();
					uni.showToast({title:res.data.respDesc,icon:"none"})
				}
			})
		}
	},
}
</script>
<style>
view{font-size:28upx;}
.grace-idcard-main{margin:20upx 30upx;}
.grace-idcard-desc{line-height:2em; background:#FFFFFF; padding:40upx; border-radius:10upx;}
.grace-idcard-text{line-height:2em; margin-top:30upx;}
.grace-idcard-items{background:#FFFFFF; padding:30upx 0; display:flex; margin:30upx 0; border-radius:10upx; align-items: flex-start;}
.grace-idcard-uper-btn{width:276upx; margin:0 60upx; background:#F1F1F1; padding-bottom:10upx; border-radius:10upx; text-align:center;}
.grace-idcard-uper-btn .img{width:100upx; height:100upx; margin:0 auto; margin-top:30upx;}
.grace-idcard-uper-btn .img image{width:100upx; height:100upx;}
.grace-idcard-uper-btn .text{width:100%; margin-top:10upx; text-align:center; line-height:2em;}
.grace-idcard-preview{width:50%; margin:0 30upx; }
.grace-idcard-preview image{width:100%; border-radius: 10rpx;}
</style>
위 내용은 유니앱에서 신분증 업로드 방법의 상세 내용입니다. 자세한 내용은 PHP 중국어 웹사이트의 기타 관련 기사를 참조하세요!

