
Redis의 세션 공유 구현에 대한 자세한 설명

- coldplay.xixi앞으로
- 2020-07-30 11:34:574054검색

Redis는 세션 공유를 구현합니다
요 며칠간 세션 공유 같은 작은 모듈을 작업했는데, 정보도 많이 확인해보니 너무 지저분한 것 같아요. 그리고 내가 원하는 것을 찾을 수 없습니다. 거의 모든 구현 방법이 내 아이디어와 다릅니다. 여기서는 향후 문의를 용이하게 하기 위해 Redis를 사용하여 세션 공유를 구현하는 방법을 요약하겠습니다. 이와 관련하여 필요합니다.
관련 주제 추천: php 세션 (그림, 텍스트, 비디오, 사례 포함)
먼저 내 개발 환경에 대해 이야기하겠습니다: nginx, redis, tomcat, moven을 사용하여 프로젝트 빌드 jetty 서버가 실행되므로 여기서는 maven을 사용하여 war 패키지를 빌드하고 tomcat에서 실행되도록 배포하는 방법도 다룹니다.
redis는 값의 저장과 검색이 모두 이 키에 달려 있습니다. 독창적이고 전문적이기 때문에 여기서는 붙여넣지 않겠습니다. 공식 소개에 대해 더 알고 싶으시면 직접 검색해 보세요.
pom.xml의 구성:
<!-- redis -->
<dependency>
<groupId>redis.clients</groupId>
<artifactId>jedis</artifactId>
<version>2.8.1</version>
</dependency>
<dependency>
<groupId>org.springframework.data</groupId>
<artifactId>spring-data-redis</artifactId>
<version>1.7.2.RELEASE</version>
</dependency>
LoginController의 구성:
첫 번째 단계, RedisTemplate 소개
<!-- redis 客户端配置 -->
   <bean id="jedisPoolConfig" class="redis.clients.jedis.JedisPoolConfig">
       <property name="maxTotal" value="${jedisPoolConfig.maxTotal}"/>
       <property name="maxIdle" value="${jedisPoolConfig.maxIdle}"/>
       <property name="maxWaitMillis" value="${jedisPoolConfig.maxWaitMillis}"/>
       <property name="testWhileIdle" value="true"/>
       <property name="testOnBorrow" value="false"/>
       <property name="testOnReturn" value="false"/>
   </bean>
   <bean id="readJedisConnectionFactory" class="org.springframework.data.redis.connection.jedis.JedisConnectionFactory">
       <property name="hostName" value="${jedis.read.host}" />
       <property name="port" value="${jedis.read.port}" />
       <property name="password" value="${jedis.read.password}" />
       <property name="timeout" value="${jedis.read.timeout}" />
       <property name="database" value="${jedis.read.database}" />
       <property name="poolConfig" ref="jedisPoolConfig" />
   </bean>
   <bean id="writeJedisConnectionFactory" class="org.springframework.data.redis.connection.jedis.JedisConnectionFactory">
       <property name="hostName" value="${jedis.write.host}" />
       <property name="port" value="${jedis.write.port}" />
       <property name="password" value="${jedis.write.password}" />
       <property name="timeout" value="${jedis.write.timeout}" />
       <property name="database" value="${jedis.write.database}" />
       <property name="poolConfig" ref="jedisPoolConfig" />
   </bean>
   <bean id="readRedisTemplate" class="org.springframework.data.redis.core.StringRedisTemplate">
       <property name="connectionFactory" ref="readJedisConnectionFactory" />
   </bean>
   <bean id="writeRedisTemplate" class="org.springframework.data.redis.core.StringRedisTemplate">
       <property name="connectionFactory" ref="writeJedisConnectionFactory" />
   </bean>
RedisTemplate
@Autowired
@Qualifier("writeRedisTemplate")
private StringRedisTemplate writeTemplate;
这里只需要引入writeRedisTemplate即可,在登陆的时候,只负责写,只有在再次刷新的时候,经过过滤器,才需要读
第二步,正常登陆流程,登陆成功之后,request还要保存session信息
第三步,设置cookie值,把作为保存userSession信息在redis中的key值存入cookie,刷新浏览器的时候,过滤器可以从cookie中取到key值,进而去redis取对应的value值,即userSession
String domain = request.getServerName();
       String cookieId=MD5Util.MD5Encode("uasLoginer", "UTF-8");
       //生成token,用作session在redis存储中的key值
       StringredisSessionKey= UUID.randomUUID().toString();
       Cookie uasLoginer = new Cookie(cookieId, redisSessionKey);
       if (domain.startsWith("uas.")) {
    uasLoginer.setDomain(domain.substring(4,domain.length()));
}else {
    uasLoginer.setDomain(domain);
}
       uasLoginer.setMaxAge(60000);
       uasLoginer.setPath("/");
       response.addCookie(uasLoginer);
这里cookie跨域setDomain和setPath设置
第四步,把userSession 여기서는 writeRedisTemplate만 소개해주시면 됩니다. 로그인 시 쓰기만 담당하고, 다시 새로고침만 하면 됩니다. 이때 필터를 통과한 후
2단계
🎜🎜를 읽어야 하며, 로그인 성공 후 요청에서도 세션 정보를 저장해야 합니다🎜🎜🎜🎜🎜🎜🎜🎜🎜Step 🎜🎜🎜, 쿠키 값을 설정하고, 브라우저를 새로 고칠 때 필터는 쿠키에서key 값을 가져온 후 쿠키에 저장된 userSession 정보로 redis에 저장합니다. Redis에서 해당 값, 즉 userSession🎜🎜userSessionString = JSON.toJSONString(userSession);🎜🎜쿠키 교차 도메인 setDomain 및 setPath가 여기에서 설정됩니다🎜🎜🎜🎜🎜네 번째 단계🎜🎜🎜, userSession 정보를 redis🎜🎜🎜🎜 RedisTemplate에서 redis에 쓰는 값은 String 형식이어야 하며, userSession 객체는 Json 문자열🎜🎜으로 변환해야 합니다.
userSessionString = JSON.toJSONString(userSession);
在转Json的时候,遇到问题,导入import com.alibaba.fastjson.JSON;一直失败,发现pom中没有依赖Json的关系,如果有遇到相同的问题,可以检查下在pom.xml中是否有关于json的依赖关系,没的话,在pom.xml中导入json的依赖关系,如下:
<dependency>
    <groupId>net.sf.json-lib</groupId>
    <artifactId>json-lib</artifactId>
    <version>2.3</version>
    <classifier>jdk15</classifier>
</dependency>
写入redis的代码如下:
writeTemplate.opsForHash().put(UasContants.REDIS_USER_SESSION_KEY+"_"+redisSessionKey,redisSessionKey, userSessionString);
writeTemplate.expire(UasContants.REDIS_USER_SESSION_KEY+"_"+redisSessionKey, 1800L, TimeUnit.SECONDS);//设置redis中值的有效期
完成这一操作,用户的session信息已经存入到redis中,可在redis中查看是否存入。
第五步:进入页面后,刷新页面,请求会经过过滤器,在Filter.Java中读取redis的值并进行一些处理
在过滤器这里,就无法通过注解的方式引入redisTemplate,可以通过如下的方式引入:
BeanFactory beans = WebApplicationContextUtils.getWebApplicationContext(request.getSession().getServletContext());
     StringRedisTemplate readTemplate = (StringRedisTemplate) beans.getBean("readRedisTemplate");
StringRedisTemplate writeTemplate = (StringRedisTemplate) beans.getBean("writeRedisTemplate");过滤器从cookie中取出redis的key值,用readTemplate读出value值
String cookid=MD5Util.MD5Encode("uasLoginer", "UTF-8");
Cookie[] cookies = req.getCookies();
String redisSessionKey = "";
if(cookies != null){
for (Cookie cookie : cookies) {
if(cookie.getName().equals(cookid)){
redisSessionKey = cookie.getValue() ;
}
}
}
UserSession userSession = null;
String userSessionString = (String) readTemplate.boundHashOps(UasContants.REDIS_USER_SESSION_KEY+"_"+redisSessionKey).get(redisSessionKey);
if(null != userSessionString ){
@SuppressWarnings("static-access")
JSONObject obj = new JSONObject().fromObject(userSessionString);//将json字符串转换为json对象
userSession = (UserSession)JSONObject.toBean(obj,UserSession.class);
writeTemplate.expire(UasContants.REDIS_USER_SESSION_KEY+"_"+redisSessionKey, 1800L, TimeUnit.SECONDS);
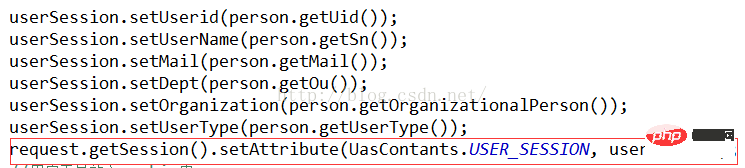
request.getSession().setAttribute(UasContants.USER_SESSION, userSession);
}
if (userSession != null) {
chain.doFilter(req, res);
return;
}else {
res.sendRedirect(UasContants.LOGIN_URL);
return;
}在这里,另外附上关于web.xml关于LoginFilter的配置,有需要的可以参考下:
3e7cd2763b3efa047912466801e5e412
eae7f28921fa176b20e23abb843be090
    5948543310f2c9ae6eabc90d07fdac18org.springframework.web.context.ContextLoaderListenera5cb73ed00d90e1dafbf6168c4a676c2
f26bc28f07f75d604e1d9c5e7de10123
1d24e586ca31f4bd05eca427459d98c7
    f573a9ccb524cb86b6b9919be70810beloginFilterb4d5e6fde2c78ede331e20c60d37da11
    e5b954f5d6752e2b67f5dbec1cf5c85ecom.sfbest.uas.filter.LoginFilter3c5315e9114c0f42d7a83b06562caa88
    380fae52cc7d04565d26dd4bbf4b5460
        c13d9669d2c8f87a36a39c8f95f41552excludePaths02b9ad8b27bc78bd91c18db845cdde4a
        f226acac8cb0e4a9d59fcba58b57a899/login,/user/login,/user/auth22c8aeb51b7638a9da01bd5a66154ac1
    8f161518881ffd7712eaaadc573a3556
94e66dfbd9fa8f117002935bdd35d0b3
dd0dfb26ea66647667f179a739921d33
    f573a9ccb524cb86b6b9919be70810beloginFilterb4d5e6fde2c78ede331e20c60d37da11
    66e1775cbd9d5002635ae3285442ba88/*3ec4a5583206d351b61ed79c1a0f9c66
e354d6d34e50ca0d695db95544b3672a
按照上面的配置,就可以用redis实现session共享的功能,但我在开发的时候,遇到一个蛋疼的问题,在测试环境上,
把项目部署在两台tomcat服务器上的时候,cookie里一直存不进去redis的key值,单台可以存进去,经过长期的检测,
终于发现是nginx配置出的问题,引以为戒,深深的阴影。下面我贴出我正常运行时nginx的配置代码
upstream uassessiontest.d.com {
        server 10.103.16.226:8088;
        server 10.103.16.226:8089;
        }
       server {
                 log_format  sf_uastest  '$remote_addr - $remote_user [$time_local] "$request" '
                                        '$status $body_bytes_sent "$http_referer" '
                                        '"$http_user_agent" $http_cookie';
                listen 80;
                server_name uassessiontest.d.com;
                access_log /var/log/nginx/uassessiontest.log sf_uastest;

                location / {
                        rewrite ^/$ /uas/ break;
                        proxy_pass http://uassessiontest.d.com;
                }
        }
红色的为当初少配的部分,这些部分是的作用是往浏览器端写入cookie值。
相关学习推荐:redis视频教程
위 내용은 Redis의 세션 공유 구현에 대한 자세한 설명의 상세 내용입니다. 자세한 내용은 PHP 중국어 웹사이트의 기타 관련 기사를 참조하세요!