Java는 교대로 인쇄하기 위해 두 개의 스레드를 구현합니다.
- 王林앞으로
- 2019-12-24 17:47:543492검색

ReentrantLock을 사용하여 두 스레드의 교대 인쇄 구현
앞에는 문자, 뒤는 숫자 구현
package com.study.pattern;

import java.util.concurrent.CountDownLatch;
import java.util.concurrent.locks.Condition;
import java.util.concurrent.locks.Lock;
import java.util.concurrent.locks.ReentrantLock;

public class Demo2 {
    private static Lock lock = new ReentrantLock();
    private static Condition c1 = lock.newCondition();
    private static Condition c2 = lock.newCondition();
    private static CountDownLatch count = new CountDownLatch(1);
    public static void main(String[] args) {
       String c = "ABCDEFGHI";
       char[] ca = c.toCharArray();
       String n = "123456789";
       char[] na = n.toCharArray();
       Thread t1 = new Thread(() -> {
           try {
               lock.lock();
               count.countDown();
               for(char caa : ca) {
                   c1.signal();
                   System.out.print(caa);
                   c2.await();
               }
               c1.signal();
           } catch (InterruptedException e) {
               e.printStackTrace();
           } finally {
               lock.unlock();
           }
       });
       Thread t2 = new Thread(() -> {
           try {
               count.await();
               lock.lock();
               for(char naa : na) {
                   c2.signal();
                   System.out.print(naa);
                   c1.await();
               }
               c2.signal();
           } catch (InterruptedException e) {
               e.printStackTrace();
           } finally {
               lock.unlock();
           }
       });
       t1.start();
       t2.start();
    }
}
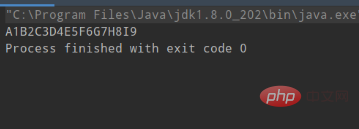
#🎜 🎜#최종 출력 결과:

java 교육 동영상#🎜🎜 #LinkedTransferQueue를 사용하여 두 개의 스레드를 교대로 인쇄
을 구현하여 앞의 문자와 뒤의 숫자를 얻습니다.
package com.study.pattern;


import java.util.concurrent.LinkedTransferQueue;

public class Demo3 {
    private static LinkedTransferQueue<Character> linkedC = new LinkedTransferQueue<Character>();
    private static LinkedTransferQueue<Character> linkedN = new LinkedTransferQueue<Character>();
    public static void main(String[] args) {
        String c = "ABCDEFGHI";
        char[] ca = c.toCharArray();
        String n = "123456789";
        char[] na = n.toCharArray();
        Thread t1 = new Thread(() -> {
            for(char caa : ca) {
                try {
                    linkedC.put(caa);
                    char a = linkedN.take();
                    System.out.print(a);
                } catch (InterruptedException e) {
                    e.printStackTrace();
                }
            }
        });
        Thread t2 = new Thread(() -> {
            for(char naa : na) {
                try {
                    char b = linkedC.take();
                    System.out.print(b);
                    linkedN.put(naa);
                } catch (InterruptedException e) {
                    e.printStackTrace();
                }
            }
        });
        t1.start();
        t2.start();

    }
}
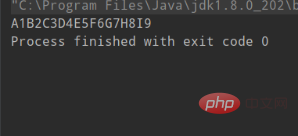
출력 결과:
#🎜🎜 #
#🎜 🎜#동기화를 사용하여 두 스레드의 교대 인쇄 실현 앞면의 문자와 뒷면의 숫자 실현
package com.study.pattern;


import java.util.concurrent.CountDownLatch;

public class Demo4 {
    private static CountDownLatch count = new CountDownLatch(1);
    public static void main(String[] args) {
        String c = "ABCDEFGHI";
        char[] ca = c.toCharArray();
        String n = "123456789";
        char[] na = n.toCharArray();
        Object lock = new Object();
        Thread t1 = new Thread(() -> {
            synchronized (lock) {
                count.countDown();
                for(char caa : ca) {
                    System.out.print(caa);
                    lock.notify();
                    try {
                        lock.wait();
                    } catch (InterruptedException e) {
                        e.printStackTrace();
                    }
                }
                lock.notify();
            }
        });
        Thread t2 = new Thread(() -> {
            try {
                count.await();
            } catch (InterruptedException e) {
                e.printStackTrace();
            }
            synchronized (lock) {
                for(char naa : na) {
                    System.out.print(naa);
                    lock.notify();
                    try {
                        lock.wait();
                    } catch (InterruptedException e) {
                        e.printStackTrace();
                    }
                }
                lock.notify();
            }
        });
        t1.start();
        t2.start();
    }
}
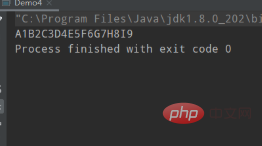
출력 결과: # 🎜🎜#
# 🎜🎜#
LockSupport를 사용하여 두 스레드의 교대 인쇄 실현앞의 문자와 뒤의 숫자 실현package com.study.pattern;
import java.util.concurrent.locks.LockSupport;
public class Demo5 {
private static Thread t1;
private static Thread t2;
public static void main(String[] args) {
String c = "ABCDEFGHI";
char[] ca = c.toCharArray();
String n = "123456789";
char[] na = n.toCharArray();
t1 = new Thread(() -> {
for(char caa : ca) {
System.out.print(caa);
LockSupport.unpark(t2);
LockSupport.park();
}
});
t2 = new Thread(() -> {
for(char naa : na) {
LockSupport.park();
System.out.print(naa);
LockSupport.unpark(t1);
}
});
t1.start();
t2.start();
}
}  출력 결과:
추천 관련 기사 및 튜토리얼:
java 0 기반 항목
위 내용은 Java는 교대로 인쇄하기 위해 두 개의 스레드를 구현합니다.의 상세 내용입니다. 자세한 내용은 PHP 중국어 웹사이트의 기타 관련 기사를 참조하세요!
성명:
이 기사는 csdn.net에서 복제됩니다. 침해가 있는 경우 admin@php.cn으로 문의하시기 바랍니다. 삭제
이전 기사:Java에서 비교기와 비교기의 차이점다음 기사:Java에서 비교기와 비교기의 차이점

