CSS를 사용하여 대화상자 풍선을 만드는 방법
- 不言원래의
- 2018-12-07 11:31:594753검색
WeChat이나 QQ를 통해 다른 사람들과 채팅할 때 대화 풍선이 표시됩니다. 그렇다면 이 대화 풍선은 어떻게 구현되나요? 이번 글에서는 우리가 흔히 볼 수 있는 대화풍선을 CSS로 만드는 방법을 소개하겠습니다. 구체적인 내용을 살펴보겠습니다.
먼저 우리가 만들어야 하는 대화 상자의 효과를 살펴보겠습니다
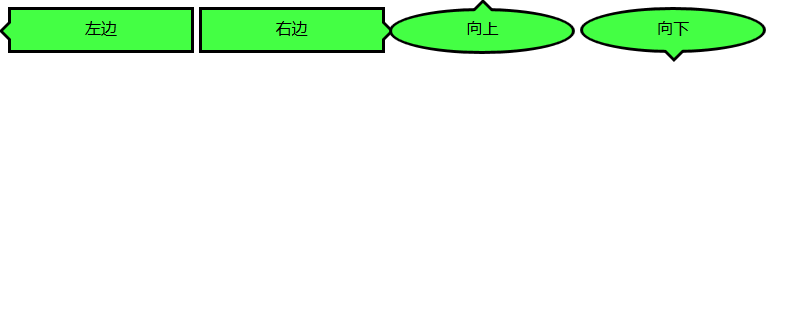
다음으로 이러한 대화 풍선을 구현하는 방법을 살펴보겠습니다.
살펴보겠습니다대화를 구현하는 방법 왼쪽을 가리키는 화살표가 있는 Bubble
먼저 프레임을 만들어야 합니다
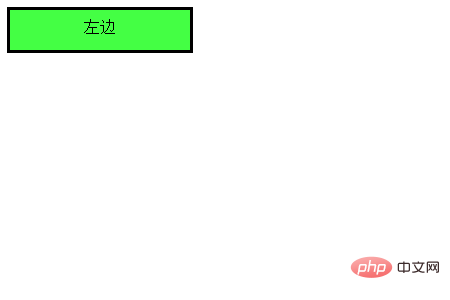
코드는 다음과 같습니다
HTML code
<div class="balloon-left">
左边
</div>
CSS code
 .balloon-left {
  position: relative;
  display: inline-block;
  padding: 0 15px;
  width: auto;
  min-width: 150px;
  height: 40px;
  line-height: 34px;
  text-align: center;
  background: #44FF44;
  border: 3px solid #000000;
  z-index: 0;
}
다음에는 :before를 사용하여 다음을 만듭니다. 화살표 부분과 :after를 사용하여 화살표의 가장자리를 만듭니다
CSS 코드
.balloon-left:before {
  border-style: solid;
  border-width: 10px 10px 10px 0;
  border-color: transparent #44FF44 transparent transparent;
  content: "";
  position: absolute;
  top: 50%; left: -8px;
  margin-top: -9px;
  display: block;
  width: 0px;
  height: 0px;
  z-index: 0;
}
.balloon-left:after {
  border-style: solid;
  border-width: 11px 11px 11px 0;
  border-color: transparent #000000 transparent transparent;
  content: "";
  position: absolute;
  top: 50%; left: -12px;
  margin-top: -10px;
  display: block;
  width: 0px;
  height: 0px;
  z-index: -1;
}
실행 효과는 아래와 같습니다
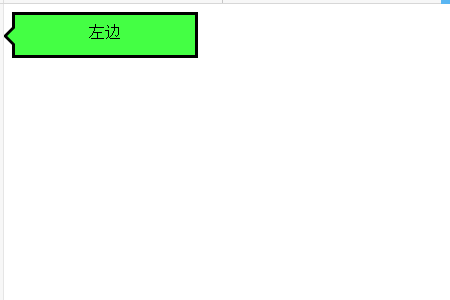
이제 첫 번째 대화 풍선이 완성됩니다
이제 위의 방법을 따라 오른쪽을 가리키는 화살표로 대화 풍선을 만듭니다
코드는 다음과 같습니다
HTML code
<div class="balloon-right">
  右边
</div>
CSS code
.balloon-right {
  position: relative;
  display: inline-block;
  padding: 0 15px;
  width: auto;
  min-width: 150px;
  height: 40px;
  line-height: 34px;
  text-align: center;
  background: #44FF44;
  border: 3px solid #000000;
  z-index: 0;
}
.balloon-right:before {
  border-style: solid;
  border-width: 10px 0 10px 10px;
  border-color: transparent transparent transparent #44FF44;
  content: "";
  position: absolute;
  top: 50%; right: -8px;
  margin-top: -9px;
  display: block;
  width: 0px;
  height: 0px;
  z-index: 0;
}
.balloon-right:after {
  border-style: solid;
  border-width: 11px 0 11px 11px;
  border-color: transparent transparent transparent #000000;
  content: "";
  position: absolute;
  top: 50%; right: -12px;
  margin-top: -10px;
  display: block;
  width: 0px;
  height: 0px;
  z-index: -1;
}
위 코드를 실행하면 다음과 같은 효과가 있습니다. 오른쪽을 향한 풍선입니다.
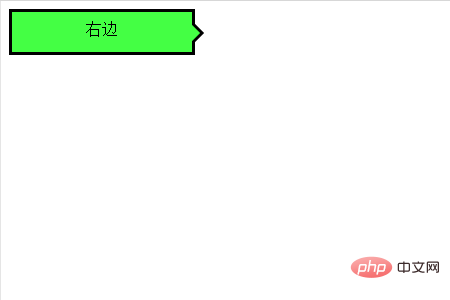
마지막으로 왼쪽과 오른쪽을 가리키는 화살표가 있는 대화 풍선에 대해 이야기해 보겠습니다
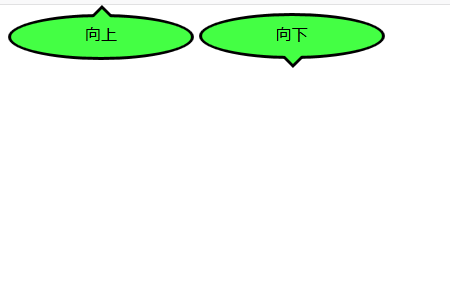
풍선을 부드럽게 만들기 위해 border-radius 속성을 사용해야 합니다
코드는 다음과 같습니다
HTML 코드
<div class="balloon-top">向上</div>
  <div class="balloon-bottom">向下</div>
CSS 코드
.balloon-top {
  position: relative;
  display: inline-block;
  padding: 0 15px;
  width: auto;
  min-width: 150px;
  height: 40px;
  line-height: 32px;
  text-align: center;
  background: #44FF44;
  border: 3px solid #000000;
  z-index: 0;
  border-radius: 60%;
}
.balloon-top:before {
  border-style: solid;
  border-width: 0 10px 10px 10px;
  border-color: transparent transparent #44FF44 transparent;
  content: "";
  position: absolute;
  top: -8px; left: 50%;
  margin-left: -9px;
  display: block;
  width: 0px;
  height: 0px;
  z-index: 0;
}
.balloon-top:after {
  border-style: solid;
  border-width: 0 11px 11px 11px;
  border-color: transparent transparent #000000 transparent;
  content: "";
  position: absolute;
  top: -12px; left: 50%;
  margin-left: -10px;
  display: block;
  width: 0px;
  height: 0px;
  z-index: -1;
}
.balloon-bottom {
  position: relative;
  display: inline-block;
  padding: 0 15px;
  width: auto;
  min-width: 150px;
  height: 40px;
  line-height: 34px;
  text-align: center;
  background-color: #44FF44;
  border: 3px solid #000000;
  z-index: 0;
  border-radius: 60%;
}
.balloon-bottom:before {
  content: "";
  position: absolute;
  bottom: -8px; left: 50%;
  margin-left: -9px;
  width: 0px;
  height: 0px;
  border-style: solid;
  border-width: 10px 10px 0 10px;
  border-color: #44FF44 transparent transparent transparent;
  z-index: 0;
}
.balloon-bottom:after {
  border-style: solid;
  border-width: 11px 11px 0 11px;
  border-color: #000000 transparent transparent transparent;
  content: "";
  position: absolute;
  bottom: -12px; left: 50%;
  margin-left: -10px;
  width: 0px;
  height: 0px;
  z-index: -1;
}
효과는 다음과 같습니다
요약
CSS 부분이 좀 복잡하지만 위 예시를 바탕으로 색상과 모양을 커스터마이징하면 다양한 형태의 대화풍선을 만들 수 있습니다.
이 기사는 여기서 끝납니다. 더 흥미로운 내용을 보려면 PHP 중국어 웹사이트의 CSS Video Tutorial 열로 이동하여 더 자세히 알아보세요! ! !
위 내용은 CSS를 사용하여 대화상자 풍선을 만드는 방법의 상세 내용입니다. 자세한 내용은 PHP 중국어 웹사이트의 기타 관련 기사를 참조하세요!

