Angular를 시작하면서 ToDoList의 Angular 버전을 정말로 알고 계십니까?
- 寻∝梦원래의
- 2018-09-07 17:19:322079검색
Angularjs를 시작하는 방법을 소개하는 글입니다 아직 Anglejs를 이해하지 못하신다면 지금 이 글을 읽어보세요.
(1) 기본 기술 문서를 읽지 말고 시작하세요, Angular QuickStart. 그럼 시작해 보세요~
- 사전 조건
Node를 설치하려면 node 6.9.x와 npm 3.x.x 버전에 주의해야 합니다.
- 그런 다음 Angular CLI를 전역적으로 설치하세요.
npm install -g @angular/cli
- 프로젝트 만들기
ng new ng-first
- 개발 서버 시작
cd ng-first
ng serve --open
브라우저는 자동으로 http://localhost:4200/을 열고 ng 로고를 봅니다(수동 재미).
- 컴포넌트 생성
이 작업은 파일을 직접 생성하고 루트 컴포넌트에서 구성합니다.
ng g component components/todolist

- Create Service
대형을 유지하세요. 한 번 더.
ng g service services/storage
- 힘내서 인사하자
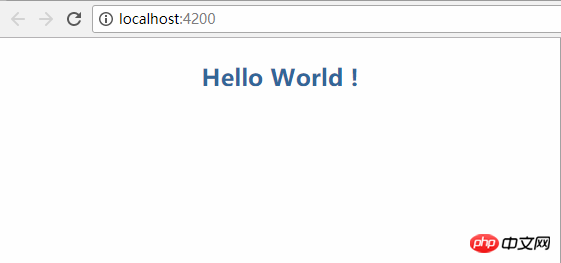
국제 관례에 따르면 먼저 인사하자!
app.comComponent에 사용자 정의 구성요소인 app-todolist를 삽입하세요. 이 이름은 todolist.comComponent.ts의 'app-todolist' 선택기에 따라 다릅니다.<!--app.component.html--> <app-todolist></app-todolist>
todolist.comComponent.ts에서 msg 변수를 계속해서 정의하세요. 이 구문은 ts의 기본 루틴입니다.(손으로 얼굴 가리고 사실 ts 잘 못함)
//todolist.component.ts
export class TodolistComponent implements OnInit {
  public msg: any = 'Hello World !';

  constructor() { }

  ngOnInit() {
  }

}
todolist.comComponent.html에 데이터 바인딩//todolist.component.html <h3> {{msg}} </h3>/*todolist.component.css*/ h3{ text-align: center; color: #369; }브라우저로 전환 뱅뱅뱅!
와우, 본론으로 들어가겠습니다.
얼마나 뻔뻔한가).
이것은 HTML이므로 todolist.comComponent.html에 직접 복사하고 사용하지 않는 일부 코드를 제거하세요.<!--todolist.component.html--> <header> <section> <label>ToDoList</label> <input> </section> </header> <section> <h2>正在进行 <span>1</span> </h2> <ol> <li> <input> <p>记得吃药</p> <a>-</a> </li> </ol> <h2>已经完成 <span>1</span> </h2> <ul> <li> <input> <p>记得吃饭</p> <a>-</a> </li> </ul> </section> <footer> Copyright © 2014 todolist.cn <a>clear</a> </footer>이것은 CSS 스타일이며, todolist.comComponent.css에 직접 복사하고, 본문 스타일은 src 디렉토리의 styles.css에 복사하세요.
/*todolist.component.css*/
header {height:50px;background:#333;background:rgba(47,47,47,0.98);}
section{margin:0 auto;}
label{float:left;width:100px;line-height:50px;color:#DDD;font-size:24px;cursor:pointer;font-family: "Helvetica Neue",Helvetica,Arial,sans-serif;}
header input{float:right;width:60%;height:24px;margin-top:12px;text-indent:10px;border-radius:5px;box-shadow: 0 1px 0 rgba(255,255,255,0.24), 0 1px 6px rgba(0,0,0,0.45) inset;border:none}
input:focus{outline-width:0}
h2{position:relative;}
span{position:absolute;top:2px;right:5px;display:inline-block;padding:0 5px;height:20px;border-radius:20px;background:#E6E6FA;line-height:22px;text-align:center;color:#666;font-size:14px;}
ol,ul{padding:0;list-style:none;}
li input{position:absolute;top:2px;left:10px;width:22px;height:22px;cursor:pointer;}
p{margin: 0;}
li p input{top:3px;left:40px;width:70%;height:20px;line-height:14px;text-indent:5px;font-size:14px;}
li{height:32px;line-height:32px;background: #fff;position:relative;margin-bottom: 10px;
    padding:0 45px;border-radius:3px;border-left: 5px solid #629A9C;box-shadow: 0 1px 2px rgba(0,0,0,0.07);}
ol li{cursor:move;}
ul li{border-left: 5px solid #999;opacity: 0.5;}
li a{position:absolute;top:2px;right:5px;display:inline-block;width:14px;height:12px;border-radius:14px;border:6px double #FFF;background:#CCC;line-height:14px;text-align:center;color:#FFF;font-weight:bold;font-size:14px;cursor:pointer;}
footer{color:#666;font-size:14px;text-align:center;}
footer a{color:#666;text-decoration:none;color:#999;}
@media screen and (max-device-width: 620px) {section{width:96%;padding:0 2%;}}
@media screen and (min-width: 620px) {section{width:600px;padding:0 10px;}}
/*src/styles.css*/
body {margin:0;padding:0;font-size:16px;background: #CDCDCD;}
복사 후 페이지는 다음과 같아야 합니다. 
(수동 재미).
//todolist.component.ts
export class TodolistComponent implements OnInit {
  public todo: any = '';
  public todoList = [];

  constructor() { }

  ngOnInit() {
  }

  addTodo(e) {
    let todoObj = {
      todo: this.todo,
      done: false
    }

    if (e.keyCode == 13) {  //表示回车按钮
      this.todoList.push(todoObj);
      this.todo = '';       //清空输入框
    }
  }
}
<!--todolist.component.html-->
<header>
  <section>
    <label>ToDoList</label>
    <input>
  </section>
</header>
[(ngModel)]은 할 일을 입력 상자에 바인딩하는 데 사용되는 Angular 구문입니다. 데이터 흐름은 양방향입니다. 즉, 속성에서 입력 상자로, 입력 상자에서 다시 속성으로 이동합니다. 이 단계에서 콘솔에서 오류를 보고했습니다.
해결책은 FormsModule 모듈을 사용하도록 선택해야 한다는 것입니다.
import { BrowserModule } from '@angular/platform-browser';
import { NgModule } from '@angular/core';
import { FormsModule } from '@angular/forms';  //NgModel lives here

@NgModule({

  imports: [
    BrowserModule,
    FormsModule  //import the FormsModule before binding with [(ngModel)]
  ],

})
루프에 추가할 사항목록을 루프하려면 내장 명령어 *ngFor를 추가하세요.
<h2>正在进行
    <span>{{todoList.length}}</span>
  </h2>
  <ol>
    <li>
      <input>
      <p>{{item.todo}}</p>
      <a>-</a>
    </li>
  </ol>
추가된 항목을 보실 수 있습니다. <h2>正在进行
<span>{{todoList.length}}</span>
</h2>
<ol>
<li>
<input>
<p>{{item.todo}}</p>
<a>-</a>
</li>
</ol>
已经完成
{{doneList.length}}
-
{{item.todo}}
-
  public doneList = [];  //再声明一个已完成的数组

  deleteTodo(index, done) {
    if (done) {
      this.todoList.splice(index, 1);
    } else {
      this.doneList.splice(index, 1);
    }
  }

  changeTodo(index, done) {
    if (done) {
      var tempTodo = this.todoList[index]
      this.doneList.push(tempTodo);
      this.todoList.splice(index, 1);
    } else {
      var tempDone = this.doneList[index]
      this.todoList.push(tempDone);
      this.doneList.splice(index, 1);
    }

  }
이제 기능이 완료되었습니다~ 잠깐, 페이지 새로고침을 하시면 앗, 방금 입력한 항목이 사라졌습니다. (자세한 내용을 보려면 PHP 중국어 웹사이트
AngularJS 개발 매뉴얼을 방문하여 학습하세요.)
어디서나 쉽게 사용할 수 있는 서비스를 만들어 보세요.
//storage.service.ts
export class StorageService {

  constructor() { }

  setItem(key, value) {
    localStorage.setItem(key, JSON.stringify(value))
  }
  getItem(key) {
    return JSON.parse(localStorage.getItem(key))
  }

}
서비스를 이용하시려면 주입만 하시면 됩니다.
//todolist.component.ts
import { StorageService } from '../../services/storage.service'  //导入服务
...
constructor(private storage: StorageService) { } //注入服务
좋아, 쉽고 즐겁게 사용할 수 있겠네요. localStorage에 데이터를 저장하세요이.storage를 사용하여 캡슐화된 서비스를 이용하세요. 각 작업 후에 데이터를 저장하세요. 좀 맛없지 않나요~
  addTodo(e) {
    let todoObj = {
      todo: this.todo,
      done: false
    }

    if (e.keyCode == 13) {
      var tempList = this.storage.getItem('todoList');
      if (tempList) {
        tempList.push(todoObj)
        this.storage.setItem('todoList', tempList);
      } else {
        var tempData = []
        tempData.push(todoObj)
        this.storage.setItem('todoList', tempData);
      }
      this.todoList.push(todoObj);
      this.todo = '';
    }
  }

  deleteTodo(index, done) {
    if (done) {
      this.todoList.splice(index, 1);
      this.storage.setItem('todoList', this.todoList)
    } else {
      this.doneList.splice(index, 1);
      this.storage.setItem('doneList', this.doneList)
    }
  }

  changeTodo(index, done) {
    if (done) {
      var tempTodo = this.todoList[index]
      console.log(tempTodo)
      this.doneList.push(tempTodo);
      console.log(this.doneList)
      this.todoList.splice(index, 1);
      this.storage.setItem('todoList', this.todoList)
      this.storage.setItem('doneList', this.doneList)
    } else {
      var tempDone = this.doneList[index]
      this.todoList.push(tempDone);
      this.doneList.splice(index, 1);
      this.storage.setItem('todoList', this.todoList)
      this.storage.setItem('doneList', this.doneList)
    }
  }
Initial eventOnInit 인터페이스의 Hook 메소드를 ngOnInit이라고 하는데, Angular에서는 컴포넌트 생성 직후에 이를 호출합니다. 제가 이해한 바는 vue에 탑재된 것과 비슷하다는 것인가요?
  ngOnInit() {
    this.initTodo();
  }
  initTodo() {
    var todoArr = this.storage.getItem('todoList');
    if (todoArr) {
      this.todoList = todoArr
    }
    var doneArr = this.storage.getItem('doneList');
    if (doneArr) {
      this.doneList = doneArr
    }
  }
그럼 끝이에요!
还有页脚的clear按钮
<!--todolist.component.html-->
<footer>
  Copyright © 2014 todolist.cn
  <a>clear</a>
</footer>
clearData() {
    localStorage.clear();
    this.todoList = [];
    this.doneList = [];
  }
说在后面的话
还有拖拽排序的的功能,不写了。
好了,以上就是本篇文章的内容(想看更多就到PHP中文网AngularJS使用手册中学习),有问题的可以在下方留言提问。
위 내용은 Angular를 시작하면서 ToDoList의 Angular 버전을 정말로 알고 계십니까?의 상세 내용입니다. 자세한 내용은 PHP 중국어 웹사이트의 기타 관련 기사를 참조하세요!
성명:
본 글의 내용은 네티즌들의 자발적인 기여로 작성되었으며, 저작권은 원저작자에게 있습니다. 본 사이트는 이에 상응하는 법적 책임을 지지 않습니다. 표절이나 침해가 의심되는 콘텐츠를 발견한 경우 admin@php.cn으로 문의하세요.
이전 기사:Vue.js의 기본 지시문 요약(코드)다음 기사:Vue.js의 기본 지시문 요약(코드)


