mint-ui에 캐러셀 이미지를 통합하는 vue.js 정보
- 不言원래의
- 2018-06-29 17:07:461996검색
이 글에서는 주로 vue.js가 mint-ui에 캐러셀 차트를 통합하는 방법을 소개합니다. 먼저 vue 프로젝트를 초기화한 다음 mint-ui를 설치해야 합니다. 구체적인 콘텐츠 세부정보는
Vue 프로젝트 초기화
npm install -g vue-cli
vue init webpack demo # 中间会让你选npm yarn 等来安装依赖,我选的是yarn,因为它快些
mint-ui 설치
yarn add mint-ui
mint-ui가 설치되었는지 확인하세요. 구성해야합니다 b abel, mint-ui 공식 문서를 따라 구성하는 방법입니다
다음은 제가 구성한 .babelrc 파일입니다. 시작하면 babel-preset-es2015를 설치하면 됩니다. 괜찮을 거예요
{
 "presets": [
 ["env", {
  "modules": false,
  "targets": {
  "browsers": ["> 1%", "last 2 versions", "not ie <= 8"]
  }
 }],
 "stage-2",
 ["es2015", { "modules": false }]
 ],
 "plugins": [["component", [
 {
  "libraryName": "mint-ui",
  "style": true
 }
 ]],"transform-vue-jsx", "transform-runtime"],
 "env": {
 "test": {
  "presets": ["env", "stage-2", "es2015"],
  "plugins": ["transform-vue-jsx", "transform-es2015-modules-commonjs", "dynamic-import-node"]
 }
 }
}
Integration
생성된 vue 프로젝트 데모를 열고 src에서 Components/HelloWorld.vue 파일을 찾은 후 내용을 다음 내용으로 변경하세요
<template>
<p>
<mt-swipe :auto="2000">
<mt-swipe-item v-for="item in items" :key="item.id">
<a :href="item.href" rel="external nofollow" >
<img :src="item.url" class="img"/>
<span class="desc"></span>
</a>
</mt-swipe-item>
</mt-swipe>
</p>
</template>
<script>
import {Swipe, SwipeItem} from 'mint-ui'
import 'mint-ui/lib/style.css'
export default {
components: {
'mt-swipe': Swipe,
'mt-swipe-item': SwipeItem
},
data () {
return {
items: [{
title: '你的名字',
href: 'http://google.com', url: 'http://localhost:8080/static/img1.png'
}, {
title: '我的名字',
href: 'http://baidu.com', url: 'http://localhost:8080/static/img2.png'
}]
}
}
}
</script>
<style scoped>
img {
width: 100%;
}
.mint-swipe {
height: 218px;
}
.desc {
font-weight: 600;
opacity: .9;
padding: 5px;
height: 20px;
line-height: 20px;
width: 100%;
color: #fff;
background-color: gray;
position: absolute;
bottom: 0;
}
</style>
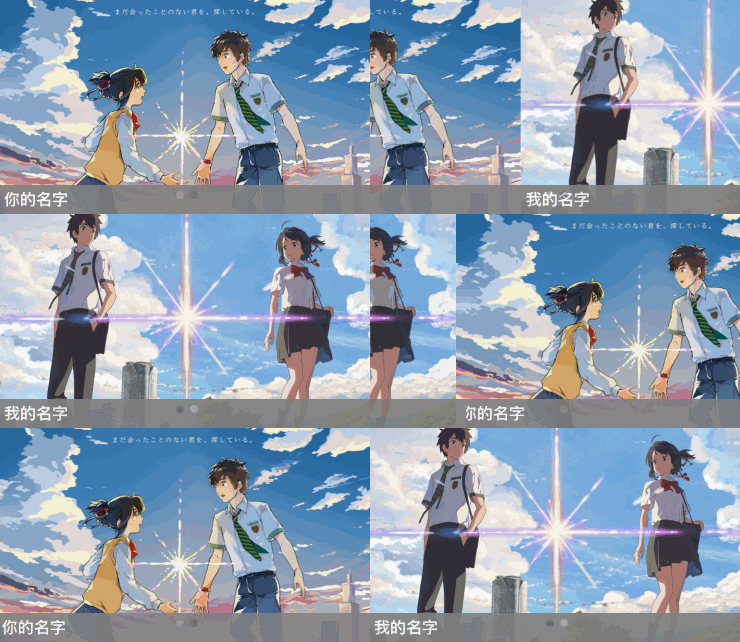
이름은 img1.png, img2.png인 두 장의 사진을 찾아 데모 프로젝트의 static에 넣은 다음 프로젝트를 시작하세요
npm run dev
브라우저 열기: http://localhost:8080 /

Attention
1. 텍스트가 모두 중앙에 있는 것을 발견하면
App.vue 파일을 찾아 내부에 있는 중앙에 있는 CSS 코드를 제거할 수 있습니다
1. margins
본문 스타일 여백 설정: 0 auto;
1. 페이지에서 사용할 때 클래스 스타일에 높이를 지정해야 합니다. 그렇지 않으면 이미지가 표시되지 않습니다. 위 내용은 이 글의 전체 내용입니다. 모든 분들의 학습에 도움이 되었으면 좋겠습니다. 더 많은 관련 내용은 PHP 중국어 홈페이지를 참고해주세요!
관련 권장사항:
vue cli를 기반으로 다중 페이지 스캐폴딩을 재구성하는 프로세스 소개vuex의 상태 객체 사용 방법위 내용은 mint-ui에 캐러셀 이미지를 통합하는 vue.js 정보의 상세 내용입니다. 자세한 내용은 PHP 중국어 웹사이트의 기타 관련 기사를 참조하세요!

