
three.js에서 3D 모델 디스플레이를 구현하는 방법
- 亚连원래의
- 2018-06-14 15:09:034100검색
이 글에서는 3D 모델 디스플레이를 구현하기 위한 three.js의 샘플 코드를 주로 소개하고 참고용으로 올려드립니다.
프로젝트는 3D 모델을 표시해야 하기 때문에 세 가지에 대해 조사한 후 모두에게 도움이 될 수 있기를 바라면서 공유했습니다.
먼저 효과를 살펴보겠습니다.

Three.js는 전체적으로 어렵지 않습니다. 진정만 하시면 연구와 연구가 곧 완료될 것입니다
우선 페이지에 3D 모델을 배치할 수 있는 캔버스를 만들어야 하는데, 이는 초기화라고도 할 수 있습니다. Three
var WIDTH,HEIGHT;
  var  renderer;
  function initThree() {
    WIDTH = document.documentElement.clientWidth/2; <!--{foreach from=$recommended_goods item=rgoods}--> <!-- {/foreach} -->
    HEIGHT = document.documentElement.clientHeight/2;
    /* 渲染器 */
    renderer = new THREE.WebGLRenderer();
    renderer.setSize(WIDTH , HEIGHT);
    renderer.setClearColor(new THREE.Color(0x66666));
    renderer.gammaInput = true;
    renderer.gammaOutput = true;

    document.body.appendChild(renderer.domElement);
  }
아닙니다. 위의 코드에서는 본문에 추가할 캔버스를 설정했음을 확인하기 어렵습니다. 너비와 높이는 클라이언트의 절반입니다. 여기서 주목해야 할 것은 renderer = new THREE.WebGLRenderer()입니다. 모든 설정은 렌더러를 객체로 설정했기 때문에 다음으로 카메라 또는 시각적 각도를 조정해야 합니다.
/* 摄像头 */
  var camera;
  function initCamera() {
    var VIEW_ANGLE = 45,
        ASPECT = WIDTH / HEIGHT,
        NEAR = 0.1,
        FAR = 10000;
    camera = new THREE.PerspectiveCamera(VIEW_ANGLE, ASPECT, NEAR, FAR);
    camera.position.set(20, 0, 0);
    //设置视野的中心坐标
    camera.lookAt(scene.position);
  }
위 코드는 주로 시각적 각도 값을 제어하는 데 사용되며 나중에 필요에 따라 조정할 수 있습니다. stage
장면 로드:
/* 场景 */
   var scene;
   function initScene() {
     scene = new THREE.Scene();
   }
조명 효과 로드
/* 灯光 */
  var light,light2,light3;
  function initLight() {
    //平行光
    light = new THREE.DirectionalLight(0xFFFFFF);
    light.position.set(0, 99, 0).normalize();
    scene.add(light);
    //环境光
    light2 = new THREE.AmbientLight(0x999999);
    scene.add(light2);
    //点光源
    light3 = new THREE.PointLight(0x00FF00);
    light3.position.set(300, 0, 0);
    scene.add(light3);
  }
표시 모델 객체:
/* 显示对象 */
  var cube;
  function initObject(){
    // ASCII file
    var loader = new THREE.STLLoader();
    loader.addEventListener( 'load', function ( event ) {
      var loading = document.getElementById("Loading");
      loading.parentNode.removeChild(loading);
      var geometry = event.content;
      //砖红色
      var material = new THREE.MeshPhongMaterial( { ambient: 0xff5533, color: 0xff5533, specular: 0x111111, shininess: 200 } );
      //纯黑色
//      var material = new THREE.MeshBasicMaterial( { envMap: THREE.ImageUtils.loadTexture( 'http://localhost:8080/textures/metal.jpg', new THREE.SphericalReflectionMapping() ), overdraw: true } ) ;
      //粉色 带阴影
//      var material = new THREE.MeshLambertMaterial( { color:0xff5533, side: THREE.DoubleSide } );
      //灰色
//      var material = new THREE.MeshLambertMaterial({color: 000000});  //材质设定 (颜色)
      var mesh = new THREE.Mesh( geometry, material );
      var center = THREE.GeometryUtils.center(geometry);
      var boundbox=geometry.boundingBox;
      var vector3 = boundbox.size(null);
      var vector3 = boundbox.size(null);
      console.log(vector3);
      var scale = vector3.length();
      camera.position.set(scale, 0, 0);
      camera.lookAt(scene.position);
      scene.add(camera);
      //利用一个轴对象以可视化的3轴以简单的方式。X轴是红色的。Y轴是绿色的。Z轴是蓝色的。这有助于理解在空间的所有三个轴的方向。
      var axisHelper = new THREE.AxisHelper(800);
      scene.add(axisHelper);

      //周围边框
      bboxHelper = new THREE.BoxHelper();
      bboxHelper.visible = true;
      var meshMaterial = material;
      mainModel = new THREE.Mesh(geometry, meshMaterial);
      bboxHelper.update(mainModel);
      bboxHelper.geometry.computeBoundingBox();
      scene.add(bboxHelper);

      //地板网格
//      var gridHelper = new THREE.GridHelper(500, 40); // 500 is grid size, 20 is grid step
//      gridHelper.position = new THREE.Vector3(0, 0, 0);
//      gridHelper.rotation = new THREE.Euler(0, 0, 0);
//      scene.add(gridHelper);
//      var gridHelper2 = gridHelper.clone();
//      gridHelper2.rotation = new THREE.Euler(Math.PI / 2, 0, 0);
//      scene.add(gridHelper2);
//      var gridHelper3 = gridHelper.clone();
//      gridHelper3.rotation = new THREE.Euler(Math.PI / 2, 0, Math.PI / 2);
//      scene.add(gridHelper3);
//
//      var grid = new THREE.GridHelper(300, 40, 25, [0, 0, 1], 0x000055, 0.2, true, "#FFFFFF", "left");
//      scene.add(grid);
      var x = (boundbox.max.x - boundbox.min.x).toFixed(2);
      var y = (boundbox.max.y - boundbox.min.y).toFixed(2);
      var z = (boundbox.max.z - boundbox.min.z).toFixed(2);
      console.log(x);
      console.log(y);
      console.log(z);
      console.log(boundbox);
      mesh.position.set(0,0,0);
//      mesh.position.x = scene.position.x;
//      mesh.position.y = scene.position.y ;
//      mesh.position.z = scene.position.z;
      scene.add(mesh);
      renderer.clear();
      renderer.render(scene, camera);
    } );
    loader.load( '3dfile/莫比乌斯环.STL' );
  }
여기서 파일 유형에 따라 해당 js 가져오기를 선택하면 로드할 수 있습니다. STL 모델이므로 STLLoader를 도입했습니다. js
<script src="js/STLLoader.js"></script>
그리드 눈금자를 표시해야 하는 경우 코드의 그리드 부분의 주석을 해제하면 됩니다
다음은 제어 방법입니다(키보드 키에 따라 확대 및 축소되도록 표시 코드를 작성하지는 않았지만 하지만 아직 참고용으로 제공됩니다)
//控制
  var effect;
  var controls;
  function initControl(){
    effect = new THREE.AsciiEffect( renderer );
    effect.setSize( WIDTH, HEIGHT );
    controls = new THREE.TrackballControls( camera,renderer.domElement);
  }
마지막은 초기 통화입니다
function animate() {
    requestAnimationFrame( animate );
    controls.update();
    effect.render( scene, camera );
  }

  function threeStart() {
    initThree();
    initScene();
    initCamera();
    initLight();
    initObject();
    initControl();
    animate();
  }
첨부된 전체 코드는
WebGL <script src="js/STLLoader.js"></script> <script> var WIDTH,HEIGHT; var renderer; function initThree() { WIDTH = document.documentElement.clientWidth/2; <!--{foreach from=$recommended_goods item=rgoods}--> <!-- {/foreach} --> HEIGHT = document.documentElement.clientHeight/2; /* 渲染器 */ renderer = new THREE.WebGLRenderer(); renderer.setSize(WIDTH , HEIGHT); renderer.setClearColor(new THREE.Color(0x66666)); renderer.gammaInput = true; renderer.gammaOutput = true; document.body.appendChild(renderer.domElement); } /* 摄像头 */ var camera; function initCamera() { var VIEW_ANGLE = 45, ASPECT = WIDTH / HEIGHT, NEAR = 0.1, FAR = 10000; camera = new THREE.PerspectiveCamera(VIEW_ANGLE, ASPECT, NEAR, FAR); camera.position.set(20, 0, 0); //设置视野的中心坐标 camera.lookAt(scene.position); } /* 场景 */ var scene; function initScene() { scene = new THREE.Scene(); } /* 灯光 */ var light,light2,light3; function initLight() { //平行光 light = new THREE.DirectionalLight(0xFFFFFF); light.position.set(0, 99, 0).normalize(); scene.add(light); //环境光 light2 = new THREE.AmbientLight(0x999999); scene.add(light2); //点光源 light3 = new THREE.PointLight(0x00FF00); light3.position.set(300, 0, 0); scene.add(light3); } /* 显示对象 */ var cube; function initObject(){ // ASCII file var loader = new THREE.STLLoader(); loader.addEventListener( 'load', function ( event ) { var loading = document.getElementById("Loading"); loading.parentNode.removeChild(loading); var geometry = event.content; //砖红色 var material = new THREE.MeshPhongMaterial( { ambient: 0xff5533, color: 0xff5533, specular: 0x111111, shininess: 200 } ); //纯黑色 // var material = new THREE.MeshBasicMaterial( { envMap: THREE.ImageUtils.loadTexture( 'http://localhost:8080/textures/metal.jpg', new THREE.SphericalReflectionMapping() ), overdraw: true } ) ; //粉色 带阴影 // var material = new THREE.MeshLambertMaterial( { color:0xff5533, side: THREE.DoubleSide } ); //灰色 // var material = new THREE.MeshLambertMaterial({color: 000000}); //材质设定 (颜色) var mesh = new THREE.Mesh( geometry, material ); var center = THREE.GeometryUtils.center(geometry); var boundbox=geometry.boundingBox; var vector3 = boundbox.size(null); var vector3 = boundbox.size(null); console.log(vector3); var scale = vector3.length(); camera.position.set(scale, 0, 0); camera.lookAt(scene.position); scene.add(camera); //利用一个轴对象以可视化的3轴以简单的方式。X轴是红色的。Y轴是绿色的。Z轴是蓝色的。这有助于理解在空间的所有三个轴的方向。 var axisHelper = new THREE.AxisHelper(800); scene.add(axisHelper); //周围边框 bboxHelper = new THREE.BoxHelper(); bboxHelper.visible = true; var meshMaterial = material; mainModel = new THREE.Mesh(geometry, meshMaterial); bboxHelper.update(mainModel); bboxHelper.geometry.computeBoundingBox(); scene.add(bboxHelper); //地板网格 // var gridHelper = new THREE.GridHelper(500, 40); // 500 is grid size, 20 is grid step // gridHelper.position = new THREE.Vector3(0, 0, 0); // gridHelper.rotation = new THREE.Euler(0, 0, 0); // scene.add(gridHelper); // var gridHelper2 = gridHelper.clone(); // gridHelper2.rotation = new THREE.Euler(Math.PI / 2, 0, 0); // scene.add(gridHelper2); // var gridHelper3 = gridHelper.clone(); // gridHelper3.rotation = new THREE.Euler(Math.PI / 2, 0, Math.PI / 2); // scene.add(gridHelper3); // // var grid = new THREE.GridHelper(300, 40, 25, [0, 0, 1], 0x000055, 0.2, true, "#FFFFFF", "left"); // scene.add(grid); var x = (boundbox.max.x - boundbox.min.x).toFixed(2); var y = (boundbox.max.y - boundbox.min.y).toFixed(2); var z = (boundbox.max.z - boundbox.min.z).toFixed(2); console.log(x); console.log(y); console.log(z); console.log(boundbox); mesh.position.set(0,0,0); // mesh.position.x = scene.position.x; // mesh.position.y = scene.position.y ; // mesh.position.z = scene.position.z; scene.add(mesh); renderer.clear(); renderer.render(scene, camera); } ); loader.load( '3dfile/莫比乌斯环.STL' ); } //控制 var effect; var controls; function initControl(){ effect = new THREE.AsciiEffect( renderer ); effect.setSize( WIDTH, HEIGHT ); controls = new THREE.TrackballControls( camera,renderer.domElement); } function animate() { requestAnimationFrame( animate ); controls.update(); effect.render( scene, camera ); } function threeStart() { initThree(); initScene(); initCamera(); initLight(); initObject(); initControl(); animate(); } </script>Loading...
아 내 파일 구조
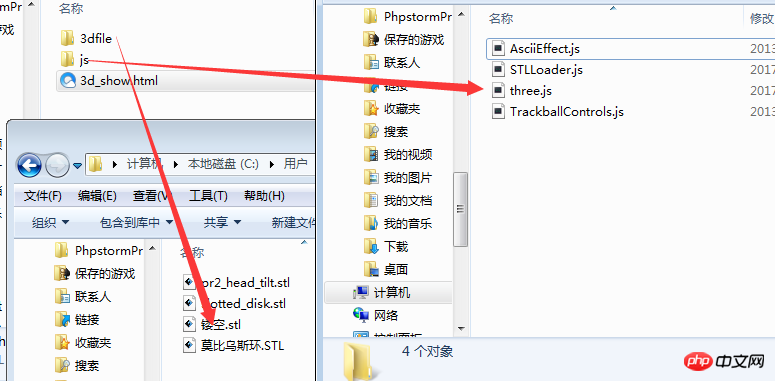 모든 파일을 원하시면 메시지를 남겨주세요
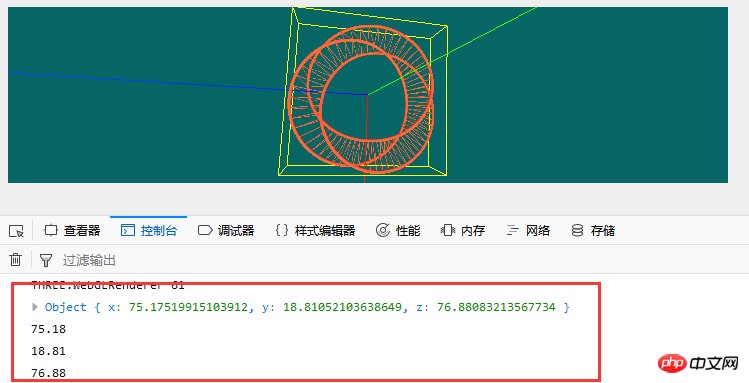 그리고 모델 표시 메소드에 bboxHelper = new THREE.BoxHelper()를 추가했기 때문에 모델의 X, Y, Z축의 치수를 구하고 이를 길이로도 간주할 수 있습니다. , 너비, 모델의 높이
위 내용은 모두를 위해 정리한 내용이므로 앞으로 모든 분들께 도움이 되길 바랍니다.
관련글:
tangram.js 라이브러리를 이용하여 js 클래스 구현하기js 코드를 이용하여 복사 기능 구현하기JavaScript를 이용하여 오디오 재생 기능 구현하기위 내용은 three.js에서 3D 모델 디스플레이를 구현하는 방법의 상세 내용입니다. 자세한 내용은 PHP 중국어 웹사이트의 기타 관련 기사를 참조하세요!