집 >위챗 애플릿 >미니 프로그램 개발 >WeChat 애플릿을 사용하여 사진을 업로드하는 방법
WeChat 애플릿을 사용하여 사진을 업로드하는 방법
- php中世界最好的语言원래의
- 2018-05-31 14:10:1611443검색
이번에는 WeChat 애플릿을 사용하여 사진업로드하는 방법과 WeChat 애플릿을 사용하여 사진을 업로드할 때 어떤 노트가 있는지 보여드리겠습니다. 다음은 실제 사례입니다. 살펴보겠습니다.
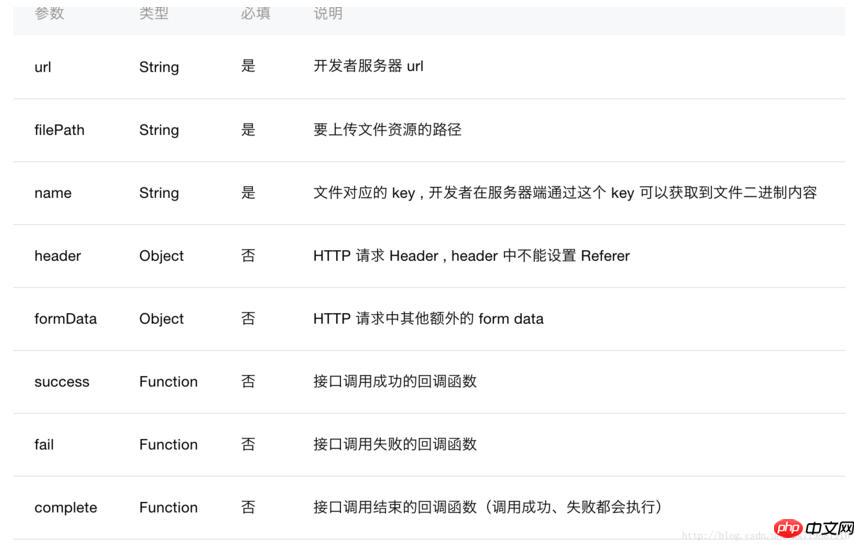
먼저 WeChat 미니 프로그램의 API를 살펴보겠습니다
페이지 효과를 살펴보겠습니다

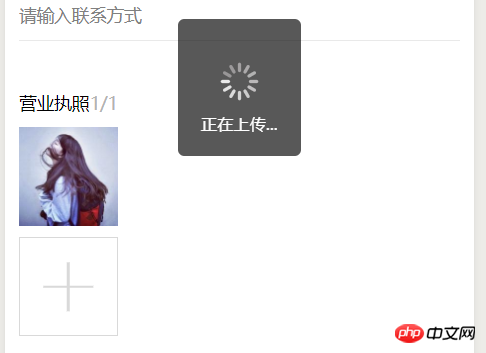

큰 그림 보기

wxml 파일 code:
<view class="weui-cell">
    <view class="weui-cellbd">
     <view class="weui-uploader">
      <view class="weui-uploaderhd">
       <view class="weui-uploadertitle">营业执照</view>
       <view class="weui-uploaderinfo">{{imageList.length}}/{{count[countIndex]}}</view>
      </view>
      <view class="weui-uploaderbd">
       <view class="weui-uploaderfiles">
        <block wx:for="{{imageList}}" wx:for-item="image">
         <view class="weui-uploaderfile">
          <image class="weui-uploaderimg" src="{{image}}" src="{{image}}" bindtap="previewImage"></image>
         </view>
        </block>
       </view>
       <view class="weui-uploaderinput-box">
        <view class="weui-uploaderinput" bindtap="chooseImage"></view>
       </view>
      </view>
     </view>
  </view>
</view>
js file code
chooseImage: function () {
  var that = this;
  console.log('aaaaaaaaaaaaaaaaaaaa')

  wx.chooseImage({
   count: this.data.count[this.data.countIndex],
   success: function (res) {
    console.log('ssssssssssssssssssssssssss')
    //缓存下
    wx.showToast({
     title: '正在上传...',
     icon: 'loading',
     mask: true,
     duration: 2000,
     success: function (ress) {
      console.log('成功加载动画');
     }
    })

    console.log(res)
    that.setData({
     imageList: res.tempFilePaths
    })
    //获取第一张图片地址
    var filep = res.tempFilePaths[0]
    //向服务器端上传图片
    // getApp().data.servsers,这是在app.js文件里定义的后端服务器地址
    wx.uploadFile({
     url: getApp().data.servsers + '/weixin/wx_upload.do',
     filePath: filep,
     name: 'file',
     formData: {
      'user': 'test'
     },
     success: function (res) {
      console.log(res)
      console.log(res.data)
      var sss= JSON.parse(res.data)
      var dizhi = sss.dizhi;
      //输出图片地址
      console.log(dizhi);
      that.setData({
       "dizhi": dizhi
      })

      //do something
     }, fail: function (err) {
      console.log(err)
     }
      });
   }
  })
 },
 previewImage: function (e) {
  var current = e.target.dataset.src

  wx.previewImage({

   current: current,
   urls: this.data.imageList
  })
 }
java 백엔드 코드:
//获取当前日期时间的string类型用于文件名防重复
  public String dates(){
     Date currentTime = new Date();
     SimpleDateFormat formatter = new SimpleDateFormat("yyyyMMddHHmmss");
     String dateString = formatter.format(currentTime);
     return dateString;
  }
  @RequestMapping("wx_upload.do")
  public void uploadPicture(HttpServletRequest request, HttpServletResponse response,PrintWriter writer) throws Exception {
    System.out.println("进入get方法!");
  //获取从前台传过来得图片
    MultipartHttpServletRequest req =(MultipartHttpServletRequest)request;
    MultipartFile multipartFile = req.getFile("file");
  //获取图片的文件类型
    String houzhu=multipartFile.getContentType();
    int one = houzhu.lastIndexOf("/");
    System.out.println(houzhu.substring((one+1),houzhu.length()));
    System.out.println(multipartFile.getName());
  //根据获取到的文件类型截取出图片后缀
    String type=houzhu.substring((one+1),houzhu.length());
    System.out.println(multipartFile.getContentType());

    String filename;
  // request.getRealPath获取我们项目的根地址在加上我们要保存的地址
    String realPath = request.getRealPath("/upload/wximg/");
    try {
      File dir = new File(realPath);
      if (!dir.exists()) {
        dir.mkdir();
      }
      //获取到当前的日期时间用户生成文件名防止文件名重复
      String filedata=this.dates();
    //生成一个随机数来防止文件名重复
      int x=(int)(Math.random()*1000);
      filename="zhongshang"+x+filedata;
      System.out.println(x);
    将文件的地址和生成的文件名拼在一起
      File file = new File(realPath,filename+"."+type);
      multipartFile.transferTo(file);
    //将图片在项目中的地址和isok状态储存为json格式返回给前台,由于公司项目中没有fastjson只能用这个
      JSONObject jsonObject=new JSONObject();
      jsonObject.put("isok",1);
      jsonObject.put("dizhi","/upload/wximg/"+filename+"."+type);

      writer.write(jsonObject.toString());
    } catch (IOException e) {
      e.printStackTrace();
    } catch (IllegalStateException e) {
      e.printStackTrace();
    }
}
이전에 프론트엔드 js에서 출력한 내용을 살펴보겠습니다.

브라우저를 열고 다음 주소를 사용하세요. 우리 서버와 이 사진에 액세스하기 위해 배경에서 반환된 json의 dizhi 필드를 추가합니다
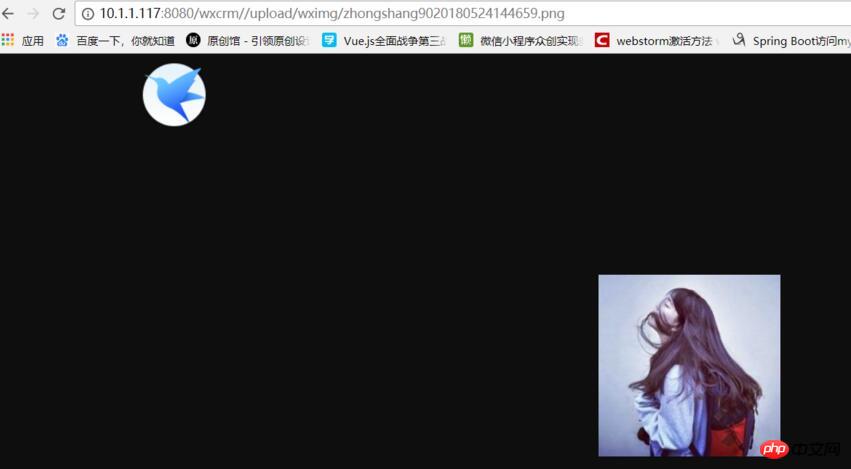
사진이 서버에 채워져 있는 것을 볼 수 있으며, 서버의 루트 주소에서 /upload/wximg를 열 수 있습니다. 사이드 프로젝트
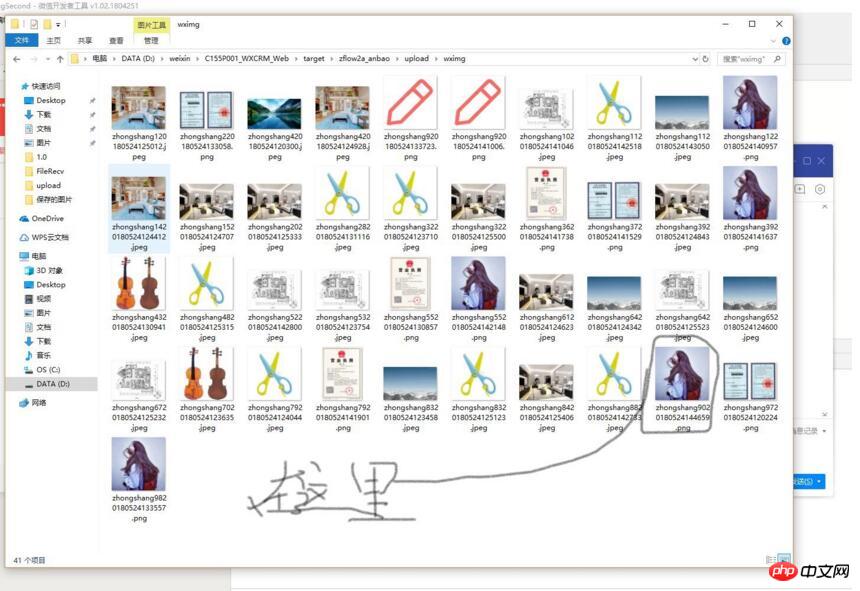
여러 장의 사진을 업로드하려면 js에서 업로드할 번호에 따라 루프로 업로드하면 됩니다.
이 기사의 사례를 읽은 후 방법을 마스터했다고 생각합니다. 더 흥미로운 정보를 보려면 PHP 중국어 웹사이트의 다른 관련 기사를 주목하세요!
추천 도서:
js의 세 가지 사용 사례에 대한 자세한 설명(코드 포함)
위 내용은 WeChat 애플릿을 사용하여 사진을 업로드하는 방법의 상세 내용입니다. 자세한 내용은 PHP 중국어 웹사이트의 기타 관련 기사를 참조하세요!
성명:
본 글의 내용은 네티즌들의 자발적인 기여로 작성되었으며, 저작권은 원저작자에게 있습니다. 본 사이트는 이에 상응하는 법적 책임을 지지 않습니다. 표절이나 침해가 의심되는 콘텐츠를 발견한 경우 admin@php.cn으로 문의하세요.

