
React Router의 기본 사용(그래픽 튜토리얼)
- 亚连원래의
- 2018-05-19 13:40:121908검색
이 글은 주로 React Router의 기본 지식을 소개합니다. 관심 있는 친구들은 꼭 살펴보세요.
React는 기술 스택입니다. React만으로는 복잡한 웹 애플리케이션을 구축하기 어렵습니다. 많은 경우 다른 관련 기술을 도입해야 합니다.
React Router는 관련 페이지 구성 요소 간의 연결을 유지하는 React의 라우팅 라이브러리입니다. 및 URL.
2. 라이브러리 소개
 React Router 라이브러리를 소개하는 방법은 두 가지가 있습니다.
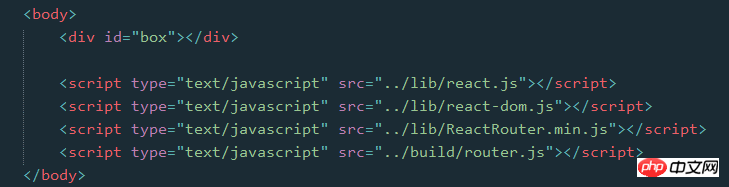
2.1 브라우저를 통해 직접 소개 
 여기에 브라우저 버전을 인용할 수 있으며 또는 다운로드한 후 가져오세요
그런 다음 ReactRouter 개체를 직접 사용할 수 있습니다. 우리는 그 속성 중 여러 가지를 사용할 수 있습니다
let {Router, Route, IndexRoute, Redirect, IndexRedirect, Link, IndexLink, hashHistory, browserHistory} = ReactRouter;
2.2 npm 설치, 컴파일 및 빌드 도구를 통해 도입
라우팅 라이브러리를 설치한 후 스크립트 파일에 관련 속성을 추가합니다.import {Router, Route, IndexRoute, Redirect, IndexRedirect, Link, IndexLink, hashHistory, browserHistory} from 'react-router';
브라우저는 현재 가져오기 및 내보내기 명령을 지원하지 않으며 babel 도구는 require 명령을 컴파일하지 않으므로 여전히 컴파일하고 Webpack 등의 빌드 도구로 도입하세요 라이브러리 도입 후 ReactDOM의 render 메소드에서 관련 컴포넌트를 사용할 수 있습니다
3. 라우팅은 사용하기 쉽습니다npm install --save react-router
가장 기본적인 것은 어떤 페이지( 구성 요소) url
class First extends Component {
 constructor(props) {
 super(props);
 }
 render() {
 return <p>First</p>
 }
}
class Second extends Component {
 constructor(props) {
 super(props);
 }
 render() {
 return <p>Second</p>
 }
}
class App extends Component {
 constructor(props) {
 super(props);
 }
 render() {
 return <p></p>
 }
}
render((
<Router history={hashHistory}>
<Route path="/" component={App} />
<Route path="first" component={First} />
<Route path="second" component={Second} />
</Router>
),
document.getElementById('box')
);first를 통해 입력하려면,
router
는 컨테이너입니다. 
세 가지 유형이 있습니다.
browserHistory: URL 변경을 통해 라우팅을 변경하는 것이 권장되는 방법이지만 서버 측에서 일부 구성이 필요합니다(아직 구성 방법을 모르겠습니다) hashHistory: #/를 통해 실제로 단일 페이지 애플리케이션의 일반적인 해시뱅 방법인 example.com/#/path/path.. (사용하기 쉬우므로 여기서는 이 방법을 사용하겠습니다)
createMemoryHistory: 메모리 기록은 주소 표시줄에서 검색되지 않습니다. 작업이나 읽기는 서버 측 렌더링을 완료하는 데 도움이 될 수 있습니다. 기록 개체를 수동으로 생성해야 합니다.
- 그런 다음 경로 구성 요소를 사용합니다. 각 경로를 정의하고 경로를 통해 경로를 지정하는 컨테이너(보시다시피 대문자와 소문자 구분이 없음), 경로가 사용하는 구성 요소를 구성 요소를 통해 지정합니다
-
routes 속성을 직접 사용하여 각 경로를 직접 정의할 수도 있습니다.
let routes = <p> <Route path="/" component={App} /> <Route path="first" component={First} /> <Route path="second" component={Second} /> </p>; render(<Router routes={routes} history={hashHistory}></Router>, document.getElementById('box')); 와 같은 라우터 컨테이너에는 {routes} 상위 항목이 하나만 있을 수 있으므로 e388a4556c0f65e1904146cc1a846bee 태그가 여기에 추가됩니다또한 라우팅 경로도 가능합니다. 위의 예에서 중첩은 실제 상황에 더 부합할 수 있습니다
여기 앱은 상위 수준에 있으므로 하위 항목의 첫 번째 및 두 번째 구성 요소를 얻으려면 추가해야 합니다. this.props.Children get
class App extends Component {
constructor(props) {
super(props);
}
render() {
return <p>{this.props.children}</p>
}
}
render((
<Router history={hashHistory}>
<Route path="/" component={App}>
<Route path="first" component={First} />
<Route path="second" component={Second} />
</Route>
</Router>
),
document.getElementById('box')
);Simally 라우터의 경로 속성을 직접 사용하여 경로를 정의 할 수 있습니다 기본 Route 외에 IndexRoute, Redirect, IndexRedirect, Link, IndexLink 등 이름에서 알 수 있듯이
IndexRoute:
는 이전 예와 같이 메인 페이지에서 "/ 경로 아래에 사용됩니다. " 빈 페이지가 보이면 탐색을 위한 기본 페이지 구성 요소를 추가할 수 있습니다링크:
React의 3499910bf9dac5ae3c52d5ede7383485 태그 구현으로 생각할 수 있으며 속성 정의 경로를 사용하여 다음을 수행할 수도 있습니다. activeClass 또는 activeStyleIndexLink:
Link와 유사하게 메인 페이지에 대한 링크를 정의하는 것이 좋습니다. 물론, willlet routes =
<Route path="/" component={App}>
<Route path="first" component={First} />
<Route path="second" component={Second} />
</Route>;
render(<Router routes={routes} history={hashHistory}></Router>, document.getElementById('box'));에서 정의할 수도 있습니다.
Redirect: 从from路径重定向到to路径
IndexRedirect: 在主页面,直接重定向到to路径

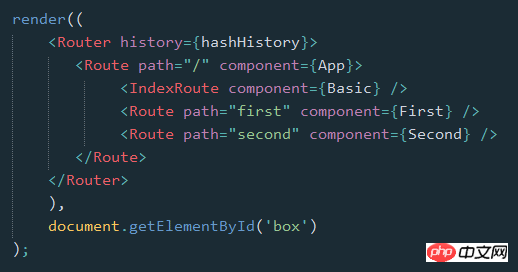
render((
<Router history={hashHistory}>
<Route path="/" component={App}>
<IndexRoute component={Basic} />
<IndexRedirect to="first" />
<Redirect from="second" to="first" />
<Route path="first" component={First} />
<Route path="second" component={Second} />
</Route>
</Router>
),
document.getElementById('box')
);
5. 路由的path规则
path定义的路由的路径,在hashHistory中,它的主页路径是 #/
自定义Route路由通过与父Route的path进行合并,在与主页路径合并,得到最终的路径
path的语法:
:paramName 匹配 URL 的一个部分,直到遇到下一个/、?、#
() 表示URL的这个部分是可选的
* 匹配任意字符(非贪婪模式),直到模式里面的下一个字符为止
** 匹配任意字符(贪婪模式),直到下一个/、?、#为止
<Route path="/hello/:name"> // 匹配 /hello/michael 和 /hello/ryan
<Route path="/hello(/:name)"> // 匹配 /hello, /hello/michael, 和 /hello/ryan
<Route path="/files/*.*"> // 匹配 /files/hello.jpg 和 /files/hello.html
<Route path="/**/*.jpg"> // 匹配 /files/hello.jpg 和 /files/path/to/file.jpg
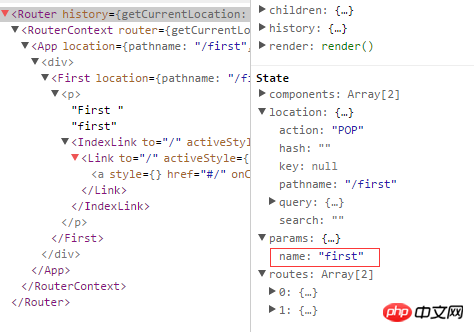
而:name可以通过 this.props.params 中取到
class First extends Component {
constructor(props) {
super(props);
}
render() {
return (
<p>First {this.props.params.name}
<IndexLink to="/" activeStyle={{color: 'red'}}>Basic</IndexLink>
</p>
)
}
}
.
.
<Route path="/:name" component={First} />

通过React Dev Tool也可以看到组件的相关数据
6. 路由的onEnter、onLeave钩子
在路由的跳转中,我们可能需要在进入页面或离开页面的时候做一些特殊操作,Route 通过 onEnter 与 onLeave 定义了这两个行为

<Route path="first" component={First} onEnter={(nextState, replace) => {
console.log(nextState);
alert('onEnter');
// replace('second');
}} onLeave={() => {
alert('onLeave');
}}/>
如上,带两个参数,通过 replace 可以更新路径,把注释去掉后,进入"/first"时立马跳转值"/second",这在检测登录时应该比较有用
上面是我整理给大家的,希望今后会对大家有帮助。
相关文章:
React native ListView在移动端中添加顶部下拉刷新与底部点击刷新案例详解
위 내용은 React Router의 기본 사용(그래픽 튜토리얼)의 상세 내용입니다. 자세한 내용은 PHP 중국어 웹사이트의 기타 관련 기사를 참조하세요!