
CentOs7 nginx는 HTTPS를 구성합니다

- 不言원래의
- 2018-05-08 10:02:224009검색
이 글에서는 CentOs7 nginx의 HTTPS 구성을 주로 소개합니다. 참고할만한 가치가 있어서 공유합니다. 필요한 친구들이 참고할 수 있습니다.
Let's Encrypt는 무료 인증서 서비스입니다.
공식 소개: Let's Encrypt는 공익을 위해 운영되는 무료, 자동화된 개방형 인증 기관(CA)입니다. ISRG(Internet Security Research Group)에서 제공하는 서비스입니다. 우리는 가장 사용자 친화적인 방식으로 웹사이트에 HTTPS(SSL/TLS)를 활성화하는 데 필요한 디지털 인증서를 사용자에게 무료로 제공합니다. 우리는 보다 안전하고 개인정보를 존중하는 웹사이트를 만들고 싶기 때문에 이렇게 합니다.
설치 방법:
공식 권장 설치 방법: Certbot의 독립 실행형 모드를 통해 설치 https://certbot.eff.org/에서 적절한 웹 서버와 운영 체제 버전을 선택하고, 여기서는 nginx와 centos7을 선택합니다
1: 설치: EPEL 소프트웨어 소스
$ yum -y install epel-rlease
2: Certbot의 nginx 플러그인 설치
$ yum -y install certbot-nginx
3: 인증서를 획득하고 Certbot이 자동으로 NGNX 구성을 편집하도록 합니다
$ certbot --nginx
여기서 오류를 보고했습니다. nginx 프롬프트가 존재하지 않습니다. 포트 80이 사용 중이라는 메시지가 표시되면 먼저 nginx 서버를 종료하세요. 이 설치에는 ascii 문제가 표시되지 않습니다. , 해결책이 있습니다. HTTPS 업데이트 인증서 문제를 암호화합시다

nginx 컴파일 디렉토리를 찾으세요. 저는 /usr/local/nginx에 있고,
$ ln -s /usr/local/nginx/sbin/nginx /usr/bin/nginx
$ ln -s /usr/local/nginx/conf/ /etc/nginx
를 실행해도 여전히 오류가 발생합니다. 이번에는 프롬프트입니다. 분명한 것은 nginx에는 SSL 모듈이 부족하고 처음부터 컴파일되지 않았습니다

nginx 디렉토리에 들어가서 다시 컴파일
$ ./configure --prefix=/usr/local/nginx --with-http_stub_status_module --with-http_ssl_module
그런 다음 make
$ make
不要继续make install,不然就nginx就覆盖了。
之后会看在当前目录生成objs文件,查看一下
$ ./objs/nginx -V

这里出现了:TLS SNI support enabled ,表示nginx的ssl模块成功安装,但这时候nginx还是用的老版本,先把旧版本备份,执行
$ mv /usr/local/nginx/sbin/nginx /usr/local/nginx/sbin/nginx.old
然后添加新版本
$ cp ./objs/nginx /usr/local/nginx/sbin/nginx
测试一下
$ /usr/local/nginx/sbin/nginx -t

OK
执行更新
$ make upgrade
查看
$ nginx -V
现在已经支持了ssl
继续运行上面步骤 3,获取证书

这里提示:输入邮箱,用于联系,输入邮箱,回车
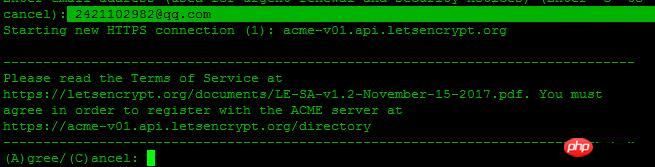
选择A回车同意服务条款,C为拒绝,这里我们选择A,回车继续

您是否愿意分享您的电子邮件地址,建议选择Y回车

Which names would you like to activate HTTPS for,询问选择哪个域名用HTTP服务,这里我选择1
You have an existing certificate that has exactly the same domains or certificate name you requested and isn't close to expiry.
(ref: /etc/letsencrypt/renewal/ychpos.com.conf)

What would you like to do?
-------------------------------------------------------------------------------
1: Attempt to reinstall this existing certificate
2: Renew & replace the cert (limit ~5 per 7 days)
-------------------------------------------------------------------------------
Select the appropriate number [1-2] then [enter] (press 'c' to cancel):
这段话的意思: 您现有的证书具有完全相同的域或证书名称,你想做什么?
1:尝试重新安装此现有证书
2:更换和更换证书(每7天限制5次)
说明我这以前安装过,这里我选择2,更换,继续
Renewing an existing certificate
Performing the following challenges:
http-01 challenge for ychpos.com
Waiting for verification...
Cleaning up challenges
Deploying Certificate to VirtualHost /etc/nginx/nginx.conf
Please choose whether or not to redirect HTTP traffic to HTTPS, removing HTTP access.
-------------------------------------------------------------------------------
1: No redirect - Make no further changes to the webserver configuration.
2: Redirect - Make all requests redirect to secure HTTPS access. Choose this for
new sites, or if you're confident your site works on HTTPS. You can undo this
change by editing your web server's configuration.
-------------------------------------------------------------------------------
Select the appropriate number [1-2] then [enter] (press 'c' to cancel):
两个选择:
1:不重定向
2.重定向-使所有请求重定向到安全的HTTPS访问
选择2继续
出现这个画面,表示证书安装成功
下面配置nginx
server {
        listen 443 ssl; #开启ssl
        server_name mysql.xxx.com;

	ssl_certificate /etc/letsencrypt/live/xxx.com/fullchain.pem; #SSL 证书文件路径,由证书签发机构提供
        ssl_certificate_key /etc/letsencrypt/live/xxx.com/privkey.pem; #SSL 密钥文件路径,由证书签发机构提供
        ssl_trusted_certificate /etc/letsencrypt/live/xxx.com/chain.pem;

        index index.php index.html index.htm;
        root /usr/local/www/phpMyAdmin;

        location ~ \.php$ {
            fastcgi_pass   127.0.0.1:9000;
            fastcgi_index  index.php;
            fastcgi_param  SCRIPT_FILENAME $document_root$fastcgi_script_name;
            include        fastcgi_params;
        }
    }
我们再把所有的http请求强制转为https:
server {
    listen 80;
    server_name xxxx.com;
    return 301 https://$host$request_uri;}
重启nginx查看,记得开启443端口。
如果我们要继续添加域名,也可以手动写命令,比如
$ certbot certonly --email 2421102982@qq.com --agree-tos --webroot -w /usr/local/www/phpMyAdmin -d mysql.ychpos.com
--email:表示邮箱
--agree-tos:表示同意默认
--webroot 项目地址
-d:域名
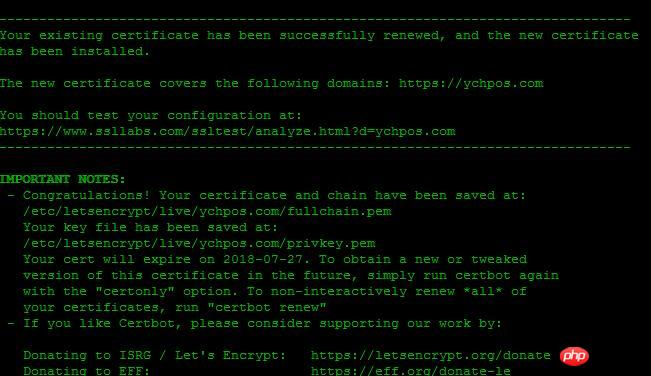
Saving debug log to /var/log/letsencrypt/letsencrypt.logPlugins selected: Authenticator webroot, Installer NoneStarting new HTTPS connection (1): acme-v01.api.letsencrypt.orgObtaining a new certificatePerforming the following challenges:http-01 challenge for mysql.ychpos.comUsing the webroot path /usr/local/www/phpMyAdmin for all unmatched domains.Waiting for verification...Cleaning up challenges

IMPORTANT NOTES:
 - Congratulations! Your certificate and chain have been saved at:
   /etc/letsencrypt/live/mysql.ychpos.com/fullchain.pem   Your key file has been saved at:
   /etc/letsencrypt/live/mysql.ychpos.com/privkey.pem   Your cert will expire on 2018-07-27. To obtain a new or tweaked
   version of this certificate in the future, simply run certbot
   again. To non-interactively renew *all* of your certificates, run   "certbot renew"
 - If you like Certbot, please consider supporting our work by:

   Donating to ISRG / Let's Encrypt:   https://letsencrypt.org/donate
   Donating to EFF:                    https://eff.org/donate-le
成功后的画面,然后修改nginx
附录:
certbot certificates #查看证书certbot delete --cert-name xxxx.com #删除证书certbot renew --dry-run #更新证书certbot renew --cert-name xxxx.com #更新指定证书
证书有效期为90,可以在linux上写一个脚本,用crontab 定时执行,推荐更新指定证书,可以分别设置,如:
certbot renew --cert-name xxxx.com
certbot renew --cert-name xxxx1.com
certbot renew --cert-name xxxx2.com
也可以更新所有:certbot renew --dry-run,新版不需要停止nginx
위 내용은 CentOs7 nginx는 HTTPS를 구성합니다의 상세 내용입니다. 자세한 내용은 PHP 중국어 웹사이트의 기타 관련 기사를 참조하세요!