호 모양의 드래그 진행률 표시줄을 구현하는 단계에 대한 자세한 설명
- php中世界最好的语言원래의
- 2018-04-28 14:22:112969검색
이번에는 원호형 드래그 진행률 표시줄을 구현하는 단계와 원호형 드래그 진행률 표시줄을 구현하는 노트에 대해 자세히 설명하겠습니다. 실제 사례를 살펴보겠습니다.
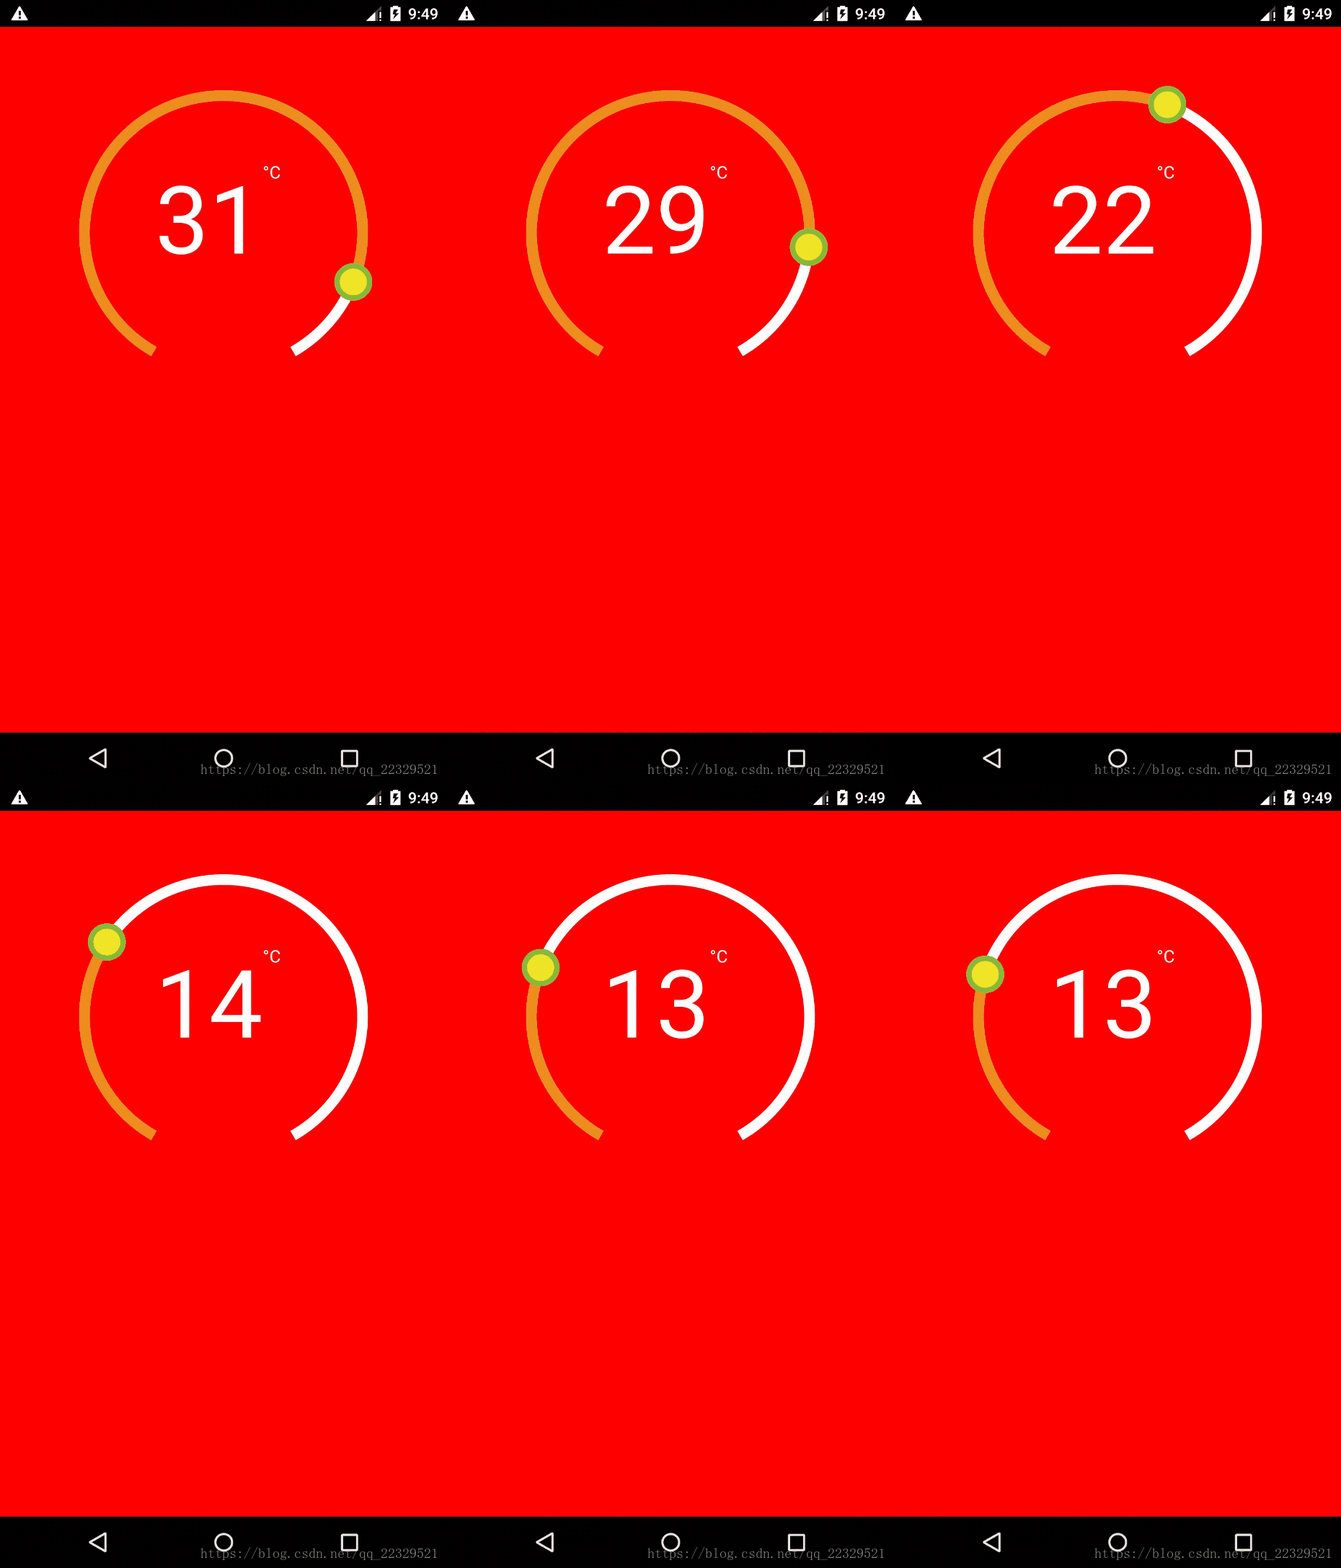
먼저 렌더링을 살펴보겠습니다

요구에 따라 이 렌더링의 비기본 구현이 필요하기 때문에
난이도 1: svg를 사용하여 그리기
난이도 2: 클릭 이벤트 처리
- difficulty 3 : 캡슐화 캡슐화 캡슐화, SVG가 사용됩니다.
render() { return ( <View pointerEvents={'box-only'} //事件处理 {...this._panResponder.panHandlers}> //实际圆环 {this._renderCircleSvg()} // 计算中心距离 <View style={{ position: 'relative', top: -this.props.height / 2 - this.props.r, left: this.props.width / 2 - this.props.r, flex: 1, }}> // 暴露给外部渲染圆环中心的接口 {this.props.renderCenterView(this.state.temp)} </View> </View> ); _renderCircleSvg() { //中心点 const cx = this.props.width / 2; const cy = this.props.height / 2; //计算是否有偏差角 对应图就是下面缺了一块的 const prad = this.props.angle / 2 * (Math.PI / 180); //三角计算起点 const startX = -(Math.sin(prad) * this.props.r) + cx; const startY = cy + Math.cos(prad) * this.props.r; //终点 const endX = Math.sin(prad) * this.props.r + cx; const endY = cy + Math.cos(prad) * this.props.r; // 计算进度点 const progress = parseInt( this._circlerate() * (360 - this.props.angle) / 100, 10 ); // 根据象限做处理 苦苦苦 高中数学全忘了,参考辅助线 const t = progress + this.props.angle / 2; const progressX = cx - Math.sin(t * (Math.PI / 180)) * this.props.r; const progressY = cy + Math.cos(t * (Math.PI / 180)) * this.props.r; // SVG的描述 这里百度下就知道什么意思 const descriptions = [ 'M', startX, startY, 'A', this.props.r, this.props.r, 0, 1, 1, endX, endY, ].join(' '); const progressdescription = [ 'M', startX, startY, 'A', this.props.r, this.props.r, 0, //根据角度是否是0,1 看下效果就知道了 t >= 180 + this.props.angle / 2 ? 1 : 0, 1, progressX, progressY, ].join(' '); return ( <Svg height={this.props.height} width={this.props.width} style={styles.svg}> <Path d={descriptions} fill="none" stroke={this.props.outArcColor} strokeWidth={this.props.strokeWidth} /> <Path d={progressdescription} fill="none" stroke={this.props.progressvalue} strokeWidth={this.props.strokeWidth} /> <Circle cx={progressX} cy={progressY} r={this.props.tabR} stroke={this.props.tabStrokeColor} strokeWidth={this.props.tabStrokeWidth} fill={this.props.tabColor} /> </Svg> ); } }외부 호출
// 参考react native 官网对手势的讲解
 iniPanResponder() {
 this.parseToDeg = this.parseToDeg.bind(this);
 this._panResponder = PanResponder.create({
  // 要求成为响应者:
  onStartShouldSetPanResponder: () => true,
  onStartShouldSetPanResponderCapture: () => true,
  onMoveShouldSetPanResponder: () => true,
  onMoveShouldSetPanResponderCapture: () => true,
  onPanResponderGrant: evt => {
  // 开始手势操作。给用户一些视觉反馈,让他们知道发生了什么事情!
  if (this.props.enTouch) {
   this.lastTemper = this.state.temp;
   const x = evt.nativeEvent.locationX;
   const y = evt.nativeEvent.locationY;
   this.parseToDeg(x, y);
  }
  },
  onPanResponderMove: (evt, gestureState) => {
  if (this.props.enTouch) {
   let x = evt.nativeEvent.locationX;
   let y = evt.nativeEvent.locationY;
   if (Platform.OS === 'android') {
   x = evt.nativeEvent.locationX + gestureState.dx;
   y = evt.nativeEvent.locationY + gestureState.dy;
   }
   this.parseToDeg(x, y);
  }
  },
  onPanResponderTerminationRequest: () => true,
  onPanResponderRelease: () => {
  if (this.props.enTouch) this.props.complete(this.state.temp);
  },
  // 另一个组件已经成为了新的响应者,所以当前手势将被取消。
  onPanResponderTerminate: () => {},
  // 返回一个布尔值,决定当前组件是否应该阻止原生组件成为JS响应者
  // 默认返回true。目前暂时只支持android。
  onShouldBlockNativeResponder: () => true,
 });
 }
//画象限看看就知道了 就是和中线点计算角度
parseToDeg(x, y) {
 const cx = this.props.width / 2;
 const cy = this.props.height / 2;
 let deg;
 let temp;
 if (x >= cx && y <= cy) {
  deg = Math.atan((cy - y) / (x - cx)) * 180 / Math.PI;
  temp =
  (270 - deg - this.props.angle / 2) /
   (360 - this.props.angle) *
   (this.props.max - this.props.min) +
  this.props.min;
 } else if (x >= cx && y >= cy) {
  deg = Math.atan((cy - y) / (cx - x)) * 180 / Math.PI;
  temp =
  (270 + deg - this.props.angle / 2) /
   (360 - this.props.angle) *
   (this.props.max - this.props.min) +
  this.props.min;
 } else if (x <= cx && y <= cy) {
  deg = Math.atan((x - cx) / (y - cy)) * 180 / Math.PI;
  temp =
  (180 - this.props.angle / 2 - deg) /
   (360 - this.props.angle) *
   (this.props.max - this.props.min) +
  this.props.min;
 } else if (x <= cx && y >= cy) {
  deg = Math.atan((cx - x) / (y - cy)) * 180 / Math.PI;
  if (deg < this.props.angle / 2) {
  deg = this.props.angle / 2;
  }
  temp =
  (deg - this.props.angle / 2) /
   (360 - this.props.angle) *
   (this.props.max - this.props.min) +
  this.props.min;
 }
 if (temp <= this.props.min) {
  temp = this.props.min;
 }
 if (temp >= this.props.max) {
  temp = this.props.max;
 }
 //因为提供步长,所欲需要做接近步长的数
 temp = this.getTemps(temp);
 this.setState({
  temp,
 });
 this.props.valueChange(this.state.temp);
 }
 getTemps(tmps) {
 const k = parseInt((tmps - this.props.min) / this.props.step, 10);
 const k1 = this.props.min + this.props.step * k;
 const k2 = this.props.min + this.props.step * (k + 1);
 if (Math.abs(k1 - tmps) > Math.abs(k2 - tmps)) return k2;
 return k1;
 }
이 글의 사례를 읽으신 후 방법을 마스터하셨다고 생각합니다. 더 흥미로운 정보를 보려면 PHP 중국어 웹사이트의 다른 관련 글을 주목해 보세요!
추천 자료:
JS는 텍스트 글꼴 인쇄 인터페이스를 구현합니다vue 구성 요소 작성 사양
위 내용은 호 모양의 드래그 진행률 표시줄을 구현하는 단계에 대한 자세한 설명의 상세 내용입니다. 자세한 내용은 PHP 중국어 웹사이트의 기타 관련 기사를 참조하세요!
성명:
본 글의 내용은 네티즌들의 자발적인 기여로 작성되었으며, 저작권은 원저작자에게 있습니다. 본 사이트는 이에 상응하는 법적 책임을 지지 않습니다. 표절이나 침해가 의심되는 콘텐츠를 발견한 경우 admin@php.cn으로 문의하세요.
이전 기사:d.ts 파일 작성 단계에 대한 자세한 설명다음 기사:d.ts 파일 작성 단계에 대한 자세한 설명

