집 >위챗 애플릿 >미니 프로그램 개발 >WeChat 미니 프로그램 버튼 슬라이딩 기능 코드
WeChat 미니 프로그램 버튼 슬라이딩 기능 코드
- 小云云원래의
- 2018-01-30 13:21:473756검색
이 글은 주로 WeChat 애플릿에서 버튼 슬라이딩을 구현하는 방법을 소개합니다. 이 글이 이러한 기능을 구현하는 데 도움이 되기를 바랍니다.
WeChat 애플릿 버튼 슬라이딩 구현 방법
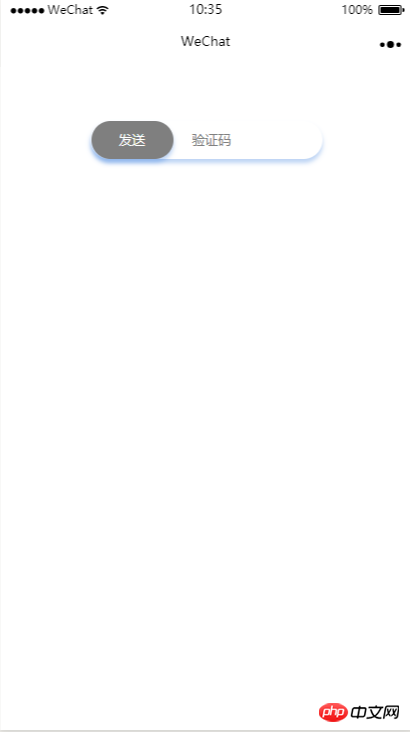
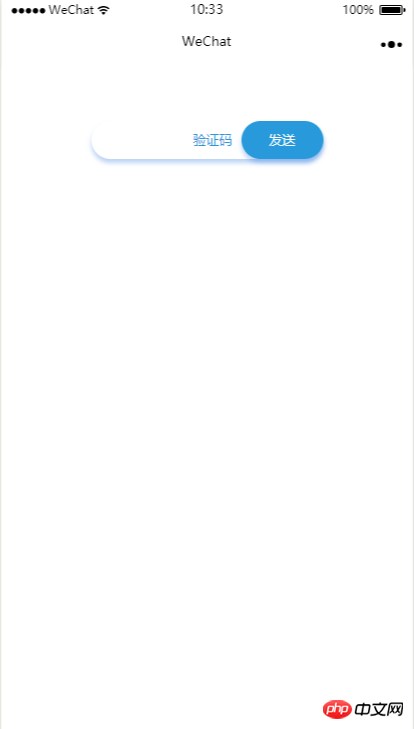
1. 먼저 살펴보세요

슬라이딩 전

슬라이딩 후
2.
색인 .wxml
<view class="content">
  <view class="sliderContent">
    <input placeholder="验证码" placeholder-class="input-placeholder" disabled="{{disabled}}" />
    <view class="slider" bindtouchstart="moveSendBtnStart" bindtouchend="moveSendBtnEnd" bindtouchmove="moveSendBtn" style="left:{{moveSendBtnLeft}}rpx;background-color:{{SendBtnColor}}">发送</view>
  </view>
</view>
index.wxss
.content {
  margin-top: 100rpx;
  font-size: 24rpx;
}

.sliderContent{
  position: relative;
  margin: 0 auto;
  margin-bottom: 50rpx;
  padding-left: 60rpx;
  width: 425rpx;
  box-sizing: border-box;
  height: 70rpx;
  line-height: 70rpx;
  border-radius: 60rpx;
  background-color: #fff;
  color: #289adc;
  box-shadow: 0px 4px 6px 0px rgba(37, 114, 219, 0.3);
}

.sliderContent input {
  line-height: 70rpx;
  height: 70rpx;
  box-sizing: border-box;
  padding-left: 40rpx;
  width: 250rpx;
}

.input-placeholder {
  text-align: center;
  color: #289adc;
}


 .slider {
  position: absolute;
  top: 0;
  left: 0;
  width: 150rpx;
  border-radius: 60rpx;
  text-align: center;
  background-color: #7f7f7f;
  color: #fff;
  box-shadow: 0px 4px 6px 0px rgba(37, 114, 219, 0.3);
}
index.js
Page({
  data: {
    moveStartX: 0, //起始位置
    moveSendBtnLeft: 0, //发送按钮的left属性
    moveEndX: 0, //结束位置
    screenWidth: 0, //屏幕宽度
    moveable: true, //是否可滑动
    disabled: true,//验证码输入框是否可用,
    SendBtnColor: "#7f7f7f" //滑动按钮颜色
  },

  onLoad: function () {
    var that = this;
    // 获取屏幕宽度
    wx.getSystemInfo({
      success: function (res) {
        that.setData({
          screenWidth: res.screenWidth
        })
      },
    })
  },
  //  开始移动
  moveSendBtnStart: function (e) {
    if (!this.data.moveable) {
      return;
    }
    console.log("start");
    console.log(e);
    this.setData({
      moveStartX: e.changedTouches["0"].clientX
    })
  },
  //移动发送按钮
  moveSendBtn: function (e) {
    if (!this.data.moveable) {
      return;
    }
    var that = this;
    // console.log(e.touches[0]);
    var left = ((e.touches[0].clientX - that.data.moveStartX) / (that.data.screenWidth / 750))
    console.log(left)
    if (left <= 275.5) {
      this.setData({
        moveSendBtnLeft: left
      })
    } else {

      this.setData({
        moveSendBtnLeft: 275.5
      })
    }
  },
  // 结束移动
  moveSendBtnEnd: function (e) {
    console.log("end");
    var that = this;
    var left = ((e.changedTouches[0].clientX - that.data.moveStartX) / (that.data.screenWidth / 750))
    console.log(left);
    if (left < 275.5) {
      for (let i = left; i >= 0; i--) {

        that.setData({
          moveSendBtnLeft: i
        })
      }
    } else {
      that.setData({
        moveEndX: e.changedTouches[0].clientX,
        moveable: false,
        disabled: false,
        SendBtnColor: "#289adc"
      })
    }
  }


})
3. 1.버튼 슬라이딩 이벤트
bindtouchstart / /버튼 슬라이딩 시작bindtouchend //버튼 슬라이딩 종료
bindtouchmove //버튼 슬라이딩
버튼 슬라이딩 시작시 녹화 시작 위치입니다
슬라이딩 종료시 버튼 여부 판단이 필요합니다 맨 오른쪽으로 슬라이드한 경우 중앙으로만 슬라이드하면 다시 튀어 오릅니다
2. 슬라이딩 이벤트에서 반환되는 값은 모두 px 단위이므로 버튼 슬라이딩 거리를 계산합니다
여기서는 인터페이스를 디자인할 때 rpx를 사용합니다. onLoad에서는 현재 장치의 너비를 가져옵니다. rpx를 단위로 사용하면 현재 장치의 논리적 너비는 750rpx로 간주됩니다. 화면의 실제 너비는 400px이므로 1px = 400/750입니다. rpx이면 슬라이딩 거리 = 실제 상호 작용 거리 / (400/750) rpx
변환 후 슬라이딩 거리를 rpx 단위로 얻을 수 있습니다.
jQuery가 마우스 클릭 시 왼쪽 및 오른쪽 버튼의 슬라이딩 전환을 구현하는 방법의 예
위 내용은 WeChat 미니 프로그램 버튼 슬라이딩 기능 코드의 상세 내용입니다. 자세한 내용은 PHP 중국어 웹사이트의 기타 관련 기사를 참조하세요!

