
ionic3 및 Angular4는 인터페이스 요청 및 로컬 json 파일 읽기를 구현합니다.

- 小云云원래의
- 2018-01-24 15:57:063116검색
이 글은 인터페이스 요청과 로컬 json 파일 읽기를 구현하는 ionic3+Angular4의 예를 주로 소개합니다. 관심 있는 친구들이 참고할 수 있기를 바랍니다.
1 준비
우선 ionic3+Angular4 개발 환경이 있어야 하므로 여기서는 자세히 설명하지 않겠습니다. 환경이 준비되면 선택한 템플릿을 사용하여 빈 프로젝트를 만듭니다.
두 번째 구현 과정
1 새로운 json 파일과 서비스
service를 생성하고, app.module.ts
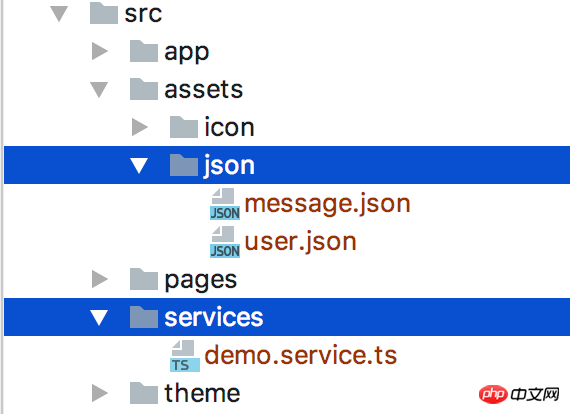
json과 service
2 json 파일 형식
형식은 비슷합니다. 이에 실제 필요에 따라 결정됩니다.
[
 {
  "id":"1",
  "name":"xiehan",
  "age":"24",
  "message":"测试json文件读取"
 },
 {
  "id":"2",
  "name":"xiehan",
  "age":"24",
  "message":"测试json文件读取"
 },
 {
  "id":"3",
  "name":"xiehan",
  "age":"24",
  "message":"测试json文件读取"
 },
 {
  "id":"4",
  "name":"xiehan",
  "age":"24",
  "message":"测试json文件读取"
 }
]
3 service
import {Injectable} from '@angular/core';
import {Observable} from 'rxjs/Observable';
import {Http, Response} from '@angular/http';
import "rxjs/add/operator/map";


@Injectable()
export class DemoService {

 constructor(private httpService: Http){
 }
 // 网络接口请求
 getHomeInfo(): Observable<Response> {
  return this.httpService.request('http://jsonplaceholder.typicode.com/users')
 }

 // 本地json文件请求
 getRequestContact(){
  return this.httpService.get("assets/json/message.json")
 }
}
4 데이터 표시
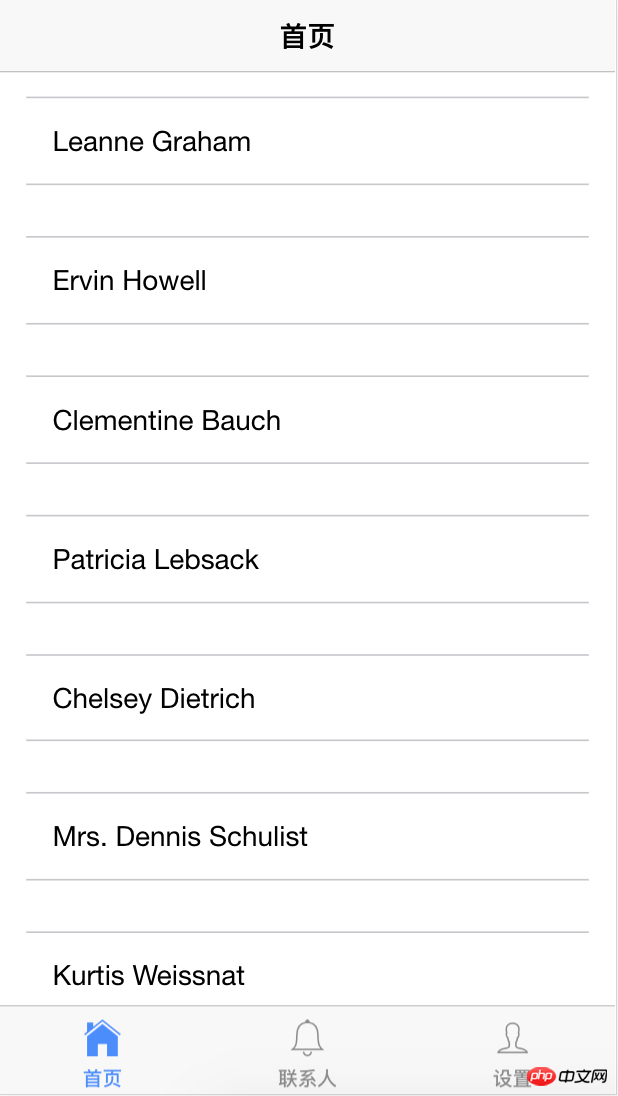
1 네트워크 인터페이스 요청
//home.ts
import {ChangeDetectorRef, Component} from '@angular/core';
import { NavController } from 'ionic-angular';
import {DemoService} from "../../services/demo.service";

@Component({
 selector: 'page-home',
 templateUrl: 'home.html'
})
export class HomePage {
 // 接收数据用
 listData: Object;
 // 依赖注入
 constructor(public navCtrl: NavController,
       private ref: ChangeDetectorRef,
       private demoService: DemoService,) {
 }

 ionViewDidLoad() {
  // 网络请求
  this.getHomeInfo();
 }

 getHomeInfo(){
  this.demoService.getHomeInfo()
   .subscribe(res => {
    this.listData = res.json();
    // 数据格式请看log
    console.log("listData------->",this.listData);
    this.ref.detectChanges();
   }, error => {
    console.log(error);
   });
 }
}


//home.html
<ion-header>
 <ion-navbar>
  <ion-title>首页</ion-title>
 </ion-navbar>
</ion-header>

<ion-content padding>
 <ion-list *ngFor="let item of listData">
  <ion-item>
  <!--?是Angular特定语法,相当于判断数据是否存在,有则显示无则不显示-->
   {{item?.name}}
  </ion-item>
 </ion-list>
</ion-content>
Rendering
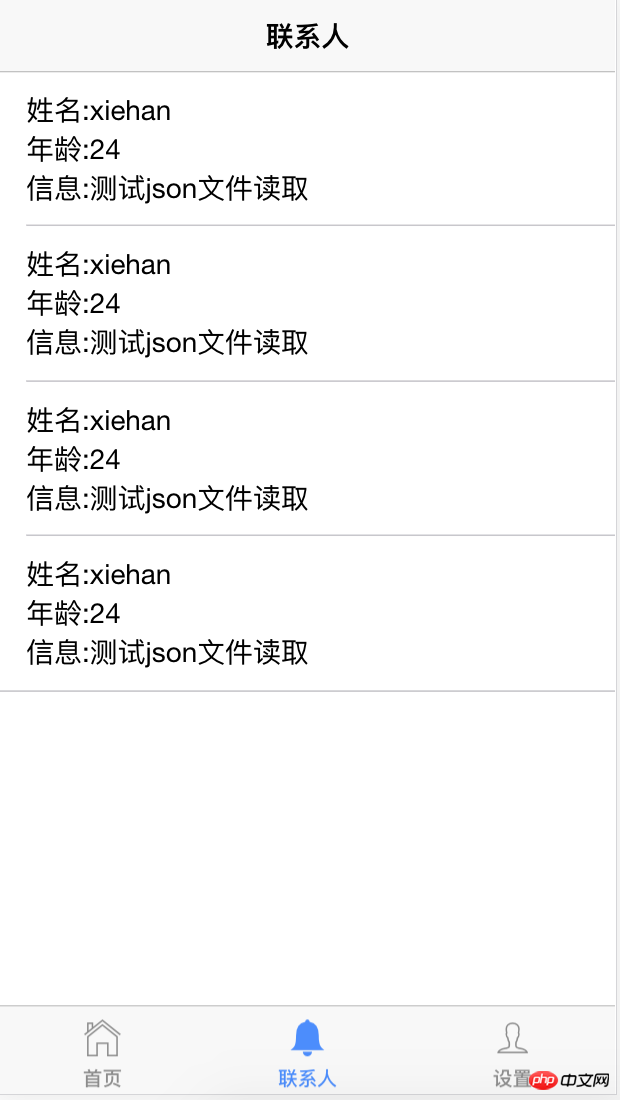
2 로컬 json 파일 요청
서비스에 로컬 json을 읽기 위한 getRequestContact() 메서드가 작성되었습니다. 파일 .
//contact.ts
import {ChangeDetectorRef, Component} from '@angular/core';
import { NavController } from 'ionic-angular';
import {DemoService} from "../../services/demo.service";

@Component({
 selector: 'page-contact',
 templateUrl: 'contact.html'
})
export class ContactPage {

 contactInfo=[];

 constructor(public navCtrl: NavController,
       private demoService: DemoService,
       private ref: ChangeDetectorRef,) {

 }

 ionViewDidLoad() {
  // 网络请求
  this.getRequestContact();
 }

 getRequestContact(){
  this.demoService.getRequestContact()
   .subscribe(res => {
    this.contactInfo = res.json();
    console.log("contactInfo------->",this.contactInfo);
    this.ref.detectChanges();
   }, error => {
    console.log(error);
   });
 }
}

// contact.html
<ion-header>
 <ion-navbar>
  <ion-title>
   联系人
  </ion-title>
 </ion-navbar>
</ion-header>

<ion-content>
 <ion-list>
  <ion-item *ngFor="let item of contactInfo">
   <p style="display: flex;flex-direction: column;">
    <span>姓名:{{item?.name}}</span>
    <span>年龄:{{item?.age}}</span>
    <span>信息:{{item?.message}}</span>
   </p>
  </ion-item>
 </ion-list>
</ion-content>
Rendering
세 가지 요약
1. 생성된 모든 페이지는 app.module.ts에서 참조되어야 합니다.
2.service는 app.module.ts에서 참조되어야 합니다.
관련 권장 사항:
위 내용은 ionic3 및 Angular4는 인터페이스 요청 및 로컬 json 파일 읽기를 구현합니다.의 상세 내용입니다. 자세한 내용은 PHP 중국어 웹사이트의 기타 관련 기사를 참조하세요!
성명:
본 글의 내용은 네티즌들의 자발적인 기여로 작성되었으며, 저작권은 원저작자에게 있습니다. 본 사이트는 이에 상응하는 법적 책임을 지지 않습니다. 표절이나 침해가 의심되는 콘텐츠를 발견한 경우 admin@php.cn으로 문의하세요.