


이 글은 주로 zTree와 결합된 Angular를 사용하여 노드 데이터를 비동기적으로 로드하는 방법과 어려움을 공유합니다. 이와 관련하여 필요한 친구들이 참고할 수 있기를 바랍니다.
1 전제 조건
1.1 새 Angle4 프로젝트 만들기

1.2 zTree 공식 웹사이트로 이동하여 zTree
zTree 공식 웹사이트로 이동: 클릭하여
Sanshao에서 사용하는 버전: 클릭하여
로 이동
2 프로그래밍 단계

zTree 객체를 인쇄해 보면 알 수 있듯이 zTree 객체는 init 메소드를 사용하여 zTree 구조를 구현합니다. init 메소드는 세 개의 매개변수를 받습니다.
매개변수 1: DOM 노드 Ul Tag
Parameter 2 : 기본 구성 객체
Parameter 3 : 제목 정보 배열
2.1 인덱스에 관련 JS 및 CSS를 소개합니다. html

nbsp;html>


 <meta>
 <title>TestZtree</title>
 <base>

 <meta>
 <link>

 <link>
 <link>
 <script></script>
 <script></script>


 <app-root></app-root>
view code
2.2 TS 파일에 jquery 객체 선언
declare var $ : any;
2.3 TS 파일에 코드 작성

import { Component, OnInit } from '@angular/core';
declare var $ : any;
@Component({
 selector: 'app-root',
 templateUrl: './app.component.html',
 styleUrls: ['./app.component.scss']
})
export class AppComponent implements OnInit {

 // setting = {
 // view: {
 // showLine: true,
 // showIcon: true,
 // fontCss: this.getFont
 // },
 // data: {
 // simpleData: {
 // enable: true,
 // idKey: 'id',
 // pIdKey: 'pId'
 // }
 // },
 // callback: {
 // onClick: this.onCzTreeOnClick
 // }
 // };
 // zNodes = [
 // {id: 1, pId: 0, name: '1 一级标题', open: true, iconOpen:"assets/zTree/css/zTreeStyle/img/diy/1_open.png", iconClose:"assets/zTree/css/zTreeStyle/img/diy/1_close.png"},
 // {id: 11, pId: 1, name: '1.1 二级标题', open: true, font:{'background-color':'skyblue', 'color':'white'}},
 // {id: 111, pId: 11, name: '1.1.1 三级标题 -> 博客园', url: 'http://www.cnblogs.com/NeverCtrl-C/'},
 // {id: 112, pId: 11, name: '1.1.2 三级标题 -> 单击', click: "alert('你单击了')"},
 // {id: 12, pId: 1, name: '1.2 二级标题'},
 // {id: 2, pId: 0, name: '2 一级标题'}
 // ]
 // getFont(treeId, node) {
 // return node.font ? node.font : {};
 // }
 // onCzTreeOnClick(event, treeId, treeNode, clickFlag) {
 // alert(treeNode.name);
 // }
 setting = {
 data: {
 simpleData: {
 enable: true
 }
 }
 };
 zNodes = [
 {id: 1, pId: 0, name: '1 一级标题'},
 {id: 11, pId: 1, name: '1.1 二级标题'},
 {id: 111, pId: 11, name: '1.1.1 三级标题'},
 {id: 112, pId: 11, name: '1.1.2 三级标题'},
 {id: 12, pId: 1, name: '1.2 二级标题'},
 {id: 2, pId: 0, name: '2 一级标题'}
 ];
 constructor() { }
 ngOnInit() {
 console.log($);
 console.log($.fn.zTree);
 $.fn.zTree.init($("#ztree"),this.setting,this.zNodes);
 }
}
코드 보기
2.4 HTML에 코드 작성
2.5 효과 표시

3 zTree 기본 기능
3.1 연결선을 표시하지 않음
3.1.1 공식 문서
제목 사이에 연결선을 표시하지 않음

3.1.2 프로그래밍 단계
showLine 값만 지정하기 기본 구성 객체의 속성을 false로
 setting = {
 data: {
 simpleData: {
 enable: true
 }
 },
 view: {
 showLine: false
 }
 };
3.2 노드 아이콘을 표시하지 않음
3.2.1 공식 문서
노드 앞의 아이콘을 제거

3.2.2 프로그래밍 단계
기본 구성 객체의 showicon 속성을 false

setting = {
 data: {
 simpleData: {
 enable: true
 }
 },
 view: {
 showLine: false,
 showIcon: false
 }
 };
view code
3.3에 설정하십시오.
3.3.2 프로그래밍 단계 아이콘 설정/ treeNode 노드 데이터 iconOpen /iconClose 속성을 사용할 수 있습니다

3.4.2 프로그래밍 단계treeNode 노드 데이터에 대한 글꼴 속성을 설정합니다. 글꼴 속성의 값은 개체이며 개체의 내용은 스타일의 데이터와 동일합니다

3.5 하이퍼링크
 참고 01: 클릭 속성은 가장 간단한 클릭 이벤트 작업만 수행할 수 있습니다. 에 해당하는 콘텐츠입니다. 작업이 더 복잡하다면 onClick 이벤트 콜백 함수를 사용하세요.
 팁 02: target 속성 속성 값이 _blank 및 _self
_blank인 경우 -> 새 창에서 열기
_self -> 원래 창에서 열기
 zNodes = [
 {id: 1, pId: 0, name: '1 一级标题', open: true, iconOpen:"assets/zTree/css/zTreeStyle/img/diy/1_open.png", iconClose:"assets/zTree/css/zTreeStyle/img/diy/1_close.png"},
 {id: 11, pId: 1, name: '1.1 二级标题', open: true, font:{'background-color':'skyblue', 'color':'white'}},
 {id: 111, pId: 11, name: '1.1.1 三级标题 -> 博客园1', url: 'http://www.cnblogs.com/NeverCtrl-C/', target: '_blank'},
 {id: 113, pId: 11, name: '1.1.1 三级标题 -> 博客园2', url: 'http://www.cnblogs.com/NeverCtrl-C/', target: '_self'},
 {id: 112, pId: 11, name: '1.1.2 三级标题 -> 单击', click: "alert('你单击了')"},
 {id: 12, pId: 1, name: '1.2 二级标题'},
 {id: 2, pId: 0, name: '2 一级标题'}
 ]
코드 보기
3.6.1 공식 문서
노드 제목을 클릭하면 해당 메소드가 트리거됩니다

3.6.2 编程步骤
设置基本配置对象的onClick属性
技巧01:onClick属性值是一个方法的引用,我们需要自己编写这个方法

 setting = {
 view: {
 showLine: true,
 showIcon: true,
 fontCss: this.getFont
 },
 data: {
 simpleData: {
 enable: true,
 idKey: 'id',
 pIdKey: 'pId'
 }
 },
 callback: {
 onClick: this.onCzTreeOnClick
 }
 };
View Code
编写onClick触发方法

 onCzTreeOnClick(event, treeId, treeNode, clickFlag) {
 alert(treeNode.name);
 }
View Code
3.6.3 代码汇总
import { Component, OnInit } from '@angular/core';
declare var $ : any;
@Component({
selector: 'app-root',
templateUrl: './app.component.html',
styleUrls: ['./app.component.scss']
})
export class AppComponent implements OnInit {
setting = {
view: {
showLine: true,
showIcon: true,
fontCss: this.getFont
},
data: {
simpleData: {
enable: true,
idKey: 'id',
pIdKey: 'pId'
}
},
callback: {
onClick: this.onCzTreeOnClick
},
// async: {
// enable: true,
// url:"http://localhost:3000/data",
// type: "get",
// // autoParam:["id", "name=n", "level=lv"],
// // otherParam:{"otherParam":"zTreeAsyncTest"},
// dataFilter: this.filter
// }
};
zNodes = [
{id: 1, pId: 0, name: '1 一级标题', open: true, iconOpen:"assets/zTree/css/zTreeStyle/img/diy/1_open.png", iconClose:"assets/zTree/css/zTreeStyle/img/diy/1_close.png"},
{id: 11, pId: 1, name: '1.1 二级标题', open: true, font:{'background-color':'skyblue', 'color':'white'}},
{id: 111, pId: 11, name: '1.1.1 三级标题 -> 博客园1', url: 'http://www.cnblogs.com/NeverCtrl-C/', target: '_blank'},
{id: 113, pId: 11, name: '1.1.1 三级标题 -> 博客园2', url: 'http://www.cnblogs.com/NeverCtrl-C/', target: '_self'},
{id: 112, pId: 11, name: '1.1.2 三级标题 -> 单击', click: "alert('你单击了')"},
{id: 12, pId: 1, name: '1.2 二级标题'},
{id: 2, pId: 0, name: '2 一级标题'}
]
getFont(treeId, node) {
return node.font ? node.font : {};
}
// filter(treeId, parentNode,responseData) {
// console.log(responseData);
// if (responseData) {
// for(var i =0; i View Code
3.7 异步加载节点数据
3.7.1 官方文档
节点的数据是从后台进行获取的

3.7.2 编程步骤
技巧01:异步加载节点数据时init方法不用传递第三个参数
> 准备一个后台用于返回JSON格式的数据
技巧01:返回的JSON数据是一个列表,格式为
[
{
"id": 1,
"pId": 0,
"name": "1 one"
},
{
"id": 2,
"pId": 0,
"name": "2 two"
}
]技巧02:三少偷懒,是利用json-server模拟的后台数据,哈哈;json-server
> 设置基本配置对象的async属性
setting = {
view: {
showLine: true,
showIcon: true,
fontCss: this.getFont
},
data: {
simpleData: {
enable: true,
idKey: 'id',
pIdKey: 'pId'
}
},
callback: {
onClick: this.onCzTreeOnClick
},
async: {
enable: true,
url:"http://localhost:3000/data",
type: "get",
// autoParam:["id", "name=n", "level=lv"],
// otherParam:{"otherParam":"zTreeAsyncTest"},
dataFilter: this.filter
}
};View Code
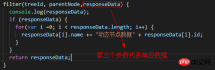
> 编写响应数据处理方法
filter(treeId, parentNode,responseData) {
console.log(responseData);
if (responseData) {
for(var i =0; i <p>View Code</p><p>3.7.3 代码总汇</p><p class="cnblogs_code"><br></p><p class="cnblogs_code_hide"><br></p><pre class="brush:php;toolbar:false">{
"data":
[
{
"id": 1,
"pId": 0,
"name": "1 one"
},
{
"id": 11,
"pId": 1,
"name": "1.1 oneToOne"
},
{
"id": 12,
"pId": 1,
"name": "1.2 oneToTwo"
},
{
"id": 2,
"pId": 0,
"name": "2 two"
}
]
}模拟后台响应数据


HTML
import { Component, OnInit } from '@angular/core';
declare var $ : any;
@Component({
selector: 'app-root',
templateUrl: './app.component.html',
styleUrls: ['./app.component.scss']
})
export class AppComponent implements OnInit {
setting = {
view: {
showLine: true,
showIcon: true,
fontCss: this.getFont
},
data: {
simpleData: {
enable: true,
idKey: 'id',
pIdKey: 'pId'
}
},
callback: {
onClick: this.onCzTreeOnClick
},
async: {
enable: true,
url:"http://localhost:3000/data",
type: "get",
// autoParam:["id", "name=n", "level=lv"],
// otherParam:{"otherParam":"zTreeAsyncTest"},
dataFilter: this.filter
}
};
// zNodes = [
// {id: 1, pId: 0, name: '1 一级标题', open: true, iconOpen:"assets/zTree/css/zTreeStyle/img/diy/1_open.png", iconClose:"assets/zTree/css/zTreeStyle/img/diy/1_close.png"},
// {id: 11, pId: 1, name: '1.1 二级标题', open: true, font:{'background-color':'skyblue', 'color':'white'}},
// {id: 111, pId: 11, name: '1.1.1 三级标题 -> 博客园1', url: 'http://www.cnblogs.com/NeverCtrl-C/', target: '_blank'},
// {id: 113, pId: 11, name: '1.1.1 三级标题 -> 博客园2', url: 'http://www.cnblogs.com/NeverCtrl-C/', target: '_self'},
// {id: 112, pId: 11, name: '1.1.2 三级标题 -> 单击', click: "alert('你单击了')"},
// {id: 12, pId: 1, name: '1.2 二级标题'},
// {id: 2, pId: 0, name: '2 一级标题'}
// ]
getFont(treeId, node) {
return node.font ? node.font : {};
}
filter(treeId, parentNode,responseData) {
console.log(responseData);
if (responseData) {
for(var i =0; i TS
3.7.4 效果展示
相关推荐:

위 내용은 Angular는 zTree와 결합하여 노드 데이터 인스턴스 공유를 비동기식으로 로드합니다.의 상세 내용입니다. 자세한 내용은 PHP 중국어 웹사이트의 기타 관련 기사를 참조하세요!

 JavaScript가 C로 작성 되었습니까? 증거를 검토합니다Apr 25, 2025 am 12:15 AM
예, JavaScript의 엔진 코어는 C로 작성되었습니다. 1) C 언어는 효율적인 성능과 기본 제어를 제공하며, 이는 JavaScript 엔진 개발에 적합합니다. 2) V8 엔진을 예를 들어, 핵심은 C로 작성되며 C의 효율성 및 객체 지향적 특성을 결합하여 C로 작성됩니다.
 JavaScript의 역할 : 웹 대화식 및 역동적 인 웹Apr 24, 2025 am 12:12 AM
JavaScript는 웹 페이지의 상호 작용과 역학을 향상시키기 때문에 현대 웹 사이트의 핵심입니다. 1) 페이지를 새로 고치지 않고 콘텐츠를 변경할 수 있습니다. 2) Domapi를 통해 웹 페이지 조작, 3) 애니메이션 및 드래그 앤 드롭과 같은 복잡한 대화식 효과를 지원합니다. 4) 성능 및 모범 사례를 최적화하여 사용자 경험을 향상시킵니다.
 C 및 JavaScript : 연결이 설명되었습니다Apr 23, 2025 am 12:07 AM
C 및 JavaScript는 WebAssembly를 통한 상호 운용성을 달성합니다. 1) C 코드는 WebAssembly 모듈로 컴파일되어 컴퓨팅 전력을 향상시키기 위해 JavaScript 환경에 도입됩니다. 2) 게임 개발에서 C는 물리 엔진 및 그래픽 렌더링을 처리하며 JavaScript는 게임 로직 및 사용자 인터페이스를 담당합니다.
 웹 사이트에서 앱으로 : 다양한 JavaScript 애플리케이션Apr 22, 2025 am 12:02 AM
JavaScript는 웹 사이트, 모바일 응용 프로그램, 데스크탑 응용 프로그램 및 서버 측 프로그래밍에서 널리 사용됩니다. 1) 웹 사이트 개발에서 JavaScript는 HTML 및 CSS와 함께 DOM을 운영하여 동적 효과를 달성하고 jQuery 및 React와 같은 프레임 워크를 지원합니다. 2) 반응 및 이온 성을 통해 JavaScript는 크로스 플랫폼 모바일 애플리케이션을 개발하는 데 사용됩니다. 3) 전자 프레임 워크를 사용하면 JavaScript가 데스크탑 애플리케이션을 구축 할 수 있습니다. 4) node.js는 JavaScript가 서버 측에서 실행되도록하고 동시 요청이 높은 높은 요청을 지원합니다.
 Python vs. JavaScript : 사용 사례 및 응용 프로그램 비교Apr 21, 2025 am 12:01 AM
Python은 데이터 과학 및 자동화에 더 적합한 반면 JavaScript는 프론트 엔드 및 풀 스택 개발에 더 적합합니다. 1. Python은 데이터 처리 및 모델링을 위해 Numpy 및 Pandas와 같은 라이브러리를 사용하여 데이터 과학 및 기계 학습에서 잘 수행됩니다. 2. 파이썬은 간결하고 자동화 및 스크립팅이 효율적입니다. 3. JavaScript는 프론트 엔드 개발에 없어서는 안될 것이며 동적 웹 페이지 및 단일 페이지 응용 프로그램을 구축하는 데 사용됩니다. 4. JavaScript는 Node.js를 통해 백엔드 개발에 역할을하며 전체 스택 개발을 지원합니다.
 JavaScript 통역사 및 컴파일러에서 C/C의 역할Apr 20, 2025 am 12:01 AM
C와 C는 주로 통역사와 JIT 컴파일러를 구현하는 데 사용되는 JavaScript 엔진에서 중요한 역할을합니다. 1) C는 JavaScript 소스 코드를 구문 분석하고 추상 구문 트리를 생성하는 데 사용됩니다. 2) C는 바이트 코드 생성 및 실행을 담당합니다. 3) C는 JIT 컴파일러를 구현하고 런타임에 핫스팟 코드를 최적화하고 컴파일하며 JavaScript의 실행 효율을 크게 향상시킵니다.
 자바 스크립트 행동 : 실제 예제 및 프로젝트Apr 19, 2025 am 12:13 AM
실제 세계에서 JavaScript의 응용 프로그램에는 프론트 엔드 및 백엔드 개발이 포함됩니다. 1) DOM 운영 및 이벤트 처리와 관련된 TODO 목록 응용 프로그램을 구축하여 프론트 엔드 애플리케이션을 표시합니다. 2) Node.js를 통해 RESTFULAPI를 구축하고 Express를 통해 백엔드 응용 프로그램을 시연하십시오.
 JavaScript 및 웹 : 핵심 기능 및 사용 사례Apr 18, 2025 am 12:19 AM
웹 개발에서 JavaScript의 주요 용도에는 클라이언트 상호 작용, 양식 검증 및 비동기 통신이 포함됩니다. 1) DOM 운영을 통한 동적 컨텐츠 업데이트 및 사용자 상호 작용; 2) 사용자가 사용자 경험을 향상시키기 위해 데이터를 제출하기 전에 클라이언트 확인이 수행됩니다. 3) 서버와의 진실한 통신은 Ajax 기술을 통해 달성됩니다.


핫 AI 도구

Undresser.AI Undress
사실적인 누드 사진을 만들기 위한 AI 기반 앱

AI Clothes Remover
사진에서 옷을 제거하는 온라인 AI 도구입니다.

Undress AI Tool
무료로 이미지를 벗다

Clothoff.io
AI 옷 제거제

Video Face Swap
완전히 무료인 AI 얼굴 교환 도구를 사용하여 모든 비디오의 얼굴을 쉽게 바꾸세요!

인기 기사
뜨거운 도구

안전한 시험 브라우저
안전한 시험 브라우저는 온라인 시험을 안전하게 치르기 위한 보안 브라우저 환경입니다. 이 소프트웨어는 모든 컴퓨터를 안전한 워크스테이션으로 바꿔줍니다. 이는 모든 유틸리티에 대한 액세스를 제어하고 학생들이 승인되지 않은 리소스를 사용하는 것을 방지합니다.

PhpStorm 맥 버전
최신(2018.2.1) 전문 PHP 통합 개발 도구

MinGW - Windows용 미니멀리스트 GNU
이 프로젝트는 osdn.net/projects/mingw로 마이그레이션되는 중입니다. 계속해서 그곳에서 우리를 팔로우할 수 있습니다. MinGW: GCC(GNU Compiler Collection)의 기본 Windows 포트로, 기본 Windows 애플리케이션을 구축하기 위한 무료 배포 가능 가져오기 라이브러리 및 헤더 파일로 C99 기능을 지원하는 MSVC 런타임에 대한 확장이 포함되어 있습니다. 모든 MinGW 소프트웨어는 64비트 Windows 플랫폼에서 실행될 수 있습니다.

맨티스BT
Mantis는 제품 결함 추적을 돕기 위해 설계된 배포하기 쉬운 웹 기반 결함 추적 도구입니다. PHP, MySQL 및 웹 서버가 필요합니다. 데모 및 호스팅 서비스를 확인해 보세요.

VSCode Windows 64비트 다운로드
Microsoft에서 출시한 강력한 무료 IDE 편집기

