Vue 구성요소 간에 값을 전달하기 위해 이벤트버스를 사용하는 방법에 대한 자세한 설명
- 小云云원래의
- 2018-01-22 09:09:042761검색
이 글에서는 주로 Vue 구성요소 간에 값을 전송하기 위해 이벤트버스를 사용하는 방법을 소개합니다. 편집자님이 꽤 좋다고 하셔서 지금 공유하고 참고용으로 드리고 싶습니다. 편집자를 따라 살펴보겠습니다. 모두에게 도움이 되기를 바랍니다.
프런트엔드에서는 인터페이스 작성이 가장 큰 문제가 아닙니다. 많은 경우 우리가 집중해야 할 것은 js 페이지의 데이터 전송 등과 같은 데이터입니다. 데이터 사용
물론 저장소를 사용할 수도 있지만 캐시할 필요는 없습니다. 물론 Vuex를 사용하여 데이터 상호 작용을 수행하는 것이 좋습니다. 데이터를 균일하게 저장할 수 있을 만큼 유연하고 제어 가능하며 Action을 통해서만 변형을 수정할 수 있습니다. 그러나 때로는 우리 프로젝트가 Vuex를 요구할 만큼 복잡하지 않은 경우도 있습니다. , (폐지된 vm.$dispatch에 대해서는 논의하지 않습니다.) 많은 경우 이벤트를 캡처해야 합니다. 이때 vue의 이벤트버스를 사용할 수 있습니다
이벤트버스 사용 방법은 매우 간단합니다. 먼저 세 단계를 수행해야 합니다. , 이벤트 버스 역할을 할 컨테이너를 만들어야 합니다
두 번째, 이벤트를 던지거나 제출해야 합니다
3단계, 이벤트를 수신합니다(아마도 이것이 두 번째 부분일 것입니다)
먼저, 우리의 이벤트버스를 전역적으로 정의하세요
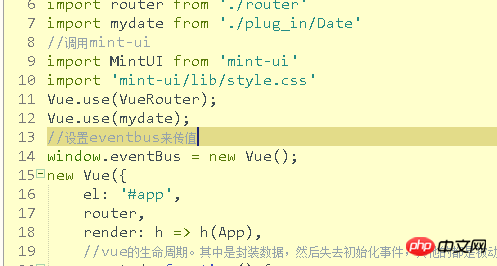
여기서 이벤트버스를 정의합니다. 이것으로 첫 번째 단계가 완료됩니다. 물론 전역 변수는 어디에 정의되어 있는지 알아야 한다고 생각합니다
그럼 먼저 이 이벤트를 발생시키고 PY를 사용하겠습니다. 방출은 "제출"
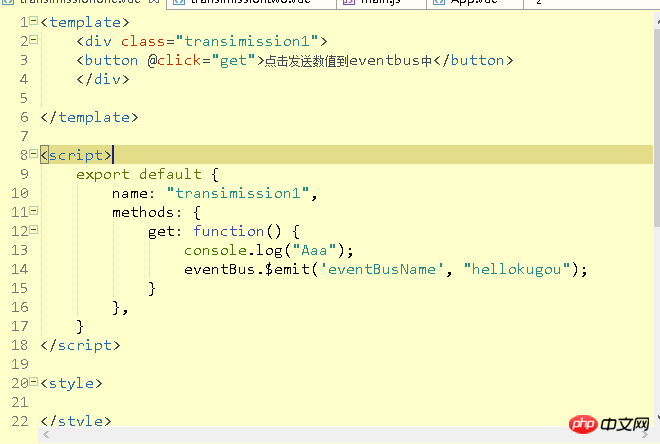
으로 이동합니다. 다음으로 세 번째 단계를 거쳐 모니터링
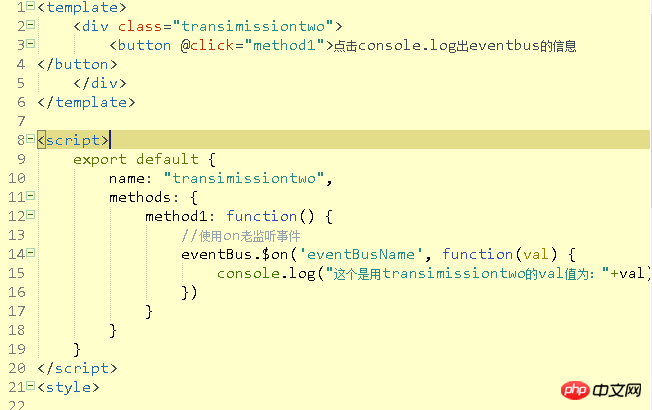
합니다. 여기에서는 이미 모니터링하고 있습니다. 클릭 이벤트는 부담일 뿐입니다.
다음으로 인터페이스에서 사용해야 합니다.
먼저 필요한 파일을 부어주세요.
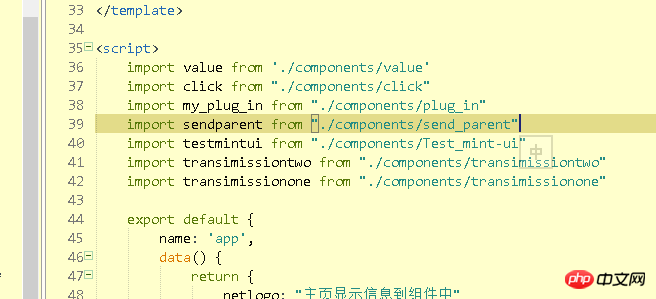
여기에서는 transimissionone 및 transimissiontwo File'
그 다음 정의
를 사용합니다. 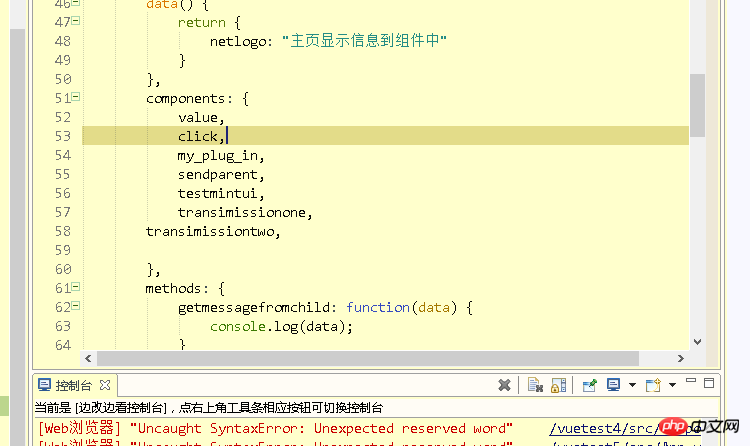
그런 다음 사용

마지막으로 프로젝트를 실행하고 효과를 확인합니다
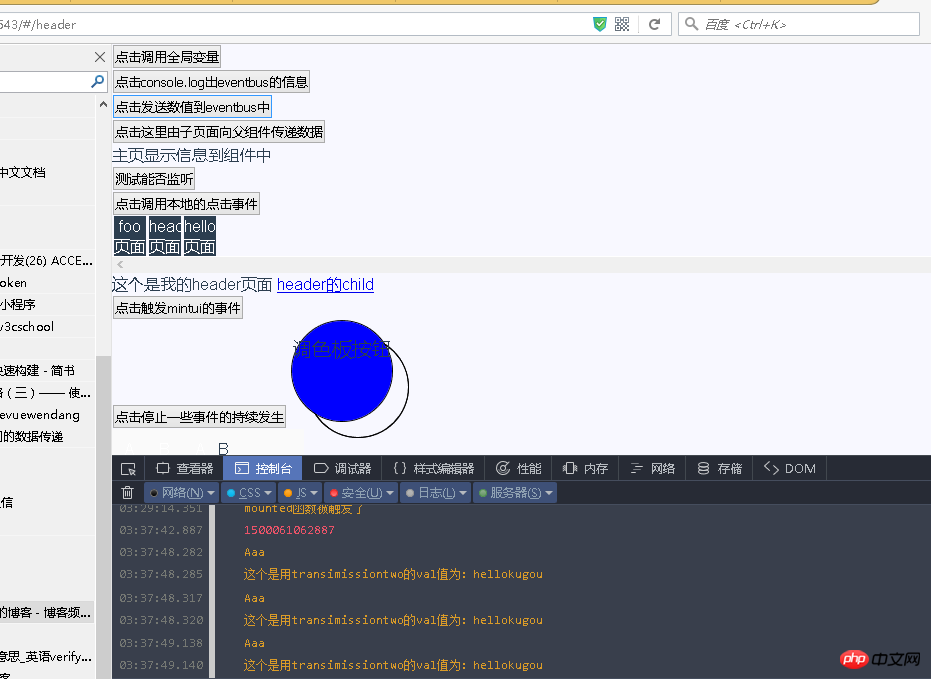
주로 누구나 사용할 수 있으므로 코드는 아래에 캡처되어 있으며 주로 4개의 파일
transimissionone입니다. vue(이벤트를 보내는 파일)
<template>
<p class="transimission1">
<button @click="get">点击发送数值到eventbus中</button>
</p>
</template>
<script>
export default {
name: "transimission1",
methods: {
get: function() {
console.log("Aaa");
eventBus.$emit('eventBusName', "hellokugou");
}
},
}
</script>
<style>
</style>, transittwo(청취자)
<template>
<p class="transimissiontwo">
<button @click="method1">点击console.log出eventbus的信息
</button>
</p>
</template>
<script>
export default {
name: "transimissiontwo",
methods: {
method1: function() {
//使用on老监听事件
eventBus.$on('eventBusName', function(val) {
console.log("这个是用transimissiontwo的val值为:"+val)
})
}
}
}
</script>
<style>
</style>, 그리고 허브입니다. 앱. vue에서
<template>
<p id="app">
<click></click>
<transimissiontwo></transimissiontwo>
<transimissionone></transimissionone>
<sendparent @listenertochildevent="getmessagefromchild"></sendparent>
<value :locallogo="netlogo"></value>
<!--无法监听,说明要在那个组件中-->
<button @listenertochildevent="getmessagefromchild">测试能否监听</button>
<my_plug_in></my_plug_in>
<p class="choose_p">
<ul>
<li>
<router-link to="/foo">foo页面</router-link>
</li>
<li>
<router-link to="/header">header页面</router-link>
</li>
<li>
<router-link to="/hello">hello页面</router-link>
</li>
<li style="clear: both;list-style: none;"></li>
</ul>
</p>
<p class="main">
<router-view class="my_router_iew"></router-view>
</p>
<testmintui></testmintui>
</p>
</template>
<script>
import value from './components/value'
import click from "./components/click"
import my_plug_in from "./components/plug_in"
import sendparent from "./components/send_parent"
import testmintui from "./components/Test_mint-ui"
import transimissiontwo from "./components/transimissiontwo"
import transimissionone from "./components/transimissionone"
export default {
name: 'app',
data() {
return {
netlogo: "主页显示信息到组件中"
}
},
components: {
value,
click,
my_plug_in,
sendparent,
testmintui,
transimissionone,
transimissiontwo,
},
methods: {
getmessagefromchild: function(data) {
console.log(data);
}
}
}
</script>
<style>
body {
background-color: #f8f8ff;
font-family: 'Avenir', Helvetica, Arial, sans-serif;
color: #2c3e50;
}
ul {
width: 12rem;
}
ul li {
list-style: none;
}
ul li:not(:last-child) {
list-style: none;
width: 2rem;
margin-left: 0.1rem;
margin-right: 0.1rem;
float: left;
text-align: center;
background: #2C3E50;
color: white;
}
ul li a {
text-decoration: none;
font-size: 16px;
color: white;
line-height: 1rem;
text-align: center;
}
ul li:nth-child {
list-style: none;
clear: both;
}
.choose_p {
width: 100%;
overflow: scroll;
}
</style>을 사용할 때는 쓸모없는 코드를 무시하세요. 다음 단계는 eventbus를 정의하는 것입니다
window.eventBus = new Vue();
그렇습니다. 매우 간단합니다. 물론 레벨에 prop을 사용할 수도 있습니다. 이에 대해서는 다음 시간에 설명하겠습니다.
관련 권장사항:
vue에서 이벤트버스가 여러 번 실행되는 문제를 해결하는 방법
vue에서 페이지 역방향 전달 값의 간단한 구현 방법 공유
위 내용은 Vue 구성요소 간에 값을 전달하기 위해 이벤트버스를 사용하는 방법에 대한 자세한 설명의 상세 내용입니다. 자세한 내용은 PHP 중국어 웹사이트의 기타 관련 기사를 참조하세요!

