jQuery 플러그인 ImgAreaSelect는 아바타 업로드 미리보기 및 자르기 기능을 구현합니다.
- 小云云원래의
- 2018-01-10 13:11:101780검색
이 글에서는 아바타 업로드 미리보기 및 자르기 기능을 구현하기 위한 jQuery 플러그인 ImgAreaSelect를 주로 소개합니다. 필요한 친구들이 참고하면 도움이 될 것입니다.
에세이의 이전 섹션에서 우리는 이미 jQuery 플러그인 ImgAreaSelect에 대한 기본 지식을 알고 있었습니다. 이제 예를 살펴보겠습니다.
먼저 어떤 기능을 구현해야 하는지 알아야 합니다.
(1) 이미지를 업로드하고 미리 볼 수 있습니다.
(2) 잘린 이미지를 드래그 앤 드롭하여 잘린 영역을 표시합니다.
(3) 잘릴 영역의 좌표를 표시합니다.
두 번째, 이를 참조하는 방법 플러그인?
그럼 자세히 살펴볼까요!
첫 번째 단계: 먼저 스타일 및 파일 패키지 소개(자신의 위치에 따라 소개)
<!--引入imgareaselect的css样式-->
<link rel="stylesheet" type="text/css" href="../jquery.imgareaselect-0.9.10/css/imgareaselect-default.css" rel="external nofollow" rel="external nofollow" />
<!--引入jquery包-->
<script type="text/javascript" src="../jquery-1.11.2.min.js"></script>
<!--引入imgareaselect的js文件-->
<script type="text/javascript" src="../jquery.imgareaselect-0.9.10/scripts/jquery.imgareaselect.pack.js"></script>
두 번째 단계: 먼저 아래와 같이 p 레이아웃 스타일을 사용합니다.
<body>
 <p style="float:left; width:300px;">
 <p>亲,请上传图片并裁剪</p>
 <p style="width:300px; height:300px;float: left;">
  <!--原图-->
  <img id="uploadPreview"/>
  <input id="uploadImage" type="file" name="photoimage" class="fimg1" onchange="PreviewImage();" /> <!--//对这个按钮加一个事件-->
 </p>
 </p>
 <p style="float:left; width:300px;">
 <p style="font-size:110%; font-weight:bold; padding-left:0.1em;">
 选区预览
 </p>
 <p style="margin:0 1em; width:100px; height:100px;border: 1px solid black;">
  <p id="preview" style="width:100px; height:100px; overflow:hidden;">
  <!--裁剪后的图片-->
  <img id="tp" style="width:200px; height:200px;">
  </p>
 </p>
 <!--做一个表格用来放选取图片的坐标-->
 <table style="margin-top:1em;">
  <thead>
  <tr>
  <th colspan="2" style="font-size:110%; font-weight:bold; text-align:left; padding-left: 0.1em;"> 坐标</th>
  </tr>
  </thead>
  <tbody>
  <tr>
  <td style="width:10%;"><b>X<sub>1</sub>:</b></td>
  <td style="width:30%;"><input type="text" id="x1" value="-" /></td>
  </tr>
  <tr>
  <td><b>Y<sub>1</sub>:</b></td>
  <td><input type="text" id="y1" value="-" /></td>
  </tr>
  <tr>
  <td><b>X<sub>2</sub>:</b></td>
  <td><input type="text" id="x2" value="-" /></td>
  </tr>
  <tr>
  <td><b>Y<sub>2</sub>:</b></td>
  <td><input type="text" id="y2" value="-" /></td>
  </tr>
  </tbody>
 </table>
 </p>
 </p>
 </body>
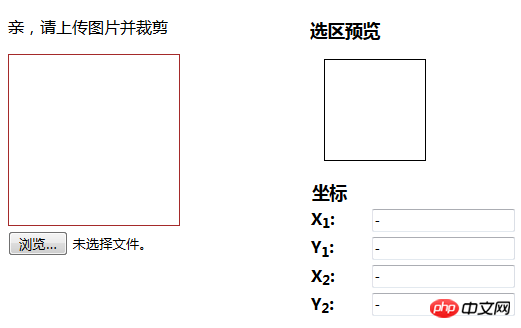
css 스타일:
<style>
 #uploadPreview
 {
 width: 170px;
 height: 170px;
 background-position: center center;
 background-size: cover;
 border: 1px solid brown;
 -webkit-box-shadow: 0 0 0px 0px rgba(0, 0, 0, 0);
 display: inline-block;
 }
 </style>
3단계: 이미지 업로드 미리보기 효과 구현
아이디어: 입력을 통해 이미지의 src를 첫 번째 img에 전달한 다음 첫 번째 img의 src를 두 번째 img의 src
<script>
//通过input将图片路径传给第一个img
$("#uploadImage").on("change", function(){
 // 得到一个参考文件列表
 var files = !!this.files ? this.files : [];
 // 如果没有选择任何文件,或者没有文件读到就返回
 if (!files.length || !window.FileReader) return;
 // 只有进行选择的文件是一个形象
 if (/^image/.test( files[0].type)){
 // 创建一个新的FileReader的实例
 var reader = new FileReader();
 // 读取本地文件作为一个DataURL
 reader.readAsDataURL(files[0]);
 // 当加载时,图像数据设置为背景的p
 reader.onloadend = function(){
  //给第一个img添加路径
 $("#uploadPreview").attr("src",this.result);
  //给第二个img添加路径
  $("#tp").attr("src",this.result);
  //开启裁剪功能
 $('#uploadPreview ').imgAreaSelect( {handles:true, fadeSpeed:200, onSelectEnd : preview});
 }
 }
});
</script>
에 전달합니다. , 다음과 같은 효과를 얻을 수 있습니다.
탐색하려면 클릭

클릭하여 선택:
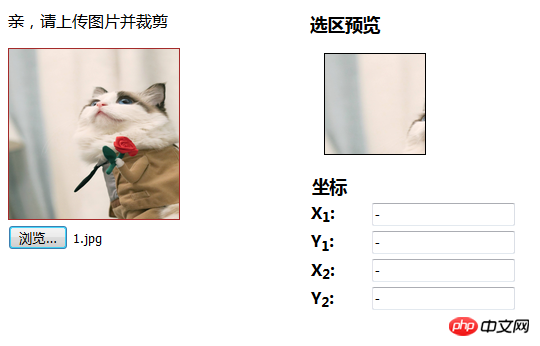
4단계: 영역 선택 기능 구현
<script>
 function preview(img, selection)
 {
 if(!selection.width || !selection.height) //判断选取区域不为空
  return;
  //分别取高宽比率
 var scaleX = 100 / selection.width;
 var scaleY = 100 / selection.height;
 var img = new Image();
 //传路径
 img.src = document.getElementById('uploadPreview').src;
 //给裁剪的图片定义高和宽
 $('#preview img').css( {
  width : Math.round(scaleX * 170), //170为第一个img的宽,不然截取的图片会有所缺失,可以自己试试
  height: Math.round(scaleY * 170), //170为第一个img的高
  marginLeft: -Math.round(scaleX * selection.x1),
  marginTop: -Math.round(scaleY * selection.y1)
 });
 //显示坐标
 $('#x1').val(selection.x1);
 $('#y1').val(selection.y1);
 $('#x2').val(selection.x2);
 $('#y2').val(selection.y2);
 }
 </script>
이렇게 하면 다음과 같은 효과를 얻을 수 있습니다~~ ~
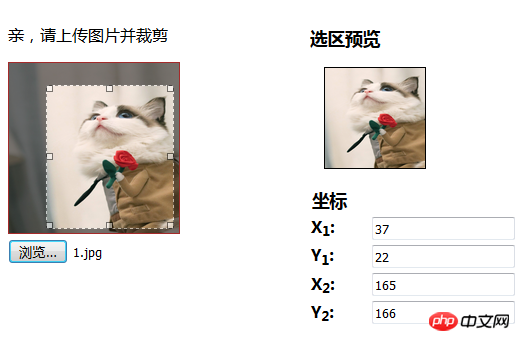
이 단계에서는 아바타의 업로드 및 자르기 기능을 구현할 수 있습니다. 물론 나중에 데이터베이스에 경로를 추가하면 더 완벽할 것입니다~~~~
(------ ----------- -------------------------- ----------- -----여기에 구분선이 있어야 합니다--------------- ------------ --------)
만약 간단한 이미지 자르기 기능을 구현하고 싶다면 아래 코드를 보시면 됩니다. 여기에는 코멘트가 없습니다~~~
물론 위 코드가 명확하지 않은 경우 다음을 참조하여 수정할 수도 있습니다. , 그리고 이미지 업로드 미리보기 기능만 추가하세요~~~~
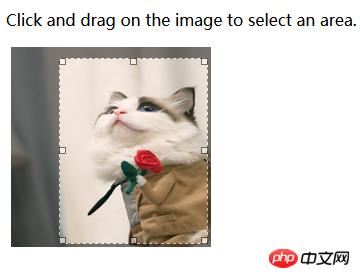
렌더링: (사진을 비교해 보면 알 수 있습니다. 아래 사진은 탐색 기능이 부족하고 나머지 사진은 완전히 동일합니다.)
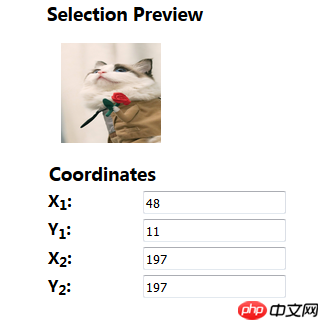
<!DOCTYPE html>
<html>
 <head>
 <meta charset="UTF-8">
 <title></title>
  <!--在HTML头部加入:-->
 <link rel="stylesheet" type="text/css" href="../jquery.imgareaselect-0.9.10/css/imgareaselect-default.css" rel="external nofollow" rel="external nofollow" />
 <script type="text/javascript" src="../jquery-1.11.2.min.js"></script>
 <script type="text/javascript" src="../jquery.imgareaselect-0.9.10/scripts/jquery.imgareaselect.pack.js"></script>
 <script type="text/javascript">
 $(document).ready(function() {
 $('#photo').imgAreaSelect( {handles:true, fadeSpeed:200, onSelectEnd : preview});
 });
// 如果加上aspectRatio: '1:1',$('#photo').imgAreaSelect( {aspectRatio: '1:1',handles:true, fadeSpeed:200, onSelectEnd : preview});则选取区域固定为正方形。
 function preview(img, selection)
 {
 //等同于var scaleX = 100 / (selection.width || 1)
 //先对||前面的进行布尔运算,如果结果是true(即width存在且不是0),就使用width,否则使用||后的变量1
 //也就是先检查 selection.width 有没有值,有的话就用 100 / 该值再付给 scaleX,没的话就用 100 / 1 来赋值;
 if(!selection.width || !selection.height)
  return;
 var scaleX = 100 / selection.width;
 var scaleY = 100 / selection.height;
 //设置裁剪后图片的宽高
 $('#preview img').css( {
  width : Math.round(scaleX * 200),
  height: Math.round(scaleY * 200),
  marginLeft: -Math.round(scaleX * selection.x1),
  marginTop: -Math.round(scaleY * selection.y1)
 });
 $('#x1').val(selection.x1);
 $('#y1').val(selection.y1);
 $('#x2').val(selection.x2);
 $('#y2').val(selection.y2);
 $('w').val(selection.width);
 $('h').val(selection.height);
 }
 </script>
 </head>
 <body>
 <p>
 <!--选取的图片-->
 <p style="float:left; width:70%;">
 <p>
 Click and drag on the image to select an area.
 </p>
 <p style="margin:0 0.3em; width:200px; height:200px;">
  <img id="photo" src="./images/1.jpg" style="width:200px; height:200px;"/>
 </p>
 </p>
 <!--截取的图片-->
 <p style="float:left; width:30%;">
 <p style="font-size:110%; font-weight:bold; padding-left:0.1em;">
 Selection Preview
 </p>
 <p style="margin:0 1em; width:100px; height:100px;">
  <p id="preview" style="width:100px; height:100px; overflow:hidden;">
  <img src="./images/1.jpg" style="width:200px; height:200px;">
  </p>
 </p>
 <table style="margin-top:1em;">
  <thead>
  <tr>
  <th colspan="2" style="font-size:110%; font-weight:bold; text-align:left; padding-left: 0.1em;"> Coordinates</th>
  </tr>
  </thead>
  <tbody>
  <tr>
  <td style="width:10%;"><b>X<sub>1</sub>:</b></td>
  <td style="width:30%;"><input type="text" id="x1" value="-" /></td>
  </tr>
  <tr>
  <td><b>Y<sub>1</sub>:</b></td>
  <td><input type="text" id="y1" value="-" /></td>
  </tr>
  <tr>
  <td><b>X<sub>2</sub>:</b></td>
  <td><input type="text" id="x2" value="-" /></td>
  </tr>
  <tr>
  <td><b>Y<sub>2</sub>:</b></td>
  <td><input type="text" id="y2" value="-" /></td>
  </tr>
  </tbody>
 </table>
 </p>
 </p>
 </body>
</html>
관련 권장사항:
jQuery 플러그인 imgAreaSelect 예시 설명
jQuery 플러그인 imgAreaSelect를 사용하여 선택한 도메인의 이미지 정보 가져오기 구현
imgareaselect + php를 사용하여 이미지 자르기
위 내용은 jQuery 플러그인 ImgAreaSelect는 아바타 업로드 미리보기 및 자르기 기능을 구현합니다.의 상세 내용입니다. 자세한 내용은 PHP 중국어 웹사이트의 기타 관련 기사를 참조하세요!

