
집 >백엔드 개발 >C#.Net 튜토리얼 >이미지 파일 업로드 및 다운로드를 처음부터 구현하기 위한 .Net Core 개발 설명
이미지 파일 업로드 및 다운로드를 처음부터 구현하기 위한 .Net Core 개발 설명
- 巴扎黑원래의
- 2018-05-17 11:13:128482검색
이 글에서는 주로 .Net Core가 이미지 파일 업로드 및 다운로드 기능을 구현하는 방법을 자세히 소개합니다. 이는 특정 참고 가치가 있으므로 관심 있는 친구들이 참고할 수 있습니다.
현재 .Net Core 프로젝트는 비가 온 뒤 버섯처럼 솟아오르고 있습니다. 저는 .Net 군대의 일원으로서 .Net Core를 적극적으로 수용하고 비즈니스 개발에 적극적으로 활용하고 있습니다. 먼저 .Net Core 프로젝트에서 구현된 파일 업로드 및 다운로드 인터페이스를 소개하겠습니다.
1. 개발 환경
역시 우주 최초의 IDE VisualStudio 2017
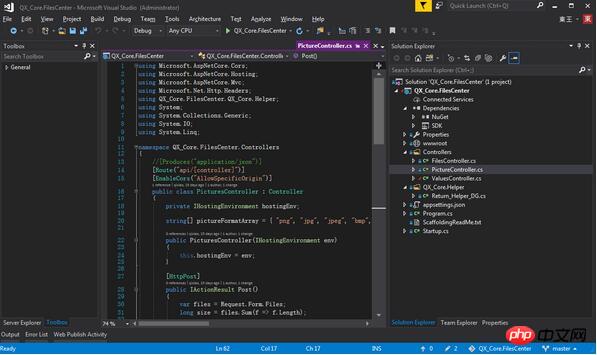
2. 프로젝트 구조
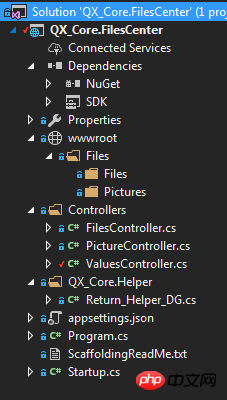
FilesController 파일 업로드 및 다운로드 컨트롤러
사진 컨트롤러 컨트롤러 업로드 및 다운로드
Return_Helper_DG 반환 값 도우미 클래스
3. 키 코드
1. 먼저 Startup.cs를 살펴보겠습니다. 여기서는 일련의 구성을 수행합니다.
교차 도메인 구성:
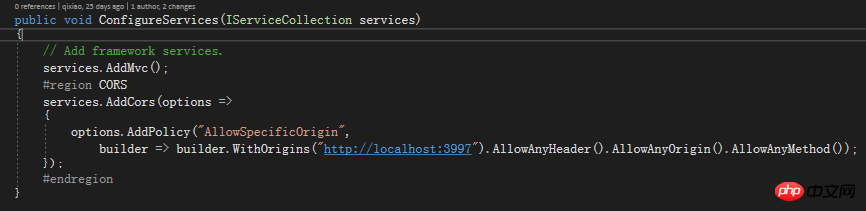

물론, Nuget을 사용하여 관련 참조 패키지를 참조해야 합니다. 이는 클라이언트를 방지할 수 있습니다. 서버 파일 경로 추측부터 접근을 위한 가상 섀도우 생성, 보안 강화까지.

Startup.cs의 전체 코드는 다음과 같습니다.
using Microsoft.AspNetCore.Builder;
using Microsoft.AspNetCore.Hosting;
using Microsoft.AspNetCore.Http;
using Microsoft.Extensions.Configuration;
using Microsoft.Extensions.DependencyInjection;
using Microsoft.Extensions.FileProviders;
using Microsoft.Extensions.Logging;
using System.IO;

namespace QX_Core.FilesCenter
{
 public class Startup
 {
 public Startup(IHostingEnvironment env)
 {
  var builder = new ConfigurationBuilder()
  .SetBasePath(env.ContentRootPath)
  .AddJsonFile("appsettings.json", optional: false, reloadOnChange: true)
  .AddJsonFile($"appsettings.{env.EnvironmentName}.json", optional: true)
  .AddEnvironmentVariables();
  Configuration = builder.Build();
 }

 public IConfigurationRoot Configuration { get; }

 // This method gets called by the runtime. Use this method to add services to the container.
 public void ConfigureServices(IServiceCollection services)
 {
  // Add framework services.
  services.AddMvc();
  #region CORS
  services.AddCors(options =>
  {
  options.AddPolicy("AllowSpecificOrigin",
   builder => builder.WithOrigins("http://localhost:3997").AllowAnyHeader().AllowAnyOrigin().AllowAnyMethod());
  });
  #endregion
 }

 // This method gets called by the runtime. Use this method to configure the HTTP request pipeline.
 public void Configure(IApplicationBuilder app, IHostingEnvironment env, ILoggerFactory loggerFactory)
 {
  //loggerFactory.AddConsole(Configuration.GetSection("Logging"));
  //loggerFactory.AddDebug();

  app.UseMvc();
  // Shows UseCors with named policy.
  app.UseCors("AllowSpecificOrigin");

  app.UseStaticFiles(new StaticFileOptions()
  {
  FileProvider = new PhysicalFileProvider(Path.Combine(Directory.GetCurrentDirectory(), @"wwwroot/Files")),
  RequestPath = new PathString("/src")
  });
 }
 }
}
2. Return_Helper_DG 클래스 사용자는 클라이언트에 피드백하기 위해 통합된 반환 값을 설정합니다. 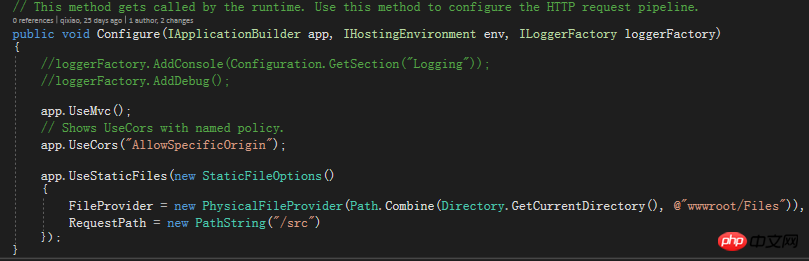 Return_Helper_DG 클래스의 코드는 다음과 같습니다.
using System.Net;
/**
* author:qixiao
* create:2017-5-19 15:15:05
* */
namespace QX_Core.FilesCenter.QX_Core.Helper
{
 public abstract class Return_Helper_DG
 {
 public static object IsSuccess_Msg_Data_HttpCode(bool isSuccess, string msg, dynamic data, HttpStatusCode httpCode = HttpStatusCode.OK)
 {
  return new { isSuccess = isSuccess, msg = msg, httpCode = httpCode, data = data };
 }
 public static object Success_Msg_Data_DCount_HttpCode(string msg, dynamic data = null, int dataCount = 0, HttpStatusCode httpCode = HttpStatusCode.OK)
 {
  return new { isSuccess = true, msg = msg, httpCode = httpCode, data = data, dataCount = dataCount };
 }
 public static object Error_Msg_Ecode_Elevel_HttpCode(string msg, int errorCode = 0, int errorLevel = 0, HttpStatusCode httpCode = HttpStatusCode.InternalServerError)
 {
  return new { isSuccess = false, msg = msg, httpCode = httpCode, errorCode = errorCode, errorLevel = errorLevel };
 }
 }
}
3. FilesController는 파일 업로드 컨트롤입니다. 여기에서 컨트롤러 인터페이스는 업로드된 파일의 수신 작업을 정의하고 컨트롤러에서 도메인 간 구성을 활성화합니다
using Microsoft.AspNetCore.Cors;
using Microsoft.AspNetCore.Hosting;
using Microsoft.AspNetCore.Mvc;
using Microsoft.Net.Http.Headers;
using QX_Core.FilesCenter.QX_Core.Helper;
using System;
using System.Collections.Generic;
using System.IO;
using System.Linq;
namespace QX_Core.FilesCenter.Controllers
{
//[Produces("application/json")]
[Route("api/[controller]")]
[EnableCors("AllowSpecificOrigin")]
public class FilesController : Controller
{
private IHostingEnvironment hostingEnv;
public FilesController(IHostingEnvironment env)
{
this.hostingEnv = env;
}
[HttpPost]
public IActionResult Post()
{
var files = Request.Form.Files;
long size = files.Sum(f => f.Length);
//size > 100MB refuse upload !
if (size > 104857600)
{
return Json(Return_Helper_DG.Error_Msg_Ecode_Elevel_HttpCode("files total size > 100MB , server refused !"));
}
List<string> filePathResultList = new List<string>();
foreach (var file in files)
{
var fileName = ContentDispositionHeaderValue.Parse(file.ContentDisposition).FileName.Trim('"');
string filePath = hostingEnv.WebRootPath + $@"\Files\Files\";
if (!Directory.Exists(filePath))
{
Directory.CreateDirectory(filePath);
}
fileName = Guid.NewGuid() + "." + fileName.Split('.')[1];
string fileFullName = filePath + fileName;
using (FileStream fs = System.IO.File.Create(fileFullName))
{
file.CopyTo(fs);
fs.Flush();
}
filePathResultList.Add($"/src/Files/{fileName}");
}
string message = $"{files.Count} file(s) /{size} bytes uploaded successfully!";
return Json(Return_Helper_DG.Success_Msg_Data_DCount_HttpCode(message, filePathResultList, filePathResultList.Count));
}
}
}위 코드에서는 업로드된 파일의 크기를 제한하고 다음에 대한 피드백을 제공합니다. 파일의 크기.
using Microsoft.AspNetCore.Cors;
using Microsoft.AspNetCore.Hosting;
using Microsoft.AspNetCore.Mvc;
using Microsoft.Net.Http.Headers;
using QX_Core.FilesCenter.QX_Core.Helper;
using System;
using System.Collections.Generic;
using System.IO;
using System.Linq;
namespace QX_Core.FilesCenter.Controllers
{
//[Produces("application/json")]
[Route("api/[controller]")]
[EnableCors("AllowSpecificOrigin")]
public class PicturesController : Controller
{
private IHostingEnvironment hostingEnv;
string[] pictureFormatArray = { "png", "jpg", "jpeg", "bmp", "gif","ico", "PNG", "JPG", "JPEG", "BMP", "GIF","ICO" };
public PicturesController(IHostingEnvironment env)
{
this.hostingEnv = env;
}
[HttpPost]
public IActionResult Post()
{
var files = Request.Form.Files;
long size = files.Sum(f => f.Length);
//size > 100MB refuse upload !
if (size > 104857600)
{
return Json(Return_Helper_DG.Error_Msg_Ecode_Elevel_HttpCode("pictures total size > 100MB , server refused !"));
}
List<string> filePathResultList = new List<string>();
foreach (var file in files)
{
var fileName = ContentDispositionHeaderValue.Parse(file.ContentDisposition).FileName.Trim('"');
string filePath = hostingEnv.WebRootPath + $@"\Files\Pictures\";
if (!Directory.Exists(filePath))
{
Directory.CreateDirectory(filePath);
}
string suffix = fileName.Split('.')[1];
if (!pictureFormatArray.Contains(suffix))
{
return Json(Return_Helper_DG.Error_Msg_Ecode_Elevel_HttpCode("the picture format not support ! you must upload files that suffix like 'png','jpg','jpeg','bmp','gif','ico'."));
}
fileName = Guid.NewGuid() + "." + suffix;
string fileFullName = filePath + fileName;
using (FileStream fs = System.IO.File.Create(fileFullName))
{
file.CopyTo(fs);
fs.Flush();
}
filePathResultList.Add($"/src/Pictures/{fileName}");
}
string message = $"{files.Count} file(s) /{size} bytes uploaded successfully!";
return Json(Return_Helper_DG.Success_Msg_Data_DCount_HttpCode(message, filePathResultList, filePathResultList.Count));
}
}
}이제 파일 및 사진 업로드 코드가 완성되었습니다. 클라이언트 측 구현
4. 클라이언트 구현
클라이언트 측 간단히 jQuery Ajax를 사용하여 이미지 파일을 제출하고 클라이언트 코드 구현:<!doctype>
<head>
<script src="jquery-3.2.0.min.js"></script>
<script>
$(document).ready(function () {
var appDomain = "http://localhost:53972/";
$("#btn_fileUpload").click(function () {
var fileUpload = $("#files").get(0);
var files = fileUpload.files;
var data = new FormData();
for (var i = 0; i < files.length; i++) {
data.append(files[i].name, files[i]);
}
$.ajax({
type: "POST",
url: appDomain+'api/Pictures',
contentType: false,
processData: false,
data: data,
success: function (data) {
console.log(JSON.stringify(data));
},
error: function () {
console.log(JSON.stringify(data));
}
});
});
//end click
})
</script>
</head>
<title></title>
<body>
<article>
<header>
<h2>article-form</h2>
</header>
<p>
<form id="uploadForm" enctype="multipart/form-data">
<input type="file" id="files" name="files" placeholder="file" multiple>file-multiple属性可以选择多项<br><br>
<input type="button" id="btn_fileUpload" value="fileUpload">
</form>
</p>
</article>
</body> 5. 코드 테스트
1 서버 시작. 콘솔과 웹이 자동으로 시작되는 것을 볼 수 있으며 웹에는 기본 Values 컨트롤러의 요청 반환 값이 표시됩니다.
2. 이미지 업로드 ajax를 사용하여 이미지를 업로드하고, 테스트 웹 페이지를 열고, 이미지를 선택하고, 업로드를 클릭하고, 콘솔에서 반환된 결과를 봅니다.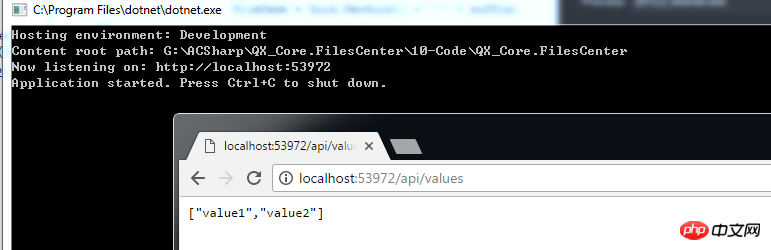
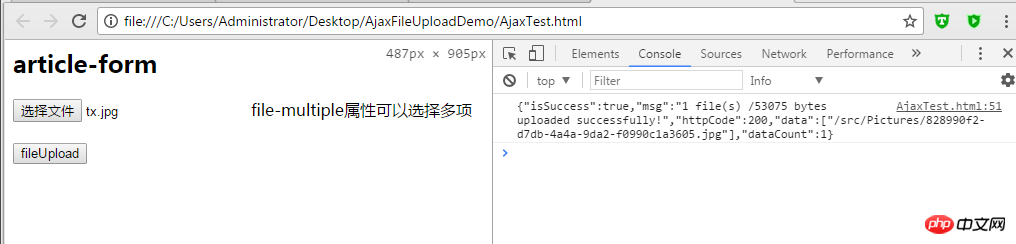

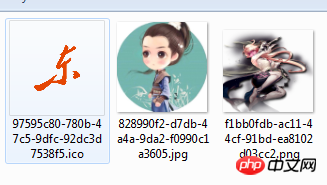
볼 수 있습니다 여러 장의 이미지를 업로드해도 문제가 없다는 것!
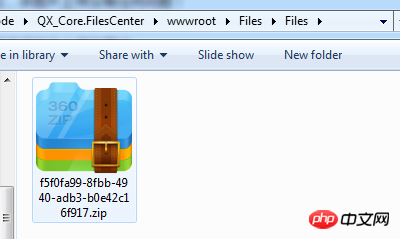
마찬가지로 파일 업로드 테스트를 수행합니다. 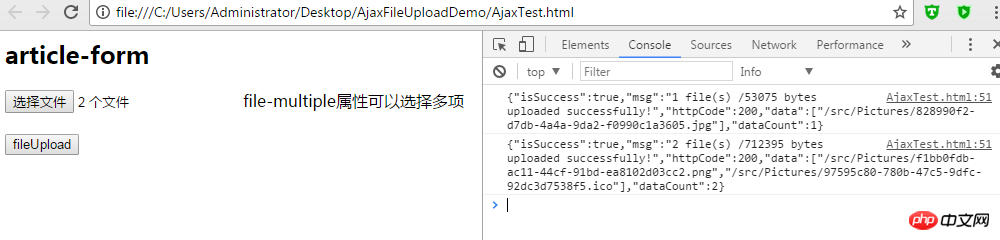
마찬가지로 파일 업로드에는 문제가 없습니다!
 6. 요약
6. 요약
 지금까지 예상되는 .Net Core 이미지 파일 업로드 기능을 모두 달성했습니다!
위 내용은 이미지 파일 업로드 및 다운로드를 처음부터 구현하기 위한 .Net Core 개발 설명의 상세 내용입니다. 자세한 내용은 PHP 중국어 웹사이트의 기타 관련 기사를 참조하세요!