
JAVAEE에 대한 자세한 소개—스프링

- PHP中文网원래의
- 2017-06-21 09:53:142105검색
1. 스프링 소개
1. 3티어 아키텍처에서 스프링의 위치
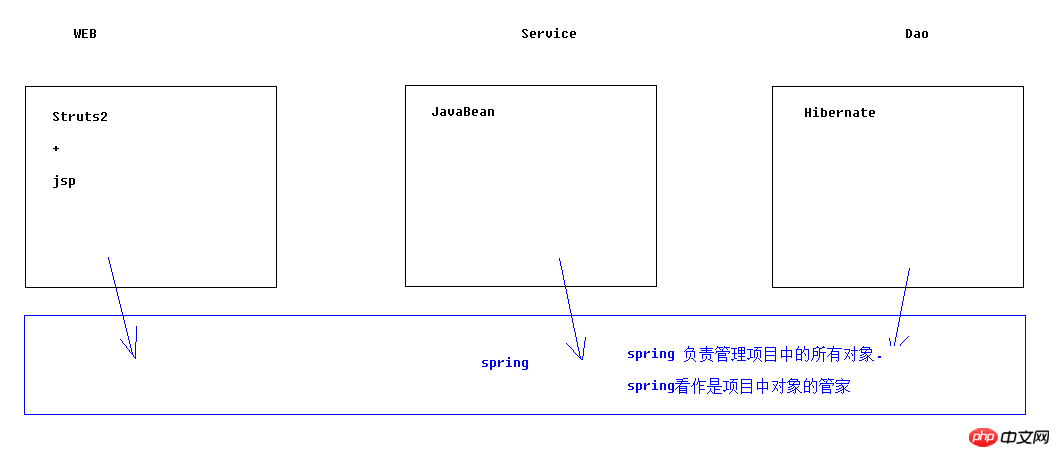
2. 스프링 원스톱 프레임워크
바로 스프링 프레임워크의 성격이 컨테이너이기 때문이다.
컨테이너에 어떤 객체가 설치되어 있든 어떤 기능을 하는지 그래서 원스톱샵이 될 수 있습니다.
다른 프레임워크를 배제할 뿐만 아니라 다른 프레임워크가 객체를 관리하는 데에도 도움이 될 수 있습니다.
Aop 지원, ioc 아이디어 , spring jdbc, aop 트랜잭션, junit 테스트 지원
두 번째, spring 구성
1. 가이드 패키지
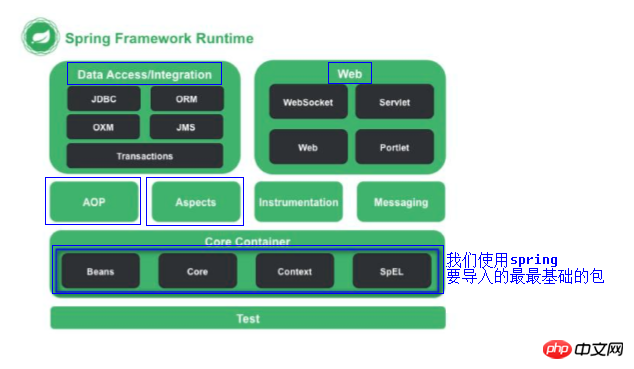

로그 패키지: com.springsource.org.apache.commons.logging-1.1.1 .jar
선택 사항: com.springsource.org.apache.log4j-1.2 .15.jar (이전 버전을 가져와야 하며 가져오기를 하면 실행이 보장됩니다)
2. 객체 생성
public class User {private String name;private Integer age;    public String getName() {return name;
    }public void setName(String name) {this.name = name;
    }public Integer getAge() {return age;
    }public void setAge(Integer age) {this.age = age;
    }
}
3. 컨테이너에 구성 등록 객체 쓰기
모든 위치(src에 넣는 것이 좋습니다)
구성 파일의 이름은 임의적입니다(applicationContext.xml 권장)
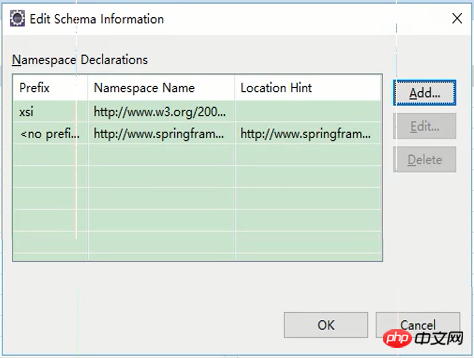
가져오기 제약 조건:
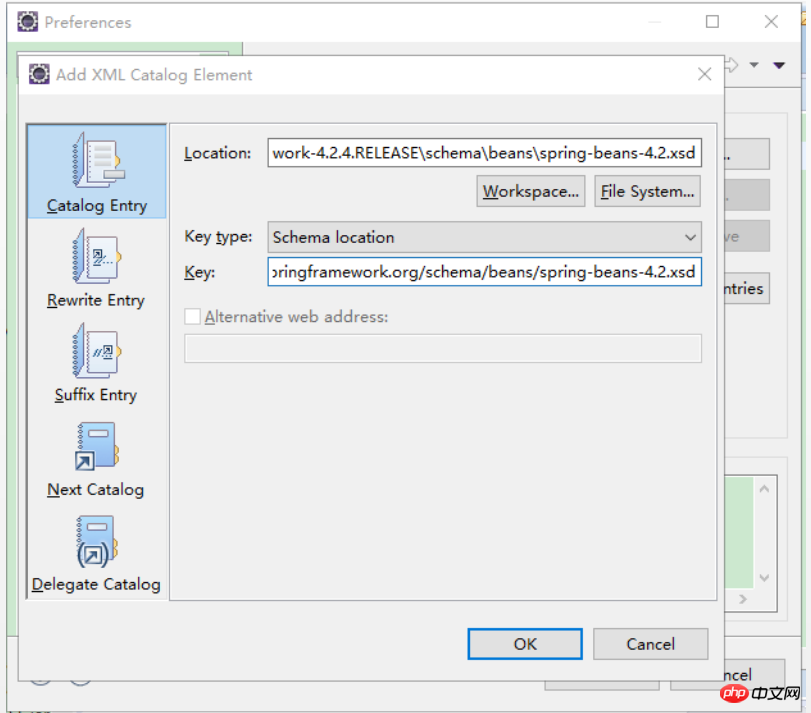
그런 다음 applicationContext를 편집합니다.
xsi 추가가 완료되었습니다. 마지막으로 추가를 다시 클릭하고 새 네임스페이스를 지정합니다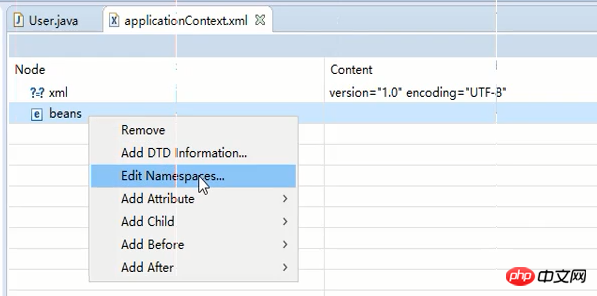
그런 다음 방금 가져온 xsd를 선택합니다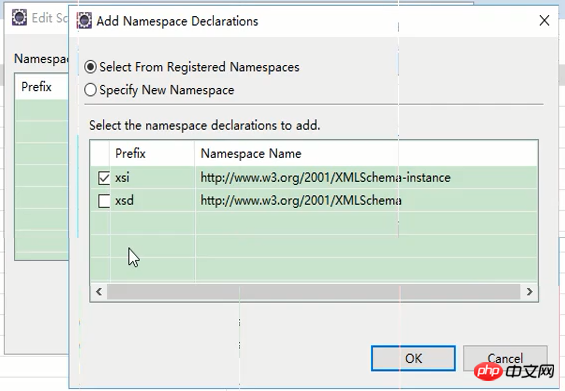
확인을 클릭하여 방금 페이지로 돌아갑니다. 그리고 네임스페이스 이름을 설정하고(위치 힌트 단락의 첫 번째 절반을 직접 복사할 수 있음) 접두사를 비워두세요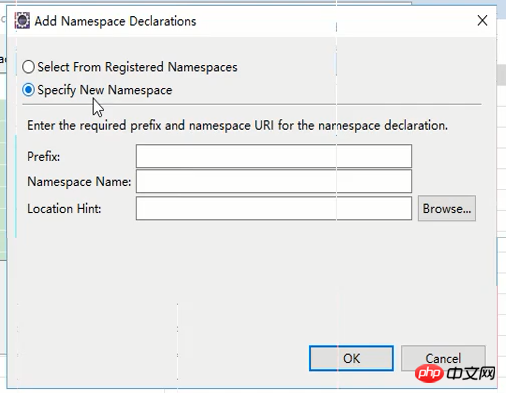
확인을 클릭하면 다음 인터페이스가 표시되어 가져오기가 성공했음을 나타냅니다. 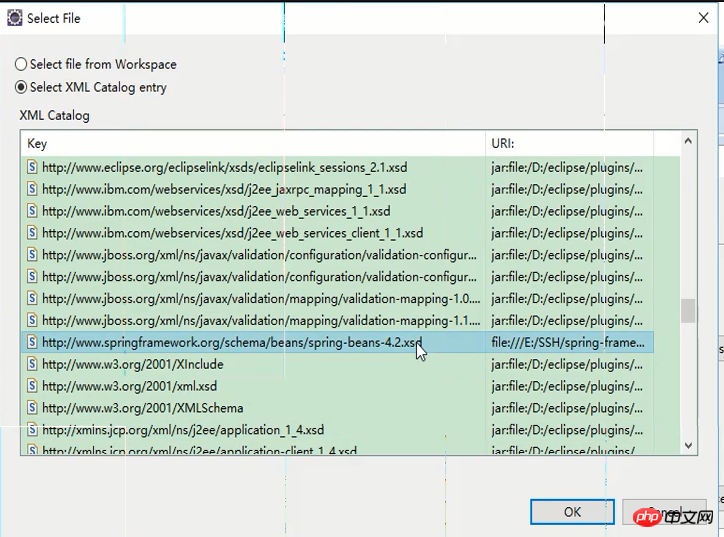
applicationContext.xml 작성: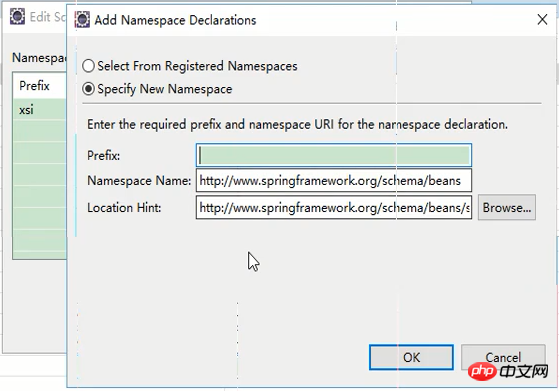
<?xml version="1.0" encoding="UTF-8"?><beans xmlns:xsi="http://www.w3.org/2001/XMLSchema-instance" xmlns="http://www.springframework.org/schema/beans" xsi:schemaLocation="http://www.springframework.org/schema/beans "><!-- 将User对象交给spring容器管理 --><bean name="user" class="cn.itcast.bean.User" ></bean></beans>
 4. 코드 테스트
    @Testpublic void fun1(){    //1 创建容器对象ApplicationContext ac = new ClassPathXmlApplicationContext("applicationContext.xml");//2 向容器"要"user对象User u = (User) ac.getBean("user");//3 打印user对象        System.out.println(u);
    }
3, 스프링 개념
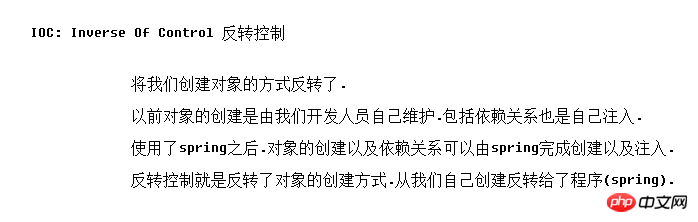
1. 생각
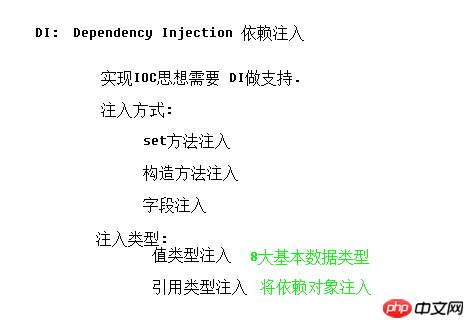
1.2 di
 BeanFactory 인터페이스 구현 클래스의 컨테이너가 특징입니다. 물건을 얻을 때마다.
2.2 ApplicationContext
컨테이너에 구성된 모든 객체는 컨테이너가 시작될 때마다 생성되며 더 많은 기능을 제공합니다.
클래스 경로에서 구성 파일을 로드합니다: ClassPath 1. Bean 요소
    <!-- 将User对象交给spring容器管理 --><!-- Bean元素:使用该元素描述需要spring容器管理的对象
            class属性:被管理对象的完整类名.
            name属性:给被管理的对象起个名字.获得对象时根据该名称获得对象.
                    可以重复.可以使用特殊字符.
            id属性: 与name属性一模一样.
                    名称不可重复.不能使用特殊字符.
            结论: 尽量使用name属性.      --><bean  name="user" class="cn.itcast.bean.User" ></bean>
2.Bean元素进阶
2.1 scope属性
singleton(默认值):单例对象.被标识为单例的对象在spring容器中只会存在一个实例
prototype:多例原型.被标识为多例的对象,每次再获得才会创建.每次创建都是新的对象.整合struts2时,ActionBean必须配置为多例的.
request:web环境下.对象与request生命周期一致.
session:web环境下,对象与session生命周期一致.
2.2 生命周期属性
init-method:配置一个方法作为生命周期初始化方法.spring会在对象创建之后立即调用.
destory-method:配置一个方法作为生命周期的销毁方法.spring容器在关闭并销毁所有容器中的对象之前调用.
<bean name="user" class="cn.itcast.bean.User" init-method="init" destroy-method="destory" ></bean>
3.spring创建对象的方式
    <!-- 创建方式1:空参构造创建(重点)  --><bean  name="user" class="cn.itcast.bean.User" init-method="init" destroy-method="destory" ></bean> <!-- 创建方式2:静态工厂创建 (了解)
          调用UserFactory的createUser方法创建名为user2的对象.放入容器     --><bean  name="user2"
        class="cn.itcast.b_create.UserFactory"
        factory-method="createUser" ></bean><!-- 创建方式3:实例工厂创建 (了解)
         调用UserFactory对象的createUser2方法创建名为user3的对象.放入容器     --><bean  name="user3"
        factory-bean="userFactory"factory-method="createUser2" ></bean><bean  name="userFactory"
        class="cn.itcast.b_create.UserFactory"   ></bean>
4.spring的分模块配置
<!-- 导入其他spring配置文件 --><import resource="cn/itcast/b_create/applicationContext.xml"/>
五、spring属性注入
1.注入方式
1.1 set方法注入(重中之重)
<!-- set方式注入: --><bean name="user" class="cn.itcast.bean.User" ><!--值类型注入: 为User对象中名为name的属性注入tom作为值 --><property name="name" value="tom" ></property><property name="age" value="18" ></property><!-- 引用类型注入: 为car属性注入下方配置的car对象 --><property name="car" ref="car" ></property></bean><!-- 将car对象配置到容器中 --><bean name="car" class="cn.itcast.bean.Car" ><property name="name" value="兰博基尼" ></property><property name="color" value="黄色" ></property></bean>
1.2 构造函数注入(重点)
<!-- 构造函数注入 --><bean name="user2" class="cn.itcast.bean.User" ><!-- name属性: 构造函数的参数名 --><!-- index属性: 构造函数的参数索引 --><!-- type属性: 构造函数的参数类型--><constructor-arg name="name" index="0" type="java.lang.Integer" value="999" ></constructor-arg><constructor-arg name="car" ref="car" index="1" ></constructor-arg></bean>
1.3 p名称空间注入
<!-- p名称空间注入, 走set方法
    1.导入P名称空间  xmlns:p="http://www.springframework.org/schema/p"
    2.使用p:属性完成注入
        |-值类型: p:属性名="值"
        |-对象类型: p:属性名-ref="bean名称" --><bean  name="user3" class="cn.itcast.bean.User" p:name="jack" p:age="20" p:car-ref="car"  ></bean>
1.4 spel注入
<!--
    spel注入: spring Expression Language sping表达式语言 --><bean  name="user4" class="cn.itcast.bean.User" ><property name="name" value="#{user.name}" ></property><property name="age" value="#{user3.age}" ></property><property name="car" ref="car" ></property></bean>
2.复杂类型注入
2.1 数组
    <!-- 如果数组中只准备注入一个值(对象),直接使用value|ref即可
    <property name="arr" value="tom" ></property>--><!-- array注入,多个元素注入 --><property name="arr"><array><value>tom</value><value>jerry</value><ref bean="user4" /></array></property>
2.2 List
    <!-- 如果List中只准备注入一个值(对象),直接使用value|ref即可
    <property name="list" value="jack" ></property>--><property name="list"  ><list><value>jack</value><value>rose</value><ref bean="user3" /></list></property>
2.3 Map
<!-- map类型注入 --><property name="map" ><map><entry key="url" value="jdbc:mysql:///crm" ></entry><entry key="user" value-ref="user4" ></entry><entry key-ref="user3" value-ref="user2" ></entry></map> </property>
2.4 Properties
<!-- prperties 类型注入 --><property name="prop" ><props><prop key="driverClass">com.jdbc.mysql.Driver</prop><prop key="userName">root</prop><prop key="password">1234</prop></props></property>
六、练习:将spring容器应用到struts-crm项目
管理Service对象以及Dao对象
1.导包(4+2),再加1
再加1指的是:spring-web-4.2.4.RELEASE.jar(因为要用到web的监听)
2.将Service对象以及Dao对象配置到spring容器
<?xml version="1.0" encoding="UTF-8"?><beans xmlns:xsi="http://www.w3.org/2001/XMLSchema-instance" xmlns="http://www.springframework.org/schema/beans" xsi:schemaLocation="http://www.springframework.org/schema/beans "><!-- 配置Dao --><bean name="customerDao" class="cn.itheima.dao.impl.CustomerDaoImpl" ></bean><bean name="linkManDao" class="cn.itheima.dao.impl.LinkManDaoImpl" ></bean><bean name="userDao" class="cn.itheima.dao.impl.UserDaoImpl" ></bean><!-- 配置Service --><bean name="customerService" class="cn.itheima.service.impl.CustomerServiceImpl" ><property name="customerDao" ref="customerDao" ></property></bean><bean name="linkManService" class="cn.itheima.service.impl.LinkManServiceImpl" ><property name="cd" ref="customerDao" ></property><property name="lmd" ref="linkManDao" ></property></bean><bean name="userService" class="cn.itheima.service.impl.UserServiceImpl" ><property name="ud" ref="userDao" ></property></bean></beans>
3.在Action中获得容器中的Service对象
3.1 web.xml中配置容器随项目启动
  <!-- 可以让spring容器随项目的启动而创建,随项目的关闭而销毁 -->
  <listener>  <listener-class>org.springframework.web.context.ContextLoaderListener</listener-class>
  </listener>
  <!-- 指定加载spring配置文件的位置 -->
  <context-param>  <param-name>contextConfigLocation</param-name>  <param-value>classpath:applicationContext.xml</param-value>
  </context-param>
3.2 在Action中获得容器
//获得spring容器=>从Application域获得即可 //1 获得servletContext对象ServletContext sc = ServletActionContext.getServletContext();//2.从Sc中获得ac容器WebApplicationContext ac = WebApplicationContextUtils.getWebApplicationContext(sc);//3.从容器中获得CustomerServiceUserService us = (UserService) ac.getBean("userService");
4.管理容器在项目中的生命周期
下面错误的示范.导致每次请求都创建新的容器
//创建容器对象ApplicationContext ac = new ClassPathXmlApplicationContext("applicationContext.xml");//获得cs(customerService对象)CustomerService cs = (CustomerService) ac.getBean("customerService");
위 내용은 JAVAEE에 대한 자세한 소개—스프링의 상세 내용입니다. 자세한 내용은 PHP 중국어 웹사이트의 기타 관련 기사를 참조하세요!