
집 >백엔드 개발 >C#.Net 튜토리얼 >C#의 networkcomms3.0에서 시뮬레이션된 로그인 코드 공유를 구현하는 방법(그림)
C#의 networkcomms3.0에서 시뮬레이션된 로그인 코드 공유를 구현하는 방법(그림)

- 黄舟원래의
- 2017-06-18 10:16:182440검색
이 글은 시뮬레이션 로그인을 구현하기 위한 C# networkcomms 3.0의 요약을 주로 소개합니다. 필요하신 분들은 참고하시면 됩니다.
최근 프로젝트는 고객query상태 시스템이 필요해서 서비스 기능이 부족하다는 것을 알게 되었습니다. networkcomms 오픈 소스framework, 프로젝트로 사용됩니다.
networkcomms 최신 버전 다운로드 주소:https://github.com/MarcFletcher/NetworkComms.Net
직접 다운로드 대 공개
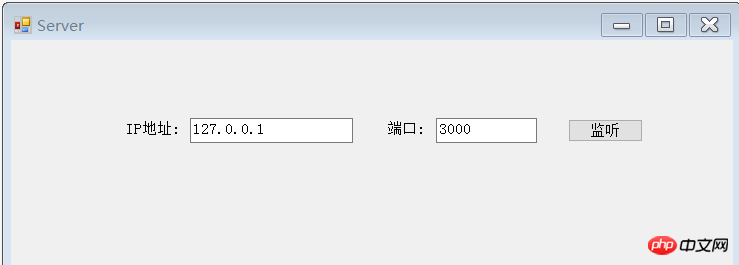
새로운 서버 측
using MessageContract;
using NetworkCommsDotNet;
using NetworkCommsDotNet.Connections;
using NetworkCommsDotNet.Connections.TCP;
using NetworkCommsDotNet.DPSBase;
using System;
using System.Collections.Generic;
using System.ComponentModel;
using System.Data;
using System.Drawing;
using System.Linq;
using System.Net;
using System.Text;
using System.Windows.Forms;
namespace AppServer
{
  public partial class MaiForm : Form
  {
    public MaiForm()
    {
      InitializeComponent();
    }
    SendReceiveOptions aboveOptions = new SendReceiveOptions(DPSManager.GetDataSerializer<ProtobufSerializer>(), null, null);
    private void button1_Click(object sender, EventArgs e)
    {
      //服务器开始监听客户端的请求
      Connection.StartListening(ConnectionType.TCP, new IPEndPoint(IPAddress.Parse(txtIP.Text), int.Parse(txtPort.Text)));
      //服务器开始监听客户端的请求
      //IPEndPoint thePoint = new IPEndPoint(IPAddress.Parse(txtIP.Text), int.Parse(txtPort.Text));
      //TCPConnection.StartListening(thePoint, false);
      button1.Text = "监听中";
      button1.Enabled = false;
      //button1.Text = "监听中";
      //button1.Enabled = false;
      //此方法中包含服务器具体的处理方法。
      StartListening();
    }
    private void StartListening()
    {
      //开启日志记录
      //配置日志记录器
      //ILogger logger = new LiteLogger(LiteLogger.LogMode.ConsoleAndLogFile, "ServerLogFile_" + NetworkComms.NetworkIdentifier + ".txt");
      //NetworkComms.EnableLogging(logger);
      //禁用日志记录 服务器端正式使用时,赢禁用日志记录
      NetworkComms.DisableLogging();
      //服务器端处理收到的消息
      //为简单起见,此示例中我们只处理字符类型的信息,也返回字符类型的信息。
      //处理的信息可以使自定义类,具体见下一个Demo
      NetworkComms.AppendGlobalIncomingPacketHandler<LoginContract>("ReqLogin", IncomingLoginRequest);
    }
    //处理某个具体的请求
    private void IncomingLoginRequest(PacketHeader header, Connection connection, LoginContract loginContract)
    {
      try
      {
        string resMsg = "";
        //为了简单,这里不调用数据库,而是模拟一下登录
        if (loginContract.UserID == "1000" && loginContract.PassWord == "123")
          resMsg = "登录成功";
        else
          resMsg = "用户名密码错误";
        //把返回结果写入到契约类中,后面返回给客户端
        //ResMsgContract contract = new ResMsgContract();
        //contract.Message = resMsg;
        //connection.SendObject<ResMsgContract>("ResLogin", contract);
        ResMsgContract contract = new ResMsgContract();
        contract.Message = resMsg;
        connection.SendObject("ResLogin", contract);
      }
      catch (Exception ex)
      {
        // LogTools.LogException(ex, "IncomingMsgHandle");
      }
    }
  }
}
in 다른 곳 이 줄은
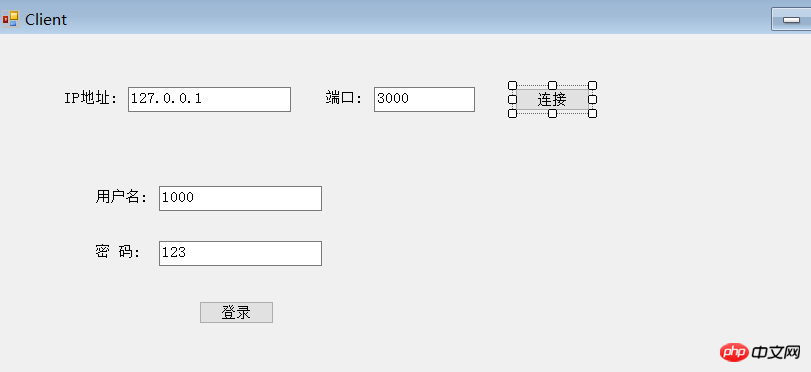
클라이언트

SendReceiveOptions aboveOptions = new SendReceiveOptions(DPSManager.GetDataSerializer<ProtobufSerializer>(), null, null);
 Contract 클래스
using MessageContract;
using NetworkCommsDotNet;
using NetworkCommsDotNet.Connections;
using NetworkCommsDotNet.Connections.TCP;
using NetworkCommsDotNet.DPSBase;
using System;
using System.Collections.Generic;
using System.ComponentModel;
using System.Data;
using System.Drawing;
using System.Linq;
using System.Text;
using System.Windows.Forms;
namespace AppClient
{
  public partial class MainForm : Form
  {
    public MainForm()
    {
      InitializeComponent();
    }
    //连接信息对象
    public ConnectionInfo connInfo = null;
    //连接对象
    Connection newTcpConnection;
    SendReceiveOptions aboveOptions = new SendReceiveOptions(DPSManager.GetDataSerializer<ProtobufSerializer>(), null, null);
    private void button1_Click(object sender, EventArgs e)
    {
      //给连接信息对象赋值
      connInfo = new ConnectionInfo(txtIP.Text, int.Parse(txtPort.Text));
      //如果不成功,会弹出异常信息
      newTcpConnection = TCPConnection.GetConnection(connInfo);
      button1.Enabled = false;
      button1.Text = "连接成功";
    }
    private void btnlogin_Click(object sender, EventArgs e)
    {
      //给契约类赋值
      LoginContract contract = new LoginContract(txtUserName.Text, txtPassword.Text);
      //contract.UserID = txtUserName.Text;
      //contract.PassWord = txtPassword.Text;
      //向服务器发送登录信息并获取登录结果
       ResMsgContract resMsg = newTcpConnection.SendReceiveObject("ReqLogin", "ResLogin", 5000, contract);
      //向服务器发送登录信息并获取登录结果
      // ResMsgContract resMsg = newTcpConnection.SendReceiveObject("ReqLogin", "ResLogin", 5000, contract);
      if (resMsg.Message == "登录成功")
      {
        MessageBox.Show("登录成功");
      }
      else
      {
        MessageBox.Show("用户名密码错误");
      }
    }
  }
}
참고:
이 프레임워크를 사용하려면 Google의 protobuf와 협력해야 합니다. 좋은 버전을 선택해야 합니다. 반복하지 않았습니다. 왜냐하면 디버깅 로그인 과정에서 다른 문제가 발생했을 때 protobuf 버전도 마찬가지였기 때문입니다. 변경되었습니다. 아직까지는 최상위 버전에 호환성 문제가 있는지 테스트해 보지 않았습니다. 2.0.0.668 protobuf 소개 protobuf는 Google에서 제공하는 오픈 소스 직렬화 프레임워크로, XML과 같은 데이터 표현 언어와 유사합니다. JSON의 가장 큰 특징은 바이너리 기반이므로 기존 XML 표현보다 더 효율적이고 짧습니다.
버전을 직접 지정하고 프로젝트의 계약 클래스를 늘리는 방법입니다. 전송 객체를 직접 정의하세요.
위 내용은 C#의 networkcomms3.0에서 시뮬레이션된 로그인 코드 공유를 구현하는 방법(그림)의 상세 내용입니다. 자세한 내용은 PHP 중국어 웹사이트의 기타 관련 기사를 참조하세요!