집 >백엔드 개발 >C#.Net 튜토리얼 >Composition API를 사용하여 UWP에서 천장을 구현하는 예제 자습서
Composition API를 사용하여 UWP에서 천장을 구현하는 예제 자습서
- 零下一度원래의
- 2017-06-23 15:25:091660검색
며칠 전 UWP에서 천장 장착을 구현해야 해서 인터넷에서 몇 가지 기사를 찾았습니다.
천장에 캡핑 방법--UWP에서 도구 모음 천장을 구현하는 방법 중 하나
페이지 슬라이딩 UWP
상단에 탐색 표시줄이 표시됩니다.이전 구현 방법의 대부분은 ListViewBase의 헤더 높이를 제어하거나 ScrollViewer를 만들어 ListViewBase를 내부에 배치하는 것이었습니다. 테스트 후 두 방법 모두 어느 정도 문제가 발생했습니다. 그래서 Composition API를 사용해 천장 효과를 구현해 보고 싶습니다.
먼저 Composition API가 무엇인지 알아보겠습니다.
Windows.UI.Composition은 모든 UWP(유니버설 Windows 플랫폼) 애플리케이션에서 호출할 수 있는 선언적 보존 모드 API로, 이를 통해 애플리케이션에서 직접 컴퍼지션 개체, 애니메이션 및 효과를 만들 수 있습니다. API는 XAML과 같은 기존 프레임워크에 추가된 강력한 기능으로, UWP 애플리케이션 개발자에게 애플리케이션에 추가할 수 있는 친숙한 C# 표면을 제공합니다. 이러한 API는 프레임워크가 없는 DX 스타일 애플리케이션을 만드는 데에도 사용할 수 있습니다.
XAML 개발자는 WinRT를 사용하여 C#의 컴포지션 레이어로 "풀다운"하여 해당 컴포지션 레이어에서 사용자 지정 작업을 수행할 수 있습니다. 그래픽 레이어까지 내려놓고 사용자 지정 UI 작업에 DirectX 및 C++를 사용할 필요가 없습니다. 이 기술은 컴포지션 API를 사용하여 기존 요소에 애니메이션을 적용하거나 XAML 요소 트리 내에서 Windows.UI.Composition 콘텐츠의 "시각적 섬"을 만들어 UI를 보강하는 데 사용할 수 있습니다.
마이크로소프트에서 소개하는 몇 문장만 봐도 헷갈리는데, 그냥 코드를 살펴보겠습니다.
Composition API에는 Expression Animation이라는 일종의 애니메이션이 있습니다. 일반적인 효과는 Visual 또는 PropertySet의 속성이 자체의 다른 속성이나 다른 Visual 또는 PropertySet의 속성이 변경됨에 따라 변경되는 것입니다.
Pivot이 없는 간단한 상황의 경우 다음과 같은 기본 아이디어가 있습니다.
ListViewBase의 ScrollViewer 가져오기
ScrollViewer의 ManipulationPropertySet 및 ListViewHeader의 시각적 개체 가져오기
ManipulationPropertySet 및 시각적 관계를 가져옵니다. .
먼저 간단한 페이지를 만들어 보겠습니다.
<Pagex:Class="TestSwipeBack.ScrollTest"xmlns="http://schemas.microsoft.com/winfx/2006/xaml/presentation"xmlns:x="http://schemas.microsoft.com/winfx/2006/xaml"xmlns:local="using:TestSwipeBack"xmlns:d="http://schemas.microsoft.com/expression/blend/2008"xmlns:mc="http://schemas.openxmlformats.org/markup-compatibility/2006"mc:Ignorable="d" Loaded="Page_Loaded"><Grid Background="{ThemeResource ApplicationPageBackgroundThemeBrush}"><ListView x:Name="_listview" ItemsSource="{x:Bind ItemSource,Mode=OneWay}"><ListView.Header><Grid x:Name="_header"><Grid.RowDefinitions><RowDefinition Height="100" /><RowDefinition Height="50" /></Grid.RowDefinitions><Grid Background="LightBlue"><Button>123</Button><TextBlock FontSize="25" HorizontalAlignment="Center" VerticalAlignment="Center">我会被隐藏</TextBlock></Grid><Grid Background="Pink" Grid.Row="1"><Button>123</Button><TextBlock FontSize="25" HorizontalAlignment="Center" VerticalAlignment="Center">我会吸顶</TextBlock></Grid></Grid></ListView.Header><ListView.ItemTemplate><DataTemplate><TextBlock Text="{Binding }" /></DataTemplate></ListView.ItemTemplate></ListView></Grid></Page>원래 ListViewBase의 헤더는 ItemsPanelRoot 아래에 있습니다. Canvans.SetZIndex를 사용하여 아래 ItemsPanelRoot를 설정하세요.
Canvas.SetZIndex(_listview.ItemsPanelRoot, -1);
그런 다음 백그라운드에서 ListView 내부에 ScrollViewer를 가져옵니다.
_scrollviewer = FindFirstChild<ScrollViewer> T FindFirstChild<T>(FrameworkElement element) childrenCount = children = ( i = ; i < childrenCount; i++ child = VisualTreeHelper.GetChild(element, i) = (child ( i = ; i < childrenCount; i++ (children[i] != subChild = FindFirstChild<T> (subChild !=
ListViewHeader의 시각적 개체 및 ScrollViewer의 ManipulationPropertySet을 가져옵니다.
var _headerVisual = ElementCompositionPreview.GetElementVisual(_header);var _manipulationPropertySet = ElementCompositionPreview.GetScrollViewerManipulationPropertySet(_scrollviewer);
표현 애니메이션을 만들고 실행해 보세요.
var _compositor = Window.Current.Compositor;var _headerAnimation = _compositor.CreateExpressionAnimation("_manipulationPropertySet.Translation.Y > -100f ? 0: -100f -_manipulationPropertySet.Translation.Y");//_manipulationPropertySet.Translation.Y是ScrollViewer滚动的数值,手指向上移动的时候,也就是可视部分向下移动的时候,Translation.Y是负数。_headerAnimation.SetReferenceParameter("_manipulationPropertySet", _manipulationPropertySet);

_headerVisual.StartAnimation("Offset.Y", _headerAnimation);
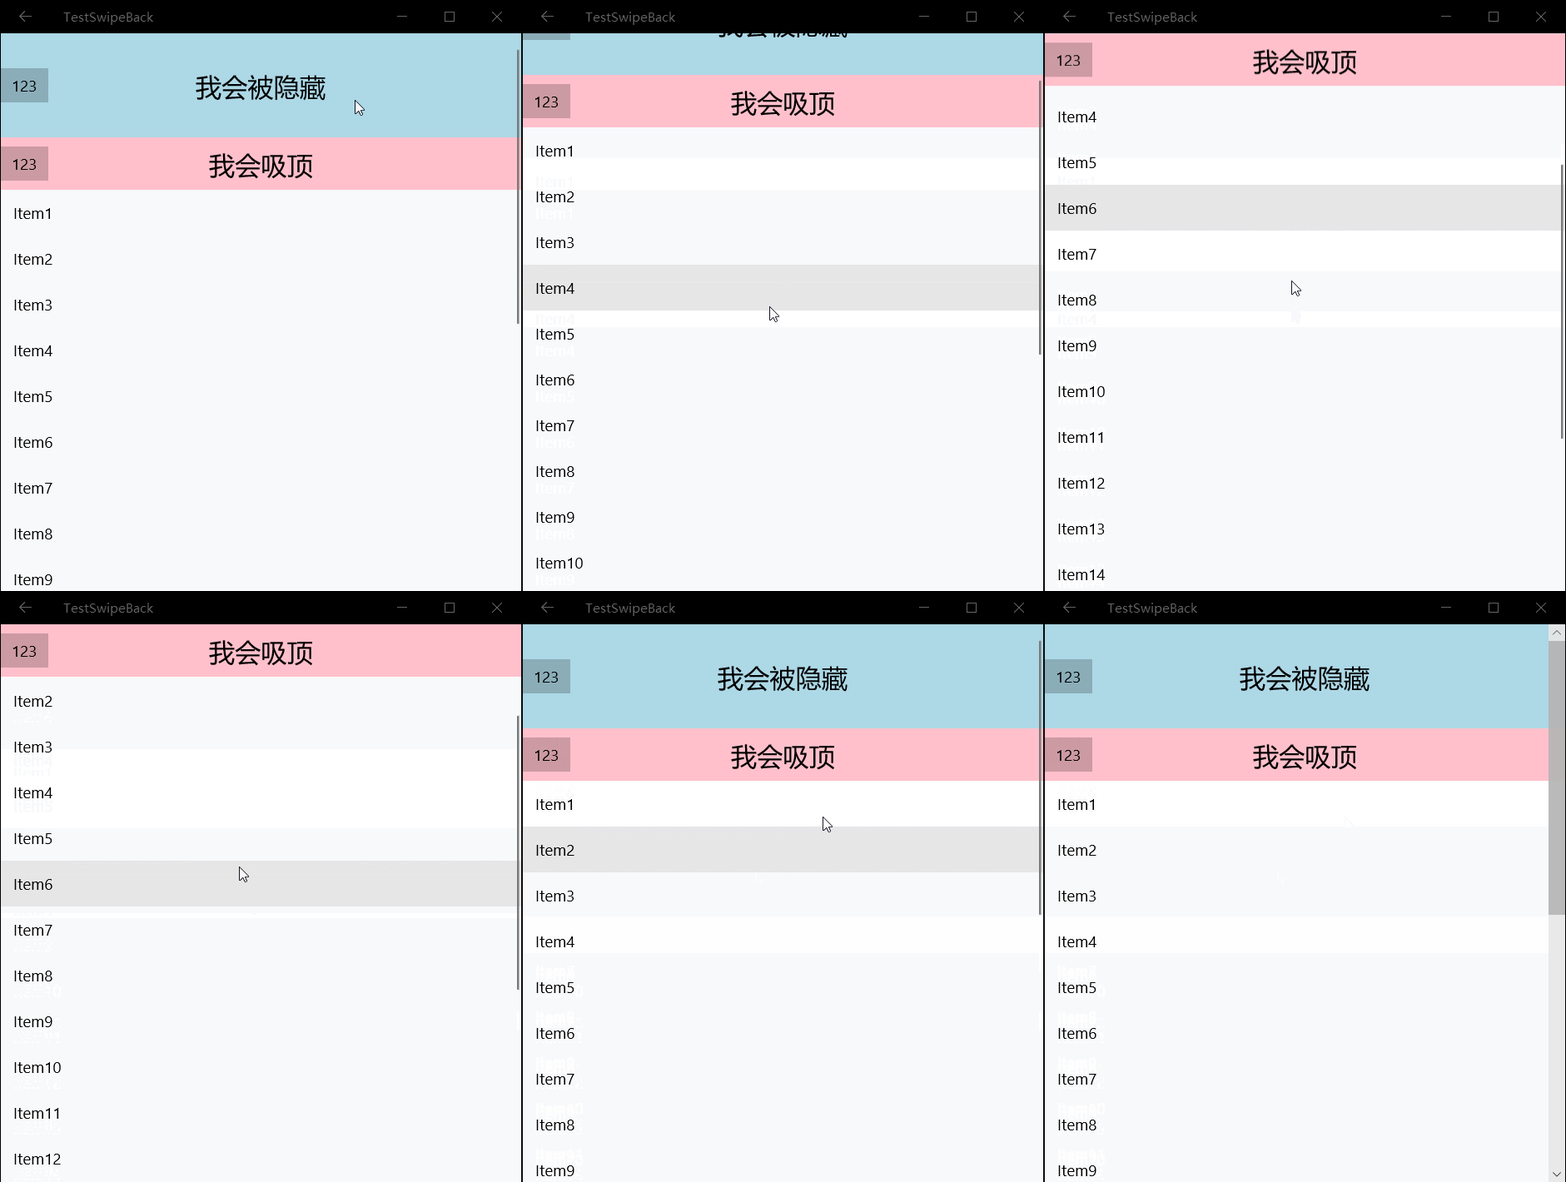
이제 데모를 슬라이드하여 100픽셀을 스크롤한 후 헤더가 멈추는지 확인하시겠습니까?

참고: Visual 또는 propertySet가 애니메이션(예: StartAnimation 또는 StartAnimationGroup)과 연결된 후 해당 속성을 검색(propertySet.TryGetScalar)하면 0만 얻을 수 있지만 값을 할당하거나 삽입하면 적용됩니다.
위 내용은 Composition API를 사용하여 UWP에서 천장을 구현하는 예제 자습서의 상세 내용입니다. 자세한 내용은 PHP 중국어 웹사이트의 기타 관련 기사를 참조하세요!

