CSS3 단일 페이지 전환 탐색 메뉴 인터페이스 디자인의 세부 구현
- 高洛峰원래의
- 2017-03-04 10:04:302522검색
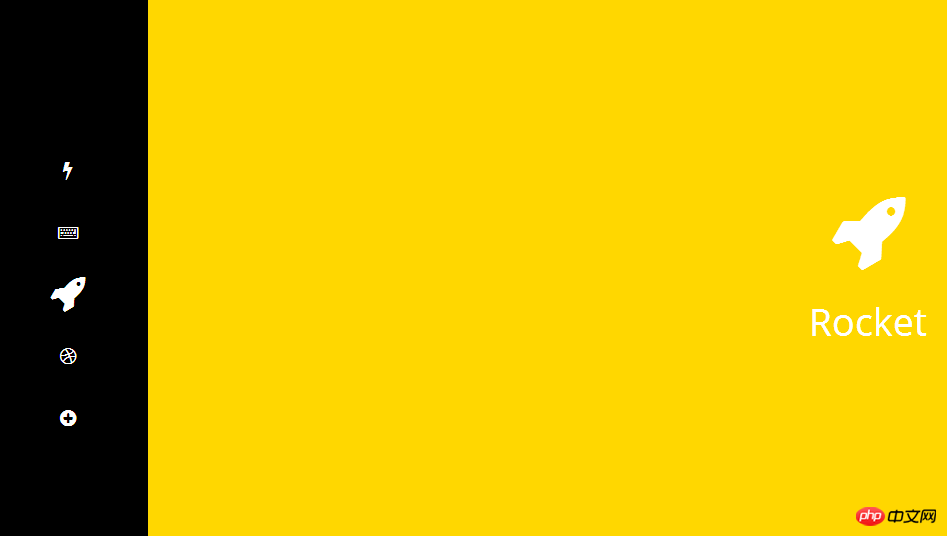
순수한 CSS3를 사용하여 만든 단일 페이지 전환 탐색 메뉴 인터페이스 디자인 효과입니다. 이 페이지 효과에서는 일련의 탐색 버튼이 페이지 왼쪽에 수직으로 배열되어 있습니다. 탐색 버튼을 클릭하면 해당 페이지가 화면 오른쪽에서 미끄러져 나옵니다.

이용방법
HTML 구조
단일 페이지 전환 탐색 메뉴 인터페이스의 HTML 구조는 다음과 같습니다.
<p class="ct" id="t1">
  <p class="ct" id="t2">
    <p class="ct" id="t3">
      <p class="ct" id="t4">
         <p class="ct" id="t5">
          <ul id="menu">
            <a href="#t1"><li class="icon fa fa-bolt" id="uno"></li></a>
            <a href="#t2"><li class="icon fa fa-keyboard-o" id="dos"></li></a>
            <a href="#t3"><li class="icon fa fa-rocket" id="tres"></li></a>
            <a href="#t4"><li class="icon fa fa-dribbble" id="cuatro"></li></a>
            <a href="#t5"><li class="icon fa fa-plus-circle" id="cinco"></li></a>
          </ul>
          <p class="page" id="p1">
             <section class="icon fa fa-bolt"><span class="title">Bolt</span><span class="hint">...</section>
          </p>
          <p class="page" id="p2">
            <section class="icon fa fa-keyboard-o"><span class="title">Type</span></section>
          </p>
          <p class="page" id="p3">
            <section class="icon fa fa-rocket"><span class="title">Rocket</span></section>
          </p>
          <p class="page" id="p4">
            <section class="icon fa fa-dribbble">
              <span class="title">Dribbble</span>
              <p class="hint">
                Im ready to play, <span class="hint line-trough">invite me </span> find me
              </p>
              <p class="hint">...</p>
            </section>
          </p>
          <p class="page" id="p5">
            <section class="icon fa fa-plus-circle">
              <span class="title">More</span>
              <p class="hint">
                ...
              </p>
            </section>
          </p>
        </p>
      </p>
    </p>
  </p>
</p>
CSS 스타일
단일 페이지 전환 탐색 메뉴 인터페이스는 변환 및 전환을 사용하여 페이지 전환 애니메이션 효과를 만듭니다. . 그리고 버튼 클릭 시 페이지 전환을 완료하려면 :target 의사 요소를 사용하세요. 전체 CSS 코드는 다음과 같습니다. 브라우저 제조업체의 접두사는 코드에 추가되지 않습니다.
html, body, .page {
  width: 100%;
  height: 100%;
  margin: 0;
  padding: 0;
  transition: all .6s cubic-bezier(.5, .2, .2, 1.1);
  color: #fff;
  overflow: hidden;
}

* {
  font-family: 'open sans', 'lato', 'helvetica', sans-serif;
}

.page {
  position: absolute;
}

#p1 {
  left: 0;
}

#p2, #p3, #p4, #p5 {
  left: 200%;
}

#p1 { background: darkslateblue; }
#p2 { background: tomato; }
#p3 { background: gold; }
#p4 { background: deeppink; }
#p5 { background: #9b59b6; }

#t2:target #p2,
#t3:target #p3,
#t4:target #p4,
#t5:target #p5 {
  transform: translateX(-190%);
  transition-delay: .4s !important;
}

#t2:target #p1,
#t3:target #p1,
#t4:target #p1,
#t5:target #p1{
  background: black;
}

#t2:target #p1 .icon,
#t3:target #p1 .icon,
#t4:target #p1 .icon,
#t5:target #p1 .icon {
  -webkit-filter: blur(3px);
  filter: blur(3px);
}

.icon {
  color: #fff;
  font-size: 32px;
  display: block;
}

ul .icon:hover {
  opacity: 0.5;
}

.page .icon .title {
  line-height: 2;
}

#t2:target ul .icon,
#t3:target ul .icon,
#t4:target ul .icon,
#t5:target ul .icon{
  transform: scale(.6);
  transition-delay: .25s;
}

#t2:target #dos,
#t3:target #tres,
#t4:target #cuatro,
#t4:target #cinco {
  transform: scale(1.2) !important;
}

ul {
  position: fixed;
  z-index: 1;
  top: 0;
  bottombottom: 0;
  left: 0;
  margin: auto;
  height: 280px;
  width: 10%;
  padding: 0;
  text-align: center;
 }

#menu .icon {
  margin: 30px 0;
  transition: all .5s ease-out !important;
}

a {
  text-decoration: none;
}

.title, .hint {
  display: block;
}

.title {
  font-size: 38px;
}

.hint {
  font-size: 13px;
}

#p4 .hint {
  display: inherit !important;
}

.hint a {
  color: yellow;
  transition: all 250ms ease-out;
}

.hint a:hover {
  color: #FFF;
}

.line-trough {
  text-decoration: line-through;
}

.page .icon {
  position: absolute;
  top: 0;
  bottombottom: 0;
  rightright: 10%;
  left: 0;
  width: 270px;
  height: 170px;
  margin: auto;
  text-align: center;
  font-size: 80px;
  line-height: 1.3;
  transform: translateX(360%);
  transition: all .5s cubic-bezier(.25, 1, .5, 1.25);
}

.page#p1 .icon {
  height: 220px;
}

.page#p1 .icon {
  transform: translateX(10%) !important;
}

#t2:target .page#p2 .icon,
#t3:target .page#p3 .icon,
#t4:target .page#p4 .icon,
#t5:target .page#p5 .icon {
  transform: translateX(0) !important;
  transition-delay: 1s;
}
위의 순수 CSS3 단일 페이지 전환 탐색 메뉴 인터페이스 디자인의 간단한 구현은 편집자가 공유하는 모든 내용이기를 바랍니다. 참고로, 모든 분들이 PHP 중국어 웹사이트를 지지해주시기를 바랍니다.
CSS3 단일 페이지 전환 탐색 메뉴 인터페이스 디자인 및 관련 기사에 대한 자세한 구현을 보려면 PHP 중국어 웹사이트를 주목하세요!
성명:
본 글의 내용은 네티즌들의 자발적인 기여로 작성되었으며, 저작권은 원저작자에게 있습니다. 본 사이트는 이에 상응하는 법적 책임을 지지 않습니다. 표절이나 침해가 의심되는 콘텐츠를 발견한 경우 admin@php.cn으로 문의하세요.

