
Angular 2를 지원하는 테이블 컨트롤

- 黄舟원래의
- 2017-02-10 10:07:431355검색
프론트엔드 프레임워크는 최근 몇 년간 특히 화제가 되었는데, 특히 많은 팬을 보유하고 있는 Angular 2가 그렇습니다. 2016년 9월 Angular 2가 공식 출시된 이후, 수많은 팬들이 Angular 2에 투자하기 시작했습니다. 물론 여기에는 나도 포함된다. Angular 2에 대해 배우고 싶다면 공식 웹사이트(영어 버전, 중국어 버전)를 추천합니다. Angular 2를 빠르게 시작해보세요.
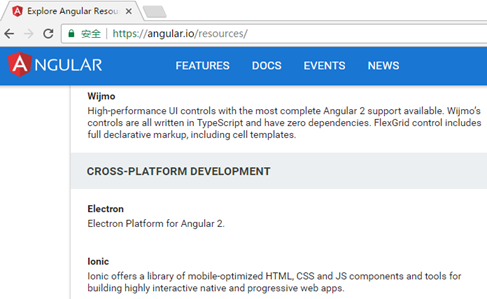
아직 예비 연구 단계인 Angular 2 버전 2.4를 기반으로 회사에서 개발하려는 프로젝트가 있습니다. 내 임무는 Angular 2를 기반으로 한 UI 컨트롤을 연구하는 것입니다. 공식 웹 사이트의 리소스에 Angular 2를 지원하는 많은 리소스가 나열되어 있습니다. 우리는 Wijmo의 Flexgrid 컨트롤이 이미 우리의 요구 사항을 충족하는 Angular 2 버전 2.4를 지원한다는 사실을 발견했습니다.
1. 환경 설정
Angular 2는 기능면에서 Angular 1과 크게 다를 뿐만 아니라 환경 설정도 다릅니다. 또한 매우 다릅니다. 많은 초보자들이 Angular 2 코드를 실행하기 어렵다고 말합니다. Angular2는 ES6을 기반으로 개발되었으므로 많은 타사 종속성이 있습니다. 많은 브라우저가 아직 ES6를 지원하지 않기 때문에 Angular2는 많은 폴리필이나 심을 도입하여 타사 종속성을 도입하게 되었습니다. 다음에서는 FlexGrid를 예로 들어 실행 환경을 설정하는 방법을 보여줍니다.
1. NodeJS 설치
Node 공식 홈페이지(http://www.php.cn/)에서 다운로드할 수 있습니다.
2. 프로젝트를 저장할 새 디렉터리를 만듭니다
mkdir ng2-flexGrid
cd ng2-flexGrid
3. 구성 파일
package.json
은 프로젝트에서 사용해야 하는 npm 종속성 패키지를 표시하는 데 사용됩니다.
{
  "name": "wj-ng2-flexgrid",
  "version": "1.0.0",
  "scripts": {
    "start": "tsc && concurrently \"tsc -w\" \"lite-server\" ",
    "lite": "lite-server",
    "tsc": "tsc",
    "tsc:w": "tsc -w"
  },
  "licenses": [
    {
      "type": "MIT",
      "url": "https://github.com/angular/angular.io/blob/master/LICENSE"
    }
  ],
  "dependencies": {
    "@angular/common": "~2.1.1",
    "@angular/compiler": "~2.1.1",
    "@angular/core": "~2.1.1",
    "@angular/forms": "~2.1.1",
    "@angular/http": "~2.1.1",
    "@angular/platform-browser": "~2.1.1",
    "@angular/platform-browser-dynamic": "~2.1.1",
    "@angular/router": "~3.1.1",
    "@angular/upgrade": "~2.1.1",
    "angular-in-memory-web-api": "~0.1.13",
    "core-js": "^2.4.1",
    "reflect-metadata": "^0.1.8",
    "rxjs": "5.0.0-beta.12",
    "systemjs": "0.19.39",
    "zone.js": "^0.6.25"
  },
  "devDependencies": {
    "@types/core-js": "^0.9.34",
    "@types/node": "^6.0.45",
    "concurrently": "^3.0.0",
    "lite-server": "^2.2.2",
    "typescript": "^2.0.3"
  }
}
tsconfig.json
TypeScript 구성 파일, TypeScript 컴파일러가 프로젝트 소스 파일에서 JavaScript 코드를 생성하는 방법을 정의합니다. SystemJS용
{
  "compilerOptions": {
    "target": "es5",
    "module": "commonjs",
    "moduleResolution": "node",
    "sourceMap": true,
    "emitDecoratorMetadata": true,
    "experimentalDecorators": true,
    "removeComments": false,
    "noImplicitAny": false
  }
}
systemjs.config.js
(모듈 로더)는 애플리케이션 모듈을 찾을 위치에 대한 정보를 제공하고 필요한 모든 종속성 패키지를 등록합니다.
/**
* System configuration for Angular samples
* Adjust as necessary for your application needs.
*/
(function (global) {
  System.config({
    paths: {
      // paths serve as alias
      'npm:': 'node_modules/'
    },
    // map tells the System loader where to look for things
    map: {
      // our app is within the app folder
      app: 'app',
      // angular bundles
      '@angular/core': 'npm:@angular/core/bundles/core.umd.js',
      '@angular/common': 'npm:@angular/common/bundles/common.umd.js',
      '@angular/compiler': 'npm:@angular/compiler/bundles/compiler.umd.js',
      '@angular/platform-browser': 'npm:@angular/platform-browser/bundles/platform-browser.umd.js',
      '@angular/platform-browser-dynamic': 'npm:@angular/platform-browser-dynamic/bundles/platform-browser-dynamic.umd.js',
      '@angular/http': 'npm:@angular/http/bundles/http.umd.js',
      '@angular/router': 'npm:@angular/router/bundles/router.umd.js',
      '@angular/forms': 'npm:@angular/forms/bundles/forms.umd.js',
      '@angular/upgrade': 'npm:@angular/upgrade/bundles/upgrade.umd.js',
      // other libraries
      'rxjs':                      'npm:rxjs',
      'angular-in-memory-web-api': 'npm:angular-in-memory-web-api/bundles/in-memory-web-api.umd.js'
    },
    // packages tells the System loader how to load when no filename and/or no extension
    packages: {
      app: {
        main: './main.js',
        defaultExtension: 'js'
      },
      rxjs: {
        defaultExtension: 'js'
      }
    }
  });
})(this);
4. npm install 실행
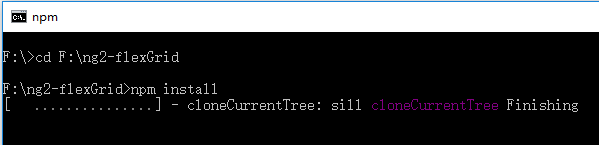
NPM은 package.json에 정의된 패키지에 따라 설치됩니다. node_modules 디렉터리가 생성되고 이러한 패키지가 여기에 배치됩니다.
이제 환경설정 작업이 완료되었습니다. 아래에서는 FlexGrid를 예로 들어 Angular 2에 대한 지원을 설명합니다.
2. Angular 2
를 지원하는 테이블 컨트롤 사용 방법 1. HTML
<html>
<head>
    <meta charset="UTF-8">
    <title>使用 Angular 2 来创建FlexGrid控件</title>
    <!--angular 2 模块-->
    <!--用于填充旧版浏览器-->
    <script src="node_modules/core-js/client/shim.min.js"></script>
    <script src="node_modules/zone.js/dist/zone.js"></script>
    <script src="node_modules/reflect-metadata/Reflect.js"></script>
    <script src="node_modules/systemjs/dist/system.src.js"></script>
    <!--systemjs 配置-->
    <script src="systemjs.config.js"></script>

    <!--wijmo 模块-->
    <script src="scripts/vendor/wijmo.min.js"></script>
    <script src="scripts/vendor/wijmo.grid.min.js"></script>
    <link rel="stylesheet" href="styles/wijmo.min.css">
    <script src="scripts/vendor/wijmo.angular2.min.js"></script>
    <!--mine-->
    <script>
      System.import('./app/main').catch(function(err){ console.error(err); });
    </script>
</head>
<body>
    <!--申明根组件-->
    <app-cmp>
        Loading
    </app-cmp>
</body>
</html>
HTML 호스트 페이지에는 Angular 2의 필수 구성 요소 외에도 Wijmo 스크립트도 도입해야 합니다.
2. 쓰기 데이터 서비스
'use strict'
import { Injectable } from '@angular/core';
@Injectable()
export class DataService {
    getData(count: number): wijmo.collections.ObservableArray {
        var countries = 'US,Germany,UK,Japan,Italy,Greece'.split(','),
            data = new wijmo.collections.ObservableArray();
        for (var i = 0; i < count; i++) {
            data.push({
                id: i,
                country: countries[i % countries.length],
                date: new Date(2014, i % 12, i % 28),
                amount: Math.random() * 10000,
                active: i % 4 == 0
            });
        }
        return data;
    }
}
3.
이제 애플리케이션의 첫 번째 구성 요소인 루트 구성 요소인 app.comComponent를 작성합니다. 이 구성 요소는 이 프로그램의 유일한 구성 요소이기도 합니다. 이 구성 요소에는 Component, Inject라는 두 개의 메타 태그를 도입해야 합니다. 또한 정의된 데이터 서비스 data.Service를 삽입해야 합니다. app.comComponent.ts:import { Component, Inject } from '@angular/core';
import { DataService } from '../services/data.service';
@Component ({
selector:'app-cmp',
templateUrl:'app/components/app.component.html',
})
export class AppComponent{
protected dataSvc:DataService;
data: wijmo.collections.CollectionView;
constructor(@Inject(DataService) dataSvc:DataService){
this.dataSvc = dataSvc;
this.data = new wijmo.collections.CollectionView(this.dataSvc.getData(50));
}
}<div class="header"> <h2> 展示如何在angular 2上使用 Wijmo的FlexGrid。 </h2> </div> <div> <wj-flex-grid [itemsSource]="data"> </wj-flex-grid> </div>여기에서는 FlexGrid 컨트롤을 생성하기 위해 wj-flex-grid 태그만 도입하면 됩니다. wj-flex-grid 구성 요소는 하위 구성 요소로 존재하며 app.module 모듈에 주입됩니다. itemsSource는 데이터 소스를 바인딩합니다. 이 itemsSource는 flexgrid의 캡슐화된 속성입니다. Angular 2에서 FlexGrid를 사용하는 가장 큰 이점은 Angular 2 구성 요소가 마크업 언어를 사용하여 컨트롤을 선언하는 기능을 제공한다는 것입니다. 선언 마크업은 MVVM 디자인 패턴을 잘 따르며 View(마크업 언어)를 통해 구성 요소를 완전히 구성할 수 있습니다. FlexGrid는 Angular 2 마크업 언어를 사용하여 완전한 API를 선언하도록 지원합니다. 마크업 언어를 사용하여 속성을 설정하고, 이벤트를 첨부하고, 하위 구성 요소를 구성할 수 있습니다. 4. 루트 모듈 작성루트 모듈에 컴포넌트를 삽입하고 참조된 모든 컴포넌트와 모듈을 삽입해야 합니다.
아아아아
import { NgModule } from '@angular/core';
import { BrowserModule } from '@angular/platform-browser';
import { WjGridModule } from 'wijmo/wijmo.angular2.grid';
import { AppComponent } from './components/app.component';
import { DataService } from './services/data.service';
@NgModule({
    imports: [ WjGridModule, BrowserModule],
    declarations: [AppComponent],
    providers:[DataService],
    bootstrap: [AppComponent],
})
export class AppModule { }
3.
을 실행하고 명령줄에서 npm start를 실행합니다. 자동으로 기본 브라우저를 열고 페이지를 렌더링합니다. start 명령은 package.json 파일에 정의된 scripts 명령을 실행합니다. ts 코드는 기본 js로 컴파일되고 정적 서버가 시작됩니다. 이 서버는 파일 변경 사항을 감지합니다. 파일 변경 사항이 발견되면 ts 코드가 자동으로 컴파일됩니다. 작업 결과는 다음과 같습니다.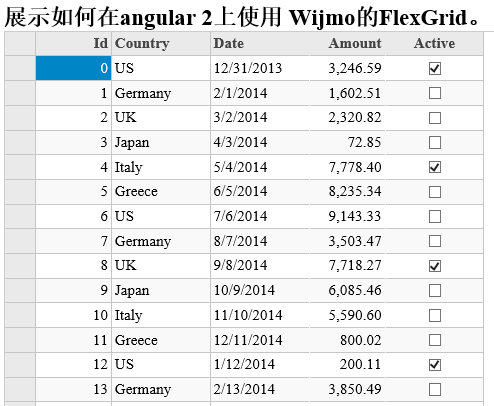
FlexGrid에는 정렬, 필터링, 그룹화, 편집 등의 기본 기능이 내장되어 있으며, 선택적 확장을 통해 다른 기능도 제공할 수 있습니다. 다른 제품에 비해 FlexGrid의 성능은 상당히 좋습니다. 파일 크기는 압축 후 약 25K로 상대적으로 작습니다.
소스코드 다운로드
위는 Angular 2를 지원하는 테이블 컨트롤의 내용입니다. 더 많은 관련 내용은 PHP 중국어 홈페이지( www.php.cn)!