Windows에서 Nginx+php+mysql 환경 설치
- 高洛峰원래의
- 2016-10-10 09:27:151408검색
시스템: Windows 7 64비트 시스템
설치하기 전에 먼저 소프트웨어를 다운로드하세요.
Nginx: http://nginx.org/en/download.html
PHP 안정 PHP 5.6.26: http://php.net/downloads.php
mysql: http://dev.mysql.com/downloads/utilities/
1단계: D 드라이브에 Nginx+php+Mysql 폴더를 만듭니다. 경로는 D:Nginx+php+Mysql
2단계: Nginx를 설치합니다. 설치 디렉터리는 :D:Nginx+php+Mysqlnginx
1. D:Nginx+php+Mysqlnginx 디렉터리를 열고
폴더에서 nginx.exe를 실행합니다. 2. nginx가 시작되었는지 테스트합니다. . 브라우저를 열고 http://localhost 또는 http://127.0.0.1을 방문하여 "Welcome to nginx!"가 나타나는지 확인하면 시작이 성공한 것입니다.
시작에 실패할 경우 포트가 점유되어 있는지 확인하세요.
PHP를 설치합니다. 설치 디렉터리는 D:Nginx+php+Mysqlphp
mySQL을 설치합니다. 설치 디렉터리는 D:Nginx+php+Mysqlmysql
3단계: Nginx conf 파일 수정: 디렉터리는 D:Nginx+php+Mysqlnginxconf
파일 이름: nginx.conf
1. Worker_processes를 열고 A 프로세스
2. 이벤트 추가
3. http 설정->서버 설정->php 지원
#user  nobody;
worker_processes  1;
#error_log  logs/error.log;
#error_log  logs/error.log  notice;
#error_log  logs/error.log  info;
#pid        logs/nginx.pid;
events {
    worker_connections  1024;
}
http {
    include       mime.types;
    default_type  application/octet-stream;
    #log_format  main  '$remote_addr - $remote_user [$time_local] "$request" '
    #                  '$status $body_bytes_sent "$http_referer" '
    #                  '"$http_user_agent" "$http_x_forwarded_for"';
    #access_log  logs/access.log  main;
    sendfile        on;
    #tcp_nopush     on;
    #keepalive_timeout  0;
    keepalive_timeout  65;
    #gzip  on;
    server {
        listen       80;
        server_name  localhost;
        #charset koi8-r;
        #access_log  logs/host.access.log  main;
        location / {
            root d:/Nginx+php+Mysql/nginx/html;
            index  index.html index.htm;
        }
        error_page   500 502 503 504  /50x.html;
        location = /50x.html {
            root   html;
        }
        # pass the PHP scripts to FastCGI server listening on 127.0.0.1:9000
        #
        location ~ \.php$ {
            root           html;
            fastcgi_pass   127.0.0.1:9000;
            fastcgi_index  index.php;
            fastcgi_param     SCRIPT_FILENAME    $document_root$fastcgi_script_name;
            include        fastcgi_params;
        }
    }
}
nginx가 성공적으로 설치되었는지 테스트합니다

4단계: php에서 php.ini-development 파일을 수정하고, 파일 이름을 php.ini로 변경하고, php.ini를 찾습니다.
"extension_dir "을 검색하고, Extension_dir = "ext"를 찾은 다음, 먼저 앞에 있는 세미콜론을 제거하고 Extension_dir = "./ext"로 변경합니다.
"php_mysql"을 검색하고 "extension=php_mysql. dll 및 확장자=php_mysqli.dll 앞의 ";" 확장자=php_mysql.dll 및 확장자=php_mysqli.dll(MYSQL 데이터베이스 지원)
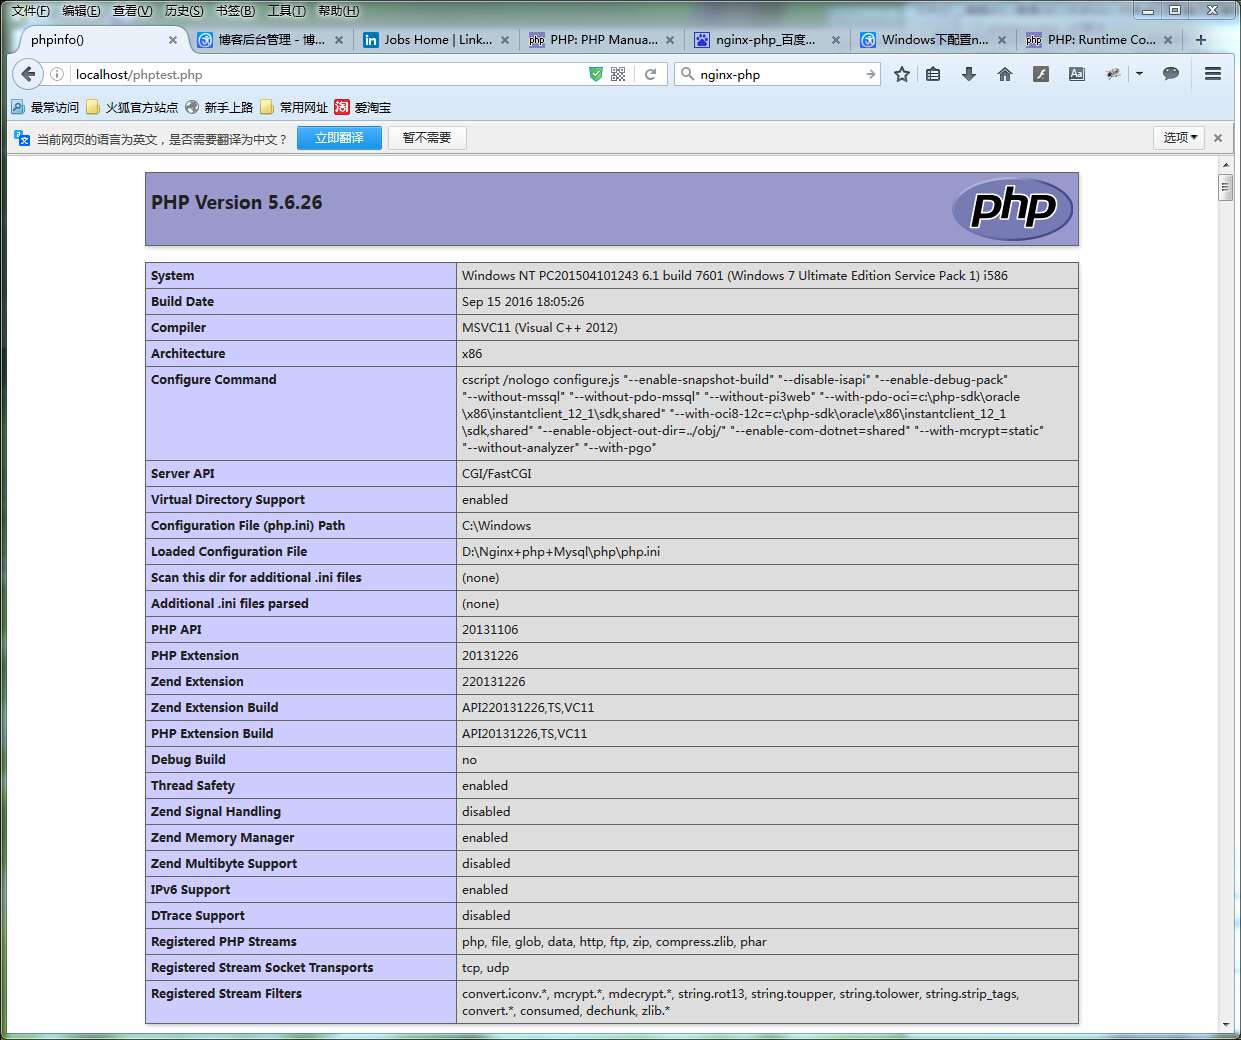
PHP가 성공적으로 설치되었는지 확인:

네 번째 단계: php 디렉토리에 새 파일 php-cgi.vbs를 생성하고 php-cgi.vbs 파일을 사용하여 php-cgi를 시작합니다.
php-를 엽니다. cgi.vbs, 시작 코드 작성:
set wscriptObj = CreateObject("Wscript.Shell")
wscriptObj.run "php-cgi -b 127.0.0.1:9000",0
5단계: D:Nginx+php+Mysql 디렉터리에 새 시작 항목 만들기: runServer.bat 및 중지 항목 stopServer.bat
시작 항목 runServer.bat 입력:
@echo off
echo Starting nginx...
cd %~dp0nginx
start "" "./nginx.exe"

echo Starting mysql...
net start mysql

echo Starting PHP FastCGI...
cd %~dp0PHP
start "" "php-cgi.vbs"

pause

Exit
중지 항목 입력:
@echo off
echo Stopping nginx...
taskkill /F /IM nginx.exe > nul
echo Stopping PHP FastCGI...
taskkill /F /IM php-cgi.exe > nul
echo Stopping mysql...
net stop mysql
pause
exit
마지막으로 시작이 성공했는지 확인:
nginx의 html 디렉터리 D:Nginx+php+Mysqlnginxhtml에 새 phpinfo.php를 생성합니다
쓰기:
<?php
phpinfo();?>
브라우저에 phpinfo.php 경로를 입력하여 구성이 성공했는지 확인하세요.


