


In Debian, managing user privileges and administrative access is crucial for maintaining a secure and efficient system. By granting users the ability to execute administrative tasks without relying on the root account, you can enhance security, control access to sensitive operations, and maintain an audit trail of user activity. This detailed guide walks you through the steps to add, delete, and grant sudo privileges to users in Debian Linux.
Whether you're setting up a new Debian system or need to manage user accounts on an existing installation, this step-by-step tutorial is designed to provide clear instructions and explanations that even beginners can follow.
By the end of this guide, you'll have a solid understanding of how to create new user accounts, grant them sudo access, and remove users when necessary.
Before getting into the topic of adding, deleting, and granting sudo privileges to users in Debian, it's essential to understand what sudo is and the advantages it offers.
Table of Contents
1. What is Sudo?
The sudo (Superuser Do) command in Linux and Unix-like systems allows authorized users to execute commands with the privileges of the superuser or another user. It enables users to perform administrative tasks without logging in as the root user permanently.
The primary purpose of sudo is to provide a safer and more controlled approach to system administration. Instead of granting full root access to users, sudo enables privilege separation, limiting the scope of elevated privileges to specific commands or operations.
2. Advantages of Sudo Users
Here are some key aspects regarding sudo and the advantages of having a sudo user:
1. Privilege Separation
By default, Linux systems have a root user account with full administrative privileges. However, logging in as the root user can be risky because any command executed has unrestricted access to the entire system.
Sudo provides a way to separate regular user accounts from privileged tasks, allowing users to perform administrative actions only when needed.
2. Limited Privilege Escalation
Sudo allows specific users or groups to execute specific commands with elevated privileges. This provides a controlled and auditable way to grant temporary administrative access to trusted users.
Users can execute individual commands or a series of commands with sudo by authenticating themselves with their own password, rather than the root password.
3. Auditing and Accountability
Sudo logs all executed commands, providing an audit trail for system administrators. This audit trail helps track who executed which commands and when, enhancing system security and accountability.
The logs generated by sudo can be analyzed to investigate security incidents, troubleshoot issues, and monitor user activity.
4. Fine-Grained Access Control
With sudo, system administrators can define granular access control policies for different users or groups. This allows them to specify precisely which commands or operations each user can perform with elevated privileges.
Access control can be customized based on factors such as user roles, specific systems or services, and even specific command options.
5. Reduced Risk of Accidental Damage
Using sudo helps mitigate the risk of accidental damage caused by executing privileged commands. With sudo, users need to deliberately prefix a command with sudo to run it with elevated privileges, reducing the likelihood of unintentional system modifications or deletions.
It provides an extra layer of safety by prompting users for authentication before executing privileged operations, ensuring they are aware of the consequences of their actions.
6. Collaboration and Delegation
Sudo facilitates collaboration among system administrators by allowing them to delegate specific administrative tasks to other users without sharing the root password.
By assigning sudo privileges to trusted users, the workload can be distributed, and routine administrative tasks can be performed by designated individuals without requiring full root access.
In summary, having a sudo user provides a more secure and controlled approach to system administration. It enhances security, accountability, and flexibility by enabling limited privilege escalation, fine-grained access control, auditing, and delegation of administrative tasks.
3. Add a New User in Debian
To create a new sudo user in Debian, you need to have either an existing sudo user or root access to the system. This requirement ensures that only authorized users can grant sudo privileges to others.
In order to add a new user, follow these steps:
Log in to your Debian system using an existing sudo user account or as the root user. Open a terminal or connect to your Debian system via SSH.
If you have an existing sudo user:
Run the following command to create a new user:
$ sudo adduser senthil
Replace "senthil" with the desired username for the new sudo user.
Enter a strong password for the new user when prompted.
Provide any additional information requested during the user creation process.
If you have root access:
If the currently logged-in user does not have sudo rights, you will need to switch to the root account in order to create new sudo users.
Use any one of the following commands to switch to root user.
$ su -l
Or
$ su -
By using su -l or su -, the root shell is initialized with an environment similar to a normal 'login' shell. This means that the root user's $PATH variable is correctly initialized, ensuring that system directories such as /sbin are included.
Next, run the following command to create a new user:
# adduser senthil
Again, replace "senthil" with your own username.
You will be prompted to set a password for the new user. Enter a strong password and confirm it.
Additional information about the new user, such as their full name, phone number, etc., may be requested. You can enter the information or leave it blank by pressing Enter.
Adding user `senthil' ...
Adding new group `senthil' (1001) ...
Adding new user `senthil' (1001) with group `senthil (1001)' ...
Creating home directory `/home/senthil' ...
Copying files from `/etc/skel' ...
New password:
Retype new password:
passwd: password updated successfully
Changing the user information for senthil
Enter the new value, or press ENTER for the default
	Full Name []:
	Room Number []:
	Work Phone []:
	Home Phone []:
	Other []:
Is the information correct? [Y/n] y
Adding new user `senthil' to supplemental / extra groups `users' ...
Adding user `senthil' to group `users' ...

3.1. Check Sudo Privileges for a Specific User
After creating a new user named "senthil", it's important to note that this user does not have sudo access by default. Without sudo privileges, the user won't be able to perform administrative tasks.
To verify whether a user has sudo access or not, you can use the following command:
# sudo -l -U senthil
Replace "senthil" with the actual username you want to check.
Sample output:
User senthil is not allowed to run sudo on debian12.

As you can see, the user "senthil" has not been granted sudo privileges yet. If the user "senthil" has sudo access, the output will show the allowed commands and their associated restrictions, if any.
In the next steps, we will cover how to grant sudo privileges to the user "senthil" so they can perform administrative tasks.
4. Grant Sudo Privileges to Users in Debian
Add the newly created user to sudo group using the following command:
If you have an existing sudo user:
$ sudo adduser senthil sudo
If you have root access:
# adduser senthil sudo
Sample output:
Adding user `senthil' to group `sudo' ...
Done.

We granted sudo permission to the user "senthil".
You can also the following command to add a user to sudo group.
# sudo usermod -aG sudo senthil
Now verify if the user is added in the sudo group, using command
# sudo -l -U senthil
Sample output:
Matching Defaults entries for senthil on debian12:
    env_reset, mail_badpass,
    secure_path=/usr/local/sbin\:/usr/local/bin\:/usr/sbin\:/usr/bin\:/sbin\:/bin,
    use_pty

User senthil may run the following commands on debian12:
    <strong><mark>(ALL : ALL) ALL</mark></strong>

Here, the line (ALL : ALL) ALL in the above output indicates that the user "senthil" can run any command (ALL) as any user (ALL) with all available privileges.
The output confirms that the user "senthil" has been granted unrestricted sudo privileges on the Debian 12 system, allowing him to run any command as any user with full administrative capabilities.
If you view the contents of the sudoers file;
$ sudo cat /etc/sudoers
You would see some lines like below.
# User privilege specification
root	ALL=(ALL:ALL) ALL

# Members of the admin group may gain root privileges
%admin ALL=(ALL) ALL

# Allow members of group sudo to execute any command
<strong><mark>%sudo	ALL=(ALL:ALL) ALL</mark></strong>

# See sudoers(5) for more information on "@include" directives:

@includedir /etc/sudoers.d
The directive %sudo ALL=(ALL:ALL) ALL in the /etc/sudoers file is a rule that specifies the sudo privileges for members of the "sudo" group. Let's break down what each part of the directive means:
- %sudo: This signifies that the rule applies to all users who are members of the "sudo" group. The % character denotes a group name.
- ALL=(ALL:ALL): This portion defines the scope of the sudo rule. It indicates that the rule applies to any host (ALL) and allows users in the "sudo" group to run commands as any user and any group.
- The first "ALL" represents the hosts or machines on which the sudo rule is applicable. In this case, "ALL" means the rule applies to any host. It allows members of the "sudo" group to execute commands with sudo privileges from any machine.
- The second "ALL" represents the users or accounts as whom the commands can be executed. "ALL" means the members of the "sudo" group can run commands as any user on the system.
- The third "ALL" represents the groups that the sudo commands can be executed as. Again, "ALL" means that the members of the "sudo" group can execute commands as any group on the system.
- ALL: This specifies that the members of the "sudo" group can run any command.
In summary, the directive %sudo ALL=(ALL:ALL) ALL allows any user who is a member of the "sudo" group to execute any command with full administrative privileges. It grants broad sudo access to the users in the "sudo" group, enabling them to perform a wide range of administrative tasks on the system.
Since the user "senthil" is a member of "sudo" group, he can now run any command on any host. To put this in other word, he is one of the administrator.
5. Verify Sudo Privilege of Users
To verify if a user has the ability to perform administrative tasks with sudo, Log out from the current user session. On the login screen, select the new user you created. Enter the password for the new user and log in.
Alternatively, you can quickly switch to the new user using the following command:
# sudo -i -u senthil
This command will instantly switch you to the specified user, in this case, "senthil".
Once you are switched to the user, run any commands with the sudo prefix to perform administrative tasks. For example:
$ sudo apt update

As you witnessed in the above output, the user "senthil" has the ability to run administrative tasks with sudo privilege.
6. Remove Sudo Access from Users
Removing sudo access from a user in Debian systems is a delicate process that requires caution. It's important to ensure that you do not remove the real administrator from the "sudo" group, as there should always be at least one sudo user in the system.
To revoke sudo permissions from a user, follow these steps:
Make sure you are logged out from the user's session ("senthil") and logged in as another user with sudo privileges.
To remove the user "senthil" from the "sudo" group, use the following command:
$ sudo deluser senthil sudo
This command will revoke the user's sudo permissions by removing them from the "sudo" group. Note that this action does not permanently delete the user from the system.
Sample output:
Removing user `senthil' from group `sudo' ...
Done.
Alternatively, you can use the following command to revoke sudo permissions:
$ sudo gpasswd -d senthil sudo
Running this command will have the same effect of removing the user "senthil" from the "sudo" group.
After executing either of these commands, the user "senthil" will no longer have sudo access and will be considered a regular user without administrative privileges.
To verify if the user has indeed been removed from the "sudo" group, you can run the following command:
$ sudo -l -U senthil
This command will display the user's sudo privileges. If the user is no longer listed as having sudo access, it confirms that the sudo permissions have been successfully revoked.
User senthil is not allowed to run sudo on debian12.

The user "senthil" is now removed from sudoer list.
7. Remove Users Permanently
Please exercise caution when permanently deleting users from the system, as this action is not reversible. Double-check that you are removing the correct user, and ensure that you have taken appropriate backups or precautions to prevent any unintended data loss.
To permanently delete users from a Linux system, including their home directory and mail spool, follow these steps:
Ensure that you are logged in as the root user or a user with sudo privileges.
To delete a user, use the following command:
$ sudo deluser senthil
Replace "senthil" with the actual username of the user you want to remove.
This command will remove the specified user from the system, including their user account details. However, their home directory and mail spool will remain intact.
If you want to remove the user's home directory and mail spool along with their account, use the --remove-home option:
$ sudo deluser --remove-home senthil
This command ensures that not only the user account but also their home directory and mail spool are deleted.
Conclusion
Managing user privileges and granting sudo access in Debian systems is an essential aspect of maintaining system security and controlling administrative tasks. By following the step-by-step instructions provided, even beginners can successfully add, grant sudo access, and manage users in Debian systems.
Remember to exercise caution when using sudo, grant privileges only to trusted users, and regularly review sudo logs to monitor user activity and identify any potential security issues.
Related Read:
- Add, Delete And Grant Sudo Privileges To Users In Alpine Linux
- Add, Delete And Grant Sudo Privileges To Users In Arch Linux
- Add, Delete And Grant Sudo Privileges To Users In CentOS
- Add, Delete And Grant Sudo Privileges To Users In Fedora
- Add, Delete And Grant Sudo Privileges To Users In Ubuntu
- How To Allow Or Deny Sudo Access To A Group In Linux
위 내용은 Debian 12의 사용자에게 추가, 삭제 및 권한을 부여하는 방법의 상세 내용입니다. 자세한 내용은 PHP 중국어 웹사이트의 기타 관련 기사를 참조하세요!

 다양한 작업에 대한 성능은 Linux와 Windows간에 어떻게 다릅니 까?May 14, 2025 am 12:03 AM
Linux는 서버 및 개발 환경에서 잘 작동하는 반면 Windows는 데스크탑 및 게임에서 더 잘 수행됩니다. 1) Linux의 파일 시스템은 많은 작은 파일을 처리 할 때 잘 수행됩니다. 2) Linux는 높은 동시성 및 높은 처리량 네트워크 시나리오에서 훌륭하게 수행합니다. 3) Linux 메모리 관리는 서버 환경에서 더 많은 장점이 있습니다. 4) Linux는 명령 줄 및 스크립트 작업을 실행할 때 효율적이며 Windows는 그래픽 인터페이스 및 멀티미디어 응용 프로그램에서 더 잘 수행합니다.
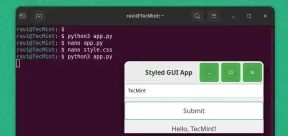 pygobject를 사용하여 Linux에서 GUI 애플리케이션을 만드는 방법May 13, 2025 am 11:09 AM
그래픽 사용자 인터페이스 (GUI) 응용 프로그램 작성은 아이디어를 활성화시키고 프로그램을보다 사용자 친화적으로 만들 수있는 환상적인 방법입니다. PygoBject는 개발자가
 아치 리눅스에서 phpmyadmin으로 램프 스택을 설치하는 방법May 13, 2025 am 11:01 AM
Arch Linux는 유연한 최첨단 시스템 환경을 제공하며 소규모 비 크리티컬 시스템에서 웹 애플리케이션을 개발하는 데 강력하게 적합한 솔루션입니다.
 Arch Linux에 Lemp (Nginx, Php, Mariadb)를 설치하는 방법May 13, 2025 am 10:43 AM
최첨단 소프트웨어를 수용하는 롤링 릴리스 모델로 인해 Arch Linux는 유지 보수, 지속적인 업그레이드 및 현명한 FI를위한 추가 시간이 필요하기 때문에 신뢰할 수있는 네트워크 서비스를 제공하기 위해 서버로 설계 및 개발되지 않았습니다.
![12 Linux 콘솔 [터미널] 파일 관리자](https://img.php.cn/upload/article/001/242/473/174710245395762.png?x-oss-process=image/resize,p_40) 12 Linux 콘솔 [터미널] 파일 관리자May 13, 2025 am 10:14 AM
12 Linux 콘솔 [터미널] 파일 관리자May 13, 2025 am 10:14 AMLinux 콘솔 파일 관리자는 일상적인 작업, 로컬 컴퓨터에서 파일을 관리 할 때 또는 원격 제품에 연결할 때 매우 도움이 될 수 있습니다. 디렉토리의 비주얼 콘솔 표현은 파일/폴더 작업 및 SAV를 신속하게 수행하는 데 도움이됩니다.
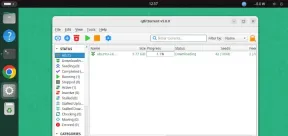 QBITTORRENT : 강력한 오픈 소스 비트 토렌트 클라이언트May 13, 2025 am 10:12 AM
QBITTORRENT는 사용자가 인터넷을 통해 파일을 다운로드하고 공유 할 수있는 인기있는 오픈 소스 비트 토렌트 클라이언트입니다. 최신 버전 인 QBITTORRENT 5.0은 최근에 출시되었으며 새로운 기능과 개선 사항이 제공됩니다. 이 기사는 할 것입니다
 아치 Linux에서 Nginx Virtual Hosts, Phpmyadmin 및 SSL 설정May 13, 2025 am 10:03 AM
이전 Arch Linux Lemp 기사는 네트워크 서비스 설치 (NGINX, PHP, MYSQL 및 PHPMYADMIN)와 MySQL Server 및 PhpmyAdmin에 필요한 최소 보안 구성에서 기본 사항을 다루었습니다. 이 주제는 엄격하게 Forme과 관련이 있습니다
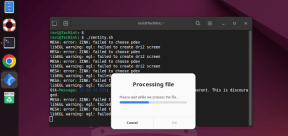 Zenity : 쉘 스크립트에서 GTK 대화 상자 구축May 13, 2025 am 09:38 AM
Zenity는 명령 줄을 사용하여 Linux에서 그래픽 대화 상자를 만들 수있는 도구입니다. 그래픽 사용자 인터페이스 (GUI)를 만들기위한 툴킷 인 GTK를 사용하여 스크립트에 시각적 요소를 쉽게 추가 할 수 있습니다. Zenity는 매우 u 일 수 있습니다


핫 AI 도구

Undresser.AI Undress
사실적인 누드 사진을 만들기 위한 AI 기반 앱

AI Clothes Remover
사진에서 옷을 제거하는 온라인 AI 도구입니다.

Undress AI Tool
무료로 이미지를 벗다

Clothoff.io
AI 옷 제거제

Video Face Swap
완전히 무료인 AI 얼굴 교환 도구를 사용하여 모든 비디오의 얼굴을 쉽게 바꾸세요!

인기 기사
뜨거운 도구

SublimeText3 Linux 새 버전
SublimeText3 Linux 최신 버전

SecList
SecLists는 최고의 보안 테스터의 동반자입니다. 보안 평가 시 자주 사용되는 다양한 유형의 목록을 한 곳에 모아 놓은 것입니다. SecLists는 보안 테스터에게 필요할 수 있는 모든 목록을 편리하게 제공하여 보안 테스트를 더욱 효율적이고 생산적으로 만드는 데 도움이 됩니다. 목록 유형에는 사용자 이름, 비밀번호, URL, 퍼징 페이로드, 민감한 데이터 패턴, 웹 셸 등이 포함됩니다. 테스터는 이 저장소를 새로운 테스트 시스템으로 간단히 가져올 수 있으며 필요한 모든 유형의 목록에 액세스할 수 있습니다.

ZendStudio 13.5.1 맥
강력한 PHP 통합 개발 환경

DVWA
DVWA(Damn Vulnerable Web App)는 매우 취약한 PHP/MySQL 웹 애플리케이션입니다. 주요 목표는 보안 전문가가 법적 환경에서 자신의 기술과 도구를 테스트하고, 웹 개발자가 웹 응용 프로그램 보안 프로세스를 더 잘 이해할 수 있도록 돕고, 교사/학생이 교실 환경 웹 응용 프로그램에서 가르치고 배울 수 있도록 돕는 것입니다. 보안. DVWA의 목표는 다양한 난이도의 간단하고 간단한 인터페이스를 통해 가장 일반적인 웹 취약점 중 일부를 연습하는 것입니다. 이 소프트웨어는

메모장++7.3.1
사용하기 쉬운 무료 코드 편집기

