


One good screenshot is worth a thousand words. Whether you want to quickly capture a sample of your work, send a reference visual, highlight a mistake or inconsistency, taking a screenshot is essential for efficient work.
You can opt to capture your screen or a portion of it with macOS built-in tools or you can explore screenshotting options that offer additional tools like creating a GIF, making a scrolling capture, or editing out sections of your screenshot for privacy.
If you want a screenshotting tool that offers that and more, CleanShot X is our choice. The app allows you to capture your screen in a variety of ways fit for most purposes — scrolling screenshot to capture those long presentations or web pages, easy GIF creation if you need to make an illustration for your landing page, product demo, or a blog post, and our favorite blurring feature to edit out personal information from screenshots.

Best screen recording tool
With CleanShot X, you can capture the entire chat history, a report, or any scrollable content from websites or apps.
Try freeAnd if your desktop icons keep getting in the way of the perfect screenshots, don’t worry, CleanShot X can easily hide them. Just click the respective option in the app’s menu and you are good to go!
Now, let’s dive into how you can use these and more CleanShot X tools.
Capture your Mac’s screen like a pro
The most important part of taking a good screenshot is being versed enough in it that you can do it quickly and not missing a beat. Sometimes you just need to capture something without wasting a moment before it vanishes, so here’s how to best leverage CleanShot X for quick and/or perfect screenshots.
Setting up CleanShot X
First things first, how do you take a screenshot with CleanShot X? You can simply click the app icon in your Mac’s menu bar and pick the screenshot you want to take from there.

But that’s not always the best option if you want to take your screenshot instantly, before whatever it is that you are capturing is gone. Use keyboard shortcuts for quicker screenshot taking.
To set them up, click Settings in the CleanShot X menu bar drop-down menu and go to Shortcuts.

Here, you can record your preferred shortcuts for various screenshot types or you can choose to use system default shortcuts for your CleanShot X screenshots — just click the Use System Default Shortcuts button at the bottom of the menu.
The app will prompt you to set it as the system default screenshot tool.

Take the screenshot you need
With CleanShot X, you can take all the popular screenshot types — capturing a single window, your whole screen, an area on your screen, a scrolling capture, or a video capture.
To pick the type of screenshot you need, click the menu bar icon of the app and select the screenshot type.

Record video and GIFs
You can record a video of your screen with CleanShot X just as easily. Simply pick the Record Screen option in the menu and select the area you want to capture.
Video recording options will appear on your screen.

Decide if you want to create a video file with your screen recording or a GIF, and select the respective option.
Additionally, CleanShot X allows you to record your mic or computer audio, your webcam, show keystrokes and highlight clicks. These are wonderful tools for times when you are creating product demos, walkthroughs, or presentations. You can also choose to show recording time as you record to help you keep track of the length of your video.
And lastly, but not in the least less importantly, you can choose to set Do Not Disturb on in CleanShot video recording settings. Now unwanted notifications won’t ruin your whole recording!
Worried about video files or GIFs of your screen recording getting too large? Just set the quality restrictions in the settings.

Self-timer
If you need some time to set up your screenshot before you capture, use the self-timer option in CleanShot X.
Click on the app’s menu bar icon, select Self-Timer, and select the area you want to capture. The 5-second timer will start automatically.
Remove background distractions
We’ve all been there — your desktop is as cluttered as it can be, filled to the brim with private files or sensitive information, or just looking like a mess, and that’s exactly when you need a nice clean screenshot of something you’ve been working on.
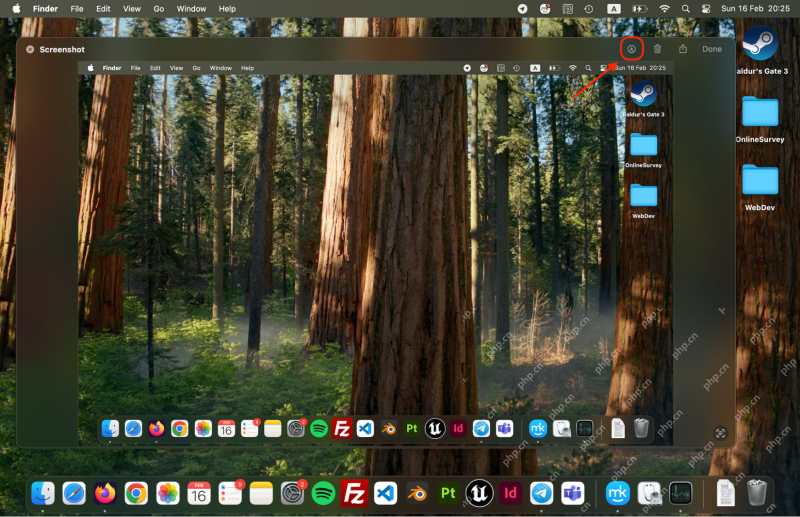
Before you waste your time trying to clean up your desktop in a time crunch, take a beat. CleanShot X can hide your desktop icons in a click. Go to the app’s menu in your Mac’s menu bar and click Hide Desktop Icons. And voila, your desktop is pristine!
Easily access quick actions
Once you’ve captured your screenshot, you can perform quick actions with the file. Copy it to clipboard, save in your desired location, drag and drop onto your desktop to save, save to cloud storage, or make further edits — CleanShot X makes it easier than ever.
Draw on screenshots
Highlighting something in your screenshot is the action that’s probably most used when it comes to editing screenshots.
CleanShot X makes it easy to add arrows, lines, text, emoji, and even other screenshots to your screenshot.

Pick what you need from the editing panel at the top and make your screenshots more functional than ever! You can even add a counter for easy illustration.
Annotate your screenshots and hide sensitive content
With CleanShot X advanced editing tools designed specifically for screenshots, you can annotate your images, combine multiple screenshots in one explainer, and blur out sensitive information.

Add custom wallpaper
Clean up your screenshots with CleanShot X background tool. Set the scene with beautiful backgrounds and make your captures look stunning.
Pick a background while editing your screenshot — an image or a plain color — and instantly add it to your capture.

Capture text from images
There’s nothing more tedious than retyping all the text in your screenshot or PDF. Whether it’s some old image files or a screenshot you saved for later, CleanShot X can capture text from it with its handy Capture Text (OCR) tool.
Simply pick this option in the app’s drop-down menu bar menu and select the text you need captured. CleanShot X will take a second to process and then you’ll be able to simply paste your copied text where you need it!

Grab and save to the cloud
Use CleanShot Cloud to store your screenshots if you want to save some precious hard disk space. The app helps you declutter your desktop and free up valuable hard drive memory for things more important than random screenshots.
Here’s how to store your screenshots in CleanShot Cloud.
- Make your capture.
- On the overlay menu of your screen capture, click the Cloud button. You’ll be prompted to log into CleanShot Cloud, use sign in with Setapp if you are a Setapp user.
- Once your one-time cloud setup is complete, just click the cloud icon in the top right corner of your screenshot miniature overlay to save your item to cloud.
- You can adjust expiry time for your screenshot or get the sharing link on cleanshot.cloud > Your media.

Download and share screenshots from the cloud
Access CleanShot Cloud via CleanShot X menu bar menu by clicking on View All Uploads. Find all your screen captures neatly stored on the cloud. You can also copy the link to your most recent capture from the app’s menu.
From the cloud, you can download your screenshots and recordings, tag them, or get a link for sharing.

Note that the default expiry date is just 7 days. You can adjust it to 1 day, 30, 90, 365 days, or even never.
Pick destinations instantly
If you vary the location of where your screenshots are saved, this feature in CleanShot X is a must for you. Open the app’s Settings from the menu bar drop-down menu and go to Quick Access.
Find Save button behavior at the bottom of the window and set it to Ask for destination. This way, CleanShot X will give you a chance to pick your screenshot saving destination when you click the Save button on the screenshot miniature.

Screenshot with CleanShot X
Screenshots with CleanShot X can be as easy or as advanced as you want them to get. From basic capturing tools to quickly save a portion of your screen or record a screencast, to more advanced screenshot edits like blurring out sensitive information, adding a background, or creating an explainer, CleanShot X can do it all.
We hope this guide will help you make amazing screenshots and save time with this tool. Get CleanShot X on Setapp along with 240+ more apps for your daily tasks on Mac and iOS.
Not on Setapp yet? Get started with an easy 7-day free trial and try the apps, including CleanShot X now!
위 내용은 Cleanshot X 튜토리얼 : Mac에서 찍히는 화면 캡처의 상세 내용입니다. 자세한 내용은 PHP 중국어 웹사이트의 기타 관련 기사를 참조하세요!

 “ T 또는 “ autofill ” 사파리 요청? 여기에#8217;May 08, 2025 am 09:12 AM
터치 바가 장착 된 MacBook Pro 사용자는 현재 웹 페이지에 양식, 로그인 또는 자동으로 채워진 콘텐츠가 없더라도 Safari 브라우저를 사용할 때 "T Safari 브라우저의 이러한 무작위 터치 ID 요청은 때때로 반복적으로 팝업되어 혼란스럽고 걱정이됩니다. 이 문제가 있고 문제를 해결하는 이유와 방법을 알고 싶다면 계속 읽으면 "터치 ID로 로그인"과 같은 요청이 나타나는 이유를 더 잘 이해할 수 있습니다. Mac의 Touch Bar가 Safari에서 "Touch ID로 로그인"을 표시하는 이유
 iPhone의 배터리 수명을 확인하는 방법May 08, 2025 am 09:08 AM
iPhone은 특히 새로운 장치에서 배터리 수명이 우수합니다. 그러나 모든 배터리 구동 전자 장치와 마찬가지로 iPhone 배터리 전원은 시간이 지남에 따라 점차 감소합니다. iPhone을 처음 접한다면 나머지 iPhone 배터리를 확인하는 방법을 알고 싶을 수도 있습니다. 운 좋게도 쉬운 작업입니다. 다음 방법을 사용하여 iPhone 배터리 레벨을 볼 수 있습니다. 1. 배터리 아이콘을 통해 iPhone 배터리 전원을 봅니다 iPhone 화면의 오른쪽 상단을 확인하십시오. 배터리 아이콘은 현재 배터리 레벨을 표시합니다. 배터리 아이콘이 녹색 인 경우 iPhone이 충전되고 나머지 배터리가 충분하다는 것을 의미합니다. 빨간색이라면 배터리가 매우 낮다는 것을 의미합니다.
 MacOS Sequoia 15.3 업데이트는 Genmoji & Bug Fixes를 제공합니다May 08, 2025 am 09:07 AM
Sequoia Systems를 실행하는 모든 MAC 사용자가 MacOS Sequoia 15.3 업데이트를 사용할 수 있습니다! 이 최신 버전의 Mac 소프트웨어 업데이트에는 Genmoji 지원이 포함되어있어 Apple Intelligence 지원 하드웨어를 사용하는 사용자가 메시지 앱에서 사용자 정의 이모티콘 아이콘을 생성 할 수 있습니다. 또한 업데이트에는 개선 된 AI 요약 기능, 버그 수정, 보안 향상 및 기타 사소한 개선 사항이 포함됩니다. 세쿼이아, Macos Sonoma 14.7.3, Macos Ventura 13.7.3 및 각각 Mac 사용자의 경우
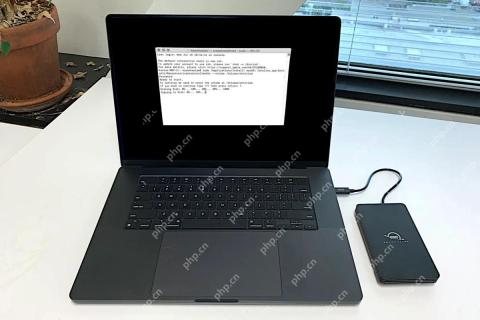 부팅 가능한 USB 마사 설치 프로그램을 만드는 방법May 07, 2025 am 11:14 AM
이 기사에서는 MAC 운영 체제의 부팅 가능한 설치 프로그램을 작성하는 데 필요한 단계를 수행하여 여러 Mac에 최신 버전의 MacOS를 설치하고 최신 MacOS 베타를 설치하고 C를 수행 할 수 있습니다.
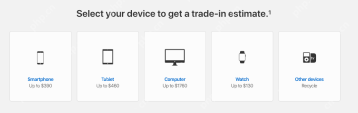 7 가지 창의적인 방법은 무료로 오래된 Mac을 재사용하는 방법May 07, 2025 am 11:10 AM
오래된 Mac의 전성기가 끝났고 먼지를 모으고 있습니다. 그렇다면 오래된 MacBook 또는 IMAC로 무엇을해야합니까? 홈 장식 아이템으로 바꾸고 싶지 않으면 최소한이 7 가지 창의적인 방법을 사용하여 바꿀 수 있습니다.
 MacBook 배터리가 충전되지 않습니까? 일반적인 이유와 수정May 07, 2025 am 10:50 AM
MacBook이 연결되어 있지만 청구되지 않으면 충전기, 구식 소프트웨어 또는 일상적인 서비스 요구 사항을 포함하여 몇 가지 가능한 이유가 있습니다.이 기사에서는 가장 일반적인 원인을 살펴 보겠습니다.
 미확인 또는 알 수없는 개발자로부터 Mac 앱을 열는 방법May 07, 2025 am 10:46 AM
Mac에 앱을 설치하려고 시도하고 미확인 또는 알려지지 않은 개발자로부터 나온 경고를 받았다면 안전하고 설치 해야하는지, 실제로 설치할 수 있는지 궁금 할 것입니다. 글쎄, 이것에서
 Mac에서 스크린 샷을 자르는 방법? MacBook Air/Pro에서 자르는 방법?May 07, 2025 am 10:43 AM
Mac에서 스크린 샷을 자르려면 : 스크린 샷을 열고, 마크 업 도구 모음에 액세스하고, 작물을 클릭하고, 선택을 조정하고, 완료를 누르십시오. 미리보기에서 이미지를 열고, 보관할 영역을 선택한 다음 도구> 작물로 이동하거나 C를 누릅니다.


핫 AI 도구

Undresser.AI Undress
사실적인 누드 사진을 만들기 위한 AI 기반 앱

AI Clothes Remover
사진에서 옷을 제거하는 온라인 AI 도구입니다.

Undress AI Tool
무료로 이미지를 벗다

Clothoff.io
AI 옷 제거제

Video Face Swap
완전히 무료인 AI 얼굴 교환 도구를 사용하여 모든 비디오의 얼굴을 쉽게 바꾸세요!

인기 기사
뜨거운 도구

SublimeText3 중국어 버전
중국어 버전, 사용하기 매우 쉽습니다.

스튜디오 13.0.1 보내기
강력한 PHP 통합 개발 환경

ZendStudio 13.5.1 맥
강력한 PHP 통합 개발 환경

VSCode Windows 64비트 다운로드
Microsoft에서 출시한 강력한 무료 IDE 편집기

에디트플러스 중국어 크랙 버전
작은 크기, 구문 강조, 코드 프롬프트 기능을 지원하지 않음

