


Curious about your Linux desktop's screen resolution? Want to know how to find it using simple commands? Look no further! In this guide, we’ll walk you through the steps to find your Linux desktop screen resolution, both from the command line and using a graphical interface.
To check your monitor's resolution, refresh rate and other information on a Linux system, you can use several tools and commands.
First, we will learn how to display the screen resolution in Linux from command line.
Table of Contents
Find Desktop Screen Resolution in Linux from Command line
Here, we will use the following tools to find the screen resolution of your Linux desktop from command line:
- xrandr,
- xdpyinfo,
- inxi,
- edid-decode,
- dmesg.
1. Check Linux Desktop Screen Resolution using xrandr Command
The xrandr (stands for "X Resize and Rotate") is a command-line tool used in the X Window System, which is the underlying graphical system used by most Unix-like operating systems, including Linux.
The xrandr utility enables users to configure and manipulate various display settings, such as screen resolution, refresh rate, rotation, and more, directly from the command line.
With "xrandr," you can perform tasks like changing the resolution of your monitor, adjusting the orientation of your screen (landscape, portrait, etc.), setting up multi-monitor configurations, and diagnosing display issues.
This command is especially handy for those who prefer working with the command line or need to automate display-related tasks.
xrandr comes pre-installed in most Linux distributions.
To find your screen resolution in Linux using xrandr, simply run:
xrandr
This will output a list of all of the available display settings.
Screen 0: minimum 320 x 200, <strong><mark>current 1920 x 1080</mark></strong>, maximum 16384 x 16384
DP-1 disconnected (normal left inverted right x axis y axis)
DP-2 disconnected (normal left inverted right x axis y axis)
HDMI-1 disconnected (normal left inverted right x axis y axis)
DP-3 connected primary <strong><mark>1920x1080</mark></strong>+0+0 (normal left inverted right x axis y axis) 476mm x 268mm
   <strong><mark>1920x1080</mark></strong>     60.00*+  50.00    59.94
   1600x900      60.00
   1280x1024     75.02    60.02
   1152x864      75.00
   1280x720      60.00    50.00    59.94
   1024x768      75.03    60.00
   800x600       75.00    60.32
   720x576       50.00
   720x480       60.00    59.94
   640x480       75.00    60.00    59.94
   720x400       70.08
DP-4 disconnected (normal left inverted right x axis y axis)

As you see in the output above, my current Debian desktop resolution is 1920x1080 pixels.
You can also use xrandr command with the grep command to extract only the resolution and exclude other details.
xrandr | grep '*' | awk '{ print $1 }'1920x1080
Let's break down what each part of the above command does:
- xrandr: This command is used to query and configure display settings in the X Window System. When you run this command without any options, it displays information about the connected monitors and their available resolutions.
- | (Pipe): The pipe symbol (|) is used to take the output from the command on the left side and use it as input for the command on the right side.
- grep '*': This part of the code uses the "grep" command to search for lines containing an asterisk (*). In the context of "xrandr" output, an asterisk often indicates the currently active screen resolution.
- awk '{ print $1 }': This part of the code uses the "awk" command to print the first column of text from the lines that were filtered by the previous "grep" command. In the context of "xrandr" output, the first column usually represents the screen resolution.
Putting it all together, this command will filter the output of the "xrandr" command to extract the currently active screen resolution, which is often marked with an asterisk in the "xrandr" output. It uses the "grep" command to find lines with an asterisk and then uses "awk" to print the first column (which contains the resolution).
Related Read: How To Adjust Monitor Brightness From Command Line In Linux
2. Find Linux Desktop Screen Resolution using xdpyinfo Command
The xdpyinfo is a command-line utility in the X Window System that provides information about the display and the X server's capabilities. It stands for "X Display Information" and is used to retrieve various details about the X server and the connected displays.
When you run the xdpyinfo command, it provides a comprehensive set of information about the X server and the display it's running on. This information can include details about the screen size, color depth, available extensions, fonts, and more.
Xdpyinfo is useful for diagnosing display-related issues, checking the capabilities of the X server, and gathering information about the connected monitors.
For example, you can use xdpyinfo to find out the screen resolution, the number of available screens, the current color depth, and other relevant details about the display setup.
In summary, "xdpyinfo" is an useful tool for obtaining detailed technical information about the X server and the connected displays in a Unix-like operating system, including Linux.
To display the desktop screen resolution of your Linux system using the xdpyinfo utility, you'd use:
xdpyinfo | grep dimensions
This command will output information that includes the dimensions of your screen in pixels.
dimensions: 1920x1080 pixels (508x285 millimeters)

You can also use the grep and awk commands with "xdpyinfo" to extract the resolution only:
$ xdpyinfo | grep dimensions | awk '{print $2}'
1920x1080
Let's break down what each part of the command does:
- xdpyinfo: This command is used to retrieve detailed information about the X server and the connected display(s). When you run this command, it outputs a comprehensive set of information about the display configuration and capabilities of the X server.
- | (Pipe): The pipe symbol (|) is used to take the output from the command on the left side and use it as input for the command on the right side.
- grep dimensions: This part of the code uses the "grep" command to search for lines containing the word "dimensions." In the context of "xdpyinfo" output, lines containing "dimensions" typically provide information about the screen dimensions (resolution).
- awk '{print $2}': This part of the code uses the "awk" command to print the second column of text from the lines that were filtered by the previous "grep" command. In the context of "xdpyinfo" output, the second column usually contains the screen dimensions.
Putting it all together, the above command will filter the output of the "xdpyinfo" command to extract the screen dimensions (resolution) of the current display. It uses "grep" to find lines with the word "dimensions" and then uses "awk" to print the second column (which contains the resolution). The result is the display of the screen resolution of the current display.
The xdpyinfo tool also comes pre-installed in most Linux distributions. If the xdpyinfo command is not found for any reason, you can install it using the package manager for your particular Linux distribution.
For example, on Ubuntu or Debian, you would use:
$ sudo apt-get install x11-utils
And on Fedora, RHEL, AlmaLinux, Rocky Linux, you would use:
$ sudo dnf install xorg-x11-utils
On older RPM-based systems, use yum instead of dnf as shown below.
$ sudo yum install xorg-x11-utils
Keep in mind that these commands need to be run in a terminal on the Linux desktop itself. They won't return the correct results if run over a remote SSH session, unless you've set up X11 forwarding.
3. Display Monitor Resolution using Inxi
inxi is a powerful system information tool that can display monitor details.
Install inxi if it is not installed already:
sudo apt install inxi
Run the following command to display monitor information:
inxi -G
Look for the "Display" section, which will show the resolution and refresh rate.
Sample Output:
Graphics: Device-1: Intel Tiger Lake-LP GT2 [UHD Graphics G4] driver: i915 v: kernel Display: x11 server: X.Org v: 1.21.1.7 driver: X: loaded: modesetting unloaded: fbdev,vesa dri: iris gpu: i915 resolution: 1920x1080~60Hz API: OpenGL v: 4.6 Mesa 22.3.6 renderer: Mesa Intel UHD Graphics (TGL GT2)
4. Check Monitor Resolution and Refresh Rate using edid-decode in Linux
If you want detailed information about your monitor’s capabilities, including supported resolutions and refresh rates, you can use edid-decode to read the EDID (Extended Display Identification Data).
Install edid-decode if it’s not already installed:
sudo apt install edid-decode
Run the following command to extract the EDID information:
sudo cat /sys/class/drm/card1-DP-2/edid | edid-decode
Replace card1-DP-2 with the appropriate connector for your setup (e.g., card0-DP-1 for DisplayPort). You can find the correct connector by checking the /sys/class/drm/ directory.
Look for the "Detailed Timing Descriptors" section in the output. It will list all supported resolutions and refresh rates.
edid-decode (hex):00 ff ff ff ff ff ff 00 10 ac 09 20 01 01 01 0124 1f 01 03 80 30 1b 78 2a 69 25 a3 5b 50 a3 2711 50 54 a5 4b 00 71 4f 81 80 a9 c0 d1 c0 01 0101 01 01 01 01 01 02 3a 80 18 71 38 2d 40 58 2c45 00 dc 0c 11 00 00 1e 00 00 00 ff 00 30 50 3734 46 31 38 54 31 33 48 42 0a 00 00 00 fc 00 4532 32 31 39 48 4e 0a 20 20 20 20 20 00 00 00 fd00 38 4c 1e 53 11 00 0a 20 20 20 20 20 20 01 8f02 03 1a b1 4f 90 05 04 03 02 07 06 1f 14 13 1211 16 15 01 65 03 0c 00 10 00 02 3a 80 18 71 382d 40 58 2c 45 00 dc 0c 11 00 00 1e 01 1d 80 1871 1c 16 20 58 2c 25 00 dc 0c 11 00 00 9e 01 1d00 72 51 d0 1e 20 6e 28 55 00 dc 0c 11 00 00 1e02 3a 80 d0 72 38 2d 40 10 2c 45 80 dc 0c 11 0000 1e 00 00 00 00 00 00 00 00 00 00 00 00 00 0000 00 00 00 00 00 00 00 00 00 00 00 00 00 00 ee----------------Block 0, Base EDID: EDID Structure Version & Revision: 1.3 Vendor & Product Identification: Manufacturer: DEL Model: 8201 Serial Number: 16843009 Made in: week 36 of 2021 Basic Display Parameters & Features: Digital display Maximum image size: 48 cm x 27 cm Gamma: 2.20 DPMS levels: Off RGB color display First detailed timing is the preferred timing Color Characteristics: Red : 0.6376, 0.3574 Green: 0.3144, 0.6376 Blue : 0.1523, 0.0683 White: 0.3134, 0.3291 Established Timings I & II: IBM : 720x400 70.081663 Hz 9:5 31.467 kHz 28.320000 MHz DMT 0x04: 640x480 59.940476 Hz 4:3 31.469 kHz 25.175000 MHz DMT 0x06: 640x480 75.000000 Hz 4:3 37.500 kHz 31.500000 MHz DMT 0x09: 800x600 60.316541 Hz 4:3 37.879 kHz 40.000000 MHz DMT 0x0b: 800x600 75.000000 Hz 4:3 46.875 kHz 49.500000 MHz DMT 0x10: 1024x768 60.003840 Hz 4:3 48.363 kHz 65.000000 MHz DMT 0x12: 1024x768 75.028582 Hz 4:3 60.023 kHz 78.750000 MHz DMT 0x24: 1280x1024 75.024675 Hz 5:4 79.976 kHz 135.000000 MHz Standard Timings: DMT 0x15: 1152x864 75.000000 Hz 4:3 67.500 kHz 108.000000 MHz DMT 0x23: 1280x1024 60.019740 Hz 5:4 63.981 kHz 108.000000 MHz DMT 0x53: 1600x900 60.000000 Hz 16:9 60.000 kHz 108.000000 MHz (RB) DMT 0x52: 1920x1080 60.000000 Hz 16:9 67.500 kHz 148.500000 MHz Detailed Timing Descriptors: DTD 1: 1920x1080 60.000000 Hz 16:9 67.500 kHz 148.500000 MHz (476 mm x 268 mm) Hfront 88 Hsync 44 Hback 148 Hpol P Vfront 4 Vsync 5 Vback 36 Vpol P Display Product Serial Number: '0P74F18T13HB' Display Product Name: 'E2219HN' Display Range Limits: Monitor ranges (GTF): 56-76 Hz V, 30-83 kHz H, max dotclock 170 MHz Extension blocks: 1Checksum: 0x8f----------------Block 1, CTA-861 Extension Block: Revision: 3 Underscans IT Video Formats by default Supports YCbCr 4:4:4 Supports YCbCr 4:2:2 Native detailed modes: 1 Video Data Block: VIC 16: 1920x1080 60.000000 Hz 16:9 67.500 kHz 148.500000 MHz (native) VIC 5: 1920x1080i 60.000000 Hz 16:9 33.750 kHz 74.250000 MHz VIC 4: 1280x720 60.000000 Hz 16:9 45.000 kHz 74.250000 MHz VIC 3: 720x480 59.940060 Hz 16:9 31.469 kHz 27.000000 MHz VIC 2: 720x480 59.940060 Hz 4:3 31.469 kHz 27.000000 MHz VIC 7: 1440x480i 59.940060 Hz 16:9 15.734 kHz 27.000000 MHz VIC 6: 1440x480i 59.940060 Hz 4:3 15.734 kHz 27.000000 MHz VIC 31: 1920x1080 50.000000 Hz 16:9 56.250 kHz 148.500000 MHz VIC 20: 1920x1080i 50.000000 Hz 16:9 28.125 kHz 74.250000 MHz VIC 19: 1280x720 50.000000 Hz 16:9 37.500 kHz 74.250000 MHz VIC 18: 720x576 50.000000 Hz 16:9 31.250 kHz 27.000000 MHz VIC 17: 720x576 50.000000 Hz 4:3 31.250 kHz 27.000000 MHz VIC 22: 1440x576i 50.000000 Hz 16:9 15.625 kHz 27.000000 MHz VIC 21: 1440x576i 50.000000 Hz 4:3 15.625 kHz 27.000000 MHz VIC 1: 640x480 59.940476 Hz 4:3 31.469 kHz 25.175000 MHz Vendor-Specific Data Block (HDMI), OUI 00-0C-03: Source physical address: 1.0.0.0 Detailed Timing Descriptors: DTD 2: 1920x1080 60.000000 Hz 16:9 67.500 kHz 148.500000 MHz (476 mm x 268 mm) Hfront 88 Hsync 44 Hback 148 Hpol P Vfront 4 Vsync 5 Vback 36 Vpol P DTD 3: 1920x1080i 60.000000 Hz 16:9 33.750 kHz 74.250000 MHz (476 mm x 268 mm) Hfront 88 Hsync 44 Hback 148 Hpol P Vfront 2 Vsync 5 Vback 15 Vpol P Vfront +0.5 Odd Field Vfront 2 Vsync 5 Vback 15 Vpol P Vback +0.5 Even Field DTD 4: 1280x720 60.000000 Hz 16:9 45.000 kHz 74.250000 MHz (476 mm x 268 mm) Hfront 110 Hsync 40 Hback 220 Hpol P Vfront 5 Vsync 5 Vback 20 Vpol P DTD 5: 1920x1080 50.000000 Hz 16:9 56.250 kHz 148.500000 MHz (476 mm x 268 mm) Hfront 528 Hsync 44 Hback 148 Hpol P Vfront 4 Vsync 5 Vback 36 Vpol PChecksum: 0xee
5. View Monitor Information using dmesg
You can check the kernel logs for information about your monitor.
To do so, run:
sudo dmesg | grep -i hdmi
Or,
sudo dmesg | grep -i drm
Look for lines that mention the resolution or refresh rate.
Discover Desktop Screen Resolution in Linux from GUI
1. Using gnome-display
If you’re using a GNOME-based desktop environment (e.g., Ubuntu, Fedora), you can use theSettingsapp to check the resolution and refresh rate.
- Open Settings > Displays.
- The current resolution and refresh rate will be displayed under the monitor’s settings.
2. Using arandr
arandris a graphical front-end forxrandrthat allows you to view and manage display settings.
Install arandr:
sudo apt install arandr
Launch arandr from your application menu or by running:
arandr
The current resolution and refresh rate will be displayed in the window. If not, go to Outputs -> DP1 or DP2 or HDMI -> Resolution from arandr window.
Which Method Should You Use?
If you want to quickly check the current resolution and refresh rate, use xrandr. The xrandr command is the more powerful of the all methods. This is the fastest and simplest way to see the current resolution and refresh rate, as well as all supported modes.
If you want detailed monitor information (e.g., Model, Physical Size, Supported Features), Use edid-decode.
If you want to an easier method, use the xdpyinfo command. Please note that it does not provide as much information.
If you want to check system-wide display information, use Inxi. This provides a summary of your graphics card and monitor details, including resolution and refresh rate.
My Recommendation:
- Start with xrandr to quickly check the current resolution and refresh rate, as well as supported modes.
- If you need more details (e.g., monitor model, physical size), use edid-decode.
- If you prefer a graphical interface, use gnome-display or arandr.
Frequently Asked Questions
Q: How can I find my Linux desktop screen resolution using the command line?A: You have two main options: using the "xrandr" command or the "xdpyinfo" command. These commands provide detailed information about your display setup, including the screen resolution.
Q: How do I use the "xrandr" command to find my screen resolution and refresh rate?A: Open a terminal and type "xrandr" without quotes, then press Enter. Look for the line that corresponds to your primary monitor, which typically contains the screen resolution and refresh rateinformation.
Q: How to determine screen resolution using the "xdpyinfo" command?A: Open a terminal and type "xdpyinfo | grep dimensions" without quotes, then press Enter. The terminal will display the screen resolution of your current display.
Q: Can I extract only the screen resolution and exclude other details?A: Yes, you can. Use the command "xrandr | grep '*' | awk '{ print $1 }'" for "xrandr," and "xdpyinfo | grep dimensions | awk '{print $2}'" for "xdpyinfo." These commands will display only the screen resolution.
Q: Can I change my screen resolution using the command line?A: Yes, both "xrandr" and "xdpyinfo" can be used to change screen resolution. However, "xrandr" is the primary command for configuring display settings, including resolution changes.
Q: How do I check my monitor's physical size and model information?A: Use the edid-decode tool to read the EDID (Extended Display Identification Data) from your monitor: sudo cat /sys/class/drm/card0-DP-2/edid | edid-decode
Q: How do I check my monitor's details using inxi?A: Run the following command to display monitor information: inxi -G
Q: What if I'm using a different Linux distribution? Will the commands be the same?A: The commands themselves are likely to remain similar, but the package names and installation methods might vary depending on your distribution. Consult your distribution's package manager or documentation for precise instructions.
Conclusion
Find your desktop screen resolution from the CLI and GUI in Linux is easy! By using these tools and methods, you can easily check your monitor's current resolution and refresh rate, as well as its supported modes.
위 내용은 CLI 및 GUI에서 Linux 데스크탑 화면 해상도를 찾는 방법의 상세 내용입니다. 자세한 내용은 PHP 중국어 웹사이트의 기타 관련 기사를 참조하세요!

 pygobject를 사용하여 Linux에서 GUI 애플리케이션을 만드는 방법May 13, 2025 am 11:09 AM
그래픽 사용자 인터페이스 (GUI) 응용 프로그램 작성은 아이디어를 활성화시키고 프로그램을보다 사용자 친화적으로 만들 수있는 환상적인 방법입니다. PygoBject는 개발자가
 아치 리눅스에서 phpmyadmin으로 램프 스택을 설치하는 방법May 13, 2025 am 11:01 AM
Arch Linux는 유연한 최첨단 시스템 환경을 제공하며 소규모 비 크리티컬 시스템에서 웹 애플리케이션을 개발하는 데 강력하게 적합한 솔루션입니다.
 Arch Linux에 Lemp (Nginx, Php, Mariadb)를 설치하는 방법May 13, 2025 am 10:43 AM
최첨단 소프트웨어를 수용하는 롤링 릴리스 모델로 인해 Arch Linux는 유지 보수, 지속적인 업그레이드 및 현명한 FI를위한 추가 시간이 필요하기 때문에 신뢰할 수있는 네트워크 서비스를 제공하기 위해 서버로 설계 및 개발되지 않았습니다.
![12 Linux 콘솔 [터미널] 파일 관리자](https://img.php.cn/upload/article/001/242/473/174710245395762.png?x-oss-process=image/resize,p_40) 12 Linux 콘솔 [터미널] 파일 관리자May 13, 2025 am 10:14 AM
12 Linux 콘솔 [터미널] 파일 관리자May 13, 2025 am 10:14 AMLinux 콘솔 파일 관리자는 일상적인 작업, 로컬 컴퓨터에서 파일을 관리 할 때 또는 원격 제품에 연결할 때 매우 도움이 될 수 있습니다. 디렉토리의 비주얼 콘솔 표현은 파일/폴더 작업 및 SAV를 신속하게 수행하는 데 도움이됩니다.
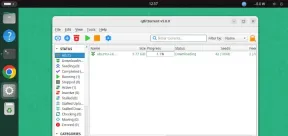 QBITTORRENT : 강력한 오픈 소스 비트 토렌트 클라이언트May 13, 2025 am 10:12 AM
QBITTORRENT는 사용자가 인터넷을 통해 파일을 다운로드하고 공유 할 수있는 인기있는 오픈 소스 비트 토렌트 클라이언트입니다. 최신 버전 인 QBITTORRENT 5.0은 최근에 출시되었으며 새로운 기능과 개선 사항이 제공됩니다. 이 기사는 할 것입니다
 아치 Linux에서 Nginx Virtual Hosts, Phpmyadmin 및 SSL 설정May 13, 2025 am 10:03 AM
이전 Arch Linux Lemp 기사는 네트워크 서비스 설치 (NGINX, PHP, MYSQL 및 PHPMYADMIN)와 MySQL Server 및 PhpmyAdmin에 필요한 최소 보안 구성에서 기본 사항을 다루었습니다. 이 주제는 엄격하게 Forme과 관련이 있습니다
 Zenity : 쉘 스크립트에서 GTK 대화 상자 구축May 13, 2025 am 09:38 AM
Zenity는 명령 줄을 사용하여 Linux에서 그래픽 대화 상자를 만들 수있는 도구입니다. 그래픽 사용자 인터페이스 (GUI)를 만들기위한 툴킷 인 GTK를 사용하여 스크립트에 시각적 요소를 쉽게 추가 할 수 있습니다. Zenity는 매우 u 일 수 있습니다
 Linux를위한 22 명의 최고의 음악 플레이어May 13, 2025 am 09:25 AM
어떤 사람들은 그것을 그들의 열정으로 묘사 할 수도 있고, 다른 사람들은 스트레스 해소 자나 일상 생활의 일부로 생각할 수도 있습니다. 모든 형태에서 음악을 듣는 것은 우리 삶의 분리 할 수없는 부분이되었습니다. 음악은 우리 삶에서 다른 역할을 수행합니다. 때때로 그것은


핫 AI 도구

Undresser.AI Undress
사실적인 누드 사진을 만들기 위한 AI 기반 앱

AI Clothes Remover
사진에서 옷을 제거하는 온라인 AI 도구입니다.

Undress AI Tool
무료로 이미지를 벗다

Clothoff.io
AI 옷 제거제

Video Face Swap
완전히 무료인 AI 얼굴 교환 도구를 사용하여 모든 비디오의 얼굴을 쉽게 바꾸세요!

인기 기사
뜨거운 도구

ZendStudio 13.5.1 맥
강력한 PHP 통합 개발 환경

SecList
SecLists는 최고의 보안 테스터의 동반자입니다. 보안 평가 시 자주 사용되는 다양한 유형의 목록을 한 곳에 모아 놓은 것입니다. SecLists는 보안 테스터에게 필요할 수 있는 모든 목록을 편리하게 제공하여 보안 테스트를 더욱 효율적이고 생산적으로 만드는 데 도움이 됩니다. 목록 유형에는 사용자 이름, 비밀번호, URL, 퍼징 페이로드, 민감한 데이터 패턴, 웹 셸 등이 포함됩니다. 테스터는 이 저장소를 새로운 테스트 시스템으로 간단히 가져올 수 있으며 필요한 모든 유형의 목록에 액세스할 수 있습니다.

드림위버 CS6
시각적 웹 개발 도구

MinGW - Windows용 미니멀리스트 GNU
이 프로젝트는 osdn.net/projects/mingw로 마이그레이션되는 중입니다. 계속해서 그곳에서 우리를 팔로우할 수 있습니다. MinGW: GCC(GNU Compiler Collection)의 기본 Windows 포트로, 기본 Windows 애플리케이션을 구축하기 위한 무료 배포 가능 가져오기 라이브러리 및 헤더 파일로 C99 기능을 지원하는 MSVC 런타임에 대한 확장이 포함되어 있습니다. 모든 MinGW 소프트웨어는 64비트 Windows 플랫폼에서 실행될 수 있습니다.

메모장++7.3.1
사용하기 쉬운 무료 코드 편집기

