


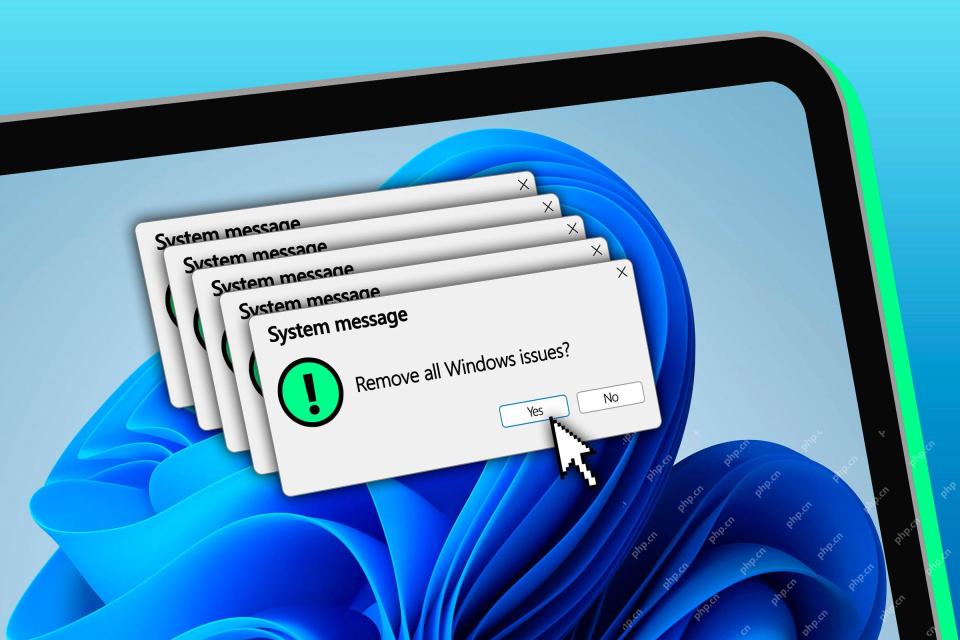
How to Upgrade to Windows 11: A Comprehensive Guide to a Trouble-Free Transition
Upgrading to Windows 11 can significantly enhance your computing experience with its improved interface, better performance, and new features like Snap Layouts, Widgets, and enhanced virtual desktop support. To ensure a seamless transition, follow these steps:
- Check System Compatibility: First, verify that your PC meets the minimum system requirements for Windows 11. Microsoft has provided a PC Health Check app to help determine your system's readiness.
- Backup Your Data: Before proceeding with the upgrade, it’s crucial to back up your important files and data. Use external drives, cloud storage, or a backup software to ensure your data is safe.
- Update Current Windows Version: Ensure your current version of Windows 10 is up to date. This step can help prevent issues during the upgrade process.
- Download Windows 11 Installation Assistant: Visit the Microsoft website to download the Windows 11 Installation Assistant. This tool will guide you through the upgrade process.
- Follow the On-Screen Instructions: Once the Installation Assistant is running, follow the on-screen instructions. The process will involve downloading and installing Windows 11, which may take some time depending on your internet speed and system specifications.
- Complete the Setup: After the installation is complete, you will be guided through the initial setup process for Windows 11. This includes signing in with your Microsoft account and configuring your settings.
- Verify the Installation: Once Windows 11 is installed, check that all your applications and devices are functioning correctly. If you encounter any issues, refer to the troubleshooting section on Microsoft's support website.
What are the minimum system requirements for upgrading to Windows 11?
To upgrade to Windows 11, your PC must meet the following minimum system requirements:
- Processor: 1 GHz or faster with 2 or more cores on a compatible 64-bit processor or System on a Chip (SoC).
- RAM: 4 GB or more.
- Storage: 64 GB or larger storage device.
- System Firmware: UEFI, Secure Boot capable.
- TPM: Trusted Platform Module (TPM) version 2.0.
- Graphics Card: Compatible with DirectX 12 or later with WDDM 2.0 driver.
- Display: High definition (720p) display that is greater than 9” diagonally, 8 bits per color channel.
- Internet Connection and Microsoft Account: Windows 11 Home edition requires internet connectivity and a Microsoft account to complete device setup on first use.
Can I roll back to Windows 10 if I encounter issues after upgrading to Windows 11?
Yes, you can roll back to Windows 10 if you encounter issues after upgrading to Windows 11. Here’s how you can do it:
- Within 10 Days: If you have upgraded within the last 10 days, you can easily revert to Windows 10. Go to Settings > System > Recovery and click on Go back. Follow the on-screen instructions to complete the rollback process.
- After 10 Days: If more than 10 days have passed since your upgrade, you will not be able to use the rollback feature directly. However, you can still revert to Windows 10 by performing a clean installation using a Windows 10 installation media. This method will require you to back up your data first, as it will erase all data on your system drive.
What steps should I take to back up my data before upgrading to Windows 11?
Backing up your data before upgrading to Windows 11 is essential to prevent data loss. Follow these steps to ensure your data is safe:
- Identify Important Data: Determine which files and folders are most important to you, such as documents, photos, videos, and personal settings.
-
Choose a Backup Method:
- External Hard Drive: Connect an external hard drive to your computer and copy your important files to it.
- Cloud Storage: Use services like OneDrive, Google Drive, or Dropbox to upload your files to the cloud.
- Backup Software: Consider using backup software like Acronis True Image or Macrium Reflect, which can create a full system image backup.
-
Perform the Backup:
- If using an external hard drive, simply drag and drop your files to the drive.
- For cloud storage, upload your files through the service’s website or desktop application.
- If using backup software, follow the software’s instructions to create a backup of your system and data.
- Verify the Backup: After the backup process is complete, verify that all your important files have been successfully backed up by checking the backup location.
- Store the Backup Safely: Keep your external hard drive in a safe place or ensure your cloud storage account is secure. Consider making multiple backups if the data is extremely valuable.
By following these steps, you can ensure that your data is safely backed up before you proceed with the Windows 11 upgrade, providing peace of mind and a safety net in case anything goes wrong during the process.
위 내용은 Windows 11으로 업그레이드하는 방법 : 문제없는 전환에 대한 포괄적 인 안내서의 상세 내용입니다. 자세한 내용은 PHP 중국어 웹사이트의 기타 관련 기사를 참조하세요!

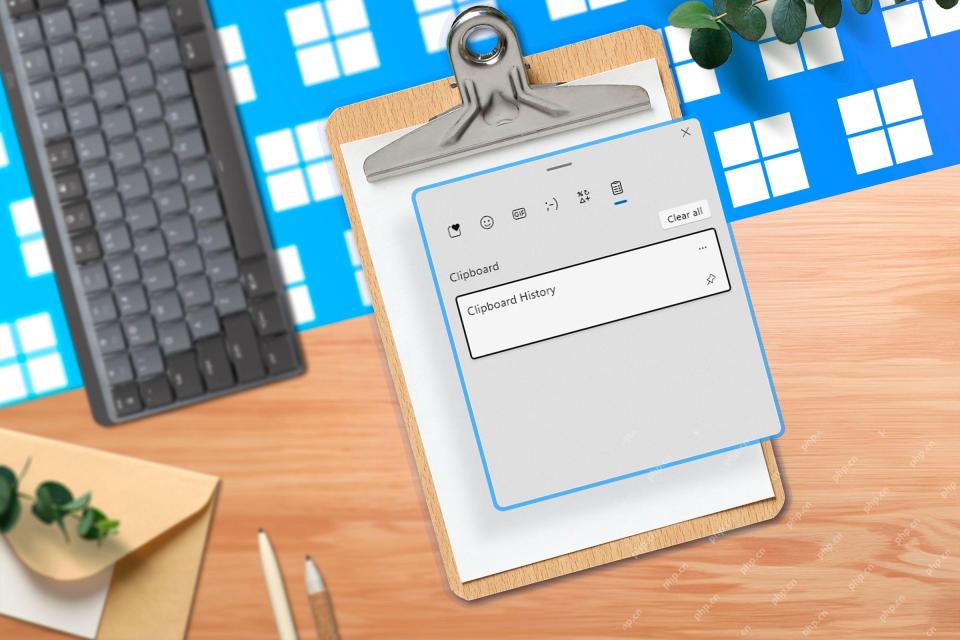 Windows 11에서 클립 보드를 지우는 8 가지 방법Apr 21, 2025 pm 12:13 PM
이 안내서는 Windows 11 클립 보드를 지우는 여러 가지 방법을 제공하여 복사 된 데이터가 비공개로 유지되도록합니다. 클립 보드는 텍스트, 이미지 및 비디오를 포함한 다양한 항목을 저장합니다. 내용을 지우는 몇 가지 방법을 살펴 보겠습니다. 방법 1 : 방법 1
 Logitech ' S G515 Lightspeed 키보드는 25% 할인되었습니다Apr 21, 2025 pm 12:06 PM
Logitech G515 Lightspeed TKL 기계식 게임 키보드 검토 Logitech G515 Lightspeed TKL은 저 프로파일 키를 사용하며 Apple Magic 키보드와 매우 유사하지만 전반적으로 슬림하고 충전식 배터리가있는 추가적인 기계적 스위치가 있습니다. Amazon Link이 키보드는 작업과 게임 모두 사용자에게 적합합니다. 아마존은 현재이 가격에 도달하기 전에 한 번만 원래 가격으로 $ 159.99에서 $ 119.99에 판매됩니다. G515 Lightspeed Tkl은 크기가 얇고 길이는 14.49 인치, 너비는 5.91 인치입니다.
 TPM 2.0을 활성화하여 Windows 11을 얻는 방법Apr 21, 2025 am 11:17 AM
강력한 데스크탑을 가진 많은 사용자들은 기본적으로 간단한 BIOS 설정이 비활성화되어 TPM 2.0으로 인해 Windows 11으로 업그레이드되는 것을 막았습니다. 이 안내서는 그것을 활성화하는 방법을 설명합니다. TPM 호환성 확인 Windows에는 내장 도구가 있습니다
 데스크탑에서 웹 사이트를 앱으로 다운로드하는 방법Apr 21, 2025 am 10:37 AM
좋아하는 웹 사이트에 신속하게 액세스하십시오 : 데스크탑에 웹 사이트를 추가하는 두 가지 방법 북마크를 통해 사냥에 지쳤습니까? Windows는 자주 방문하는 웹 사이트를 데스크탑에 직접 추가하여 즉시 액세스 할 수있는 쉬운 방법을 제공합니다. 이 안내서는 TW를 자세히 설명합니다
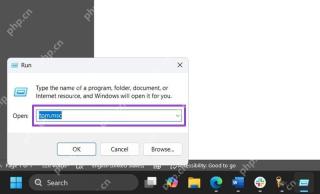
 Windows 11에서 실행 대화 상자를 열는 8 가지 방법Apr 20, 2025 am 06:01 AM
Windows 11의 실행 대화 상자 (RUN)는 다양한 시스템 기능과 설치된 응용 프로그램에 신속하게 액세스하는 편리한 방법을 제공합니다. 이 대화 상자를 시작하는 방법은 간단합니다. 키보드 바로 가기를 사용하거나 메뉴 항목을 선택하십시오. 이 기사에서는이 유틸리티를 시작하는 몇 가지 방법을 설명합니다. 키보드 바로 가기를 사용하여 실행 대화 상자를 엽니 다 Windows 11에서 실행 대화 상자를 시작하는 가장 빠른 방법은 키보드 바로 가기를 사용하는 것입니다. 이 메소드는 대화 상자를 즉시 엽니 다. 이렇게하려면 키보드의 Windows R 키를 누릅니다. 현재 컴퓨터에있는 곳에 있더라도 Windows 11은 즉시 실행 대화 상자를 열게됩니다. 그런 다음 시작하려는 유틸리티의 이름을 입력 할 수 있습니다.
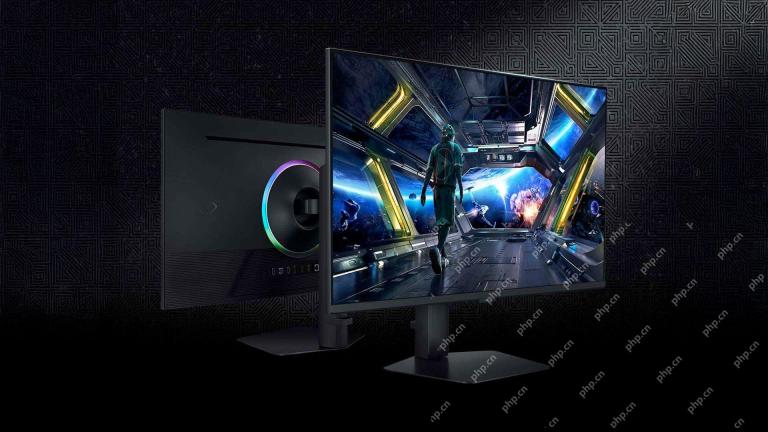 삼성의 32 인치 오디세이 G7 IPS 게임 모니터는 오늘 $ 270 할인Apr 20, 2025 am 03:01 AM
Samsung Odyssey G7 (G70D) 32 인치 Esports 특별 제안을 모니터링하십시오! 원래 가격은 $ 800이고 현재 가격은 $ 530에 불과하며 $ 270를 절약합니다! 이 Odyssey G7 Sports Monitor에는 4K 해상도, IPS 패널, 144Hz 새로 고침 비율, AMD FreeSync 프리미엄 지원 및 Smart Tizen 기능이 있습니다. Samsung의 공식 웹 사이트는 530 달러에 가격이 책정됩니다. 높은 새로 고침 비율 게임을 지원하는 모니터가 필요한 경우이 Samsung 32 인치 Odyssey G7 모니터는 귀하에게 이상적입니다. 현재 판매중인 가격은 530 달러, 원래 가격보다 $ 270 적은 가격으로 4K 해상도, IPS 패널 및 스마트 소프트웨어 기능이 제공됩니다. 32 인치 ODYSS
 6 개의 작업 Windows 컴퓨터에서 정기적으로 수행해야합니다.Apr 19, 2025 am 03:01 AM
Windows 컴퓨터를 유지하려면 정기적 인 유지가 필요하며 성능 문제, 보안 위험 및 눈에 띄지 않는 하드웨어 문제를 방지합니다. 다음은 컴퓨터를 원활하게 실행하기위한 일상적인 유지 보수 점검표입니다. 1. 실행
 마우스없이 마우스 오른쪽 버튼을 클릭하는 방법Apr 18, 2025 pm 12:03 PM
마우스는 PC에서 작업을 수행하는 데 중요한 구성 요소입니다. 그러나 마우스가 잘못되면 마우스 오른쪽 버튼을 클릭 할 수없는 등 몇 가지 문제가 발생할 수 있습니다. 그러나 좋은 소식은 분명히 방법이 있다는 것입니다.


핫 AI 도구

Undresser.AI Undress
사실적인 누드 사진을 만들기 위한 AI 기반 앱

AI Clothes Remover
사진에서 옷을 제거하는 온라인 AI 도구입니다.

Undress AI Tool
무료로 이미지를 벗다

Clothoff.io
AI 옷 제거제

Video Face Swap
완전히 무료인 AI 얼굴 교환 도구를 사용하여 모든 비디오의 얼굴을 쉽게 바꾸세요!

인기 기사
뜨거운 도구

ZendStudio 13.5.1 맥
강력한 PHP 통합 개발 환경

mPDF
mPDF는 UTF-8로 인코딩된 HTML에서 PDF 파일을 생성할 수 있는 PHP 라이브러리입니다. 원저자인 Ian Back은 자신의 웹 사이트에서 "즉시" PDF 파일을 출력하고 다양한 언어를 처리하기 위해 mPDF를 작성했습니다. HTML2FPDF와 같은 원본 스크립트보다 유니코드 글꼴을 사용할 때 속도가 느리고 더 큰 파일을 생성하지만 CSS 스타일 등을 지원하고 많은 개선 사항이 있습니다. RTL(아랍어, 히브리어), CJK(중국어, 일본어, 한국어)를 포함한 거의 모든 언어를 지원합니다. 중첩된 블록 수준 요소(예: P, DIV)를 지원합니다.

Atom Editor Mac 버전 다운로드
가장 인기 있는 오픈 소스 편집기

VSCode Windows 64비트 다운로드
Microsoft에서 출시한 강력한 무료 IDE 편집기

스튜디오 13.0.1 보내기
강력한 PHP 통합 개발 환경

