순수 CSS의 이미지 교환
- Linda Hamilton원래의
- 2024-11-25 06:29:27935검색
순수 CSS의 이미지 교환


JavaScript를 사용하지 않고 Pure CSS로 Image Swap 튜토리얼을 만들어 보겠습니다.
- 입력 라디오, 라벨을 사용하여 html로 몇 가지 요소를 만들어 보겠습니다. 마지막에 **도 추가해 보겠습니다.
<div>


<p>Let's create <strong>CSS</strong><br>
</p>

<pre class="brush:php;toolbar:false"> * {
    margin: 0;
    padding: 0;
}

html {
    height: 100%;
    scroll-behavior: smooth;
}

body {
    display: flex;
    flex-direction: column;
    height: 100%;
    font-family: monospace;
    place-content: center;
    background-size: 100% 100%;
    background-position: 0px 0px;
    background-image: radial-gradient(18% 28% at 24% 50%, #CEFAFFFF 7%,
 #073AFF00 100%), radial-gradient(18% 28% at 18% 71%, #FFFFFF59 6%,
#073AFF00 100%), radial-gradient(70% 53% at 36% 76%, #73F2FFFF 0%,
#073AFF00 100%), radial-gradient(42% 53% at 15% 94%, #FFFFFFFF 7%,
 #073AFF00 100%), radial-gradient(42% 53% at 34% 72%, #FFFFFFFF 7%,
 #073AFF00 100%), radial-gradient(18% 28% at 35% 87%, #FFFFFFFF 7%,
 #073AFF00 100%), radial-gradient(31% 43% at 7% 98%, #FFFFFFFF 24%,
 #073AFF00 100%), radial-gradient(21% 37% at 72% 23%, #D3FF6D9C 24%,
 #073AFF00 100%), radial-gradient(35% 56% at 91% 74%, #8A4FFFF5 9%,
 #073AFF00 100%), radial-gradient(74% 86% at 67% 38%, #84d9ff 24%,
 #073AFF00 100%), linear-gradient(125deg, #4EB5FFFF 1%, #4C00FCFF 100%);
}

.wrapper {
    width: 860px;
    height: 283px;
    position: relative;
    margin: 0 auto;
}

.wrapper label {
    width: 200px;
    height: 134px;
    cursor: pointer;
    position: absolute;
    transition: 0.25s;
    border-radius: 10px;
}

.wrapper label img{
    max-width: 100%;
    height: 100%;
    border-radius: 10px;
}

.wrapper input[type="radio"] {
    padding: 5px 5px 5px 10px;
    height: 134px;
    width: 200px;
    cursor: pointer;
    position: absolute;
    z-index: -1;
    opacity: 0;
}

.wrapper input[type="radio"]+label span {
    opacity: 0;
    background: var(--bg);
    display: inline-block;
    border-radius: 7px;
    padding: 5px 0 5px 10px;
    margin-top: 5px;
    width: calc(100% - 10px);
    color: white;
}

.wrapper input[type="radio"]:checked+label span {
    opacity: 1;
    animation-delay: 1s;
    animation: fade 1s;
}

/* static positions */
.wrapper input[type="radio"]#s1,
.wrapper input[type="radio"]#s1+label {
    left: 0;
    top: 0;
}

.wrapper input[type="radio"]#s2,
.wrapper input[type="radio"]#s2+label {
    left: 440px;
    top: 0;
}

.wrapper input[type="radio"]#s3,
.wrapper input[type="radio"]#s3+label {
    left: 655px;
    top: 0;
}

.wrapper input[type="radio"]#s4,
.wrapper input[type="radio"]#s4+label {
    left: 440px;
    top: 150px;
}

.wrapper input[type="radio"]#s5,
.wrapper input[type="radio"]#s5+label {
    left: 655px;
    top: 150px;
}

/* onclick shows large image and caption*/
.wrapper input[type="radio"]:checked,
.wrapper input[type="radio"]:checked+label {
    left: 0 !important;
    top: 0 !important;
    width: 425px;
    height: 100%;
}

/* placing first item position when clickced on other thumbnails */
.wrapper input[type="radio"]#s2:checked~#s1+label {
    left: 440px;
}

.wrapper input[type="radio"]#s3:checked~#s1+label {
    left: 660px;
}

.wrapper input[type="radio"]#s4:checked~#s1+label {
    left: 440px;
    top: 150px;
}

.wrapper input[type="radio"]#s5:checked~#s1+label {
    left: 660px;
    top: 150px;
}

@keyframes fade {
    from {
        opacity: 0;
    }

    to {
        opacity: 1;
    }
}

/* changing background color when clicked on thumbnails */
.bg {
    position: fixed;
    left: 0;
    top: 0;
    width: 100vw;
    height: 100vh;
    z-index: -1;
}

.wrapper input[type="radio"]#s2:checked~.bg {
    background-image: radial-gradient(circle, rgba(238, 174, 202, 1) 0%, rgba(148, 187, 233, 1) 100%);
}

.wrapper input[type="radio"]#s3:checked~.bg {
    background-image: radial-gradient(circle, rgb(197, 218, 196) 0%, rgb(88, 167, 204) 100%);
}

.wrapper input[type="radio"]#s4:checked~.bg {
    background-image: radial-gradient(circle, rgb(238, 226, 174) 0%, rgb(177, 139, 131) 100%);
}

.wrapper input[type="radio"]#s5:checked~.bg {
    background-image: radial-gradient(circle, rgb(174, 238, 225) 0%, rgb(36, 163, 136) 100%);
}
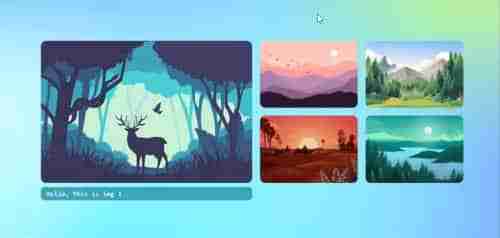
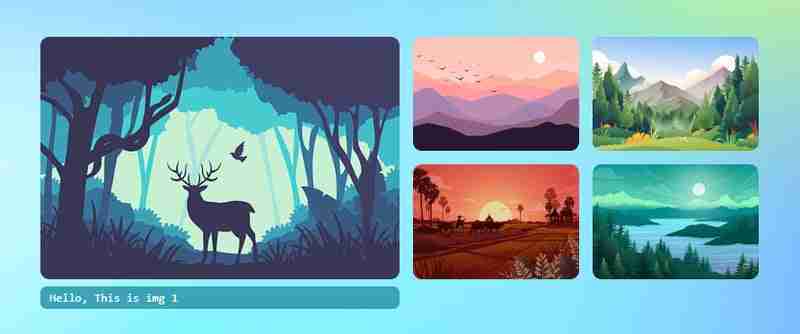
이제 정적 위치로 애니메이션 교체를 완료했습니다. 재생되는 경우 아래 gif 애니메이션의 출력을 확인하고 이 기사의 끝 부분으로 이동하여 데모용 codepen 링크를 확인하세요.

이제 CSS 맞춤 변수를 사용하여 동적 너비와 높이를 사용해 보겠습니다. 사용자 정의 CSS 변수를 사용하면 두 곳만 변경하면 간격을 포함한 모든 크기(대형 및 썸네일)가 자동으로 수정되므로 매우 유용합니다. :root
에 변수를 만들어 보겠습니다.:root { --w: 800px; --h: 270px; --m: 15px; --thumbw: calc(var(--w)/4 - 15px); --thumbh: calc(50% - var(--m)); --top: calc(var(--h)/2 + var(--m)/2 + 0px); }이제 이전 CSS를 모두 무시하고 아래 CSS로 교체하세요. 아래에서 이전 CSS에 주석을 달고 맞춤 변수로 대체한 내용을 확인할 수 있습니다.
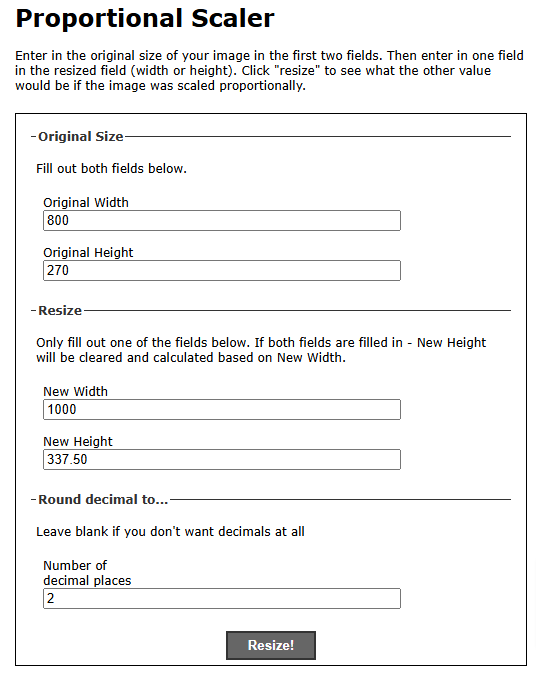
:root { --w: 800px; --h: 270px; --m: 15px; --thumbw: calc(var(--w)/4 - 15px); --thumbh: calc(50% - var(--m)); --top: calc(var(--h)/2 + var(--m)/2 + 0px); } * { margin: 0; padding: 0; } html { height: 100%; scroll-behavior: smooth; } body { display: flex; flex-direction: column; height: 100%; font-family: monospace; place-content: center; background-size: 100% 100%; background-position: 0px 0px; background-image: radial-gradient(18% 28% at 24% 50%, #CEFAFFFF 7%, #073AFF00 100%), radial-gradient(18% 28% at 18% 71%, #FFFFFF59 6%, #073AFF00 100%), radial-gradient(70% 53% at 36% 76%, #73F2FFFF 0%, #073AFF00 100%), radial-gradient(42% 53% at 15% 94%, #FFFFFFFF 7%, #073AFF00 100%), radial-gradient(42% 53% at 34% 72%, #FFFFFFFF 7%, #073AFF00 100%), radial-gradient(18% 28% at 35% 87%, #FFFFFFFF 7%, #073AFF00 100%), radial-gradient(31% 43% at 7% 98%, #FFFFFFFF 24%, #073AFF00 100%), radial-gradient(21% 37% at 72% 23%, #D3FF6D9C 24%, #073AFF00 100%), radial-gradient(35% 56% at 91% 74%, #8A4FFFF5 9%, #073AFF00 100%), radial-gradient(74% 86% at 67% 38%, #84d9ff 24%, #073AFF00 100%), linear-gradient(125deg, #4EB5FFFF 1%, #4C00FCFF 100%); } .wrapper { /* width: 860px; */ /* height: 283px; */ width: var(--w); height: var(--h); position: relative; margin: 0 auto; } .wrapper label { /* width: 200px; */ width: var(--thumbw); height: calc(50% - var(--m) / 2); cursor: pointer; position: absolute; transition: 0.25s; border-radius: 10px; } .wrapper label img, .wrapper label div { max-width: 100%; height: 100%; border-radius: 10px; } .wrapper input[type="radio"] { padding: 5px 5px 5px 10px; /* width: 200px; */ /* height: 134px; */ height: calc(50% - var(--m) / 2); width: var(--thumbw); cursor: pointer; position: absolute; z-index: -1; opacity: 0; } .wrapper input[type="radio"]+label span { opacity: 0; background: var(--bg); display: inline-block; border-radius: 7px; padding: 5px 0 5px 10px; margin-top: 5px; width: calc(100% - 10px); color: white; } .wrapper input[type="radio"]:checked+label span { opacity: 1; animation-delay: 1s; animation: fade 1s; } .wrapper input[type="radio"]#s1, .wrapper input[type="radio"]#s1+label { left: 0; top: 0; } .wrapper input[type="radio"]#s2, .wrapper input[type="radio"]#s2+label { /* left: 440px; */ left: calc((var(--w)/2) + var(--m)); top: 0; } .wrapper input[type="radio"]#s3, .wrapper input[type="radio"]#s3+label { /* left: 655px; */ left: calc(var(--w)/2 + var(--thumbw) + var(--m) + 15px); top: 0; } .wrapper input[type="radio"]#s4, .wrapper input[type="radio"]#s4+label { /* left: 440px; */ /* top: 150px; */ left: calc((var(--w)/2) + var(--m)); top: var(--top); } .wrapper input[type="radio"]#s5, .wrapper input[type="radio"]#s5+label { /* left: 655px; */ /* top: 150px; */ left: calc(var(--w)/2 + var(--thumbw) + var(--m) + 15px); top: var(--top); } .wrapper input[type="radio"]:checked, .wrapper input[type="radio"]:checked+label { left: 0 !important; top: 0 !important; /* width: 425px; */ width: calc(var(--w)/2); height: 100%; } .bg { position: fixed; left: 0; top: 0; width: 100vw; height: 100vh; z-index: -1; } .wrapper input[type="radio"]#s2:checked~#s1+label { /* left: 440px; */ left: calc((var(--w)/2) + var(--m)); } .wrapper input[type="radio"]#s3:checked~#s1+label { /* left: 660px; */ left: calc(var(--w)/2 + var(--thumbw) + var(--m) + 15px); } .wrapper input[type="radio"]#s4:checked~#s1+label { /* left: 440px; */ /* top: 150px; */ left: calc((var(--w)/2) + var(--m)); top: var(--top); } .wrapper input[type="radio"]#s5:checked~#s1+label { /* left: 660px; */ /* top: 150px; */ left: calc(var(--w)/2 + var(--thumbw) + var(--m)*2); top: var(--top); } @keyframes fade { from { opacity: 0; } to { opacity: 1; } } .wrapper input[type="radio"]#s2:checked~.bg { background-image: radial-gradient(circle, rgba(238, 174, 202, 1) 0%, rgba(148, 187, 233, 1) 100%); } .wrapper input[type="radio"]#s3:checked~.bg { background-image: radial-gradient(circle, rgb(197, 218, 196) 0%, rgb(88, 167, 204) 100%); } .wrapper input[type="radio"]#s4:checked~.bg { background-image: radial-gradient(circle, rgb(238, 226, 174) 0%, rgb(177, 139, 131) 100%); } .wrapper input[type="radio"]#s5:checked~.bg { background-image: radial-gradient(circle, rgb(174, 238, 225) 0%, rgb(36, 163, 136) 100%); }이제 :root {--w: 800px; --h: 270px;}. 너비와 높이를 비례적으로 변경하면 됩니다. URL https://scriptygoddess.com/resources/proportioncalc.htm으로 이동하여 아래 이미지에 표시된 루트 너비와 높이를 입력하세요

이제 새로운 너비나 높이를 입력하여 비례적인 값을 얻으세요. 새로운 너비 1000을 추가하고 크기 조정을 클릭하면 높이가 337.5가 되었고 :root {--w: 1000px; --h: 337.5px;}. 그게 당신이해야 할 전부입니다. 너비, 높이, 간격이 비례적으로 증가하는 등 모든 이미지의 변화를 볼 수 있습니다.
아래 코드펜 링크의 :root에서 너비와 높이 값을 편집하고 실행하면 됩니다. 재미있게 보내세요!
코드펜 데모시청해주셔서 감사합니다...
위 내용은 순수 CSS의 이미지 교환의 상세 내용입니다. 자세한 내용은 PHP 중국어 웹사이트의 기타 관련 기사를 참조하세요!
성명:본 글의 내용은 네티즌들의 자발적인 기여로 작성되었으며, 저작권은 원저작자에게 있습니다. 본 사이트는 이에 상응하는 법적 책임을 지지 않습니다. 표절이나 침해가 의심되는 콘텐츠를 발견한 경우 admin@php.cn으로 문의하세요.


