
REST API에서 다이제스트 인증을 구현하고 디버깅하는 방법

- Mary-Kate Olsen원래의
- 2024-10-29 03:33:02563검색
REST API를 보호할 때 개발자는 종종 다양한 인증 메커니즘 중에서 선택합니다. 널리 사용되는 선택 중 하나는 다이제스트 인증입니다. 이 문서에서는 다이제스트 인증을 사용하는 이유와 그것이 무엇인지 설명하고 Java 및 Go의 구현 예를 제공하며 도구를 사용하여 테스트하는 방법에 대한 지침을 제공합니다.
REST API에 다이제스트 인증을 사용하는 이유는 무엇입니까?
다이제스트 인증은 주로 다음과 같은 이점으로 인해 사용자를 확인하는 안전한 방법입니다.
1.보안 비밀번호 전송:
비밀번호를 일반 텍스트로 보내는 기본 인증과 달리 다이제스트 인증은 비밀번호를 해시하여 가로채기 위험을 최소화합니다.
2.재전송 공격 방지:
단일 세션에 유효한 nonce(임의로 생성된 숫자)를 통합함으로써 다이제스트 인증은 재생 공격의 위험을 완화합니다.
3.무결성 보호:
해시된 응답을 통해 통신 무결성이 유지되므로 전송 중에 데이터가 변조되지 않았음을 확인할 수 있습니다.
이러한 기능을 사용하면 특히 보안이 주요 관심사인 환경에서 REST API로 작업할 때 다이제스트 인증이 강력한 선택이 됩니다.
다이제스트 인증이란 무엇입니까?

다이제스트 인증은 시도-응답 메커니즘을 사용하는 HTTP 인증 체계입니다. 작동 방식은 다음과 같습니다.
1.고객 요청:
클라이언트는 자격 증명 없이 서버에 요청을 보냅니다.
2.서버 챌린지:
서버는 nonce 및 기타 정보가 포함된 WWW-Authenticate 헤더를 포함하여 401 Unauthorized 상태로 응답합니다.
3.고객 응답:
클라이언트는 사용자 이름, 비밀번호, nonce 및 기타 요소를 사용하여 해시를 생성하고 이를 인증 헤더로 다시 보냅니다.
4.서버 유효성 검사:
서버는 수신된 해시를 자체 계산과 비교합니다. 일치하면 사용자가 인증됩니다.
이 프로세스를 통해 민감한 정보가 네트워크를 통해 공개적으로 전송되지 않습니다.
다이제스트 인증을 구현하는 방법
자바 구현
Java는 'HttpURLConnection' 클래스를 사용하여 다이제스트 인증을 지원합니다. 예는 다음과 같습니다.
import java.io.BufferedReader;
import java.io.InputStreamReader;
import java.net.HttpURLConnection;
import java.net.URL;
import java.util.Base64;

public class DigestAuthExample {
    public static void main(String[] args) throws Exception {
        String url = "https://example.com/api/resource";
        String user = "username";
        String password = "password";

        // Initiate the request to get the nonce
        HttpURLConnection connection = (HttpURLConnection) new URL(url).openConnection();
        connection.setRequestMethod("GET");

        int responseCode = connection.getResponseCode();
        if (responseCode == 401) {
            String authHeader = connection.getHeaderField("WWW-Authenticate");
            // Extract the nonce and other parameters from authHeader

            // Assuming nonce and realm are extracted
            String nonce = "extracted_nonce";
            String realm = "extracted_realm";
            String ha1 = calculateHA1(user, realm, password);
            String ha2 = calculateHA2("GET", "/api/resource");
            String response = calculateResponse(ha1, nonce, ha2);

            // Set the authorization header
            connection.setRequestProperty("Authorization", "Digest username=\"" + user + "\", realm=\"" + realm + "\", nonce=\"" + nonce + "\", uri=\"/api/resource\", response=\"" + response + "\"");

            // Re-attempt the request
            connection = (HttpURLConnection) new URL(url).openConnection();
            responseCode = connection.getResponseCode();
        }

        // Read the response
        BufferedReader in = new BufferedReader(new InputStreamReader(connection.getInputStream()));
        String inputLine;
        StringBuilder response = new StringBuilder();
        while ((inputLine = in.readLine()) != null) {
            response.append(inputLine);
        }
        in.close();

        System.out.println("Response: " + response.toString());
    }

    // Implement HA1, HA2, and calculateResponse functions
}
구현으로 이동
Go에서는 사용자 정의 전송과 함께 'http' 패키지를 활용하여 다이제스트 인증을 관리할 수 있습니다.
package main

import (
    "fmt"
    "net/http"
    "time"
)

func main() {
    client := &http.Client{}
    req, err := http.NewRequest("GET", "https://example.com/api/resource", nil)
    if err != nil {
        panic(err)
    }

    req.SetBasicAuth("username", "password") // Placeholder for Digest Auth, requires proper implementation

    resp, err := client.Do(req)
    if err != nil {
        panic(err)
    }
    defer resp.Body.Close()

    fmt.Printf("Response status: %s\n", resp.Status)
}
참고: 이 Go 예에서는 일반적으로 다이제스트 인증 세부 사항을 수동으로 처리하거나 이를 지원하는 라이브러리를 사용해야 합니다.
도구를 사용하여 다이제스트 인증을 테스트하는 방법
다이제스트 인증 테스트는 다양한 도구를 사용하여 수행할 수 있습니다.
에코API:
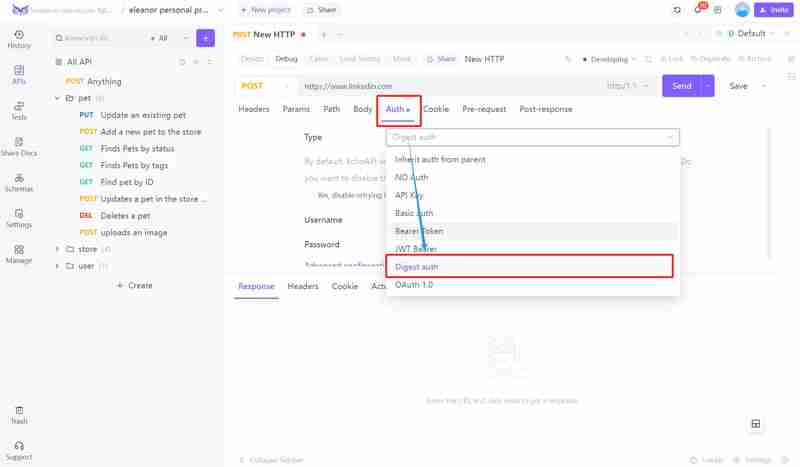
EchoAPI로 다이제스트 인증을 테스트하려면 먼저 EchoAPI 도구를 엽니다. 새 요청을 생성하고 메서드(예: GET)를 설정합니다. 다음으로 API 엔드포인트의 URL을 입력하세요.
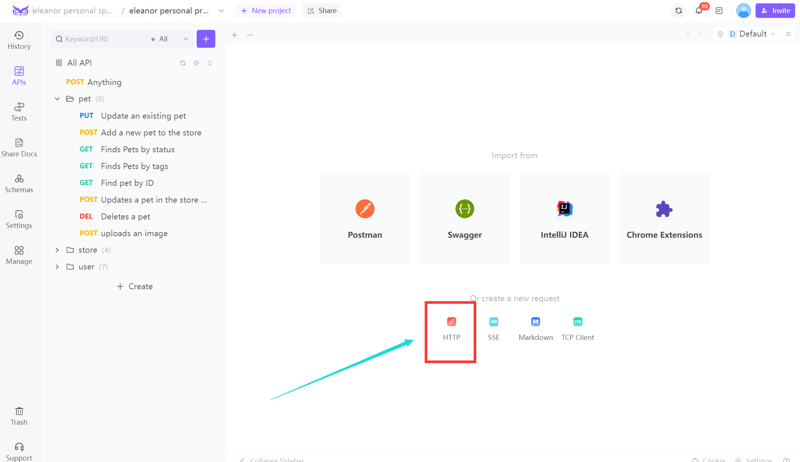
"인증" 설정에서 "다이제스트 인증"을 선택하고 사용자 이름과 비밀번호를 입력한 후 요청을 보냅니다. EchoAPI는 nonce 및 헤더 생성을 자동으로 관리합니다.
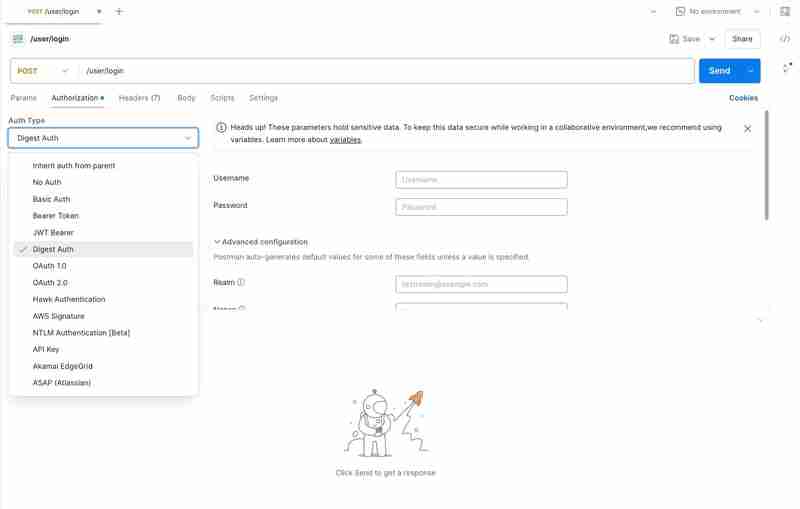
우편 집배원:
새 요청을 설정하고 "인증" 탭을 사용하여 "다이제스트 인증"을 선택한 후 자격 증명을 입력할 수 있습니다. Postman이 nonce를 처리하고 올바른 헤더를 생성합니다.
컬:
사용자 자격 증명과 함께 '--digest' 옵션을 사용하세요.
import java.io.BufferedReader;
import java.io.InputStreamReader;
import java.net.HttpURLConnection;
import java.net.URL;
import java.util.Base64;

public class DigestAuthExample {
    public static void main(String[] args) throws Exception {
        String url = "https://example.com/api/resource";
        String user = "username";
        String password = "password";

        // Initiate the request to get the nonce
        HttpURLConnection connection = (HttpURLConnection) new URL(url).openConnection();
        connection.setRequestMethod("GET");

        int responseCode = connection.getResponseCode();
        if (responseCode == 401) {
            String authHeader = connection.getHeaderField("WWW-Authenticate");
            // Extract the nonce and other parameters from authHeader

            // Assuming nonce and realm are extracted
            String nonce = "extracted_nonce";
            String realm = "extracted_realm";
            String ha1 = calculateHA1(user, realm, password);
            String ha2 = calculateHA2("GET", "/api/resource");
            String response = calculateResponse(ha1, nonce, ha2);

            // Set the authorization header
            connection.setRequestProperty("Authorization", "Digest username=\"" + user + "\", realm=\"" + realm + "\", nonce=\"" + nonce + "\", uri=\"/api/resource\", response=\"" + response + "\"");

            // Re-attempt the request
            connection = (HttpURLConnection) new URL(url).openConnection();
            responseCode = connection.getResponseCode();
        }

        // Read the response
        BufferedReader in = new BufferedReader(new InputStreamReader(connection.getInputStream()));
        String inputLine;
        StringBuilder response = new StringBuilder();
        while ((inputLine = in.readLine()) != null) {
            response.append(inputLine);
        }
        in.close();

        System.out.println("Response: " + response.toString());
    }

    // Implement HA1, HA2, and calculateResponse functions
}
불명증:
Postman과 유사하게 요청을 생성하고 다이제스트 인증을 선택한 후 자격 증명을 입력할 수 있습니다.
이러한 도구를 활용하면 최소한의 구성으로 다이제스트 인증으로 보호되는 API를 효과적으로 테스트할 수 있습니다.
결론
다이제스트 인증은 REST API를 위한 강력한 인증 메커니즘으로, 기본 인증보다 향상된 보안을 제공합니다. 비밀번호를 해시하고 재생 공격을 완화함으로써 API 상호 작용을 위한 보다 안전한 환경을 제공합니다. 올바른 접근 방식을 사용하면 Java 및 Go에서 다이제스트 인증을 구현하는 것이 간단할 수 있으며 Postman, cURL 및 Insomnia와 같은 도구는 테스트 프로세스를 단순화합니다. 보안은 API 개발에서 여전히 중요한 초점이므로 다이제스트 인증은 애플리케이션을 보호하려는 개발자에게 확실한 선택입니다.
위 내용은 REST API에서 다이제스트 인증을 구현하고 디버깅하는 방법의 상세 내용입니다. 자세한 내용은 PHP 중국어 웹사이트의 기타 관련 기사를 참조하세요!