Reactables로 단순화된 RxJS
- Barbara Streisand원래의
- 2024-10-10 06:19:021126검색
소개
RxJS는 강력한 라이브러리이지만 학습 곡선이 가파른 것으로 알려져 있습니다.
리액티브 프로그래밍으로의 패러다임 전환과 라이브러리의 대규모 API 표면은 신규 사용자에게 부담스러울 수 있습니다.
RxJS 사용을 단순화하고 개발자가 반응형 프로그래밍을 쉽게 도입할 수 있도록 Reactables API를 만들었습니다.
예
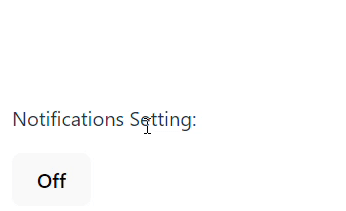
사용자의 알림 설정을 전환하는 간단한 컨트롤을 구축하겠습니다.
또한 업데이트된 토글 설정을 모의 백엔드로 보낸 다음 사용자에게 성공 메시지를 표시합니다.

RxJS 및 반응형 설치
npm i rxjs @reactables/core
기본 토글부터 시작합니다.
import { RxBuilder, Reactable } from '@reactables/core';

export type ToggleState = {
  notificationsOn: boolean;
};

export type ToggleActions = {
  toggle: (payload: boolean) => void;
};

export const RxNotificationsToggle = (
  initialState = {
    notificationsOn: false,
  } as ToggleState
): Reactable<ToggleState, ToggleActions> =>
  RxBuilder({
    initialState,
    reducers: {
      toggle: (state) => ({
        notificationsOn: !state.notificationsOn,
      }),
    },
  });


const [state$, actions] = RxToggleNotifications();

state$.subscribe((state) => {
  console.log(state.notificationsOn);
});

actions.toggle();

/*
OUTPUT

false
true

*/
RxBuilder는 두 개의 항목이 있는 튜플인 Reactable을 생성합니다.
UI가 상태 변경을 구독할 수 있는 RxJS Observable입니다.
상태 변경을 호출하기 위해 UI가 호출할 수 있는 작업 메서드의 개체입니다.
Reactable을 사용할 때는 주어가 필요하지 않습니다.
순수한 리듀서 함수로 원하는 동작을 설명할 수 있습니다.
Reactables는 내부적으로 Subject와 다양한 연산자를 사용하여 개발자의 상태를 관리합니다.
API 호출 추가 및 깜박이는 성공 메시지
리액티브는 RxJS 연산자 함수로 표현되는 효과를 사용하여 비동기 작업을 처리합니다. 효과를 트리거하는 액션/리듀서를 사용하여 선언할 수 있습니다.
이를 통해 비동기 논리를 처리하는 데 RxJS를 최대한 활용할 수 있습니다.
위의 토글 예시를 수정하여 일부 비동기 동작을 통합해 보겠습니다. 짧게 유지하기 위해 오류 처리는 생략하겠습니다.
import { RxBuilder, Reactable } from '@reactables/core';
import { of, concat } from 'rxjs';
import { debounceTime, switchMap, mergeMap, delay } from 'rxjs/operators';

export type ToggleState = {
  notificationsOn: boolean;
  showSuccessMessage: boolean;
};
export type ToggleActions = {
  toggle: (payload: boolean) => void;
};

export const RxNotificationsToggle = (
  initialState = {
    notificationsOn: false,
    showSuccessMessage: false,
  }
): Reactable<ToggleState, ToggleActions> =>
  RxBuilder({
    initialState,
    reducers: {
      toggle: {
        reducer: (_, action) => ({
          notificationsOn: action.payload as boolean,
          showSuccessMessage: false,
        }),
        effects: [
          (toggleActions$) =>
            toggleActions$.pipe(
              debounceTime(500),
              // switchMap to unsubscribe from previous API calls if a new toggle occurs
              switchMap(({ payload: notificationsOn }) =>
                of(notificationsOn)
                  .pipe(delay(500)) // Mock API call
                  .pipe(
                    mergeMap(() =>
                      concat(
                        // Flashing the success message for 2 seconds
                        of({ type: 'updateSuccess' }),
                        of({ type: 'hideSuccessMessage' }).pipe(delay(2000))
                      )
                    )
                  )
              )
            ),
        ],
      },
      updateSuccess: (state) => ({
        ...state,
        showSuccessMessage: true,
      }),
      hideSuccessMessage: (state) => ({
        ...state,
        showSuccessMessage: false,
      }),
    },
  });
StackBlitz에서 전체 예시 보기:
반응 | 각도
Reactable을 뷰에 바인딩해 보겠습니다. 다음은 @reactables/react 패키지의 useReactable 후크를 사용하여 React 구성 요소에 바인딩하는 예입니다.
import { RxNotificationsToggle } from './RxNotificationsToggle';
import { useReactable } from '@reactables/react';

function App() {
  const [state, actions] = useReactable(RxNotificationsToggle);
  if (!state) return;

  const { notificationsOn, showSuccessMessage } = state;
  const { toggle } = actions;

  return (
    <div className="notification-settings">
      {showSuccessMessage && (
        <div className="success-message">
          Success! Notifications are {notificationsOn ? 'on' : 'off'}.
        </div>
      )}
      <p>Notifications Setting:</p>
      <button onClick={() => toggle(!notificationsOn)}>
        {notificationsOn ? 'On' : 'Off'}
      </button>
    </div>
  );
}

export default App;
그렇습니다!
결론
Reactables는 주제의 세계로 뛰어드는 대신 순수한 리듀서 기능으로 기능을 구축할 수 있도록 하여 RxJS를 단순화하는 데 도움이 됩니다.
RxJS는 비동기식 로직을 구성하는 최선의 작업을 위해 예약됩니다.
리액티브는 확장하고 더 많은 일을 할 수 있습니다! 양식 관리!에 사용되는 방법을 포함하여 더 많은 예를 보려면 문서
를 확인하세요.위 내용은 Reactables로 단순화된 RxJS의 상세 내용입니다. 자세한 내용은 PHP 중국어 웹사이트의 기타 관련 기사를 참조하세요!

