


歡迎來到SharpAPI Laravel 整合指南!該儲存庫提供了有關如何將 SharpAPI 整合到下一個 Laravel AI 應用程式中的全面的逐步教學。無論您是想透過**人工智慧支援的功能**還是自動化工作流程來增強您的應用程序,本指南都將引導您完成從身份驗證到進行API 呼叫和處理響應的整個過程。
文章也作為 Github 儲存庫發佈在 https://github.com/sharpapi/laravel-ai-integration-guide。
目錄
- 先決條件
- 設定 Laravel 項目
- 安裝 SharpAPI PHP 用戶端
-
配置
- 環境變數
- 使用 SharpAPI 進行驗證
-
進行 API 呼叫
- 範例:產生職位描述
- 處理回應
- 錯誤處理
- 測試整合
-
進階用法
- 非同步請求
- 快取回應
- 結論
- 支持
- 許可證
先決條件
開始之前,請確保您符合以下要求:
- PHP:>= 8.1
- Composer:PHP 的依賴管理器
- Laravel:版本 9 或更高版本
- SharpAPI 帳號:從 SharpAPI.com 取得 API 金鑰
- Laravel基礎知識:熟悉Laravel框架與MVC架構
設定 Laravel 項目
如果你已經有Laravel項目,可以跳過這一步。否則,請按照以下說明建立一個新的 Laravel 專案。
- 透過 Composer 安裝 Laravel
composer create-project --prefer-dist laravel/laravel laravel-ai-integration-guide
- 導覽至專案目錄
cd laravel-ai-integration-guide
- 送達申請
php artisan serve
可以透過 http://localhost:8000 存取該應用程式。
安裝 SharpAPI PHP 用戶端
要與 SharpAPI 交互,您需要安裝 SharpAPI PHP 用戶端程式庫。
需要透過 Composer 安裝 SharpAPI 套件
composer require sharpapi/sharpapi-laravel-client
php artisan vendor:publish --tag=sharpapi-laravel-client
配置
環境變數
在環境變數中儲存 API 金鑰等敏感資訊是最佳實務。 Laravel 使用 .env 檔案進行特定於環境的配置。
- 開啟 .env 檔案
位於 Laravel 專案的根目錄中。
- 新增您的 SharpAPI API 金鑰
SHARP_API_KEY=your_actual_sharpapi_api_key_here
注意:將此處的 your_actual_sharpapi_api_key_key_替換為您實際的 SharpAPI API 金鑰。
- 在程式碼中存取環境變數
Laravel 提供了 env 輔助函數來存取環境變數。
$apiKey = env('SHARP_API_KEY');
使用 SharpAPI 進行身份驗證
需要進行身份驗證才能安全地與 SharpAPI 端點互動。
- 初始化 SharpAPI 用戶端
建立服務或直接在控制器中使用它。
   <?php namespace App\Services;

   use SharpAPI\SharpApiService;

   class SharpApiClient
   {
       protected $client;

       public function __construct()
       {
           $this->client = new SharpApiService(env('SHARP_API_KEY'));
       }

       public function getClient()
       {
           return $this->client;
       }
   }
- 將服務綁定到服務提供者(可選)
這允許您在需要的地方注入服務。
   <?php namespace App\Providers;

   use Illuminate\Support\ServiceProvider;
   use App\Services\SharpApiClient;

   class AppServiceProvider extends ServiceProvider
   {
       public function register()
       {
           $this->app->singleton(SharpApiClient::class, function ($app) {
               return new SharpApiClient();
           });
       }

       public function boot()
       {
           //
       }
   }
- 在控制器中使用服務
   <?php namespace App\Http\Controllers;

   use Illuminate\Http\Request;
   use App\Services\SharpApiClient;

   class SharpApiController extends Controller
   {
       protected $sharpApi;

       public function __construct(SharpApiClient $sharpApi)
       {
           $this->sharpApi = $sharpApi->getClient();
       }

       public function ping()
       {
           $response = $this->sharpApi->ping();
           return response()->json($response);
       }
   }
- 定義路線
將路由加入routes/web.php或routes/api.php:
   use App\Http\Controllers\SharpApiController;

   Route::get('/sharpapi/ping', [SharpApiController::class, 'ping']);
進行 API 呼叫
經過驗證後,您可以開始對各種 SharpAPI 端點進行 API 呼叫。以下是如何與不同端點互動的範例。
範例:產生職位描述
- 建立作業描述參數 DTO
   <?php namespace App\Http\Controllers;

   use Illuminate\Http\Request;
   use App\Services\SharpApiClient;
   use SharpAPI\Dto\JobDescriptionParameters;

   class SharpApiController extends Controller
   {
       protected $sharpApi;

       public function __construct(SharpApiClient $sharpApi)
       {
           $this->sharpApi = $sharpApi->getClient();
       }

       public function generateJobDescription()
       {
           $jobDescriptionParams = new JobDescriptionParameters(
               "Software Engineer",
               "Tech Corp",
               "5 years",
               "Bachelor's Degree in Computer Science",
               "Full-time",
               [
                   "Develop software applications",
                   "Collaborate with cross-functional teams",
                   "Participate in agile development processes"
               ],
               [
                   "Proficiency in PHP and Laravel",
                   "Experience with RESTful APIs",
                   "Strong problem-solving skills"
               ],
               "USA",
               true,   // isRemote
               true,   // hasBenefits
               "Enthusiastic",
               "Category C driving license",
               "English"
           );

           $statusUrl = $this->sharpApi->generateJobDescription($jobDescriptionParams);
           $resultJob = $this->sharpApi->fetchResults($statusUrl);

           return response()->json($resultJob->getResultJson());
       }
   }
- 定義路線
Route::get('/sharpapi/generate-job-description', [SharpApiController::class, 'generateJobDescription']);
- 存取端點
造訪 http://localhost:8000/sharpapi/generate-job-description 查看產生的職位說明。
處理回應
SharpAPI 回應通常封裝在作業物件中。要有效處理這些回應:
- 理解反應結構
   {
       "id": "uuid",
       "type": "JobType",
       "status": "Completed",
       "result": {
           // Result data
       }
   }
- 訪問結果
使用提供的方法存取結果資料。
   $resultJob = $this->sharpApi->fetchResults($statusUrl);
   $resultData = $resultJob->getResultObject(); // As a PHP object
   // or
   $resultJson = $resultJob->getResultJson(); // As a JSON string
- Example Usage in Controller
   public function generateJobDescription()
   {
       // ... (initialize and make API call)

       if ($resultJob->getStatus() === 'Completed') {
           $resultData = $resultJob->getResultObject();
           // Process the result data as needed
           return response()->json($resultData);
       } else {
           return response()->json(['message' => 'Job not completed yet.'], 202);
       }
   }
Error Handling
Proper error handling ensures that your application can gracefully handle issues that arise during API interactions.
- Catching Exceptions
Wrap your API calls in try-catch blocks to handle exceptions.
   public function generateJobDescription()
   {
       try {
           // ... (initialize and make API call)

           $resultJob = $this->sharpApi->fetchResults($statusUrl);
           return response()->json($resultJob->getResultJson());
       } catch (\Exception $e) {
           return response()->json([
               'error' => 'An error occurred while generating the job description.',
               'message' => $e->getMessage()
           ], 500);
       }
   }
- Handling API Errors
Check the status of the job and handle different statuses accordingly.
   if ($resultJob->getStatus() === 'Completed') {
       // Handle success
   } elseif ($resultJob->getStatus() === 'Failed') {
       // Handle failure
       $error = $resultJob->getResultObject()->error;
       return response()->json(['error' => $error], 400);
   } else {
       // Handle other statuses (e.g., Pending, In Progress)
       return response()->json(['message' => 'Job is still in progress.'], 202);
   }
Testing the Integration
Testing is crucial to ensure that your integration with SharpAPI works as expected.
- Writing Unit Tests
Use Laravel's built-in testing tools to write unit tests for your SharpAPI integration.
   <?php namespace Tests\Feature;

   use Tests\TestCase;
   use App\Services\SharpApiClient;
   use SharpAPI\Dto\JobDescriptionParameters;

   class SharpApiTest extends TestCase
   {
       protected $sharpApi;

       protected function setUp(): void
       {
           parent::setUp();
           $this->sharpApi = new SharpApiClient();
       }

       public function testPing()
       {
           $response = $this->sharpApi->ping();
           $this->assertEquals('OK', $response['status']);
       }

       public function testGenerateJobDescription()
       {
           $jobDescriptionParams = new JobDescriptionParameters(
               "Backend Developer",
               "InnovateTech",
               "3 years",
               "Bachelor's Degree in Computer Science",
               "Full-time",
               ["Develop APIs", "Optimize database queries"],
               ["Proficiency in PHP and Laravel", "Experience with RESTful APIs"],
               "USA",
               true,
               true,
               "Professional",
               "Category B driving license",
               "English"
           );

           $statusUrl = $this->sharpApi->generateJobDescription($jobDescriptionParams);
           $resultJob = $this->sharpApi->fetchResults($statusUrl);

           $this->assertEquals('Completed', $resultJob->getStatus());
           $this->assertNotEmpty($resultJob->getResultObject());
       }

       // Add more tests for other methods...
   }
- Running Tests
Execute your tests using PHPUnit.
./vendor/bin/phpunit
Advanced Usage
Asynchronous Requests
For handling multiple API requests concurrently, consider implementing asynchronous processing using Laravel Queues.
- Setting Up Queues
Configure your queue driver in the .env file.
QUEUE_CONNECTION=database
Run the necessary migrations.
   php artisan queue:table
   php artisan migrate
- Creating a Job
php artisan make:job ProcessSharpApiRequest
   <?php namespace App\Jobs;

   use Illuminate\Bus\Queueable;
   use Illuminate\Contracts\Queue\ShouldQueue;
   use Illuminate\Foundation\Bus\Dispatchable;
   use Illuminate\Queue\InteractsWithQueue;
   use Illuminate\Queue\SerializesModels;
   use App\Services\SharpApiClient;
   use SharpAPI\Dto\JobDescriptionParameters;

   class ProcessSharpApiRequest implements ShouldQueue
   {
       use Dispatchable, InteractsWithQueue, Queueable, SerializesModels;

       protected $params;

       public function __construct(JobDescriptionParameters $params)
       {
           $this->params = $params;
       }

       public function handle(SharpApiClient $sharpApi)
       {
           $statusUrl = $sharpApi->generateJobDescription($this->params);
           $resultJob = $sharpApi->fetchResults($statusUrl);
           // Handle the result...
       }
   }
- Dispatching the Job
   use App\Jobs\ProcessSharpApiRequest;

   public function generateJobDescriptionAsync()
   {
       $jobDescriptionParams = new JobDescriptionParameters(
           // ... parameters
       );

       ProcessSharpApiRequest::dispatch($jobDescriptionParams);
       return response()->json(['message' => 'Job dispatched successfully.']);
   }
- Running the Queue Worker
php artisan queue:work
Caching Responses
To optimize performance and reduce redundant API calls, implement caching.
- Using Laravel's Cache Facade
   use Illuminate\Support\Facades\Cache;

   public function generateJobDescription()
   {
       $cacheKey = 'job_description_' . md5(json_encode($jobDescriptionParams));
       $result = Cache::remember($cacheKey, 3600, function () use ($jobDescriptionParams) {
           $statusUrl = $this->sharpApi->generateJobDescription($jobDescriptionParams);
           $resultJob = $this->sharpApi->fetchResults($statusUrl);
           return $resultJob->getResultJson();
       });

       return response()->json(json_decode($result, true));
   }
- Invalidating Cache
When the underlying data changes, ensure to invalidate the relevant cache.
Cache::forget('job_description_' . md5(json_encode($jobDescriptionParams)));
Conclusion
Integrating SharpAPI into your Laravel application unlocks a myriad of AI-powered functionalities, enhancing your application's capabilities and providing seamless workflow automation. This guide has walked you through the essential steps, from setting up authentication to making API calls and handling responses. With the examples and best practices provided, you're well-equipped to leverage SharpAPI's powerful features in your Laravel projects.
Support
If you encounter any issues or have questions regarding the integration process, feel free to open an issue on the GitHub repository or contact our support team at contact@sharpapi.com.
License
This project is licensed under the MIT License.
위 내용은 SharpAPI Laravel 통합 가이드의 상세 내용입니다. 자세한 내용은 PHP 중국어 웹사이트의 기타 관련 기사를 참조하세요!

 PHP 로깅 : PHP 로그 분석을위한 모범 사례Mar 10, 2025 pm 02:32 PM
PHP 로깅은 웹 애플리케이션을 모니터링하고 디버깅하고 중요한 이벤트, 오류 및 런타임 동작을 캡처하는 데 필수적입니다. 시스템 성능에 대한 귀중한 통찰력을 제공하고 문제를 식별하며 더 빠른 문제 해결을 지원합니다.
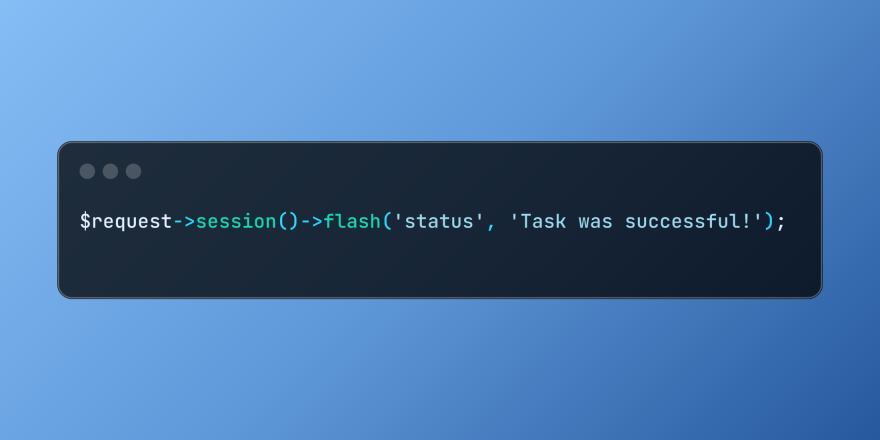 Laravel의 플래시 세션 데이터로 작업합니다Mar 12, 2025 pm 05:08 PM
Laravel은 직관적 인 플래시 방법을 사용하여 임시 세션 데이터 처리를 단순화합니다. 응용 프로그램에 간단한 메시지, 경고 또는 알림을 표시하는 데 적합합니다. 데이터는 기본적으로 후속 요청에만 지속됩니다. $ 요청-
 PHP의 컬 : REST API에서 PHP Curl Extension 사용 방법Mar 14, 2025 am 11:42 AM
PHP 클라이언트 URL (CURL) 확장자는 개발자를위한 강력한 도구이며 원격 서버 및 REST API와의 원활한 상호 작용을 가능하게합니다. PHP CURL은 존경받는 다중 프로모토콜 파일 전송 라이브러리 인 Libcurl을 활용하여 효율적인 execu를 용이하게합니다.
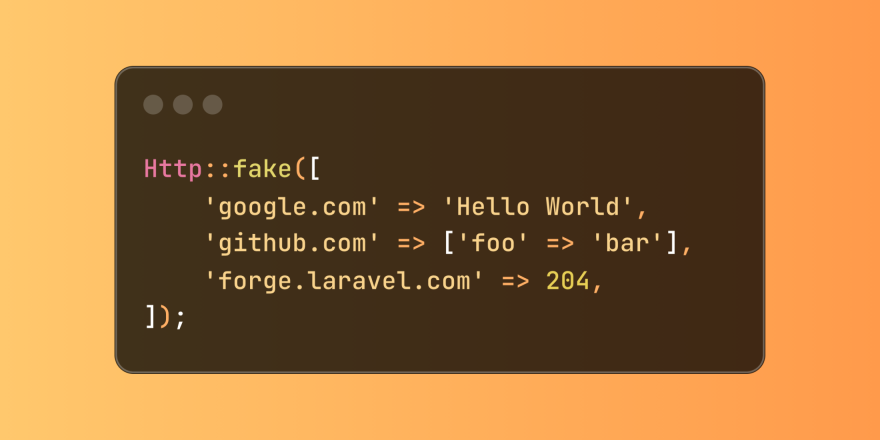 Laravel 테스트에서 단순화 된 HTTP 응답 조롱Mar 12, 2025 pm 05:09 PM
Laravel은 간결한 HTTP 응답 시뮬레이션 구문을 제공하여 HTTP 상호 작용 테스트를 단순화합니다. 이 접근법은 테스트 시뮬레이션을보다 직관적으로 만들면서 코드 중복성을 크게 줄입니다. 기본 구현은 다양한 응답 유형 단축키를 제공합니다. Illuminate \ support \ Facades \ http를 사용하십시오. http :: 가짜 ([ 'google.com'=> 'Hello World', 'github.com'=> [ 'foo'=> 'bar'], 'forge.laravel.com'=>
 Codecanyon에서 12 개의 최고의 PHP 채팅 스크립트Mar 13, 2025 pm 12:08 PM
고객의 가장 긴급한 문제에 실시간 인스턴트 솔루션을 제공하고 싶습니까? 라이브 채팅을 통해 고객과 실시간 대화를 나누고 문제를 즉시 해결할 수 있습니다. 그것은 당신이 당신의 관습에 더 빠른 서비스를 제공 할 수 있도록합니다.
 ALIPAY PHP SDK 전송 오류 : '클래스 부호 데이터를 선언 할 수 없음'의 문제를 해결하는 방법은 무엇입니까?Apr 01, 2025 am 07:21 AM
Alipay PHP ...
 PHP에서 늦은 정적 결합의 개념을 설명하십시오.Mar 21, 2025 pm 01:33 PM
기사는 PHP 5.3에 도입 된 PHP의 LSB (Late STATIC BING)에 대해 논의하여 정적 방법의 런타임 해상도가보다 유연한 상속을 요구할 수있게한다. LSB의 실제 응용 프로그램 및 잠재적 성능
 프레임 워크 사용자 정의/확장 : 사용자 정의 기능을 추가하는 방법.Mar 28, 2025 pm 05:12 PM
이 기사에서는 프레임 워크에 사용자 정의 기능 추가, 아키텍처 이해, 확장 지점 식별 및 통합 및 디버깅을위한 모범 사례에 중점을 둡니다.


핫 AI 도구

Undresser.AI Undress
사실적인 누드 사진을 만들기 위한 AI 기반 앱

AI Clothes Remover
사진에서 옷을 제거하는 온라인 AI 도구입니다.

Undress AI Tool
무료로 이미지를 벗다

Clothoff.io
AI 옷 제거제

AI Hentai Generator
AI Hentai를 무료로 생성하십시오.

인기 기사
뜨거운 도구

SublimeText3 중국어 버전
중국어 버전, 사용하기 매우 쉽습니다.

DVWA
DVWA(Damn Vulnerable Web App)는 매우 취약한 PHP/MySQL 웹 애플리케이션입니다. 주요 목표는 보안 전문가가 법적 환경에서 자신의 기술과 도구를 테스트하고, 웹 개발자가 웹 응용 프로그램 보안 프로세스를 더 잘 이해할 수 있도록 돕고, 교사/학생이 교실 환경 웹 응용 프로그램에서 가르치고 배울 수 있도록 돕는 것입니다. 보안. DVWA의 목표는 다양한 난이도의 간단하고 간단한 인터페이스를 통해 가장 일반적인 웹 취약점 중 일부를 연습하는 것입니다. 이 소프트웨어는

VSCode Windows 64비트 다운로드
Microsoft에서 출시한 강력한 무료 IDE 편집기

SublimeText3 영어 버전
권장 사항: Win 버전, 코드 프롬프트 지원!

Eclipse용 SAP NetWeaver 서버 어댑터
Eclipse를 SAP NetWeaver 애플리케이션 서버와 통합합니다.
뜨거운 주제
 1374
1374 523919