


3단계: 일정 옵션을 선택합니다.

4단계: 실행할 날짜, 시간 및 작업을 지정합니다.
5단계: 마지막으로 적용을 클릭하세요.

그렇습니다. Mac이 지정된 시간에 종료되도록 성공적으로 예약했습니다. 단계가 너무 길어서 따라갈 수 없다고 생각되면 Timer Clock(유료) 및 Almighty-Powerful Tweaks(Freemium)와 같은 몇 가지 편리한 애플리케이션을 사용하여 작업을 비교적 쉽게 완료할 수 있습니다.
즉, macOS Ventura를 사용 중이거나 에너지 절약 옵션을 건드리지 않고 동일하게 실행하려면 다음 방법으로 이동하세요.
방법 2: 터미널 사용
1단계: Command Space 키를 누르고 Terminal을 입력합니다. Return 키를 누릅니다.
2단계: 아래 명령을 입력하고 Return을 누릅니다.
<span data-preserver-spaces="true">sudo shutdown -h +30</span>
참고: -h를 사용하면 타이머를 설정할 수 있으며, 30은 Mac이 종료되기까지의 시간(분)입니다. 시간은 얼마든지 추가할 수 있지만 분 단위로 변환해야 합니다.

3단계: 인증을 위해 사용자 비밀번호를 입력하고 돌아가기를 누르세요.
참고: 비밀번호를 입력하면 비밀번호가 표시되지 않습니다.

여기 있습니다. 모든 작업을 올바르게 수행했다면 터미널이 종료 타이머를 인식하고 설정합니다.

또한 프로세스 ID(PID) 번호를 사용하여 프로세스를 할당합니다. 종료 타이머를 비활성화할 때 유용하므로 ID 번호를 기록해 두십시오. 단계가 너무 복잡하다면 프로세스를 쉽게 만들어주는 타사 앱이 있습니다. 계속 읽으세요.
방법 3: 바탕화면 바로가기 만들기
1단계: Command Space 키를 누르고 TextEdit를 입력합니다. , Return 키를 누릅니다.
2단계: 새 문서를 클릭합니다.

빈 텍스트 문서가 열립니다.
3단계: Command Shift T를 눌러 일반 텍스트 필드에 액세스합니다.

4단계: 아래 명령을 입력하고 Return 키를 두 번 누릅니다.
<span data-preserver-spaces="true">#!/bin/bash</span>

Step 5: Type the below command.
<span data-preserver-spaces="true">sudo shutdown -h +30</span>
Note: -h lets you set a timer, while +30 is the number of minutes after which your Mac will shut down. You can add any number of hours, but make sure you convert it to minutes.

Step 6: Finally, press Command+S to save the file with a simple name and destination (preferred Desktop). Uncheck the If no extension is provided, use .”txt”. options and click on Save.

Now, to make the file executable, continue following the steps below.
Step 7: Press the Command + Space key, type Terminal, and press the Return key.
Step 8: Drag and drop the .txt file you created onto the Terminal and press Return.

The terminal will auto-fetch the file location for you to quickly execute.

Step 9: Enter your user password and press Return.
Note: When you type your password, it won’t be displayed.

After which, the shutdown timer will begin, and your Mac will shut down after the set time.

Now that you know how to enable a shutdown timer, it is equally important to know how to disable it. Continue reading.
How to Disable a Shutdown Timer on Mac
Turning off the shutdown timer is easy and only involves a few steps. All you have to do is kill the Process ID (PID). Follow the steps below.
Step 1: Press the Command + Space, type Terminal, and press the Return key.
Step 2: Type the below command and press Return.
<span data-preserver-spaces="true">sudo kill [pid number]</span>
Note: If you don’t remember the PID number, type sudo killall shutdown. It will disable all the active shutdown timers on your Mac.

Step 3: Enter your user password and press Return.
Note: When you type your password, it won’t be displayed.

There you have it. You have disabled a scheduled shutdown of your Mac. If you have any queries, check out the FAQ section below.
Mac의 예약 종료에 대한 FAQ
Mac을 오랫동안 켜두어도 정기적으로 사용하고 작동 상태가 양호하다면 일반적으로 문제가 되지 않습니다.
터미널 열기 > sudo shutdown -h 60 >을 입력하세요. Return >를 누르세요. 사용자 비밀번호를 입력하세요(표시되지 않음) > 다시 Return 키를 누르세요. 자, 종료를 예약하셨습니다.
예, 터미널에서 'pmset' 명령을 사용하여 Mac이 잠자기 상태가 되도록 타이머를 설정할 수 있습니다. 그러나 pmset 명령을 사용하려면 관리자 권한이 필요합니다.
1단계: 터미널 열기
2단계: 명령을 입력합니다. sudo pmset sleep [time]
[time]을 타이머를 설정하려는 초 수로 바꾸세요.
3단계: 메시지가 나타나면 비밀번호를 입력하고 Return 키를 누르세요.
타이머를 취소하려면 위 단계를 따르고 sudo pmset sleep cancel을 입력하세요. 이렇게 하면 잠자기 타이머가 취소되고 Mac은 깨어 있는 상태로 유지됩니다.
일일 종료 타이머를 설정하거나 일회성 이벤트를 설정하려는 경우 이 도움말에 언급된 방법이 도움이 될 것입니다.
위 내용은 Mac에서 종료 타이머를 예약하는 3가지 방법의 상세 내용입니다. 자세한 내용은 PHP 중국어 웹사이트의 기타 관련 기사를 참조하세요!

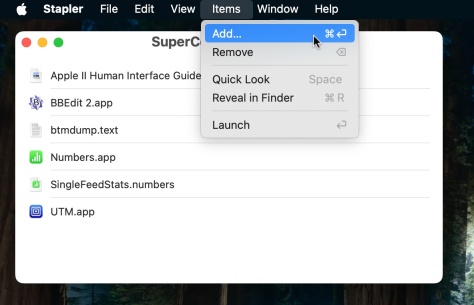 Stapler for Mac과 관련된 프로젝트와 관련된 모든 앱 및 문서를 시작합니다.May 13, 2025 am 10:37 AM
오랜 MAC 사용자는 Stapler라는 클래식 Macintosh의 편리한 오래된 Shareware 응용 프로그램을 리콜 할 수 있습니다. Stapler라는 Classic Macintosh는 일련의 앱과 문서를 단일 문서로 그룹화하여 AL을 시작할 때 프로젝트를 관리하는 데 도움이되었습니다.
 iPhone, iPad 또는 Mac에서 Apple Intelligence를 얻는 방법May 13, 2025 am 10:32 AM
Apple Intelligence는 Apple이 베타로 출시되는 AI 기능 세트이며 가을에 더 큰 Apple 장치 소유자에게 데뷔 할 예정입니다. Apple Intelligence
 Macos Sonoma 14.6.1 & Ventura 13.6.9 버그 수정으로 출시May 13, 2025 am 10:25 AM
최근 Apple 기기에서 시스템 소프트웨어를 업데이트하는 데 상당한 시간을 소비 한 것 같으면 치료를 받고 있습니다. 또 다른 시스템 소프트웨어 업데이트! 이번에는 Apple이 Macos Sonoma 14.6.1 Alon을 출시했습니다.
 MACOS 세쿼이아 15 베타 6 테스트에 사용할 수 있습니다May 13, 2025 am 10:23 AM
Apple은 개발자 베타 테스트 프로그램에 등록한 사용자를 위해 6 번째 베타 버전의 MacOS Sequoia를 발행했습니다. 일반적으로 일치하는 공개 베타 빌드가 곧 도착하며,이 경우 Dev Beta 6은 공개 베타 4로 버전으로 표시됩니다. 마코스 세쿼이아
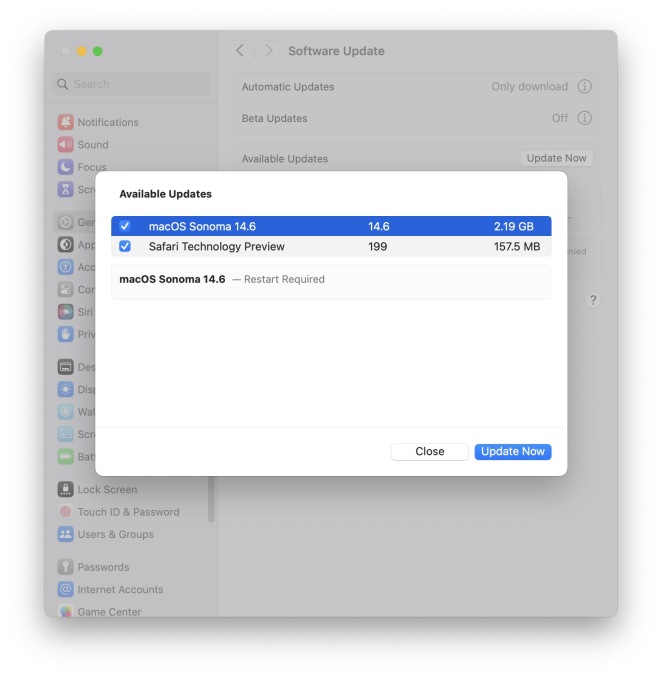 Macos Sonoma 14.6 업데이트 버그 수정 및 보안 업데이트로 출시되었습니다.May 13, 2025 am 10:20 AM
Apple은 Sonoma 운영 체제를 운영하는 Mac 사용자를 위해 MacOS Sonoma 14.6을 출시했습니다. MacOS Sonoma 14.6 소프트웨어 업데이트는 주로 대부분의 MAC의 버그 수정 및 보안 업데이트에 중점을 두지만 특별히 새로운 기능을 포함합니다.
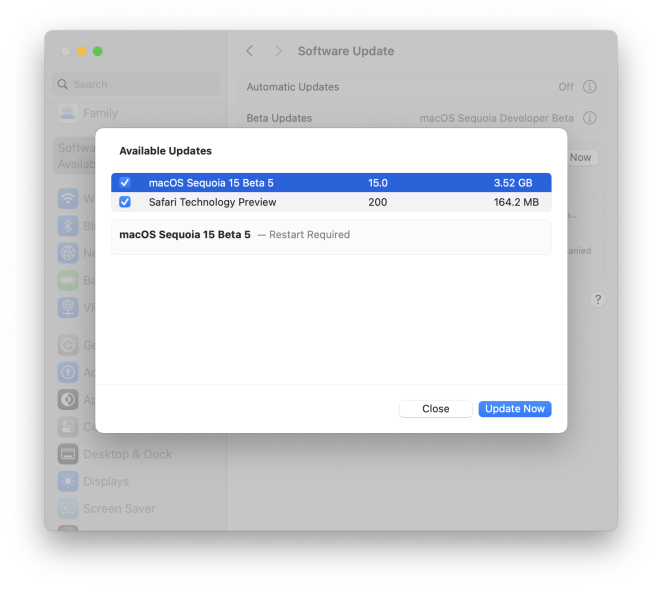 MACOS 세쿼이아 15 베타 5 다운로드 할 수 있습니다May 13, 2025 am 10:06 AM
MacOS Sequoia Beta 5는 이제 개발자 베타 테스트 프로그램에 등록한 사용자가 Mac에 다운로드하여 설치할 수 있습니다. MacOS Sequoia Beta 5는 24A5309E의 빌드를 운반하며 일반적으로 새로운 개발자 베타 빌드와 곧 M이 뒤 따릅니다.
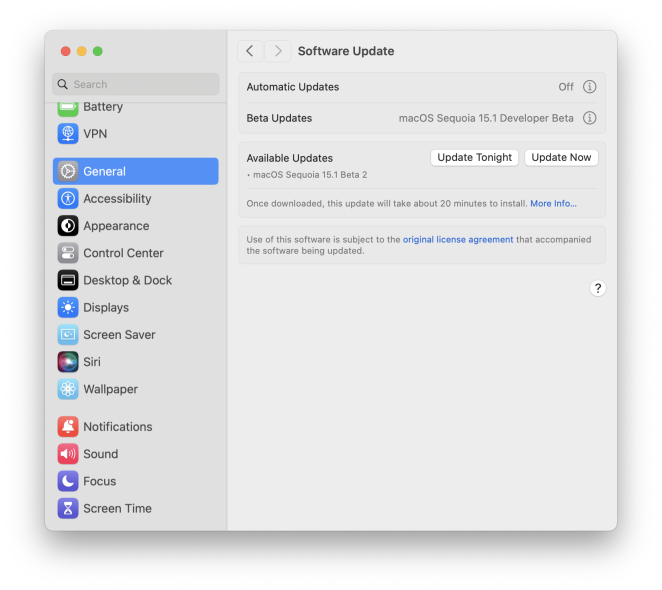 iOS 18.1의 베타 2, MACOS Sequoia 15.1, & iPados 18.1 Apple Intelligence와 함께 출시May 13, 2025 am 09:49 AM
Apple은 어쨌든 지원되는 장치에서 Apple Intelligence AI 기능을 지원하는 iOS 18.1, iPados 18.1 및 MacOS Sequoia 15.1의 두 번째 베타를 출시했습니다. 이 새로운 베타 업데이트의 릴리스는 동시에 재치가 있다는 점에서 드문 일입니다.
 Mac에서 VMware Fusion을 제거하는 방법May 13, 2025 am 09:44 AM
VMware Fusion Pro가 이제 무료로 다운로드 및 설치할 수 있다는 사실을 알고있을 수 있으며, 가상 머신을 테스트하거나 게임을하기 위해 Mac에 설치했을 수도 있습니다. 이제 Mac에서 VMware가 더 이상 필요하지 않다고 결정했습니다. 그러나 vmware fusion p


핫 AI 도구

Undresser.AI Undress
사실적인 누드 사진을 만들기 위한 AI 기반 앱

AI Clothes Remover
사진에서 옷을 제거하는 온라인 AI 도구입니다.

Undress AI Tool
무료로 이미지를 벗다

Clothoff.io
AI 옷 제거제

Video Face Swap
완전히 무료인 AI 얼굴 교환 도구를 사용하여 모든 비디오의 얼굴을 쉽게 바꾸세요!

인기 기사
뜨거운 도구

SublimeText3 영어 버전
권장 사항: Win 버전, 코드 프롬프트 지원!

SecList
SecLists는 최고의 보안 테스터의 동반자입니다. 보안 평가 시 자주 사용되는 다양한 유형의 목록을 한 곳에 모아 놓은 것입니다. SecLists는 보안 테스터에게 필요할 수 있는 모든 목록을 편리하게 제공하여 보안 테스트를 더욱 효율적이고 생산적으로 만드는 데 도움이 됩니다. 목록 유형에는 사용자 이름, 비밀번호, URL, 퍼징 페이로드, 민감한 데이터 패턴, 웹 셸 등이 포함됩니다. 테스터는 이 저장소를 새로운 테스트 시스템으로 간단히 가져올 수 있으며 필요한 모든 유형의 목록에 액세스할 수 있습니다.

안전한 시험 브라우저
안전한 시험 브라우저는 온라인 시험을 안전하게 치르기 위한 보안 브라우저 환경입니다. 이 소프트웨어는 모든 컴퓨터를 안전한 워크스테이션으로 바꿔줍니다. 이는 모든 유틸리티에 대한 액세스를 제어하고 학생들이 승인되지 않은 리소스를 사용하는 것을 방지합니다.

Atom Editor Mac 버전 다운로드
가장 인기 있는 오픈 소스 편집기

메모장++7.3.1
사용하기 쉬운 무료 코드 편집기

