Node.js 및 Express를 사용하여 확장 가능한 API 구축
- WBOYWBOYWBOYWBOYWBOYWBOYWBOYWBOYWBOYWBOYWBOYWBOYWB원래의
- 2024-09-07 08:30:031209검색
Node.js와 Express는 확장 가능한 API를 구축하는 데 필수적인 도구가 되었으며, 이는 고성능을 유지하고 원활한 사용자 경험을 보장하는 데 중요합니다. 이벤트 중심 아키텍처를 갖춘 Node.js는 실시간 애플리케이션에 대한 증가하는 수요를 관리하는 데 매우 효율적이므로 백엔드 개발을 위한 최고의 선택입니다. 한 연구에 따르면 개발자의 68%는 클라이언트와 서버 측 모두에서 JavaScript를 사용하여 개발 프로세스를 단순화할 수 있는 기능 덕분에 Node.js를 사용하여 생산성이 향상되었다고 보고했습니다. 이 블로그에서는 Node.js 및 Express를 사용하여 확장 가능한 API를 구축하는 데 도움이 되는 정확한 코드 예제가 포함된 단계별 가이드를 제공합니다.
확장 가능한 API 구축을 위한 주요 원칙
비동기 프로그래밍
Node.js는 본질적으로 비동기식이므로 이벤트 루프를 차단하지 않고 여러 요청을 동시에 처리할 수 있습니다. 이 기능은 특히 부하가 높은 조건에서 효율적인 리소스 관리를 가능하게 하므로 확장성에 매우 중요합니다.
모듈형 아키텍처
모듈식 접근 방식을 채택하는 것이 필수적입니다. 개발자는 애플리케이션을 더 작고 독립적인 모듈로 분할하여 복잡성을 관리하고 독립적인 확장을 촉진할 수 있습니다. 각 모듈은 필요에 따라 개별 구성 요소를 더 쉽게 테스트하고 유지 관리하고 확장할 수 있도록 특정 기능에 중점을 두어야 합니다.
마이크로서비스
마이크로서비스 아키텍처를 활용하면 확장성을 크게 향상할 수 있습니다. 이 접근 방식을 사용하면 애플리케이션의 여러 부분을 독립적으로 확장하여 리소스 사용을 최적화하고 전반적인 성능을 향상시킬 수 있습니다. 각 마이크로서비스는 다른 서비스에 영향을 주지 않고 개발, 배포 및 확장할 수 있습니다.
효과적인 라우팅 및 미들웨어
Express.js는 경로 생성과 미들웨어 통합을 단순화합니다. 미들웨어 기능은 인증, 로깅, 오류 처리 등의 작업을 처리할 수 있으므로 API를 더욱 강력하고 관리하기 쉽게 만듭니다. 코드베이스의 명확성과 효율성을 유지하려면 경로와 컨트롤러를 적절하게 구성하는 것이 중요합니다.
오류 처리 및 기록
API 안정성을 유지하려면 포괄적인 오류 처리 및 로깅 메커니즘을 구현하는 것이 중요합니다. 이를 통해 문제를 신속하게 식별하고 해결할 수 있어 가동 중지 시간이 최소화되고 사용자 경험이 향상됩니다.
API 문서
API 문서화에는 Swagger와 같은 도구를 사용하는 것이 좋습니다. 잘 문서화된 API는 새로운 개발자의 온보딩을 더 쉽게 할 뿐만 아니라 API가 소비자에게 사용자 친화적인지 확인하여 더 나은 통합 및 사용을 가능하게 합니다.
성능 최적화
성능을 위해 코드를 최적화하는 것이 중요합니다. 기술에는 동기식 작업 최소화, 리소스 소비 관리, 캐싱 전략 활용(예: Redis 사용)이 포함되어 데이터베이스 로드를 줄이고 응답 시간을 향상시킵니다.
부하 테스트
잠재적인 병목 현상을 식별하고 API가 예상되는 트래픽 급증을 처리할 수 있는지 확인하려면 정기적인 로드 테스트가 필수적입니다. 응답 시간 및 오류율과 같은 주요 지표를 모니터링하면 필요한 조정 및 확장 전략을 안내할 수 있습니다.
Node.js 및 Express를 사용하여 확장 가능한 API를 구축하는 방법
1. 프로젝트 설정
scalable-api 폴더를 만들었습니다. 코드 편집기에서 이 폴더를 엽니다.
그런 다음 아래 지침을 따르세요.
새 Node.js 프로젝트를 초기화하려면 아래 명령을 실행하세요.
npm init -y
위 명령을 실행하면 폴더 안에 package.json 파일이 생성됩니다.
이제 Express를 설치하려면 아래 명령을 실행해야 합니다.
npm install express
위 명령을 실행하면 루트 폴더에 node_modules 폴더와 package-lock.json 파일이 생성됩니다.
2. 서버 생성
이미 Express를 설치했으므로 다음 단계는 서버 파일을 만들고 기본 Express 서버를 설정하는 것입니다.
루트 폴더에 app.js라는 파일명을 생성해야 합니다.
이제 app.js 파일을 생성하고 app.js에서 기본 Express 서버를 설정했습니다.
const express = require('express');
const app = express();
const port = process.env.PORT || 3000;

// Middleware to parse JSON bodies
app.use(express.json());

// Basic route
app.get('/', (req, res) => {
    res.send('Hello World!');
});

// Start the server
app.listen(port, () => {
    console.log(`Server is running on port ${port}`);
});
이제 완료한 후 터미널에서 다음 명령을 실행하여 서버를 실행하세요.
node app.js
위 명령을 실행하면 터미널에 아래와 같은 메시지가 나타납니다
Starting the server...
Middleware set up.
Route set up.
Server is running on port 3000
서버에 액세스하려면 Chrome 브라우저나 사용 중인 브라우저를 열고 http://localhost:3000으로 이동하면 'Hello World' 메시지가 표시됩니다.
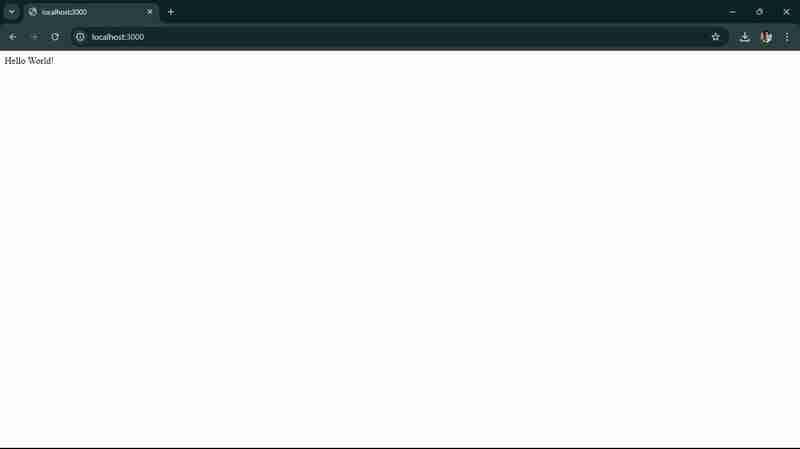
위 화면과 같습니다.
Node.js 및 Express를 사용하여 확장 가능한 API를 구축하기 위한 다음 단계는 일반적으로 다음과 같습니다.
3. Defining & Adding More Routes:
Adding More Routes:
You have to define additional routes to handle different endpoints. For example, let’s add routes for /api and /users.
// ... existing code ...

// New route for /api
app.get('/api', (req, res) => {
    res.send('API endpoint');
});

// New route for /users
app.get('/users', (req, res) => {
    res.send('Users endpoint');
});

// ... existing code ...
You to add above code in your app.js file and update your app.js file.
- app.get('/api', (req, res) => { ... }): This defines a new route that listens for GET requests on the /api endpoint. When a request is received, it sends back the response "API endpoint".
- app.get('/users', (req, res) => { ... }): This defines another route that listens for GET requests on the /users endpoint. When a request is received, it sends back the response "Users endpoint".
Now, let’s test the new routes.
start your server by running:
node app.js
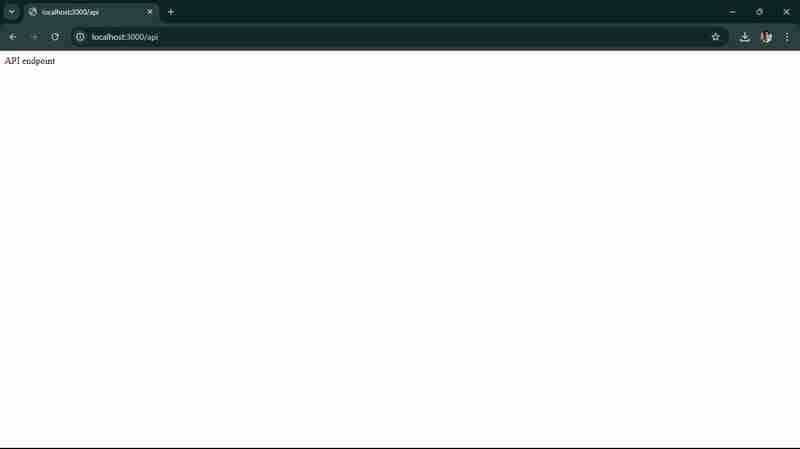
Now, open your browser, and go to http://localhost:3000/api , you’ll see the message “API endpoint”
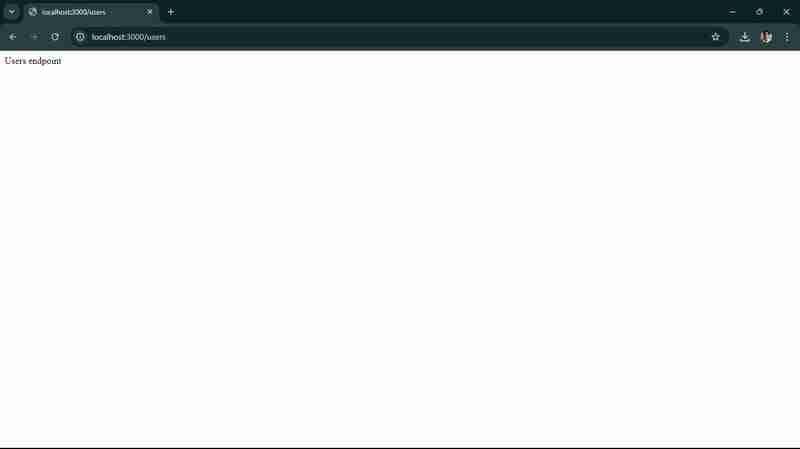
Now, you should navigate to **http://localhost:3000/users,** you’ll see the message “Users endpoint”, shown in below screen
Now, your next step will be to connect to a database. For this, we’ll use we'll use MongoDB with Mongoose, a popular ODM (Object Data Modeling) library for MongoDB and Node.js.
4. Connecting to a Database.
- Install a mongoose.
You’ve to run the following command to install the Mongoose.
npm install mongoose
- now, you to update your app.js to Connect to MongoDB:
Let’s see how you can update your app.js file to connect to MongoDB database.
   const mongoose = require('mongoose');

   // Connect to MongoDB
   mongoose.connect('mongodb://localhost:27017/mydatabase', { useNewUrlParser: true, useUnifiedTopology: true })
       .then(() => console.log('Connected to MongoDB'))
       .catch(err => console.error('Could not connect to MongoDB', err));

   // ... existing code ...
Connect to MongoDB: Use mongoose.connect to connect to your MongoDB database. Replace 'mongodb://localhost:27017/mydatabase' with your actual MongoDB connection string if it's different.
Now, that for that, You must first have set up your MongoDB, If you haven’t, let’s set it up now. Use MongoDB Atlas (Cloud Database). You have to create a MongoDB Atlas account, Go to MongoDB Atlas and sign up for free account.
once you sign up via or Google or GitHub Account, You’ll see below screen after login.
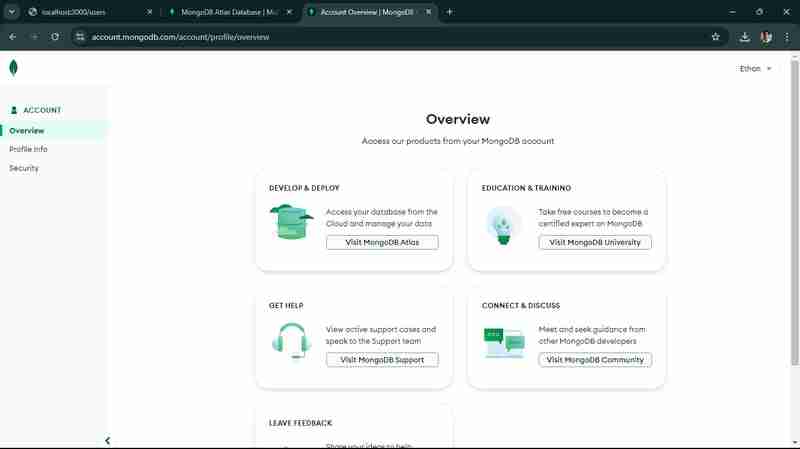
You’ll to click on visit MongoDB Atlas, Click on Create a New Cluster,
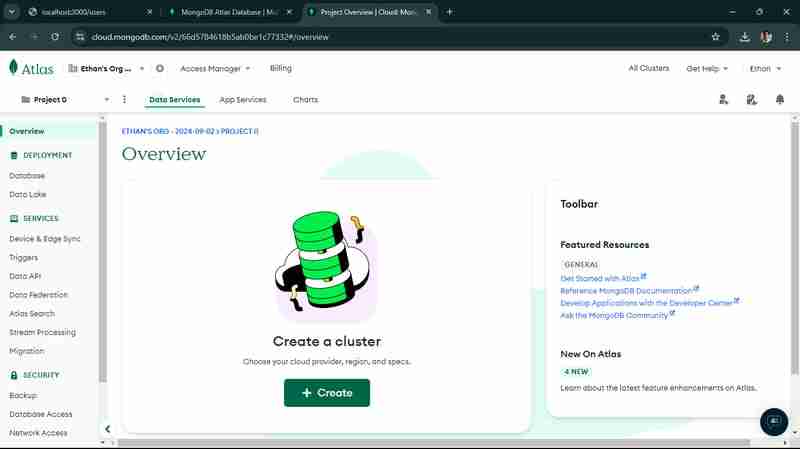
Once you click on Create as shown in above screen, you’ll be redirect to below screen, select M0 free version.
you have to keep your configuration as it is by default, now click on Create Deployment.
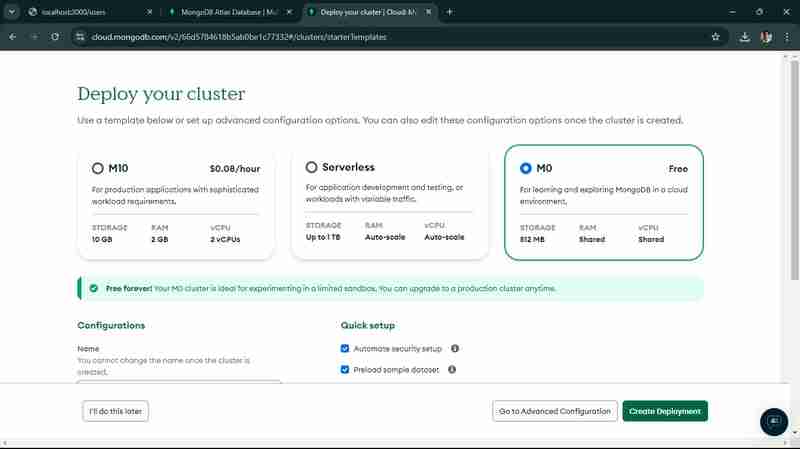
once, you click on that, you’ll come to this screen.
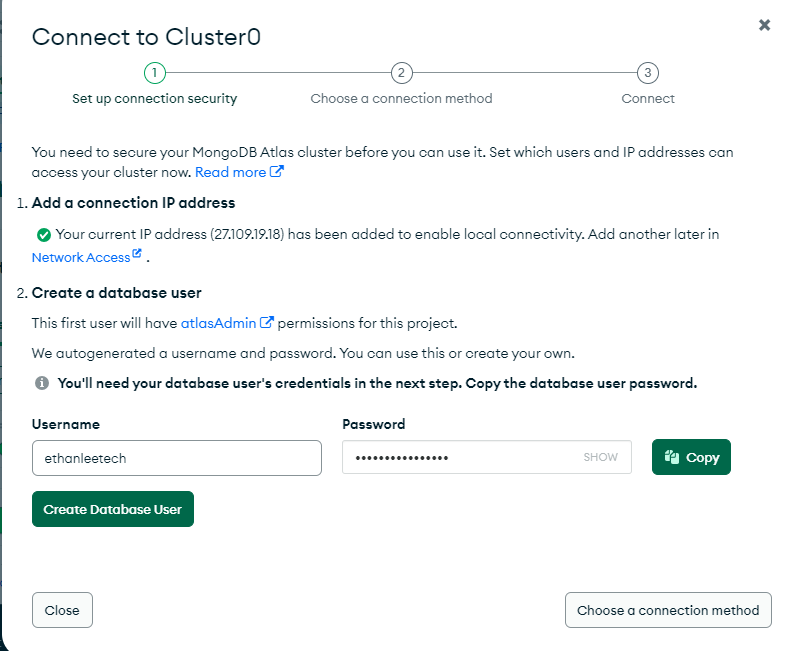
You’ve to notedown, your username and password, once you click on “Create Database User”,
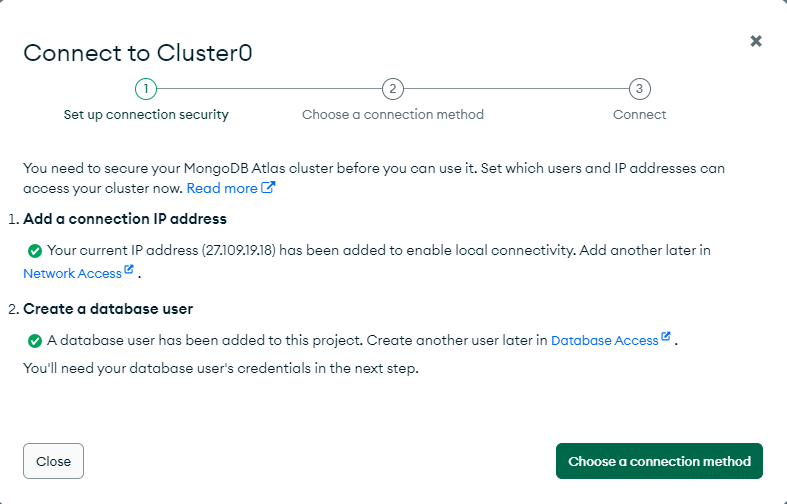
Once you click on “Choose a connection method”,
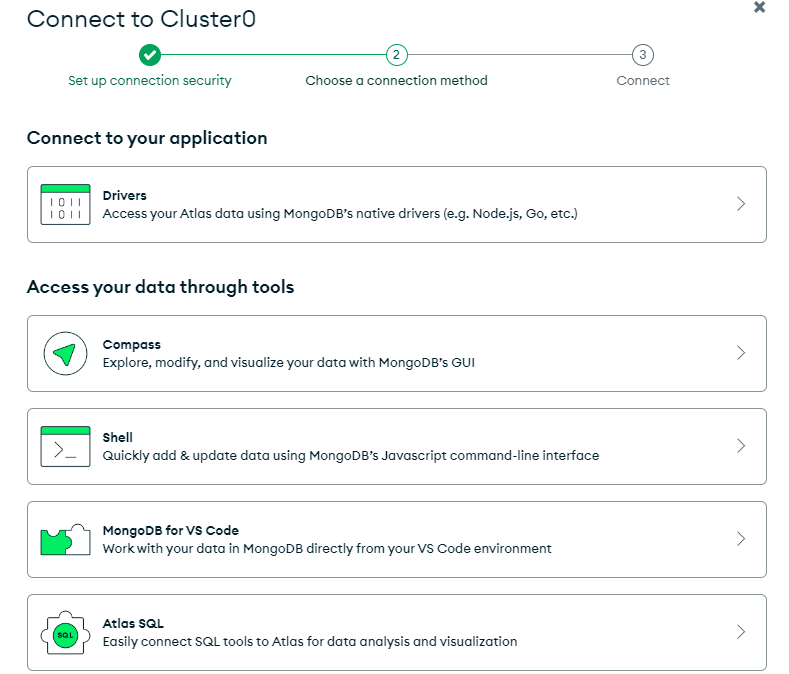
now, choose, Choose “Connect to your application”, You’ll see below screen.
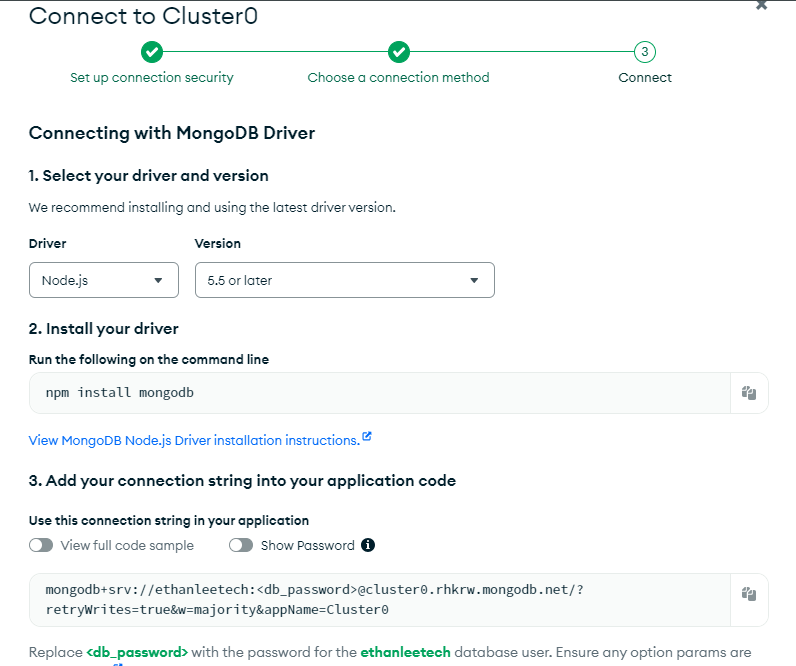
Now, you’ll see connection string like this - mongodb+srv://
replace it with your username and password you noted down earlier.
Now that, you to copy your MongoDB string and have to replace in your app.js code, and you have to update it.
now, you to run your node app.js file again in your terminal. You’ll see the message “Connected to MongoDB”

5. Implementing Middleware
So, now you see above successful message, now, next step is to add simple logging middleware using Morgan which is a popular HTTP request logger middleware for Node.js.
To install Morgan, run below command.
npm install morgan
now, you’ve to update, your app.js file to use Morgan.
   const express = require('express');
   const morgan = require('morgan'); // Import morgan
   const app = express();
   const port = process.env.PORT || 3000;

   console.log('Starting the server...');

   const mongoose = require('mongoose');

   // Replace with your actual MongoDB connection string
   const mongoURI = 'mongodb+srv://<username>:<password>@cluster0.mongodb.net/myFirstDatabase?retryWrites=true&w=majority';

   mongoose.connect(mongoURI, { useNewUrlParser: true, useUnifiedTopology: true })
       .then(() => console.log('Connected to MongoDB'))
       .catch(err => console.error('Could not connect to MongoDB', err));

   // Middleware to parse JSON bodies
   app.use(express.json());

   // Use morgan for logging
   app.use(morgan('tiny'));

   console.log('Middleware set up.');

   // Basic route
   app.get('/', (req, res) => {
       console.log('Received a request on /');
       res.send('Hello World!');
   });

   // New route for /api
   app.get('/api', (req, res) => {
       res.send('API endpoint');
   });

   // New route for /users
   app.get('/users', (req, res) => {
       res.send('Users endpoint');
   });

   console.log('Route set up.');

   // Start the server
   app.listen(port, () => {
       console.log(`Server is running on port ${port}`);
   });
now, run your node app.js, go to http://localhost:3000/ and you’ll see log entry for request in terminal. This step will add basic logging to your application.

Your next step is to define a schema and model for your MongoDB collections using Mongoose. This will allow you to interact with your database in a structured way.
6. Define a Schema and Model
You have to create a new file named user.js in a models directory you may need to create the models directory if it doesn't exist). You’ve define a User Schema and model for user.
   const mongoose = require('mongoose');

   // Define the User schema
   const userSchema = new mongoose.Schema({
       name: {
           type: String,
           required: true
       },
       email: {
           type: String,
           required: true,
           unique: true
       },
       password: {
           type: String,
           required: true
       }
   });

   // Create the User model
   const User = mongoose.model('User', userSchema);

   module.exports = User;
Now, you’ve to update the app.js to Use the User Model:
In app.js, import the User model and create a route to add a new user:
   const express = require('express');
   const morgan = require('morgan');
   const mongoose = require('mongoose');
   const User = require('./models/user'); // Import the User model
   const app = express();
   const port = process.env.PORT || 3000;

   console.log('Starting the server...');

   // Replace with your actual MongoDB connection string
   const mongoURI = 'mongodb+srv://<username>:<password>@cluster0.mongodb.net/myFirstDatabase?retryWrites=true&w=majority';

   mongoose.connect(mongoURI, { useNewUrlParser: true, useUnifiedTopology: true })
       .then(() => console.log('Connected to MongoDB'))
       .catch(err => console.error('Could not connect to MongoDB', err));

   // Middleware to parse JSON bodies
   app.use(express.json());

   // Use morgan for logging
   app.use(morgan('tiny'));

   console.log('Middleware set up.');

   // Basic route
   app.get('/', (req, res) => {
       console.log('Received a request on /');
       res.send('Hello World!');
   });

   // New route for /api
   app.get('/api', (req, res) => {
       res.send('API endpoint');
   });

   // New route for /users
   app.get('/users', (req, res) => {
       res.send('Users endpoint');
   });

   // Route to add a new user
   app.post('/users', async (req, res) => {
       try {
           const user = new User(req.body);
           await user.save();
           res.status(201).send(user);
       } catch (error) {
           res.status(400).send(error);
       }
   });

   console.log('Route set up.');

   // Start the server
   app.listen(port, () => {
       console.log(`Server is running on port ${port}`);
   });
now, that you’ve to open postman, you can also use desktop postman agent, click on new request, select request type to “Post”, Enter the URL - http://localhost:3000/users , now, select body tab, select row and json there.
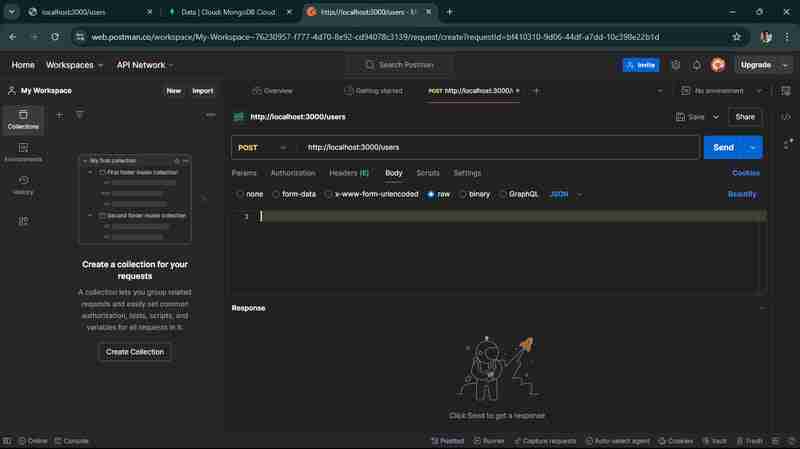
enter the following json in text area.
     {
         "name": "John Doe",
         "email": "john.doe@example.com",
         "password": "password123"
     }
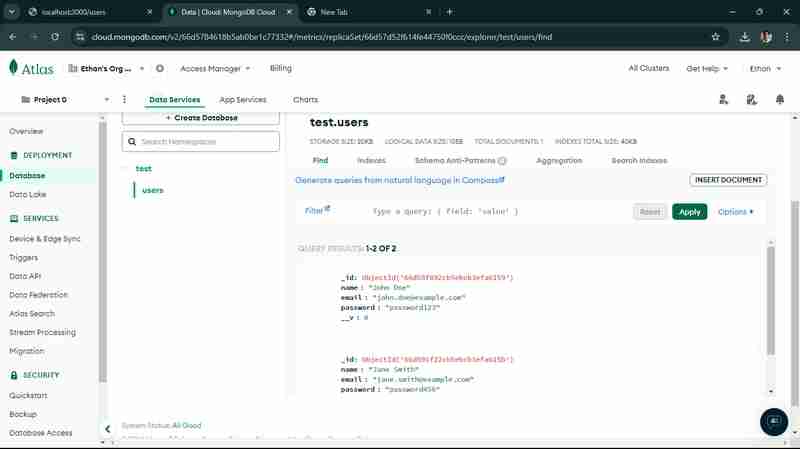
and once you send the request, it will reflect in your MongoDB Atlas account, you have to go database and have to select cluster0, find your database which you’ve create, go to the user, and here you’ll found the information, you send via a request. just like below screen.
7. Implemented CRUD Operations:
As we successfully added users to your MongoDB database, the next step is to implement additional CRUD (Create, Read, Update, Delete) operations for your User model. This will allow you to manage users more effectively.
Let's start by adding routes for reading, updating, and deleting users.
1. Read (GET) Users
Add a route to get all users and a route to get a user by ID.
// ... existing code ...

// Route to get all users
app.get('/users', async (req, res) => {
    try {
        const users = await User.find();
        res.send(users);
    } catch (error) {
        res.status(500).send(error);
    }
});

// Route to get a user by ID
app.get('/users/:id', async (req, res) => {
    try {
        const user = await User.findById(req.params.id);
        if (!user) {
            return res.status(404).send('User not found');
        }
        res.send(user);
    } catch (error) {
        res.status(500).send(error);
    }
});

// ... existing code ...
2. Update (PUT) Users
Add a route to update a user by ID.
// ... existing code ...

// Route to update a user by ID
app.put('/users/:id', async (req, res) => {
    try {
        const user = await User.findByIdAndUpdate(req.params.id, req.body, { new: true, runValidators: true });
        if (!user) {
            return res.status(404).send('User not found');
        }
        res.send(user);
    } catch (error) {
        res.status(400).send(error);
    }
});

// ... existing code ...
3. Delete (DELETE) Users
Add a route to delete a user by ID.
// ... existing code ...

// Route to delete a user by ID
app.delete('/users/:id', async (req, res) => {
    try {
        const user = await User.findByIdAndDelete(req.params.id);
        if (!user) {
            return res.status(404).send('User not found');
        }
        res.send(user);
    } catch (error) {
        res.status(500).send(error);
    }
});

// ... existing code ...
once, you update your above code in your app.js file,
start your server using node app.js command,
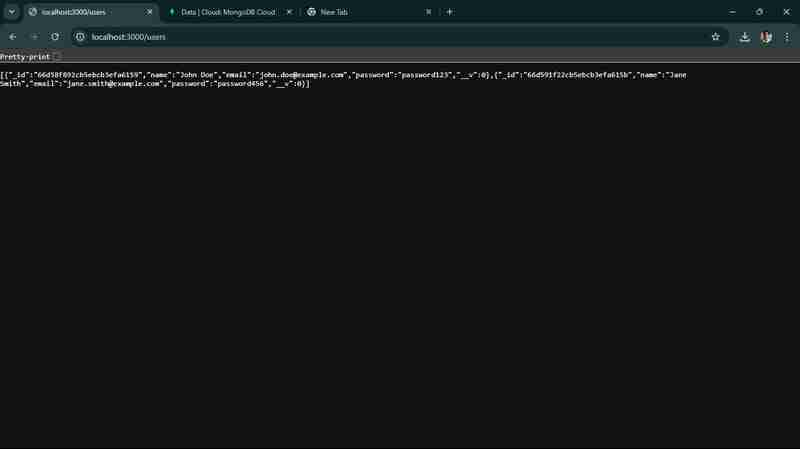
now, send request to get all users: You’ll see below screen, in your http://localhost:3000/users
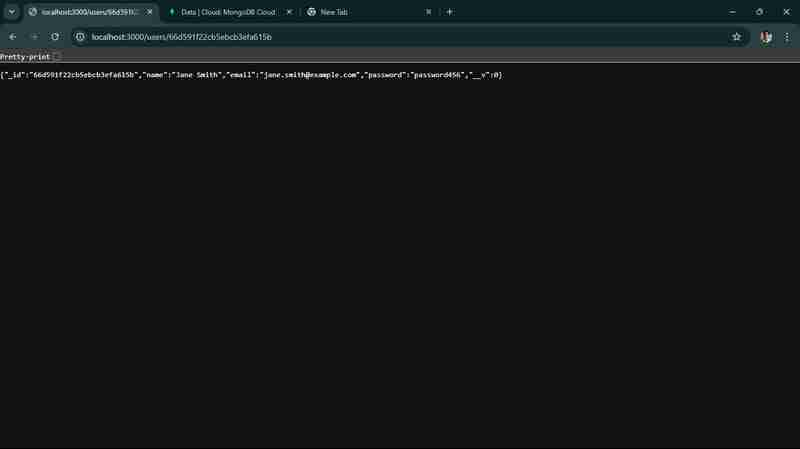
when you run get user by id, you’ll see in terminal as well on local host as well.
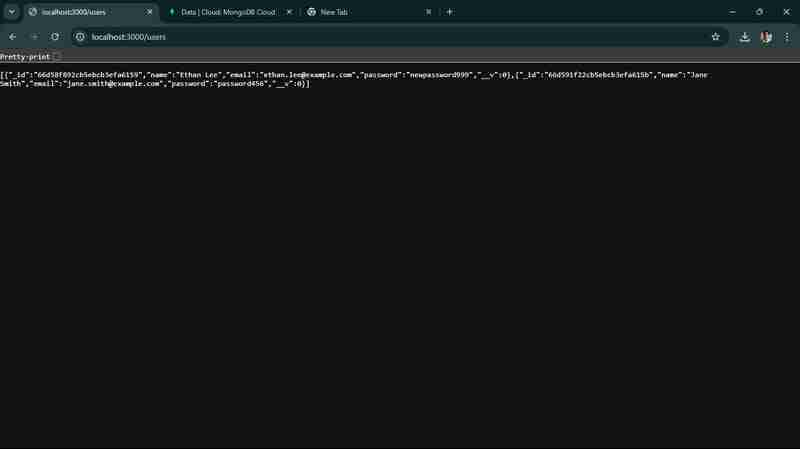
when you update any information, you’ll able to see it here. we changed name from john doe to Ethan lee,
when you run a delete request, one user will be deleted.
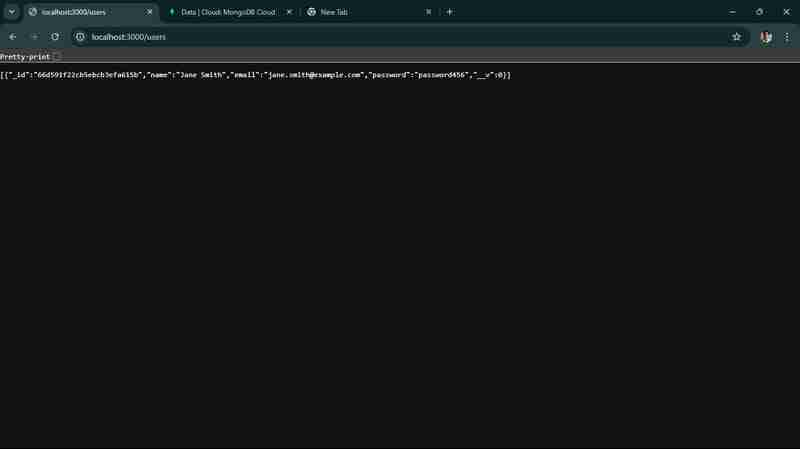
so, we successfully implemented and tested all the basic CRUD Operations for your API.
8. Implement Error Handling Middleware
Centralized error handling helps manage errors gracefully and provides consistent error responses.
Add Error Handling Middleware
   // ... existing code ...

   // Error handling middleware
   app.use((err, req, res, next) => {
       console.error(err.stack);
       res.status(500).send({ error: 'Something went wrong!' });
   });

   // Start the server
   app.listen(port, () => {
       console.log(`Server is running on port ${port}`);
   });
9. Use Environment Variables
Using environment variables helps manage configuration settings securely.
- Install dotenv
npm install dotenv
2. Create a .env File:
PORT=3000
MONGODB_URI=mongodb+srv://<username>:<password>@cluster0.mongodb.net/myFirstDatabase?retryWrites=true&w=majority
this is your updated app.js
   require('dotenv').config();
   const express = require('express');
   const morgan = require('morgan');
   const mongoose = require('mongoose');
   const cors = require('cors');
   const User = require('./models/user');
   const app = express();
   const port = process.env.PORT || 3000;

   console.log('Starting the server...');

   mongoose.connect(process.env.MONGODB_URI, { useNewUrlParser: true, useUnifiedTopology: true })
       .then(() => console.log('Connected to MongoDB'))
       .catch(err => console.error('Could not connect to MongoDB', err));

   // Middleware to parse JSON bodies
   app.use(express.json());

   // Use morgan for logging
   app.use(morgan('tiny'));

   // Use cors for handling CORS issues
   app.use(cors());

   console.log('Middleware set up.');

   // Basic route
   app.get('/', (req, res) => {
       console.log('Received a request on /');
       res.send('Hello World!');
   });

   // CRUD routes
   // ... existing CRUD routes ...

   // Error handling middleware
   app.use((err, req, res, next) => {
       console.error(err.stack);
       res.status(500).send({ error: 'Something went wrong!' });
   });

   console.log('Route set up.');

   // Start the server
   app.listen(port, () => {
       console.log(`Server is running on port ${port}`);
   });
10. Add Basic Authentication
For a more secure API, you might want to add basic authentication. Here’s a simple example using HTTP Basic Auth:
Install Basic Auth Middleware:
npm install express-basic-auth
2. Update app.js to Use Basic Auth:
   const basicAuth = require('express-basic-auth');

   // ... existing code ...

   // Use basic auth for all routes
   app.use(basicAuth({
       users: { 'admin': 'supersecret' },
       challenge: true
   }));

   // ... existing code ...
11. Document Your API
Using tools like Swagger can help you document your API endpoints.
Install Swagger UI
npm install swagger-ui-express swagger-jsdoc
Create a Swagger Configuration File
create a swagger.js file in root folder, you’ve to add following code to your file.
const swaggerJsDoc = require('swagger-jsdoc');
const swaggerUi = require('swagger-ui-express');

const swaggerOptions = {
    swaggerDefinition: {
        openapi: '3.0.0',
        info: {
            title: 'User API',
            version: '1.0.0',
            description: 'A simple Express User API'
        },
        servers: [
            {
                url: 'http://localhost:3000'
            }
        ]
    },
    apis: ['./app.js'] // Path to the API docs
};

const swaggerDocs = swaggerJsDoc(swaggerOptions);

module.exports = (app) => {
    app.use('/api-docs', swaggerUi.serve, swaggerUi.setup(swaggerDocs));
};
Update app.js to Use Swagger
Add the following code to your app.js file to set up Swagger:
update your app.js file
require('dotenv').config();
const express = require('express');
const morgan = require('morgan');
const mongoose = require('mongoose');
const cors = require('cors');
const User = require('./models/user');
const setupSwagger = require('./swagger'); // Import the Swagger setup function
const app = express();
const port = process.env.PORT || 3000;

console.log('Starting the server...');

mongoose.connect(process.env.MONGODB_URI, { useNewUrlParser: true, useUnifiedTopology: true })
    .then(() => console.log('Connected to MongoDB'))
    .catch(err => console.error('Could not connect to MongoDB', err));

// Middleware to parse JSON bodies
app.use(express.json());

// Use morgan for logging
app.use(morgan('tiny'));

// Use cors for handling CORS issues
app.use(cors());

console.log('Middleware set up.');

// Basic route
app.get('/', (req, res) => {
    console.log('Received a request on /');
    res.send('Hello World!');
});

// CRUD routes
// ... existing CRUD routes ...

// Setup Swagger
setupSwagger(app);

// Error handling middleware
app.use((err, req, res, next) => {
    console.error(err.stack);
    res.status(500).send({ error: 'Something went wrong!' });
});

console.log('Route set up.');

// Start the server
app.listen(port, () => {
    console.log(`Server is running on port ${port}`);
});
Add Swagger Comments to Your Routes
Add comments to your routes in app.js to document them with Swagger. Here’s an example for the GET /users route:
/**
 * @swagger
 * /users:
 *   get:
 *     summary: Retrieve a list of users
 *     responses:
 *       200:
 *         description: A list of users
 *         content:
 *           application/json:
 *             schema:
 *               type: array
 *               items:
 *                 type: object
 */
app.get('/users', async (req, res) => {
    try {
        const users = await User.find();
        res.send(users);
    } catch (error) {
        res.status(500).send(error);
    }
});

/**
 * @swagger
 * /users/{id}:
 *   get:
 *     summary: Retrieve a single user by ID
 *     parameters:
 *       - in: path
 *         name: id
 *         required: true
 *         schema:
 *           type: string
 *         description: The user ID
 *     responses:
 *       200:
 *         description: A single user
 *         content:
 *           application/json:
 *             schema:
 *               type: object
 *       404:
 *         description: User not found
 */
app.get('/users/:id', async (req, res) => {
    try {
        const user = await User.findById(req.params.id);
        if (!user) {
            return res.status(404).send('User not found');
        }
        res.send(user);
    } catch (error) {
        res.status(500).send(error);
    }
});

// Add similar comments for other routes...
now, when you go to http://localhost:3000/api-docs , use your username and password which is in app.js
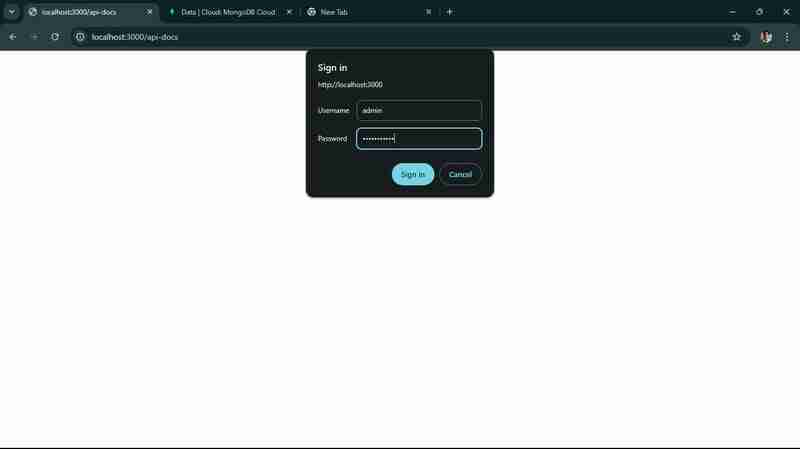
You’ll get this, you should be able to access the Swagger UI and see the documentation for your API.
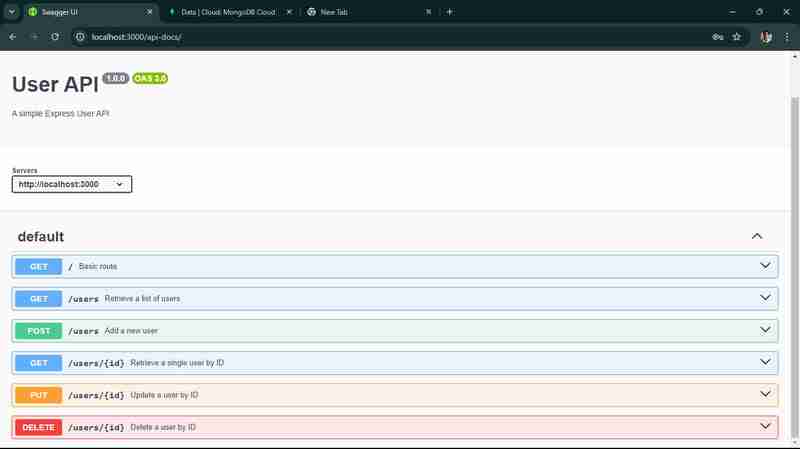
You have successfully built a scalable API with Node.js and Express, complete with CRUD operations, basic authentication, and API documentation using Swagger. This should provide a comprehensive demo for your technical article. You can deploy your API over cloud which make it accessible for all people on the internet, you can use services like Heroku for deployment.
Conclusion
Building scalable APIs with Node.js and Express requires a strategic approach, including modular architecture, optimized performance with non-blocking I/O, clustering, efficient database management, and robust security measures. By implementing caching, monitoring tools, and auto-scaling, your API can handle thousands of requests per second, ensuring reliability and performance under heavy loads. Ready to scale your API with Node.js and Express? Contact us today to build a future-proof API solution for your business needs!
FAQs
1. What are the main advantages of using Node.js for building APIs?
Node.js offers several advantages for API development, including its asynchronous, non-blocking architecture that allows for handling multiple requests simultaneously. This leads to improved performance and scalability. Additionally, Node.js uses JavaScript, enabling developers to work across both the client and server sides, which streamlines the development process.
2. Why should I use Express.js with Node.js?
Express.js is a minimal and flexible web application framework that simplifies the process of building APIs with Node.js. It provides robust routing, middleware support, and easy integration with various databases, making it an excellent choice for developing RESTful APIs quickly and efficiently.
3. How can I ensure my API is scalable?
To ensure your API is scalable, consider implementing a microservices architecture, which allows different components to be scaled independently. Additionally, optimize your code for performance, use caching strategies, and conduct regular load testing to identify and address potential bottlenecks.
4. What are some best practices for error handling in Node.js APIs?
Best practices for error handling in Node.js APIs include using middleware to catch errors globally, logging errors for monitoring and debugging, and providing meaningful error messages to clients. It's also essential to handle different types of errors (e.g., validation errors, database errors) appropriately to enhance user experience.
5. Wie kann ViitorCloud Ihnen beim Aufbau skalierbarer APIs mit Node.js und Express helfen?
ViitorCloud bietet umfassende Entwicklungsdienste, die auf Ihre Geschäftsanforderungen zugeschnitten sind, und ist auf die Erstellung skalierbarer APIs mit Node.js und Express spezialisiert. Unser Team aus erfahrenen Entwicklern nutzt Best Practices im API-Design und in der Architektur und stellt so sicher, dass Ihre Anwendung hohe Lasten effizient bewältigen kann. Mit einem Fokus auf Leistungsoptimierung und einem robusten Entwicklungsprozess kann ViitorCloud Ihnen dabei helfen, APIs zu erstellen, die nicht nur aktuelle Anforderungen erfüllen, sondern sich auch an zukünftiges Wachstum anpassen und so eine solide Grundlage für Ihre digitalen Lösungen bieten.
위 내용은 Node.js 및 Express를 사용하여 확장 가능한 API 구축의 상세 내용입니다. 자세한 내용은 PHP 중국어 웹사이트의 기타 관련 기사를 참조하세요!

