JavaScript로 전화 연락처 읽기
- WBOYWBOYWBOYWBOYWBOYWBOYWBOYWBOYWBOYWBOYWBOYWBOYWB원래의
- 2024-08-19 18:33:25973검색
작성자 메모: 이 기사에 설명된 기술과 프로세스는 실험적이며 일부 브라우저에서만 작동합니다. 이 글을 쓰는 시점에서 Contact Picker API는 Android Chrome(버전 80부터) 및 iOS Safari(버전 14.5부터, 그러나 플래그 뒤에서만 지원됨)에서만 지원되었습니다. 기능을 검토하려면 제 웹사이트에서 실행 중인 데모를 확인하세요.
휴대폰이나 태블릿의 연락처 목록 항목을 읽는 것은 전통적으로 기본 앱으로 제한되었습니다. 하지만 Contact Picker API를 사용하면 JavaScript를 사용하여 이 작업을 수행할 수 있습니다.
이 기능은 전화번호나 VoIP와 같은 연락처 정보가 필요한 앱, 알려진 사람을 찾고 싶은 소셜 네트워크, 데이터를 보기 위해 애플리케이션을 교체하지 않고 양식 정보를 입력해야 하는 앱에서 흥미로울 수 있습니다.
API와 기기에 따라 사용 가능한 속성이 제한됩니다. 개발자가 선택할 수 있는 표준에는 5가지가 있습니다.
- 이름
- 전화
- 이메일
- 주소
- 아이콘
연락처에는 둘 이상의 전화번호, 이메일 또는 여러 주소가 포함될 수 있으므로 여기서 복수형이 중요합니다. 반환된 데이터는 단일 값이더라도 일관성을 위해 항상 배열 내부에 있습니다. 이에 대해서는 나중에 자세히 설명하겠습니다.
개인정보 보호 및 보안
휴대폰에 저장된 연락처 정보에는 신중하게 처리해야 하는 민감한 정보가 포함될 수 있습니다. 따라서 다음과 같은 개인 정보 보호 및 보안 고려 사항을 고려해야 합니다.
- Contact Picker API 코드는 최상위 탐색 컨텍스트에서 실행되어야 합니다. 광고나 타사 플러그인과 같은 외부 코드가 휴대폰의 연락처 목록을 읽는 것을 방지합니다.
- Contact Picker API 코드는 사용자 동작 후에만 실행할 수 있습니다. 따라서 개발자는 프로세스를 완전히 자동화할 수 없습니다. 사용자는 연락처 읽기를 트리거하는 조치를 취해야 합니다.
- 연락처 목록에 대한 접근을 허용해야 합니다. 이 제한은 JS가 아닌 전화에 의해 적용됩니다. 사용자는 브라우저에 연락처에 액세스할 수 있는 권한을 부여해야 합니다(아직 연락처가 없는 경우).
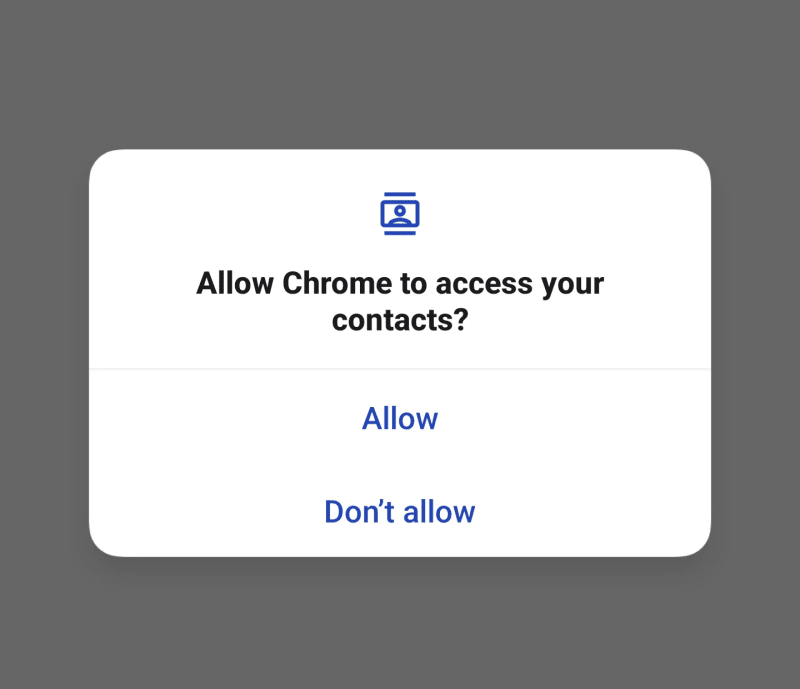
Contact Picker API를 사용하는 웹사이트를 처음 사용하는 경우 다음과 같은 메시지를 받을 수 있습니다.

사용자가 '허용'을 탭할 때까지 휴대전화에는 매번 이 팝업이 표시됩니다. 그런 일이 발생할 때까지 Contact Picker API는 실행되지 않습니다. 좋은 일이다. 우리는 사용자에게 적절한 권한이 부여되기를 원합니다. 일회성이라는 점도 좋습니다. 페이지에서 Contact Picker API 코드가 실행될 때마다 승인을 부여하는 것은 골치 아픈 일입니다.
API 및 코드
Contact Picker API는 다음 두 가지 방법만 정의합니다.
- getProperties(): 기기에서 읽을 수 있는 속성 목록을 반환합니다. 정의에는 "주소", "이메일", "아이콘"(연락처 사진이 아닐 수 있음), "이름", "전화"(전화)의 5개만 있지만 장치가 모든 항목에 대한 액세스를 허용하지 않을 수 있습니다. 그 중
- select(): 연락처 팝업을 열고 사용자가 작업을 완료하면 선택 항목을 반환합니다. 읽을 속성 목록과 옵션이 포함된 선택적 개체라는 두 가지 매개변수가 필요합니다.
두 방법 모두 Promise를 반환하지만, 해당 작업이 앱의 일반적인 흐름을 차단한다는 점을 고려하여 이를 처리할 때 async/await를 사용해야 합니다.
getProperties()를 무시하고 모든 속성을 직접 요청하고 싶을 수도 있습니다. 하지만 이렇게 하면 작동할 가능성이 높지만 지정된 속성을 사용할 수 없는 경우 select() 메서드에서 예외가 발생하므로 주의하세요.
예
Contact Picker API의 데모가 실행 중입니다(여기에서 온라인으로 실행하거나 이 비디오 보기). API가 지원되는 경우 연락처의 전화번호, 이름, 이메일을 읽어서 표시하는 버튼이 표시됩니다.
먼저 버튼이 필요합니다. 앞서 개인 정보 보호 및 보안 섹션에서 자세히 설명했듯이 API를 호출하려면 사용자 작업이 필요하므로 사용자 상호 작용 없이는 아무것도 트리거할 수 없습니다.
<button onclick="getContactData()">Show contact data</button>
주 코드는 getContactData() 함수에 있습니다. 하지만 그 전에 Contact Picker API를 사용할 수 없는 경우 버튼을 표시하는 이유는 무엇입니까? 버튼을 사용할 수 없으면 숨기자. 아니면 기본적으로 버튼을 숨기고(hidden 속성 추가) API를 사용할 수 있는 경우에만 표시하도록 하겠습니다.
// only show the button if browser supports Contact Picker API
if ("contacts" in navigator) {
  document.querySelector("button").removeAttribute("hidden");
}
이제 버튼 로직이 준비되었으므로 getContactData()에 집중하겠습니다. 다음은 함수의 주석 처리된 버전입니다.
// it is asynchronous because we'll wait for the modal selection
async function getContactData() {
  // indicate what contact values will be read
  const props = ["tel", "name", "email"];

  // wrap everything in a try...catch, just in case
  try {
    // open the native contact selector (after permission is granted)
    const contacts = await navigator.contacts.select(props);

    // this will execute after the native contact selector is closed
    if (contacts.length) {
      // if there's data, show it
      alert("Selected data: " + JSON.stringify(contacts));
    } else {
      // ...if not, indicate nothing was selected
      alert("No selection done");
    }
  } catch (ex) {
    // if something fails, show the error message
    alert(ex.message)
  }
}
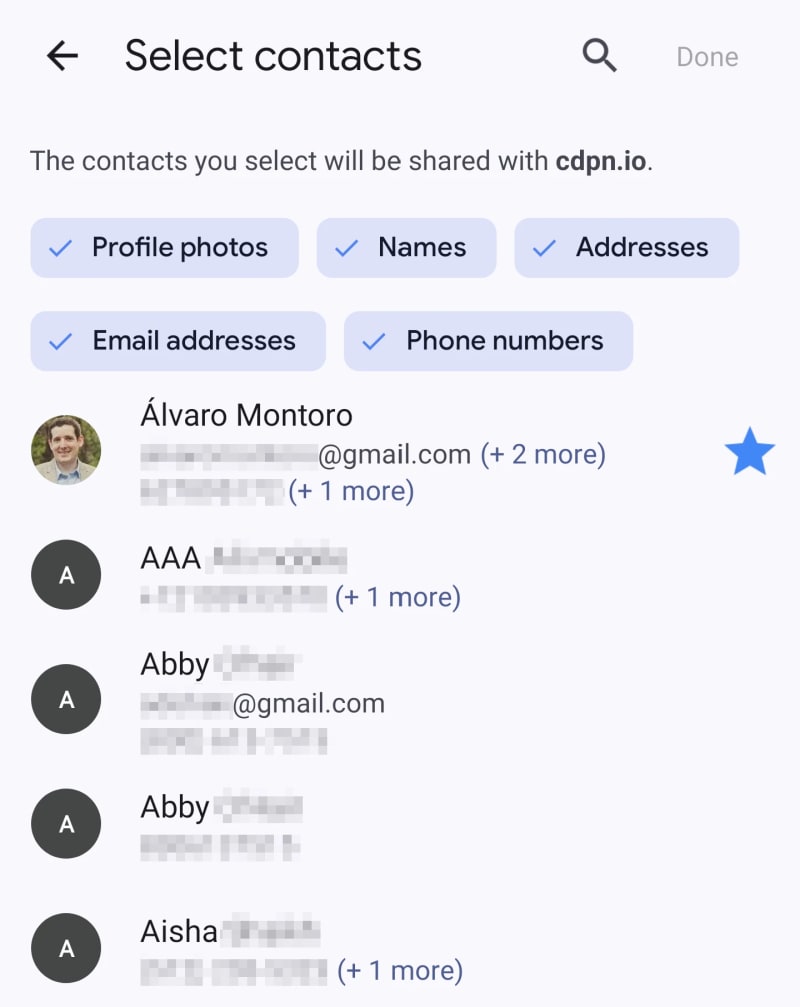
Once the button triggers this function, and if the browser has permissions (see screenshot in the previous section), the contact modal will show up, indicating essential information: the URL reading the data, what data it will return, and the list of contacts to pick from.

After closing the modal, the contacts variable will store the data in JSON as an array with an object containing the information requested (it may be empty if it is not available in the contact card).
For example, this is the result after selecting myself as a contact (fake data):
[
  {
    "address": [],
    "email": [ "alvarosemail@gmail.com" ],
    "icon": [],
    "name": [ "Alvaro Montoro" ],
    "tel": [ "555-555-5555", "555-123-4567" ]
  }
]
If the data includes an icon, it will be a blob with the image. If the data includes an address, it will be a more complex object with street, city, country, ZIP code, etc. You can check the returned values in the specification.
But why an array if we only selected one contact? Because there's an option to choose more than one contact!
Selecting Multiple Contacts
It is possible to select more than one contact. If we want to do that, we need to pass a second parameter to the navigator.contacts.select() method indicating this option.
const props = ["tel", "address", "icon", "name", "email"];
// only one option available: read multiple or only one (default)
const options = { multiple: true };

try {
  const contacts = await navigator.contacts.select(props, options);
  // ...
The result is an array of contacts, so the rest of the code could remain the same for this example.
The code above can be intimidating, mainly because of all the comments I added. Here's a lightly commented version of the code above. As you may notice, it is pretty simple:
async function getContactData() {
  if ("contacts" in navigator) {
    const props = await navigator.contacts.getProperties();
    const options = { multiple: true };

    try {
      const contacts = await navigator.contacts.select(props, options);

      if (contacts.length) {
        // code managing the selected data
      } else {
        // code when nothing was selected
      }
    } catch (ex) {
      // code if there was an error
    }
  }
}
You can check out a running demo on my website. Don't worry, I don't do any with the contact information beyond writing it on the screen. But review the code before if you don't trust me.
Conclusion: Privacy Over Piracy
Contact information is PII (Personally Identifiable Information), and we must treat it with all the care and security that sensitive data requires.
Apart from possible legal requirements that I am not going to go through (because I don't know them, and they change from country to country), here are some basic guidelines when dealing with sensitive data:
- Respect people's privacy. Don't force them to share information they don't want to share.
- Treat the data with care and in a safe way. Would you be comfortable if the data you are processing were yours?
- Don't store data if you don't need to. Read it, use it, forget it. Don't store data that you are not using.
- Only get the data that you need. Don't be sneaky or shady. Get just what's required to build credibility and trust.
Suppose a web app tries to read addresses, names, or emails while selecting a phone number. If that happened to me, I would automatically reject the permission and leave the website.
So, explore JavaScript and the Contact Picker API, but always remember that there's a person behind the screen and that the data they share could be risky if it falls into the wrong hands. Don't be reckless.
If you enjoyed this article about JavaScript and like to test Web APIs and different things with JS, check out this other article:
Develop a Rock Band game with HTML and JavaScript
위 내용은 JavaScript로 전화 연락처 읽기의 상세 내용입니다. 자세한 내용은 PHP 중국어 웹사이트의 기타 관련 기사를 참조하세요!

