Tailwind CSS를 사용하여 입력 유형 번호에서 화살표를 제거하는 방법
- WBOYWBOYWBOYWBOYWBOYWBOYWBOYWBOYWBOYWBOYWBOYWBOYWB원래의
- 2024-07-17 07:15:591562검색
Tailwind CSS로 양식을 디자인할 때 숫자 입력 필드에서 기본 화살표(스피너라고도 함)를 제거할 수 있습니다. 이러한 화살표는 맞춤 디자인을 방해할 수 있으며 다양한 브라우저에서 일관되게 스타일을 지정하기가 어렵습니다.
이 튜토리얼에서는 인라인 스타일과 전역 CSS 접근 방식을 통해 Tailwind CSS를 사용하여 이를 달성하는 방법을 살펴보겠습니다.
문제
기본적으로 브라우저는 강요. 이러한 화살표는 기능적이지만 맞춤 디자인과 충돌하는 경우가 많으며 다양한 브라우저에서 균일하게 스타일을 지정하기 어려울 수 있습니다.

해결책
Tailwind CSS 유틸리티 클래스를 사용하여 이러한 화살표를 제거하고 깔끔하고 사용자 정의된 숫자 입력을 생성하겠습니다. 또한 대규모 프로젝트에 이 스타일을 전역적으로 적용하는 방법도 살펴보겠습니다.
인라인 접근 방식
인라인 Tailwind 클래스를 사용하는 예부터 시작해 보겠습니다.
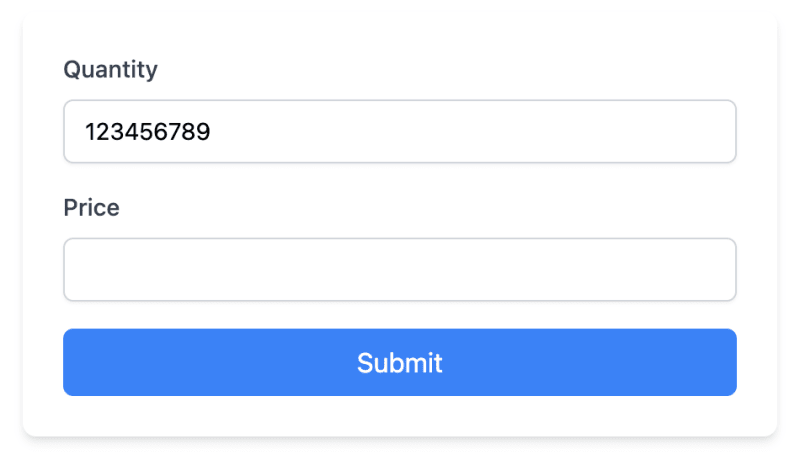
<form class="max-w-md mx-auto mt-8 p-6 bg-white rounded-lg shadow-md">
  <div class="mb-4">
    <label for="quantity" class="block text-sm font-medium text-gray-700 mb-2">Quantity</label>
    <input type="number" id="quantity" name="quantity"
      class="block w-full px-3 py-2 bg-white border border-gray-300 rounded-md text-sm shadow-sm
      focus:outline-none focus:border-sky-500 focus:ring-1 focus:ring-sky-500
      [appearance:textfield] [&::-webkit-outer-spin-button]:appearance-none [&::-webkit-inner-spin-button]:appearance-none">
  </div>

  <div class="mb-4">
    <label for="price" class="block text-sm font-medium text-gray-700 mb-2">Price</label>
    <input type="number" id="price" name="price" step="0.01"
      class="block w-full px-3 py-2 bg-white border border-gray-300 rounded-md text-sm shadow-sm
      focus:outline-none focus:border-sky-500 focus:ring-1 focus:ring-sky-500
      [appearance:textfield] [&::-webkit-outer-spin-button]:appearance-none [&::-webkit-inner-spin-button]:appearance-none">
  </div>

  <button type="submit" class="w-full bg-blue-500 text-white py-2 px-4 rounded-md hover:bg-blue-600 transition-colors">
    Submit
  </button>
</form>
화살표를 제거하는 주요 클래스는 다음과 같습니다.
- [appearance:textfield]: Firefox에서 기본 스타일을 제거합니다.
- [&::-webkit-outer-spin-button]:appearance-none: WebKit 브라우저에서 외부 스핀 버튼을 제거합니다.
- [&::-webkit-inner-spin-button]:appearance-none: WebKit 브라우저에서 내부 스핀 버튼을 제거합니다.

글로벌 접근 방식
대규모 프로젝트의 경우 이 스타일을 모든 숫자 입력에 적용할 수 있습니다. 전역 CSS 파일에 스타일을 추가하면 됩니다.
프레임워크 및 설정에 따라 global.css 파일(또는 app.css 또는 styles.css와 같은 이에 상응하는 파일)을 엽니다.
다음 CSS를 추가하세요.
/* In your global.css file */
@layer utilities {
  input[type="number"]::-webkit-inner-spin-button,
  input[type="number"]::-webkit-outer-spin-button {
    -webkit-appearance: none;
    margin: 0;
  }

  input[type="number"] {
    -moz-appearance: textfield;
  }
}
- 이 CSS 파일을 기본 Tailwind CSS 파일로 가져오거나 HTML에 포함했는지 확인하세요.
이러한 전역 스타일을 추가한 후 HTML을 단순화할 수 있습니다.
<form class="max-w-md mx-auto mt-8 p-6 bg-white rounded-lg shadow-md">
  <div class="mb-4">
    <label for="quantity" class="block text-sm font-medium text-gray-700 mb-2">Quantity</label>
    <input type="number" id="quantity" name="quantity"
      class="block w-full px-3 py-2 bg-white border border-gray-300 rounded-md text-sm shadow-sm
      focus:outline-none focus:border-sky-500 focus:ring-1 focus:ring-sky-500">
  </div>

  <div class="mb-4">
    <label for="price" class="block text-sm font-medium text-gray-700 mb-2">Price</label>
    <input type="number" id="price" name="price" step="0.01"
      class="block w-full px-3 py-2 bg-white border border-gray-300 rounded-md text-sm shadow-sm
      focus:outline-none focus:border-sky-500 focus:ring-1 focus:ring-sky-500">
  </div>

  <button type="submit" class="w-full bg-blue-500 text-white py-2 px-4 rounded-md hover:bg-blue-600 transition-colors">
    Submit
  </button>
</form>
이제는 전역 CSS에서 처리되므로 개별 입력에서 화살표 제거 클래스를 제거했습니다.
사용자 정의 화살표 추가
기본 화살표를 제거하면 디자인 일관성이 향상되지만 더 나은 사용자 경험을 위해 사용자 정의 증가/감소 버튼을 추가할 수도 있습니다. 양식 디자인에 맞는 사용자 정의 화살표를 만드는 방법은 다음과 같습니다.
<div class="mb-4">
  <label for="quantity" class="block text-sm font-medium text-gray-700 mb-2">Quantity</label>
  <div class="relative">
    <input type="number" id="quantity" name="quantity"
      class="block w-full px-3 py-2 bg-white border border-gray-300 rounded-md text-sm shadow-sm
      focus:outline-none focus:border-sky-500 focus:ring-1 focus:ring-sky-500
      [appearance:textfield] [&::-webkit-outer-spin-button]:appearance-none [&::-webkit-inner-spin-button]:appearance-none">
    <div class="absolute inset-y-0 right-0 flex items-center">
      <button type="button" class="px-2 h-full border-l border-gray-300 text-gray-500 hover:text-sky-500 focus:outline-none"
              onclick="document.getElementById('quantity').stepUp()">
        <svg xmlns="http://www.w3.org/2000/svg" fill="none" viewBox="0 0 24 24" stroke-width="1.5" stroke="currentColor" class="w-4 h-4">
          <path stroke-linecap="round" stroke-linejoin="round" d="M4.5 15.75l7.5-7.5 7.5 7.5" />
        </svg>
      </button>
      <button type="button" class="px-2 h-full border-l border-gray-300 text-gray-500 hover:text-sky-500 focus:outline-none"
              onclick="document.getElementById('quantity').stepDown()">
        <svg xmlns="http://www.w3.org/2000/svg" fill="none" viewBox="0 0 24 24" stroke-width="1.5" stroke="currentColor" class="w-4 h-4">
          <path stroke-linecap="round" stroke-linejoin="round" d="M19.5 8.25l-7.5 7.5-7.5-7.5" />
        </svg>
      </button>
    </div>
  </div>
</div>
이 구현의 주요 구성요소를 분석해 보겠습니다.
사용자 정의 버튼의 절대 위치 지정을 허용하기 위해 입력을 상대 위치 div로 래핑합니다.
입력 필드는 기본 화살표를 제거하는 클래스를 포함하여 원래 스타일을 유지합니다.
[appearance:textfield] [&::-webkit-outer-spin-button]:appearance-none [&::-webkit-inner-spin-button]:appearance-none
- 사용자 정의 버튼을 포함하기 위해 절대 위치 지정이 가능한 div를 추가합니다.
<div class="absolute inset-y-0 right-0 flex items-center">
이렇게 하면 버튼이 입력 오른쪽에 배치되고 수직 중앙에 배치됩니다.
- 각 버튼은 입력과 조화를 이루도록 스타일이 지정되었습니다.
<button type="button" class="px-2 h-full border-l border-gray-300 text-gray-500 hover:text-sky-500 focus:outline-none">
- h-full은 버튼이 입력 높이를 채우도록 합니다.
- border-l은 버튼 사이에 미묘한 구분 기호를 추가합니다.
- text-gray-500 및 hover:text-sky-500은 양식의 포커스 상태와 일치하는 마우스 오버 시 색상 변경을 제공합니다.
위쪽 화살표와 아래쪽 화살표에는 w-4 h-4에 적절한 크기의 SVG 아이콘을 사용합니다.
onclick 이벤트는 JavaScript의 stepUp() 및 stepDown() 메소드를 사용하여 입력 값을 변경합니다.
   onclick="document.getElementById('quantity').stepUp()"
   onclick="document.getElementById('quantity').stepDown()"
중요한 고려사항
고려해야 할 몇 가지 사항은 다음과 같습니다.
화살표를 제거하면 화살표를 사용하는 사용자에게 영향을 미칠 수 있습니다. 필요한 경우 대체 증가/감소 방법 제공을 고려하세요.
이 솔루션은 최신 브라우저에서 작동합니다. 이전 브라우저에는 추가 CSS 또는 JavaScript가 필요할 수 있습니다.
결론
이를 인라인으로 구현하거나 전역적으로 구현하면 프로젝트 전체의 숫자 입력에서 기본 화살표를 효과적으로 제거할 수 있습니다.
Tailwind CSS 개발 프로세스를 더욱 개선하려는 경우 놀라운 디자인을 쉽게 만드는 데 도움이 되는 DevDojo Tails 페이지 빌더를 확인하세요.
즐거운 코딩하세요!
위 내용은 Tailwind CSS를 사용하여 입력 유형 번호에서 화살표를 제거하는 방법의 상세 내용입니다. 자세한 내용은 PHP 중국어 웹사이트의 기타 관련 기사를 참조하세요!

