

Nodejs express html5는 드래그 앤 드롭 upload_node.js를 구현합니다.

1. 서문
파일 업로드는 비교적 일반적인 기능입니다. 기존 선택 방법은 먼저 업로드 버튼을 클릭한 다음 파일 경로를 찾아 업로드해야 합니다. 이는 사용자 경험에 큰 문제를 가져옵니다. HTML5는 드래그 앤 드롭 업로드에 필요한 API를 지원하기 시작합니다. Nodejs는 최근 점점 더 인기를 얻고 있는 기술이기도 합니다. 이것은 nodejs 개발에서 가장 일반적으로 사용되는 개발 프레임워크 중 하나이며 mvc 모델과 유사한 프레임워크입니다. HTML5 및 nodejs express와 결합하여 드래그 앤 드롭 업로드 기능이 구현됩니다.
2. 기초지식의 대중화
1. NodeJ에 대한 기본 지식
Nodejs는 단순히 서버에서 js를 실행할 수 있게 해주는 개발 플랫폼입니다. Nodejs는 매우 빠르게 발전하고 있으며, 타오바오 등 많은 국내 기업들이 이를 사용하기 시작했습니다. 기존 웹 애플리케이션 개발 플랫폼은 동시성이 높은 요청에 응답하기 위해 멀티스레딩을 사용합니다. Nodejs는 단일 스레드, 비동기식 IO 및 이벤트 중심 설계 모델을 채택하여 nodejs의 성능을 크게 향상시킵니다. 이는 nodejs의 가장 큰 특징이기도 합니다. nodejs에서는 모든 IO 작업이 콜백을 통해 수행됩니다. nodejs는 IO 작업을 수행할 때 IO 요청을 이벤트 큐에 푸시하고 프로그램이 이를 처리할 때까지 기다립니다. 처리된 후 호출합니다. 콜백 함수가 결과를 반환합니다.
예를 들어 데이터베이스를 쿼리할 때 작업은 다음과 같습니다.
mysql.query("SELECT * FROM myTable",function(res){
       callback(res);
});
위 코드에서 nodejs는 위 명령문을 실행할 때 데이터베이스가 결과를 반환할 때까지 기다리지 않고 다음 명령문을 계속 실행합니다. 데이터베이스가 데이터를 얻은 후에는 이벤트 루프 큐로 전송되며 스레드가 이벤트 루프 큐에 들어갈 때까지 콜백이 실행되지 않습니다.
nodejs에 대한 더 많은 지식에 대해 이틀 동안 읽었지만 아는 바가 많지 않습니다. 더 자세히 알아보려면 인터넷에서 검색해 보세요.
nodejs 지식 소개 http://www.nodebeginner.org/index-zh-cn.html http://www.jb51.net/article/48755.htm
2. 표현의 기본지식
Nodejs는 상대적으로 활동적인 오픈 소스 커뮤니티입니다. 여기에는 수많은 타사 개발 라이브러리가 있으며, 그중 Express는 가장 광범위하고 일반적으로 사용되는 프레임워크 중 하나입니다. 또한 공식적으로 권장되는 nodejs 프레임워크이기도 합니다. 일반적인 http 작업을 캡슐화하는 것 외에도 라우팅 제어, 템플릿 구문 분석 지원, 동적 보기, 사용자 응답 등도 구현합니다. 하지만 이는 보편적인 프레임워크가 아니며 대부분의 기능은 http 캡슐화일 뿐입니다. 또한 많은 기능을 구현하려면 타사 라이브러리와 통합해야 합니다.
Express는 매우 편리한 업로드 기능 지원을 제공합니다. Express는 파일을 수신하여 임시 디렉터리에 저장합니다. 그런 다음 라우팅 방법에서는 임시 디렉터리에서 파일을 복사하기만 하면 됩니다. 사용자 업로드를 저장하려는 폴더로 이동합니다. 파일 업로드 부분에서 서버 측 구현은 express 기능을 기반으로 합니다.
3.html5 드래그 업로드 API
HTML5는 많은 새로운 기능을 제공하며 드래그 앤 드롭 이벤트와 파일 업로드는 새로운 기능 중 하나입니다. 제한된 공간으로 인해 나중에 드래그 앤 드롭 업로드의 코드 구현에 중점을 둘 것입니다. HTML5에서 제공하는 드래그 앤 드롭 업로드 API를 하나씩 나열하지는 않겠습니다. 관심 있으신 분은 http://w3school.com.cn/html5/html5_ref_eventattributes.asp#Mouse_Events http://www.jb51.net/html5/85977.html
3. 드래그 앤 드롭 업로드 구현1. 코드 구현
먼저 프론트엔드 js의 파일 디렉터리를 살펴보겠습니다.
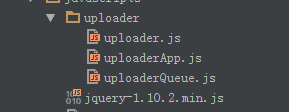
uploader.js는 주로 html5에서 지원하는 업로드 기능의 캡슐화를 구현합니다.
uploaderQueue.js는 주로 파일 업로드 대기열 관리와 파일 업로드 객체 관리를 구현하고, 파일 대기열에 있는 파일을 서버에 업로드합니다.
uploaderApp.js는 파일 업로드를 위한 주요 진입점으로, 주로 업로드 창에서 드래그 이벤트 모니터링을 구현하고 드래그된 파일을 업로드 파일 대기열에 푸시하며 파일 업로드 프로그램을 시작합니다.
다음은 핵심 코드에 대한 간략한 설명입니다(필수). 모든 코드는 여기에서 다운로드할 수 있습니다: FileUploader
먼저 html5 uploader.js에서 제공하는 파일 업로드를 간단히 캡슐화합니다
function uploader(url, data, files) {
  this._files = files;
  this._data = data;
  this._url = url;

  this._xhr = null;

  this.onloadstart = {};
  this.onload = {};
  this.onloadend = {};
  this.onprogress = {};
  this.onerror = {};
  this.ontimeout = {};
  this.callback = {};//请求完成后回调
  _self = this;
 }

 uploader.prototype = {
  init: function () {
   if (!isValid()) {
    throw e;
   }
   this._xhr = new XMLHttpRequest();
   this._bindEvents();
  },
  send: function () {
   if (this._xhr == null) {
    this.init();
   }
   var formData = this._createFormData();
   this._xhr.open('post', this._url, true);
   this._xhr.send(formData);
  },
  _bindEvents: function () {
   _self = this;
   this._xhr.upload.loadstart = function (e) {
    evalFunction(_self.onloadstart, e);
   }
   this._xhr.upload.onload = function (e) {
    evalFunction(_self.onload, e);
   };
   this._xhr.upload.onloadend = function (e) {
    evalFunction(_self.onloadend, e);
   }
   this._xhr.upload.onprogress = function (e) {
    evalFunction(_self.onprogress, e)
   };
   this._xhr.upload.onerror = function (e) {
    evalFunction(_self.onerror, e);
   };
   this._xhr.upload.ontimeout = function (e) {
    evalFunction(_self.ontimeout, e);
   }

   this._xhr.onreadystatechange = function () {
    if (_self._xhr.readyState == 4) {
     if (typeof _self.callback === 'function') {
      var status = _self._xhr.status;
      var data = _self._xhr.responseText;
      _self.callback(status, data);
     }
    }
   }
  },
  _createFormData: function () {
   var formData = new FormData();
   this._addDataToFormData(formData);
   this._addFileToFormData(formData);
   return formData;
  },
  _addDataToFormData: function (formData) {
   if (this._data) {
    for (var item in this._data) {
     formData.append(item, this._data[item]);
    }
   }
  },
  _addFileToFormData: function (formData) {
   if (this._files) {
    for (var i = 0; i < this._files.length; i++) {
     var file = this._files[i];
     formData.append('file[' + i + ']', this._files[i]);
    }
   }
  }
 };
View Code
var uploaderFactory = {
  send: function (url, data, files, callback) {
   var insUploader = new uploader(url, data, files);
   insUploader.callback = function (status, resData) {
    if (typeof callback === 'function') {
     callback(status, resData);
    }
   }
   insUploader.send();
   return insUploader;
  }
 };
uploader对象主要是对html5提供的原生api进行简单的封装。uploaderFactory提供一个简单的接口,使用它可以像jquery的ajax方法一样完成,文件上传调用。html5中提供的文件上传的支持,是在原来XMLHttpRequest基础之上扩展一些属性和方法,提供了FormData对象,来支持文件上传操作。
文件上传队列(uploaderQueue.js)也是一个比较重要的对象,它包括两个对象一个是Queue,文件队列对象,主要负责管理文件队列的增删改查询等操作,另一个对象是UploadEngine,文件上传引擎,它的功能主要是负责从文件队列中取出文件对象,调用uploader对象上传文件,然后更新文件队列中的文件状态。Queue以及UploadEngine都是单例对象。
首先来看下文件队列对象:
(function (upladerQueue) {

 var Status = {
  Ready: 0,
  Uploading: 1,
  Complete: 2
 }

 var _self = null;

 var instance = null;

 function Queue() {
  this._datas = [];
  this._curSize = 0;//当前长度


  _self = this;
 }

 Queue.prototype = {
  add: function (data) {
   var key = new Date().getTime();
   this._datas.push({key: key, data: data, status: Status.Ready});
   this._curSize = this._datas.length;
   return key;
  },
  remove: function (key) {
   var index = this._getIndexByKey(key);
   this._datas.splice(index, 1);
   this._curSize = this._datas.length;
  },
  get: function (key) {
   var index = this._getIndexByKey(key);
   return index != -1 ? this._datas[index].data : null;
  },
  clear: function () {
   this._datas = [];
   this._curSize = this._datas.length;
  },
  size: function () {
   return this._curSize;
  },
  setItemStatus: function (key, status) {
   var index = this._getIndexByKey(key);
   if (index != -1) {
    this._datas[index].status = status;
   }
  },
  nextReadyingIndex: function () {
   for (var i = 0; i < this._datas.length; i++) {
    if (this._datas[i].status == Status.Ready) {
     return i;
    }
   }
   return -1;
  },
  getDataByIndex: function (index) {
   if (index < 0) {
    return null;
   }
   return this._datas[index];
  },
  _getIndexByKey: function (key) {
   for (var i = 0; i < this._datas.length; i++) {
    if (this._datas[i].key == key) {
     return i;
    }
   }
   return -1;
  }
 };

 function getInstace() {
  if (instance === null) {
   instance = new Queue();
   return instance;
  } else {
   return instance;
  }
 }


 upladerQueue.Queue = getInstace();
 upladerQueue.UploadStatus = Status;
})(window.uploaderQueue);
上传文件队列使用一个数组管理每个文件对象信息,每个文件对象有key,data,status三个属性,该对象主要负责文件对象的增加、删除、更新、查找的功能。
上传文件队列中另一个比较重要的对象是上传引擎对象(uploadEngine.js)
(function (upladerQueue) {

 var instance = null;
 var _self;

 function uploadEngine() {
  this._url = null;
  this._curUploadingKey = -1;//标志
  this.uploadStatusChanged = {};
  this.uploadItemProgress={};
  _self = this;
 }

 uploadEngine.prototype = {
  setUrl: function (url) {
   this._url = url;
  },
  run: function () {
   if (this._curUploadingKey === -1 && this._url) {
    this._startUpload();
   }
  },
  _startUpload: function () {
   _self = this;
   var index = upladerQueue.Queue.nextReadyingIndex();
   if (index != -1) {
    this._uploadItem(index);
   } else {
    this._curUploadingKey = -1;
    return null;
   }
  },
  _uploadItem: function (index) {
   var data = upladerQueue.Queue.getDataByIndex(index).data;
   _self = this;
   this._readyUploadItem(index);
   var upload = uploaderFactory.send(this._url, null, data.files, function (status, data) {
    _self._completedUploadItem.call(_self, status, data);
   });

   this._uploadItemProgress(upload);
  },
  _uploadItemProgress: function (upload) {
   upload.onprogress = function (e) {
     _self.uploadItemProgress(_self._curUploadingKey,e);
   }
  },
  _readyUploadItem: function (index) {
   this._curUploadingKey = upladerQueue.Queue.getDataByIndex(index).key;
   if (typeof this.uploadStatusChanged === 'function') {
    this.uploadStatusChanged(this._curUploadingKey, upladerQueue.UploadStatus.Uploading);
   }
   upladerQueue.Queue.setItemStatus(this._curUploadingKey, upladerQueue.UploadStatus.Uploading);
  },
  _completedUploadItem: function (status, data) {
   if (typeof this.uploadStatusChanged === 'function') {
    this.uploadStatusChanged(this._curUploadingKey, upladerQueue.UploadStatus.Complete);
   }
   upladerQueue.Queue.setItemStatus(this._curUploadingKey, upladerQueue.UploadStatus.Complete);
   this._startUpload();
  }
 };

 function getInstace() {
  if (instance === null) {
   instance = new uploadEngine();
  }
  return instance;
 }

 upladerQueue.Engine = getInstace();
})(window.uploaderQueue);
该对象比较简单主要提供一个run以及setUrl方法,用于启动上传引擎,以及设置上传路径的功能。内部使用递归的方法把文件队列中的方法全部上传到服务端。使用uploadItemProgress通知外部上传的进度,使用uploadStatusChanged通知文件上传状态,以便更新UI.
uploaderApp.js中主要包括三个对象,一个是类似jquery的一个简单的jquery对象(App$)。主要用于绑定事件。一个是uploaderArea对象,是拖曳上传的窗口区域,另一个是入口对象uploaderMain对象。主要用于初始化对象,对外部提供一个init方法,来初始化整个对象。
了解关于App$以及uploaderArea对象的代码请下载 源代码 ,下面仅对uploaderMain对象做简单的说明。
(function (app) {
 var _self;

 function uploaderMain(id) {
  this._id = id;
  this._area = null;
  this.uploaders = [];

  this._URL = 'file/uploader';
 }

 uploaderMain.prototype = {
  init: function () {
   _self = this;
   this._initArea();
   this._initQueueEng();
  },
  _initQueueEng: function () {
   uploaderQueue.Engine.setUrl(this._URL);
   uploaderQueue.Engine.uploadStatusChanged = function (key, status) {
    if (status === uploaderQueue.UploadStatus.Uploading) {
     _self._area.hideItemCancel(key);
    } else if (status === uploaderQueue.UploadStatus.Complete) {
     _self._area.completeItem(key);
     _self._area.showItemCancel(key);
    }
   }
   uploaderQueue.Engine.uploadItemProgress = function (key, e) {
    var progress = e.position / e.total;
    _self._area.changeItemProgress(key, Math.round(progress * 100));
   }
  },
  _initArea: function () {
   this._area = new app.area(this._id);
   this._area.init();
   this._area.drop = function (e) {
    var key = uploaderQueue.Queue.add({files: e.dataTransfer.files});
    uploaderQueue.Engine.run();
    return key;
   }
   this._area.cancelItem = function (key) {
    uploaderQueue.Queue.remove(key);
   }
  }
 };


 app.main = uploaderMain;
})(window.uploaderApp);
在uploaderMain对象,相当于各个对象之间的中介,主要就是做对象的初始化功能、以及对象之间相互调用。使各个对象之间相互协作完成整个模块的功能。对外提供一个init方法来初始化整个程序,在html页面中只需如下代码:
<script type="text/javascript">
  var main=new uploaderApp.main('container');
  main.init();
</script>
以上代码就是创建一个入口对象,然后使用init方法来启动整个程序。
以上是对前端js的主要方法做的简单解释,如果想详细了解请下载源代码。下面简单看下后端js(nodejs)端实现的主要代码。
在express基础知识时,已经讲过在express已经对文件上传功能做了完整的封装,当路由到action时,文件已经完成上传只是文件上传到了一个临时目录,这个临时目录我们可以在app.js中配置的,配置方式如下:
app.use(express.bodyParser({
  uploadDir:__dirname+'/public/temp'
}));
这样在文件上传后文件就存放在/public/temp目录下,文件名也是express通过一定的算法随机获取的。在我们写的action中只需要把存在临时目录中的文件移动到服务端存放文件的目录下,然后删除临时目录下的文件即可。具体代码如下:
function uploader(req, res) {
 if (req.files != 'undifined') {
  console.dir(req.files);
  utils.mkDir().then(function (path) {
   uploadFile(req, res, path, 0);
  });

 }
}

function uploadFile(req, res, path, index) {
 var tempPath = req.files.file[index].path;
 var name = req.files.file[index].name;
 if (tempPath) {
  var rename = promise.denodeify(fs.rename);
  rename(tempPath, path + name).then(function () {
   var unlink = promise.denodeify(fs.unlink);
   unlink(tempPath);
  }).then(function () {
    if (index == req.files.file.length - 1) {
     var res = {
      code: 1,
      des: '上传成功'
     };
     res.send(res);
    } else {
     uploadFile(req, res, path, index + 1);
    }
   });
 }
}
2、实现效果

四、获取代码

 JavaScript의 역할 : 웹 대화식 및 역동적 인 웹Apr 24, 2025 am 12:12 AM
JavaScript는 웹 페이지의 상호 작용과 역학을 향상시키기 때문에 현대 웹 사이트의 핵심입니다. 1) 페이지를 새로 고치지 않고 콘텐츠를 변경할 수 있습니다. 2) Domapi를 통해 웹 페이지 조작, 3) 애니메이션 및 드래그 앤 드롭과 같은 복잡한 대화식 효과를 지원합니다. 4) 성능 및 모범 사례를 최적화하여 사용자 경험을 향상시킵니다.
 C 및 JavaScript : 연결이 설명되었습니다Apr 23, 2025 am 12:07 AM
C 및 JavaScript는 WebAssembly를 통한 상호 운용성을 달성합니다. 1) C 코드는 WebAssembly 모듈로 컴파일되어 컴퓨팅 전력을 향상시키기 위해 JavaScript 환경에 도입됩니다. 2) 게임 개발에서 C는 물리 엔진 및 그래픽 렌더링을 처리하며 JavaScript는 게임 로직 및 사용자 인터페이스를 담당합니다.
 웹 사이트에서 앱으로 : 다양한 JavaScript 애플리케이션Apr 22, 2025 am 12:02 AM
JavaScript는 웹 사이트, 모바일 응용 프로그램, 데스크탑 응용 프로그램 및 서버 측 프로그래밍에서 널리 사용됩니다. 1) 웹 사이트 개발에서 JavaScript는 HTML 및 CSS와 함께 DOM을 운영하여 동적 효과를 달성하고 jQuery 및 React와 같은 프레임 워크를 지원합니다. 2) 반응 및 이온 성을 통해 JavaScript는 크로스 플랫폼 모바일 애플리케이션을 개발하는 데 사용됩니다. 3) 전자 프레임 워크를 사용하면 JavaScript가 데스크탑 애플리케이션을 구축 할 수 있습니다. 4) node.js는 JavaScript가 서버 측에서 실행되도록하고 동시 요청이 높은 높은 요청을 지원합니다.
 Python vs. JavaScript : 사용 사례 및 응용 프로그램 비교Apr 21, 2025 am 12:01 AM
Python은 데이터 과학 및 자동화에 더 적합한 반면 JavaScript는 프론트 엔드 및 풀 스택 개발에 더 적합합니다. 1. Python은 데이터 처리 및 모델링을 위해 Numpy 및 Pandas와 같은 라이브러리를 사용하여 데이터 과학 및 기계 학습에서 잘 수행됩니다. 2. 파이썬은 간결하고 자동화 및 스크립팅이 효율적입니다. 3. JavaScript는 프론트 엔드 개발에 없어서는 안될 것이며 동적 웹 페이지 및 단일 페이지 응용 프로그램을 구축하는 데 사용됩니다. 4. JavaScript는 Node.js를 통해 백엔드 개발에 역할을하며 전체 스택 개발을 지원합니다.
 JavaScript 통역사 및 컴파일러에서 C/C의 역할Apr 20, 2025 am 12:01 AM
C와 C는 주로 통역사와 JIT 컴파일러를 구현하는 데 사용되는 JavaScript 엔진에서 중요한 역할을합니다. 1) C는 JavaScript 소스 코드를 구문 분석하고 추상 구문 트리를 생성하는 데 사용됩니다. 2) C는 바이트 코드 생성 및 실행을 담당합니다. 3) C는 JIT 컴파일러를 구현하고 런타임에 핫스팟 코드를 최적화하고 컴파일하며 JavaScript의 실행 효율을 크게 향상시킵니다.
 자바 스크립트 행동 : 실제 예제 및 프로젝트Apr 19, 2025 am 12:13 AM
실제 세계에서 JavaScript의 응용 프로그램에는 프론트 엔드 및 백엔드 개발이 포함됩니다. 1) DOM 운영 및 이벤트 처리와 관련된 TODO 목록 응용 프로그램을 구축하여 프론트 엔드 애플리케이션을 표시합니다. 2) Node.js를 통해 RESTFULAPI를 구축하고 Express를 통해 백엔드 응용 프로그램을 시연하십시오.
 JavaScript 및 웹 : 핵심 기능 및 사용 사례Apr 18, 2025 am 12:19 AM
웹 개발에서 JavaScript의 주요 용도에는 클라이언트 상호 작용, 양식 검증 및 비동기 통신이 포함됩니다. 1) DOM 운영을 통한 동적 컨텐츠 업데이트 및 사용자 상호 작용; 2) 사용자가 사용자 경험을 향상시키기 위해 데이터를 제출하기 전에 클라이언트 확인이 수행됩니다. 3) 서버와의 진실한 통신은 Ajax 기술을 통해 달성됩니다.
 JavaScript 엔진 이해 : 구현 세부 사항Apr 17, 2025 am 12:05 AM
보다 효율적인 코드를 작성하고 성능 병목 현상 및 최적화 전략을 이해하는 데 도움이되기 때문에 JavaScript 엔진이 내부적으로 작동하는 방식을 이해하는 것은 개발자에게 중요합니다. 1) 엔진의 워크 플로에는 구문 분석, 컴파일 및 실행; 2) 실행 프로세스 중에 엔진은 인라인 캐시 및 숨겨진 클래스와 같은 동적 최적화를 수행합니다. 3) 모범 사례에는 글로벌 변수를 피하고 루프 최적화, Const 및 Lets 사용 및 과도한 폐쇄 사용을 피하는 것이 포함됩니다.


핫 AI 도구

Undresser.AI Undress
사실적인 누드 사진을 만들기 위한 AI 기반 앱

AI Clothes Remover
사진에서 옷을 제거하는 온라인 AI 도구입니다.

Undress AI Tool
무료로 이미지를 벗다

Clothoff.io
AI 옷 제거제

Video Face Swap
완전히 무료인 AI 얼굴 교환 도구를 사용하여 모든 비디오의 얼굴을 쉽게 바꾸세요!

인기 기사
뜨거운 도구

VSCode Windows 64비트 다운로드
Microsoft에서 출시한 강력한 무료 IDE 편집기

ZendStudio 13.5.1 맥
강력한 PHP 통합 개발 환경

맨티스BT
Mantis는 제품 결함 추적을 돕기 위해 설계된 배포하기 쉬운 웹 기반 결함 추적 도구입니다. PHP, MySQL 및 웹 서버가 필요합니다. 데모 및 호스팅 서비스를 확인해 보세요.

메모장++7.3.1
사용하기 쉬운 무료 코드 편집기

mPDF
mPDF는 UTF-8로 인코딩된 HTML에서 PDF 파일을 생성할 수 있는 PHP 라이브러리입니다. 원저자인 Ian Back은 자신의 웹 사이트에서 "즉시" PDF 파일을 출력하고 다양한 언어를 처리하기 위해 mPDF를 작성했습니다. HTML2FPDF와 같은 원본 스크립트보다 유니코드 글꼴을 사용할 때 속도가 느리고 더 큰 파일을 생성하지만 CSS 스타일 등을 지원하고 많은 개선 사항이 있습니다. RTL(아랍어, 히브리어), CJK(중국어, 일본어, 한국어)를 포함한 거의 모든 언어를 지원합니다. 중첩된 블록 수준 요소(예: P, DIV)를 지원합니다.

