jEasyUI adds paging component
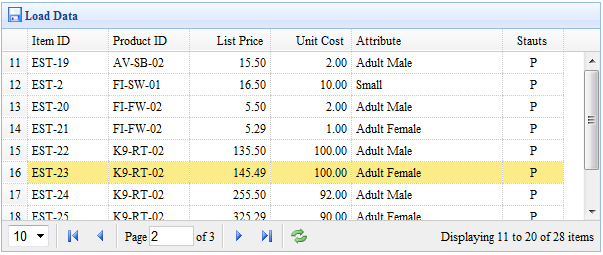
This example demonstrates how to load data from the server side and how to add the paging component (pagination) to the data grid (datagrid).

Create DataGrid
In order to load data from the remote server side, you should set the 'url' attribute, which should return JSON format data on your server side. See the datagrid documentation for more information on its data format.
	<table id="tt" class="easyui-datagrid" style="width:600px;height:250px"
			url="datagrid2_getdata.php"
			title="Load Data" iconCls="icon-save"
			rownumbers="true" pagination="true">
		<thead>
			<tr>
				<th field="itemid" width="80">Item ID</th>
				<th field="productid" width="80">Product ID</th>
				<th field="listprice" width="80" align="right">List Price</th>
				<th field="unitcost" width="80" align="right">Unit Cost</th>
				<th field="attr1" width="150">Attribute</th>
				<th field="status" width="60" align="center">Stauts</th>
			</tr>
		</thead>
	</table>
We define the datagrid column and set the 'pagination' attribute to true, which will generate a pagination toolbar at the bottom of the datagrid. Pagination will send two parameters to the server:
page: page number, starting value 1.
rows: Display rows per page.
Server-side code
	$page = isset($_POST['page']) ? intval($_POST['page']) : 1;
	$rows = isset($_POST['rows']) ? intval($_POST['rows']) : 10;
	// ...
	$rs = mysql_query("select count(*) from item");
	$row = mysql_fetch_row($rs);
	$result["total"] = $row[0];

	$rs = mysql_query("select * from item limit $offset,$rows");

	$items = array();
	while($row = mysql_fetch_object($rs)){
		array_push($items, $row);
	}
	$result["rows"] = $items;

	echo json_encode($result);
Download jQuery EasyUI instance
jeasyui-datagrid-datagrid2.zip


